HamaTime™
VIP Member
- Joined
- Feb 17, 2008
- Messages
- 1,807
- Reaction score
- 61
- Points
- 48
- Location
- Melbourne
- Members Ride
- C Class AMG
I just put in my Supercharged (L67) OTR (Over the Radiator) Cold Air Intake on my VS. Hope this guide is helpful to all those wanting to put this kit on their VR/VS.
Before I start I don't take responsibility for any damage caused by using this guide or related to using this guide. Use at your own risk.
What You Will Need
1. The Cold Air Intake kit (Available from Holden dealerships, Ebay etc etc)
2. 3Very short screws, probably 12mm
3. Hacksaw
4. Socket/Screwdriver Set
5. Power Drill with bit
6. Silicone (If needed)
Time = About 30 mins
<script type="text/javascript" src="http://include.ebaystatic.com/v4js/en_AU/e653i/SYS-D9_vjo_e653i10603144_1_en_AU.js"></script><script type="text/javascript">vjo.dsf.error.ErrorHandlerManager.register(new vjo.dsf.error.DefaultErrorHandler()); vjo.dsf.error.ErrorHandlerManager.enableOnError(); </script><center><table border="0"><tbody><tr><td><table border="0" cellpadding="0" cellspacing="0"><tbody><tr><td class="vs_w-a"><center>
 </center>
</td></tr></tbody></table>
</td></tr></tbody></table>
</center><!--v.rpn310,RcmdId VISuperSize,RlogId p4%60bo7jkrk9%3Fv%7F.rpn310-126f00f5eea--><script type="text/javascript" src="http://include.ebaystatic.com/v4js/en_AU/e655i/BuyingApp_ViewItemDefault_e655i10632898_6a_en_AU.js"></script><iframe id="wtframe" style="display: none; visibility: hidden;" height="1" width="1"></iframe><script type="text/javascript">(function () { var _r = vjo.Registry; _r.put('ic_js_vv4-0',new vjo.darwin.core.imagecontainer.ImageContainer({"errId":"vv4-0_e","cmpId":"vv4-0","IDivId":"vv4-0_idiv","err":null,"width":500,"height":500,"bdrId":"vv4-0_bdiv","imgData":{"src":"http://i10.ebayimg.com/05/i/08/41/dc/da_1.JPG","alt":null,"href":null},"clkSrvId":"IMG_CNTR_CLICKED_vv4-0","reszOnLd":false,"ancId":"vv4-0_a","loadSvcId":"LOAD_IMG_SRVC_ID_vv4-0","clkLstrKey":null,"imgId":"i_vv4-0","thr":null,"thrbId":"vv4-0_t"})); _r.put('vv4-0_js',new vjo.darwin.core.viewselector1.ViewSelector({"DE":false,"cmpId":"vv4-0","icJsInstId":"ic_js_vv4-0","width":500,"height":500,"gtId":"gt_v4-0","mnImgData":[{"src":"http://i10.ebayimg.com/05/i/08/41/dc/da_1.JPG","alt":null,"href":null}],"spTd":"vv4-0_sp","hiResImgData":null,"thWidth":0,"zoom":false,"thImgData":[{"src":"http://i10.ebayimg.com/05/i/08/41/dc/da_0.JPG","alt":null,"href":null}],"scJsInstId":null,"thHeight":0,"scrollCnt":0,"mnImgId":"i_vv4-0","thJsInstId":null})); })(); (function(){ var _s=vjo.dsf.ServiceEngine, $se=_s.register;var _r=vjo.Registry; $se(4,'null',function (message) {_r.get('vv4-0_js').UpdateImgContainer(message); }); $se(4,'null',function (message) {vjo.darwin.pres.buying.cmp.itempictures.ItemPictures1.setSelectedIdx(message); }); })();SSte
</script>
Step 1: Remove the top of the airbox by undoing the 5 metal clips on the four edges of the box
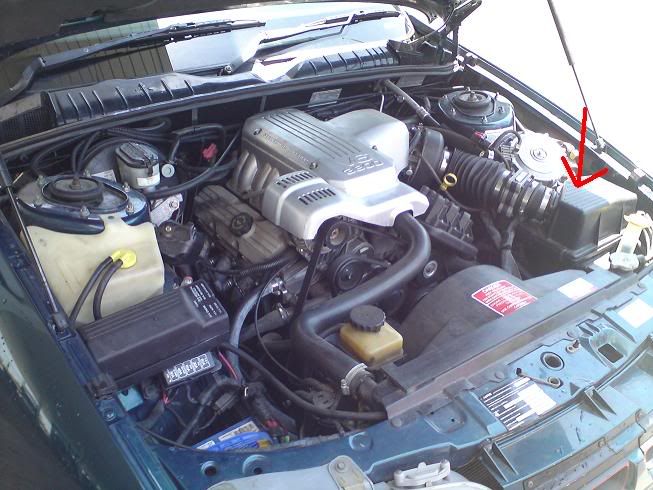
Step 2: Remove your air filter panel by simply lifting up. This will show the empty bottom section of your airbox, with 3 screws (approx 10mm) holding the bottom box to the engine bay. Use your socket set (the smallest one you can find) to undo the nuts. If you don't have a socket set, just use a set of pliers or an appropriate sized wrench to loosen the nuts and then unscrew them using your fingers.
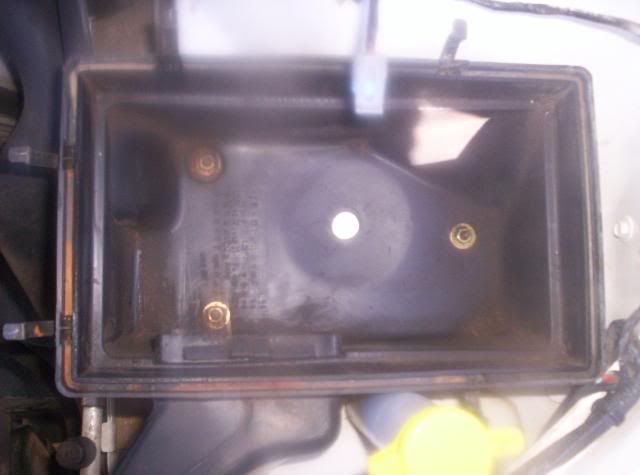
Step 3: Remove the tiny little stock pipe from the airbox (it should just pop out, if not just pull it hard and then put it in the bin...most worthless piece of equipment I have ever seen, amazing air even goes into it). Get your inlet pipe (the connector between OTR CAI manifold and the bottom section of the air box) and line it up to the bottom air box and using a Stanley Knife or Box Cutter, score the box to the appropriate size that will accomodate the new larger inlet.
Using your hacksaw, cut along the score lines and cut out the larger hole required.
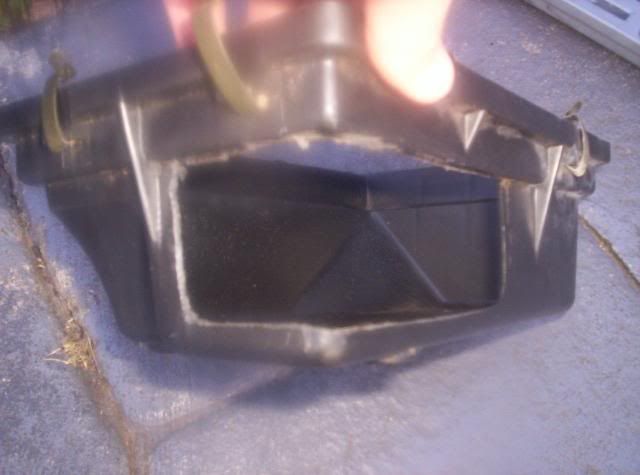
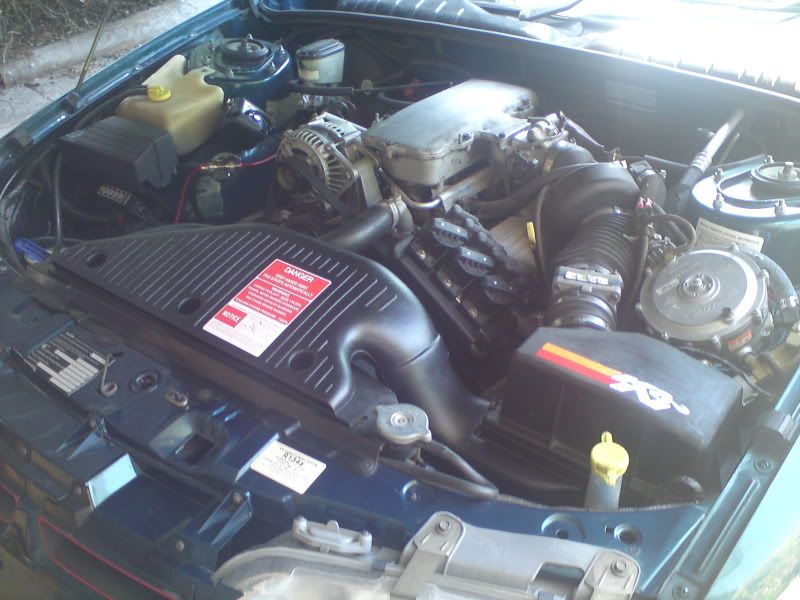
Step 4: Attach the new inlet into the larger hole and silicone the gaps between the box and the inlet if required (if you cut the hole too large). Put the bottom section of the box back into the engine bay and put the screws back on. The end result should look like this:
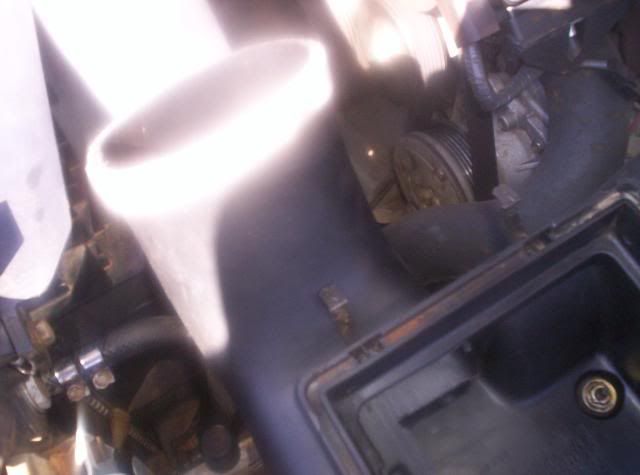
Step 5: Line up your OTR CAI manifold on the top of the radiator, plug the inlet pipe into the manifold and see how it sits. It should sit flush, if it doesn't, play around with it because you have done something wrong.
Get your drill and drill through the little holes in the top of the manifold on the little plastic rims, aim for the middle of one of the side sections, it should go through the plastic lip on the top of the radiator and go down in the gap between the plastic and the radiator. When you feel the drill go through the bottom layer, stop and pull it back out. The hole is adequate. Do this to all 3 holes and then get your screws and screw them in. Like this:
Step 6: Make sure everything is sturdy. Stand back and admire how great the new OTR CAI looks than the old Radiator/Fan shroud. Take it for a test drive and see how it feels!
Before I start I don't take responsibility for any damage caused by using this guide or related to using this guide. Use at your own risk.
What You Will Need
1. The Cold Air Intake kit (Available from Holden dealerships, Ebay etc etc)
2. 3Very short screws, probably 12mm
3. Hacksaw
4. Socket/Screwdriver Set
5. Power Drill with bit
6. Silicone (If needed)
Time = About 30 mins
<script type="text/javascript" src="http://include.ebaystatic.com/v4js/en_AU/e653i/SYS-D9_vjo_e653i10603144_1_en_AU.js"></script><script type="text/javascript">vjo.dsf.error.ErrorHandlerManager.register(new vjo.dsf.error.DefaultErrorHandler()); vjo.dsf.error.ErrorHandlerManager.enableOnError(); </script><center><table border="0"><tbody><tr><td><table border="0" cellpadding="0" cellspacing="0"><tbody><tr><td class="vs_w-a"><center>
</td></tr></tbody></table>
</td></tr></tbody></table>
</center><!--v.rpn310,RcmdId VISuperSize,RlogId p4%60bo7jkrk9%3Fv%7F.rpn310-126f00f5eea--><script type="text/javascript" src="http://include.ebaystatic.com/v4js/en_AU/e655i/BuyingApp_ViewItemDefault_e655i10632898_6a_en_AU.js"></script><iframe id="wtframe" style="display: none; visibility: hidden;" height="1" width="1"></iframe><script type="text/javascript">(function () { var _r = vjo.Registry; _r.put('ic_js_vv4-0',new vjo.darwin.core.imagecontainer.ImageContainer({"errId":"vv4-0_e","cmpId":"vv4-0","IDivId":"vv4-0_idiv","err":null,"width":500,"height":500,"bdrId":"vv4-0_bdiv","imgData":{"src":"http://i10.ebayimg.com/05/i/08/41/dc/da_1.JPG","alt":null,"href":null},"clkSrvId":"IMG_CNTR_CLICKED_vv4-0","reszOnLd":false,"ancId":"vv4-0_a","loadSvcId":"LOAD_IMG_SRVC_ID_vv4-0","clkLstrKey":null,"imgId":"i_vv4-0","thr":null,"thrbId":"vv4-0_t"})); _r.put('vv4-0_js',new vjo.darwin.core.viewselector1.ViewSelector({"DE":false,"cmpId":"vv4-0","icJsInstId":"ic_js_vv4-0","width":500,"height":500,"gtId":"gt_v4-0","mnImgData":[{"src":"http://i10.ebayimg.com/05/i/08/41/dc/da_1.JPG","alt":null,"href":null}],"spTd":"vv4-0_sp","hiResImgData":null,"thWidth":0,"zoom":false,"thImgData":[{"src":"http://i10.ebayimg.com/05/i/08/41/dc/da_0.JPG","alt":null,"href":null}],"scJsInstId":null,"thHeight":0,"scrollCnt":0,"mnImgId":"i_vv4-0","thJsInstId":null})); })(); (function(){ var _s=vjo.dsf.ServiceEngine, $se=_s.register;var _r=vjo.Registry; $se(4,'null',function (message) {_r.get('vv4-0_js').UpdateImgContainer(message); }); $se(4,'null',function (message) {vjo.darwin.pres.buying.cmp.itempictures.ItemPictures1.setSelectedIdx(message); }); })();SSte
</script>
Step 1: Remove the top of the airbox by undoing the 5 metal clips on the four edges of the box
Step 2: Remove your air filter panel by simply lifting up. This will show the empty bottom section of your airbox, with 3 screws (approx 10mm) holding the bottom box to the engine bay. Use your socket set (the smallest one you can find) to undo the nuts. If you don't have a socket set, just use a set of pliers or an appropriate sized wrench to loosen the nuts and then unscrew them using your fingers.
Step 3: Remove the tiny little stock pipe from the airbox (it should just pop out, if not just pull it hard and then put it in the bin...most worthless piece of equipment I have ever seen, amazing air even goes into it). Get your inlet pipe (the connector between OTR CAI manifold and the bottom section of the air box) and line it up to the bottom air box and using a Stanley Knife or Box Cutter, score the box to the appropriate size that will accomodate the new larger inlet.
Using your hacksaw, cut along the score lines and cut out the larger hole required.
Step 4: Attach the new inlet into the larger hole and silicone the gaps between the box and the inlet if required (if you cut the hole too large). Put the bottom section of the box back into the engine bay and put the screws back on. The end result should look like this:
Step 5: Line up your OTR CAI manifold on the top of the radiator, plug the inlet pipe into the manifold and see how it sits. It should sit flush, if it doesn't, play around with it because you have done something wrong.
Get your drill and drill through the little holes in the top of the manifold on the little plastic rims, aim for the middle of one of the side sections, it should go through the plastic lip on the top of the radiator and go down in the gap between the plastic and the radiator. When you feel the drill go through the bottom layer, stop and pull it back out. The hole is adequate. Do this to all 3 holes and then get your screws and screw them in. Like this:
Step 6: Make sure everything is sturdy. Stand back and admire how great the new OTR CAI looks than the old Radiator/Fan shroud. Take it for a test drive and see how it feels!
