Drawnnite
Obviously Unsensible
- Joined
- Sep 2, 2010
- Messages
- 2,030
- Reaction score
- 2,151
- Points
- 113
- Location
- Victoria
- Members Ride
- 2000 Vs Ute
now before i start this was done well is being done on an Ecotec engine cover.
this process is transferable to other engine covers and other coverings such as rocker covers, air and fuse boxes etc.
TOOLS and MATERIALS
1. Paint. - Primer, for Base coat
- Main Colour and any other colours you may want to use.
- Clear Coat
- Tinned Paint for those pesky areas
2. Sandpaper. Wet and Dry 240,320 and 800+ grits
3. Masking Tape
4. Stanley Knife (sharp)
5. Dust Mask
6. Degreaser or Wax and Grease remover
7. Paintbrush
8. Patience


PROCESS
1) take your engine cover off your car if not already done so, or not using a spare one.
2) CLEANING
- Clean the Cover with Wax and Grease remover, or simply use Degreaser like i did.
- Follow the instructions on the pack. making sure the cover is pretty much spotless upon completion.
- Wipe down afterwards if required.


3) SANDING
- Using your 240grit Paper sand the whole cover. i chose 240 grit to start with as it cleared off most of the old paint
- after using the 240, use the 320 Grit paper to smooth it out a little bit.
- you can use finer grit papers here if you wish.
-an electric sander as seen on page 2 is your best friend

4) PRIMING
- The next step is the Base Coat, whereby you Prime the Surface. wearing a dustmask is highly recommended
- Make sure the surface is clear of all dust and bugs, leaves etc with a rag or duster.
- in a Well Ventialated area and using a stand (i turned over a box) place the engine cover.
- spray 3-4 light to medium coats of your primer, leaving about 10 minutes between coats
- More coats can be applied, and a very light sanding inbetween is highly recommended.

5) PAINTING
- Now the Fun begins. If you are painting just the solid colour. follow along from (a)
- Lightly Sand the Surface first
- Paint the areas you want as a different colour first. a few coats, 2-4 should be plenty. leave 10 minutes between coats, sand between coats if required.
- once dry, Tape up the areas you want to be Kept this colour. such as works, symbols and other areas (like the "pipes" and writing on my cover)
- Cut these to shape with the stanley knife. take your time to get it correct.
- (a) once you are all happy with that, sand back the rest of the cover lightly with 320 grit.
- now paint with your desired colour. 3-4 light-medium coats should be plenty, sand inbetween if required.
- if you are unhappy with the colour sand and recoat in a different colour if required


6) UNTAPING
- for those that have done multi colours, take your tape off after the paint has dried, this should peel off easily.
- if the lines are not 100% perfect just touch them up with some hobby paint, or spray paint into a little tub and use with a fine paintbrush.
- also use this paintbrush for wordings such as that of "sequential injection" which it is impracticle to tape up.

- you can repeat the taping and paint process multiple times for different lines if required (pics of this will be up soon)
7) CLEAR COATING
- once you are happy with the results of your painting it is time for a clear coating.
- this is done the same way as the painting, in a well ventilated areas, multiple coats (3-4) leaving time to dry between coats.
- if required you can sand very lightly inbetween coats with some 800+ grit paper
8) FINISHING
- now stand back and admire your work.
- put back onto the engine of your car. use new grommets if you wish (about a $1 each from Holden)
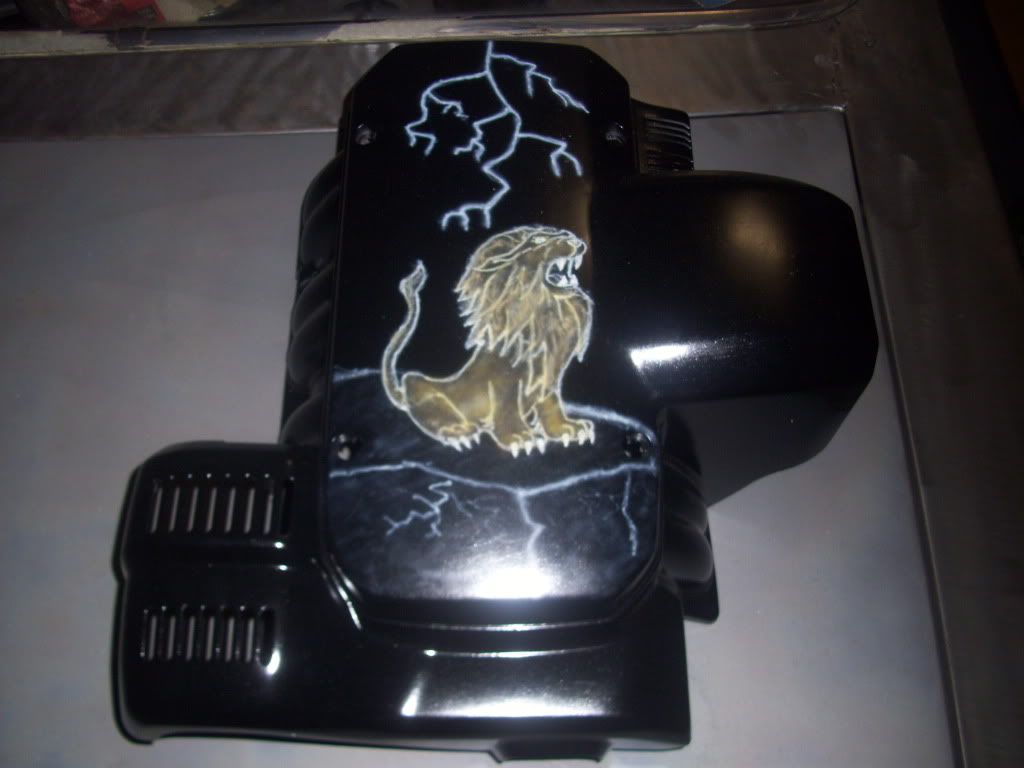
pretty much how it can look. i just need to clean it up a bit more and then it is 100% done.

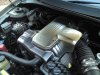
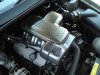
how it looked in car:

NOTES
i grabbed a 2nd engine cover from the wreckers ($15 =P) for this project.
took me about 7 weeks all up. i did about 1 stage per weekend, and had a few mistakes. single colouring should take 2 weekends. 1 to sand/prime/colour 1 to clearcoat.
i was unhappy with the intial dark grey paint as it looked blue, thus i sanded it back and repainted as black, to match the car
A Texta of the Same Colour is your Best Friend for hiding mistakes. (im my case, black texta)
if doing rocker covers i would highly suggest changing the rocker cover gaskets. and put them in the correct bloody way! =P
this process is transferable to other engine covers and other coverings such as rocker covers, air and fuse boxes etc.
TOOLS and MATERIALS
1. Paint. - Primer, for Base coat
- Main Colour and any other colours you may want to use.
- Clear Coat
- Tinned Paint for those pesky areas
2. Sandpaper. Wet and Dry 240,320 and 800+ grits
3. Masking Tape
4. Stanley Knife (sharp)
5. Dust Mask
6. Degreaser or Wax and Grease remover
7. Paintbrush
8. Patience
PROCESS
1) take your engine cover off your car if not already done so, or not using a spare one.
2) CLEANING
- Clean the Cover with Wax and Grease remover, or simply use Degreaser like i did.
- Follow the instructions on the pack. making sure the cover is pretty much spotless upon completion.
- Wipe down afterwards if required.
3) SANDING
- Using your 240grit Paper sand the whole cover. i chose 240 grit to start with as it cleared off most of the old paint
- after using the 240, use the 320 Grit paper to smooth it out a little bit.
- you can use finer grit papers here if you wish.
-an electric sander as seen on page 2 is your best friend
4) PRIMING
- The next step is the Base Coat, whereby you Prime the Surface. wearing a dustmask is highly recommended
- Make sure the surface is clear of all dust and bugs, leaves etc with a rag or duster.
- in a Well Ventialated area and using a stand (i turned over a box) place the engine cover.
- spray 3-4 light to medium coats of your primer, leaving about 10 minutes between coats
- More coats can be applied, and a very light sanding inbetween is highly recommended.
5) PAINTING
- Now the Fun begins. If you are painting just the solid colour. follow along from (a)
- Lightly Sand the Surface first
- Paint the areas you want as a different colour first. a few coats, 2-4 should be plenty. leave 10 minutes between coats, sand between coats if required.
- once dry, Tape up the areas you want to be Kept this colour. such as works, symbols and other areas (like the "pipes" and writing on my cover)
- Cut these to shape with the stanley knife. take your time to get it correct.
- (a) once you are all happy with that, sand back the rest of the cover lightly with 320 grit.
- now paint with your desired colour. 3-4 light-medium coats should be plenty, sand inbetween if required.
- if you are unhappy with the colour sand and recoat in a different colour if required
6) UNTAPING
- for those that have done multi colours, take your tape off after the paint has dried, this should peel off easily.
- if the lines are not 100% perfect just touch them up with some hobby paint, or spray paint into a little tub and use with a fine paintbrush.
- also use this paintbrush for wordings such as that of "sequential injection" which it is impracticle to tape up.
- you can repeat the taping and paint process multiple times for different lines if required (pics of this will be up soon)
7) CLEAR COATING
- once you are happy with the results of your painting it is time for a clear coating.
- this is done the same way as the painting, in a well ventilated areas, multiple coats (3-4) leaving time to dry between coats.
- if required you can sand very lightly inbetween coats with some 800+ grit paper
8) FINISHING
- now stand back and admire your work.
- put back onto the engine of your car. use new grommets if you wish (about a $1 each from Holden)
pretty much how it can look. i just need to clean it up a bit more and then it is 100% done.
how it looked in car:
NOTES
i grabbed a 2nd engine cover from the wreckers ($15 =P) for this project.
took me about 7 weeks all up. i did about 1 stage per weekend, and had a few mistakes. single colouring should take 2 weekends. 1 to sand/prime/colour 1 to clearcoat.
i was unhappy with the intial dark grey paint as it looked blue, thus i sanded it back and repainted as black, to match the car
A Texta of the Same Colour is your Best Friend for hiding mistakes. (im my case, black texta)
if doing rocker covers i would highly suggest changing the rocker cover gaskets. and put them in the correct bloody way! =P
Last edited: