jetspin_vn
JetSpin Racing Team
- Joined
- Nov 13, 2003
- Messages
- 1,430
- Reaction score
- 8
- Points
- 0
- Age
- 39
- Location
- Mission Bay, Auckland, New Zealand
- Members Ride
- VN GTS
Wow, about time I got back to these writeups. Been a bit AWOL in the last few years... sorry guys!
:bow:
Anyway, If your like me then your power steering is or was totally shagged. Age is the primary cause, but you don't often hear of Jappa power steering ****ting itself even when it gets on a bit right? One of the big reasons is a major design flaw in the VN in particular, the lack of any heat removal. If you look at a VR, they have a single metal tube that runs out in front of the radiator much like the trans cooler does and as a result I believe they might be less niggly, but seals and racks will still wear out. My personal choice was to replace both the rack and pump with overhauled ones, and install a trans cooler into the low pressure return line to shed the excess heat and promote long life of my expensive shiny new bits.
I'll split this into three threads, In this the first one we'll look at the Pump.
A few words of warning:
- Don't ever tamper with the design of the high pressure line or feed. It gets up to 300psi in corners, any kinks will rupture causing mess and tears
- If your not sure of the condition of your high or even low pressure lines, replace them. A new HP line from Holden is only about $30, and they do wear out
- Transmission line is fine for the LP side of things
- DON'T cross thread anything! I know at least one member of these forums can attest to this fact
- Use ONLY Dextron 3 Automatic Transmission Fluid in Commodores and Calais, anything else will attack the seals. This goes for any type of hydraulic system.
Tools Required
- Sockets & Ring Spanners, inc 10, 13, 16, 17, 18, & 19mm
- Screwdrivers
- 1 Litre Dextron 3 Automatic Transmission Fluid
- Hoseclips if yours are shagged
Power Steering Pump Removal & Re-installation
Note: this can be done without even getting under the car, but be sure that your not over any surface that will absorb oil unless you don't care
1. First, get familiar with what your looking at:
A = Low Pressure (Rack to Res.) Return Line
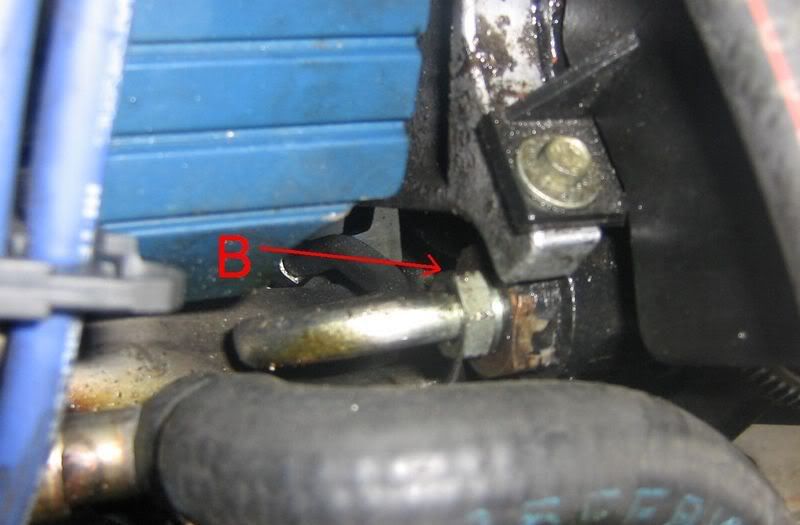
B = High Pressure (Pump to Rack) Feed Line
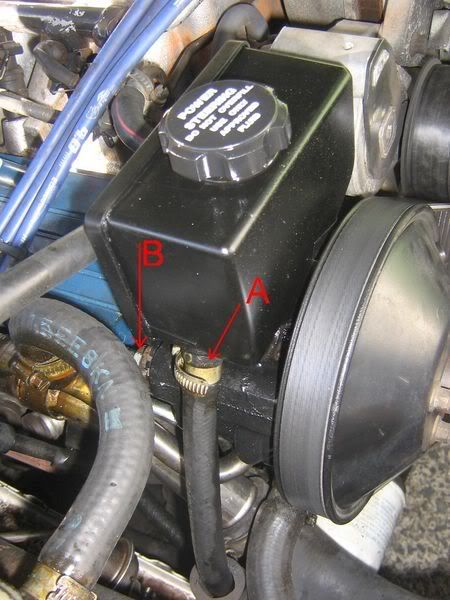
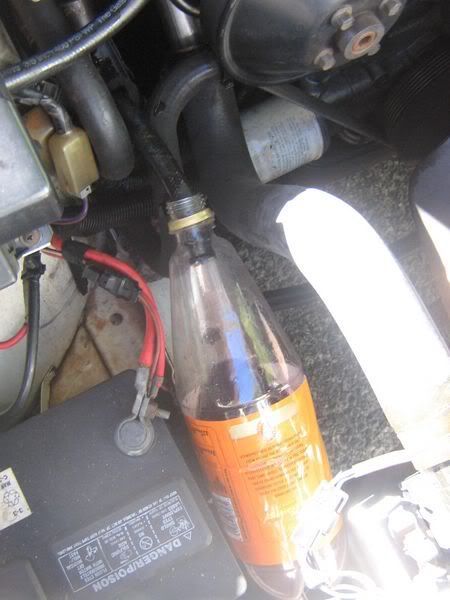
2. Now, we'd rather not have dirty old ATF all over the place, so next drain the system. Disconnect the low pressure (Line A) hose from the res, and catch any fluid as it drains out. Next place the line into a plastic bottle or bucket within the engine bay and start the engine, allowing it to run for 30 seconds or so to pump a fair chunk of the old fluid out. A few rev's helps it along.

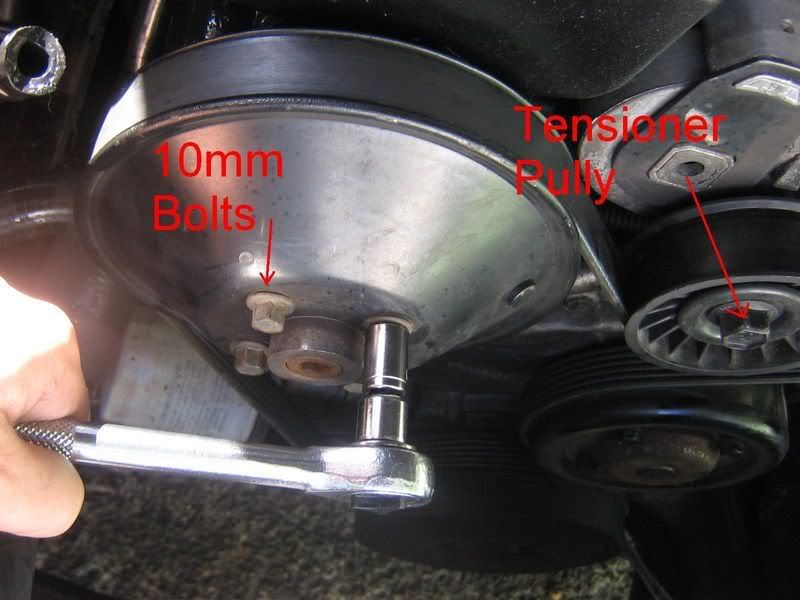
3. Done that? Great. Now to start pulling things apart. Before you remove the PK belt, first loosen off the bolts attaching the pully to the pump with a 10mm socket or spanner. It will make life a lot easier in a moment. Use the 18mm socket to lift the tensioner pully and remove the belt - take notice of the way it goes around all the pullys! With the belt off, remove the pully bolts and set them all aside.
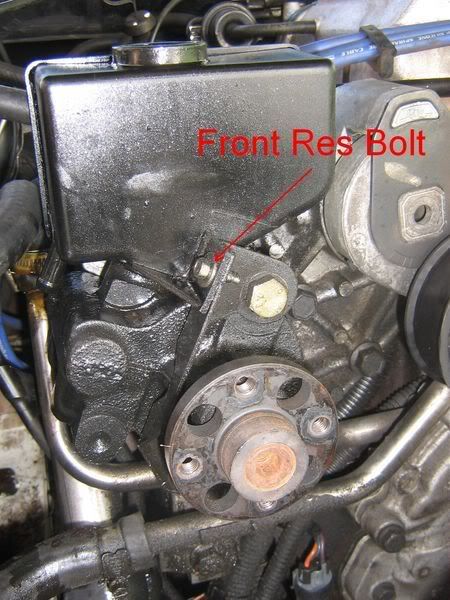
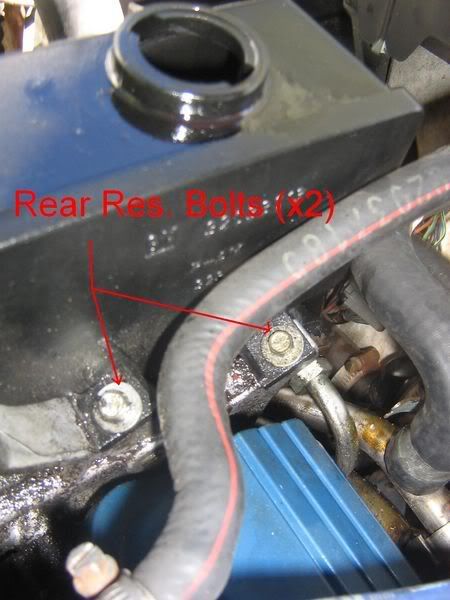
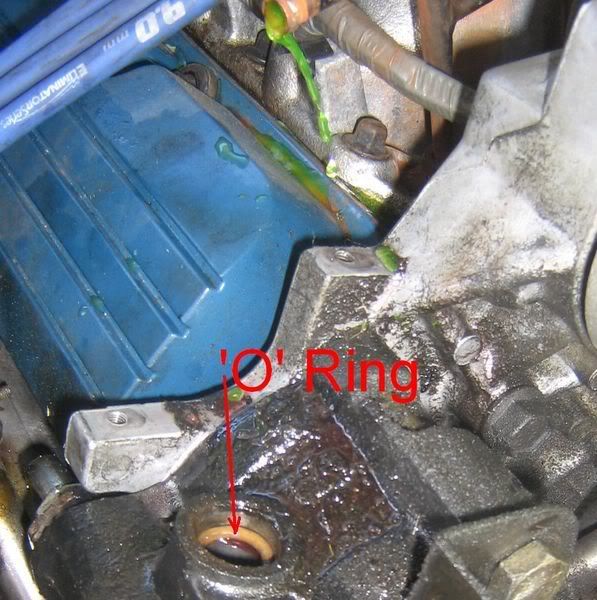
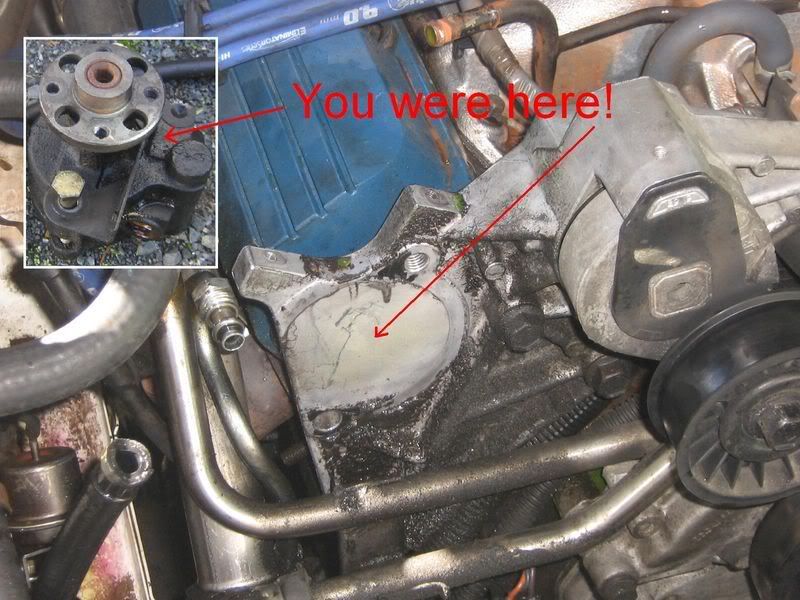
4. Time to get the Res off. Three small bolts, I think the were 8mm. With them out, the res will lift (with a little encouragment) from the pump. Note the 'O' Ring, if your new pump doesn't have one you'll need to salvage this one. Be sure to clean it with a bit of meths or similar. You'll note i've also elected to remove the top expansion bottle cooling line, thus the bleeding anti-freeze. Series one owners will anyway.
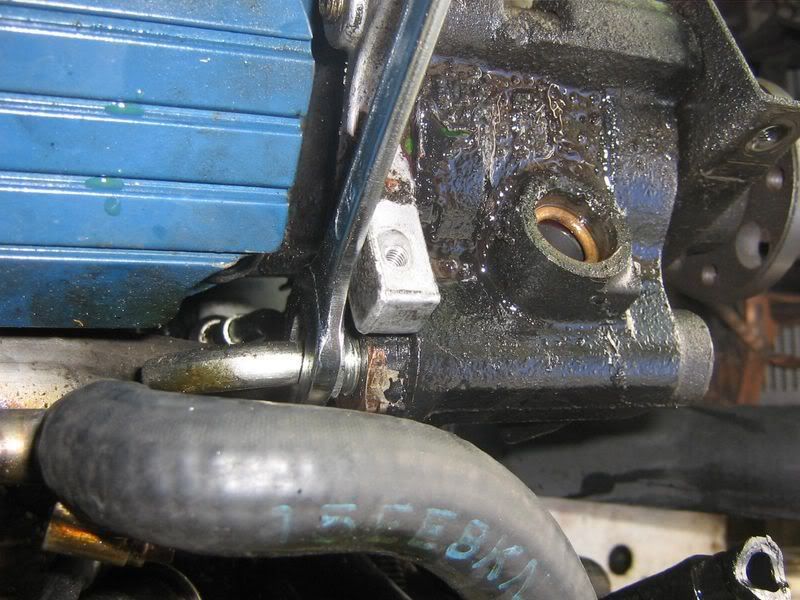
5. Remove line B from earlier, that is to say the High Pressure Line from the back of the pump. All thats holding it on now should be the front mounting bolts, two of. These are size 17mm.
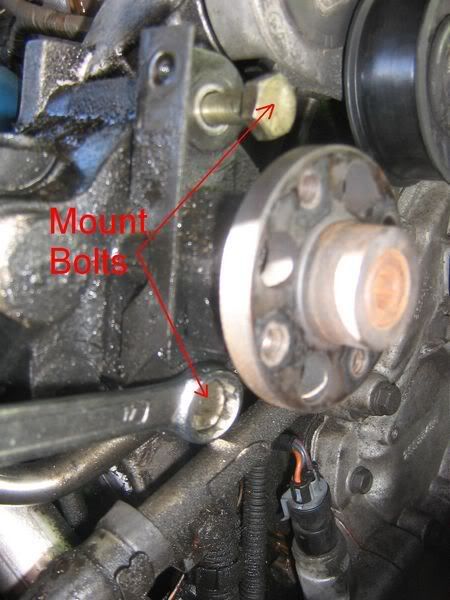
6. Just like that! Your pump should be off. Installation is a reversal of above, but I stress again DON'T cross thread the high pressure line! If you intend to remove the rack as I did, then leave the HP line until the rack if out and there is some slack to ensure you can line up the threads nice.
(c) 2008 JetSpin Racing Team
[email protected]:thumbsup:
:bow:
Anyway, If your like me then your power steering is or was totally shagged. Age is the primary cause, but you don't often hear of Jappa power steering ****ting itself even when it gets on a bit right? One of the big reasons is a major design flaw in the VN in particular, the lack of any heat removal. If you look at a VR, they have a single metal tube that runs out in front of the radiator much like the trans cooler does and as a result I believe they might be less niggly, but seals and racks will still wear out. My personal choice was to replace both the rack and pump with overhauled ones, and install a trans cooler into the low pressure return line to shed the excess heat and promote long life of my expensive shiny new bits.
I'll split this into three threads, In this the first one we'll look at the Pump.
A few words of warning:
- Don't ever tamper with the design of the high pressure line or feed. It gets up to 300psi in corners, any kinks will rupture causing mess and tears
- If your not sure of the condition of your high or even low pressure lines, replace them. A new HP line from Holden is only about $30, and they do wear out
- Transmission line is fine for the LP side of things
- DON'T cross thread anything! I know at least one member of these forums can attest to this fact
- Use ONLY Dextron 3 Automatic Transmission Fluid in Commodores and Calais, anything else will attack the seals. This goes for any type of hydraulic system.
Tools Required
- Sockets & Ring Spanners, inc 10, 13, 16, 17, 18, & 19mm
- Screwdrivers
- 1 Litre Dextron 3 Automatic Transmission Fluid
- Hoseclips if yours are shagged
Power Steering Pump Removal & Re-installation
Note: this can be done without even getting under the car, but be sure that your not over any surface that will absorb oil unless you don't care
1. First, get familiar with what your looking at:
A = Low Pressure (Rack to Res.) Return Line
B = High Pressure (Pump to Rack) Feed Line
2. Now, we'd rather not have dirty old ATF all over the place, so next drain the system. Disconnect the low pressure (Line A) hose from the res, and catch any fluid as it drains out. Next place the line into a plastic bottle or bucket within the engine bay and start the engine, allowing it to run for 30 seconds or so to pump a fair chunk of the old fluid out. A few rev's helps it along.
3. Done that? Great. Now to start pulling things apart. Before you remove the PK belt, first loosen off the bolts attaching the pully to the pump with a 10mm socket or spanner. It will make life a lot easier in a moment. Use the 18mm socket to lift the tensioner pully and remove the belt - take notice of the way it goes around all the pullys! With the belt off, remove the pully bolts and set them all aside.
4. Time to get the Res off. Three small bolts, I think the were 8mm. With them out, the res will lift (with a little encouragment) from the pump. Note the 'O' Ring, if your new pump doesn't have one you'll need to salvage this one. Be sure to clean it with a bit of meths or similar. You'll note i've also elected to remove the top expansion bottle cooling line, thus the bleeding anti-freeze. Series one owners will anyway.
5. Remove line B from earlier, that is to say the High Pressure Line from the back of the pump. All thats holding it on now should be the front mounting bolts, two of. These are size 17mm.
6. Just like that! Your pump should be off. Installation is a reversal of above, but I stress again DON'T cross thread the high pressure line! If you intend to remove the rack as I did, then leave the HP line until the rack if out and there is some slack to ensure you can line up the threads nice.
(c) 2008 JetSpin Racing Team
[email protected]:thumbsup: