Troy711
Retired Old Fart
- Joined
- Dec 13, 2003
- Messages
- 7,692
- Reaction score
- 167
- Points
- 63
- Location
- Canberra, ACT
- Website
- forums.justcommodores.com.au
- Members Ride
- 2011 Mitsubishi Pajero GLS
First of all, forgive me for all of the dirt on my car. I haven't had time to wash it and I have been getting dirt and mud on it from worksites.
Removing the front bumper is easier then you think. First time may be a little tricky but once you know how to do it you will be able to remove and refit it yourself in under 15 minutes. The following is a series of pictures taken by me. I will try to describe as best i can, what is happening in each picture and when you need to do.
REMOVAL
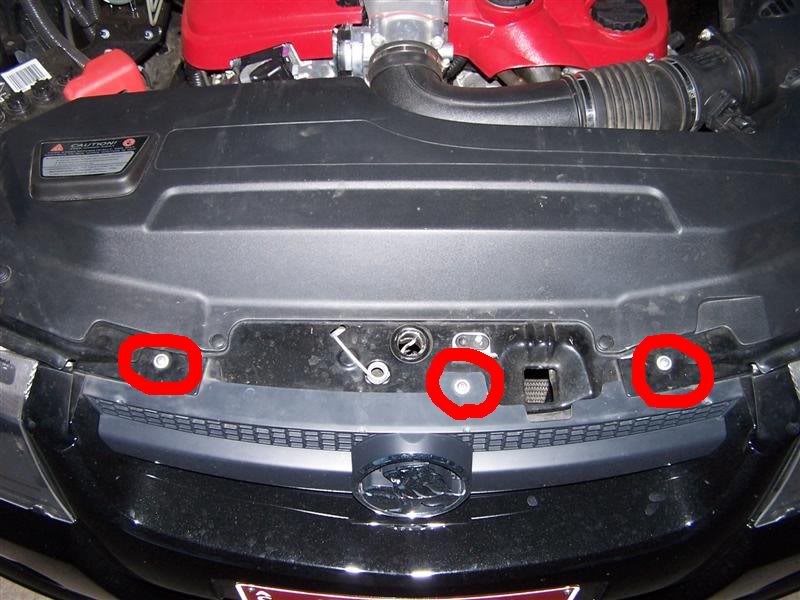
STEP 1
Pop the bonnet. Locate and remove the 3 screws as circled in red.
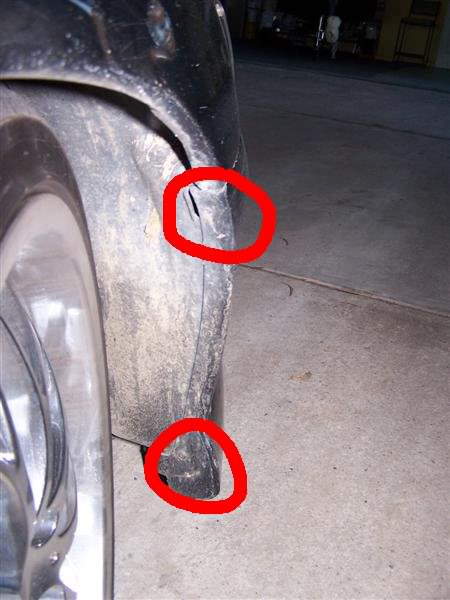
STEP 2
Turn the wheel full lock left (this gives you better access). Locate and remove the 2 screws circled in red. Sorry you can not actually see the screws in the picture, but trust me, they are there!
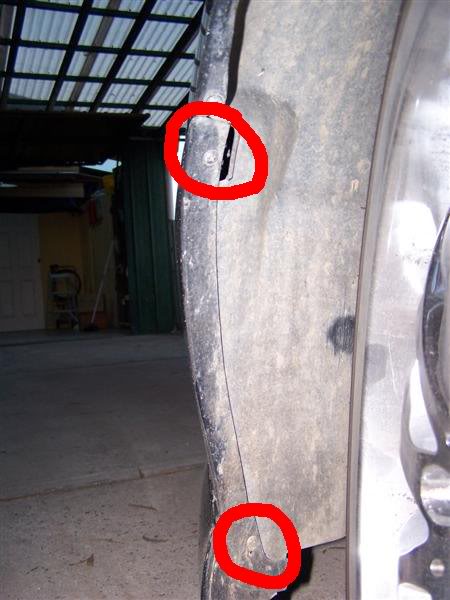
STEP 3
Turn the wheel full lock right. Locate and remove the 2 screws circled in red. Once again, sorry you can not actually see the screws in the picture.
STEP 4
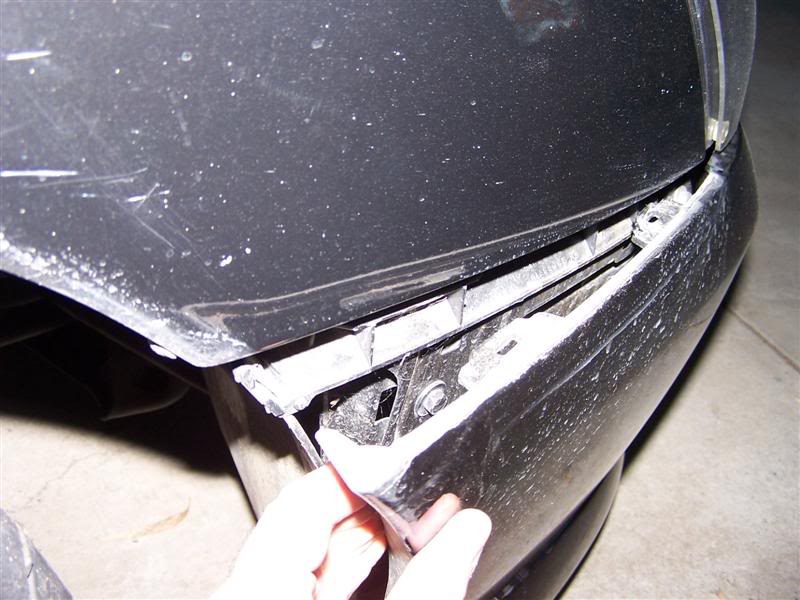
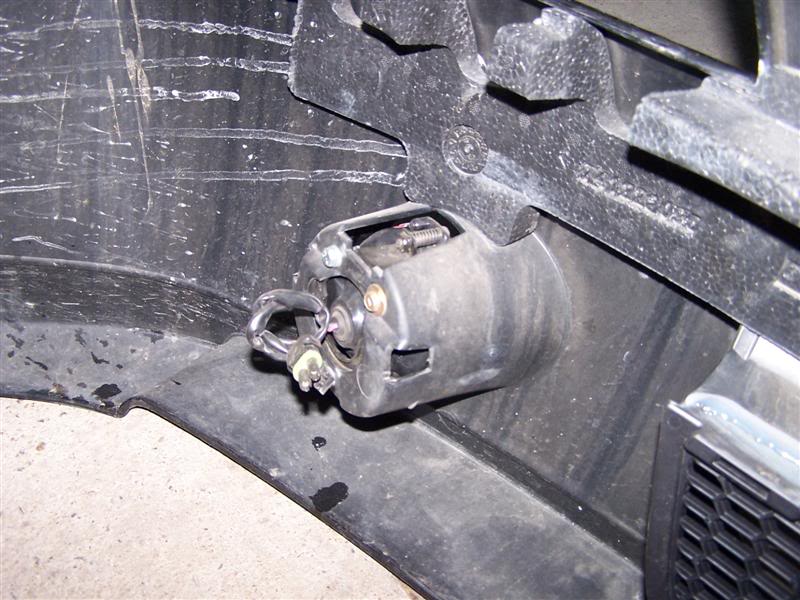
Put your fingers in between the bumper and plastic inner gaurd (as shown).
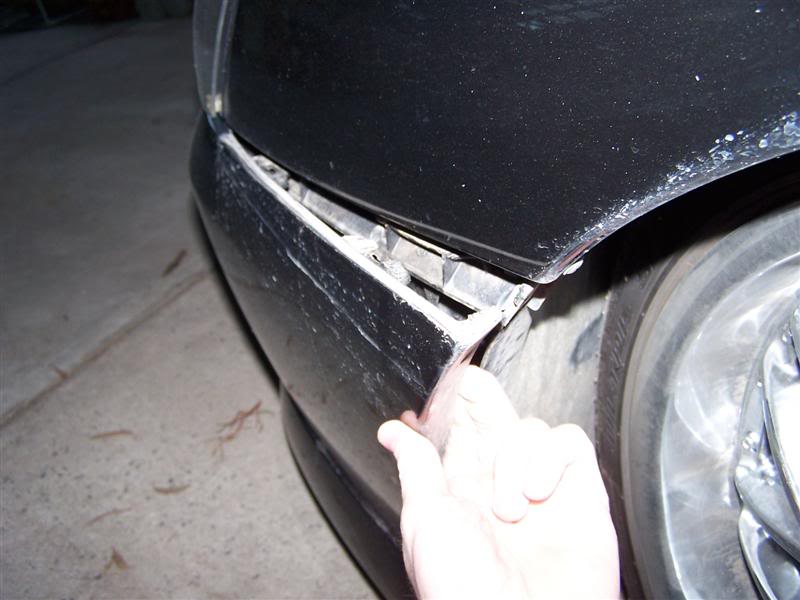
Pull back, then away from the car. This may require some force. You should hear it unclip and it should sit as shown in STEP 6.
STEP 5
Repeat STEP 4 with right side of bumper.
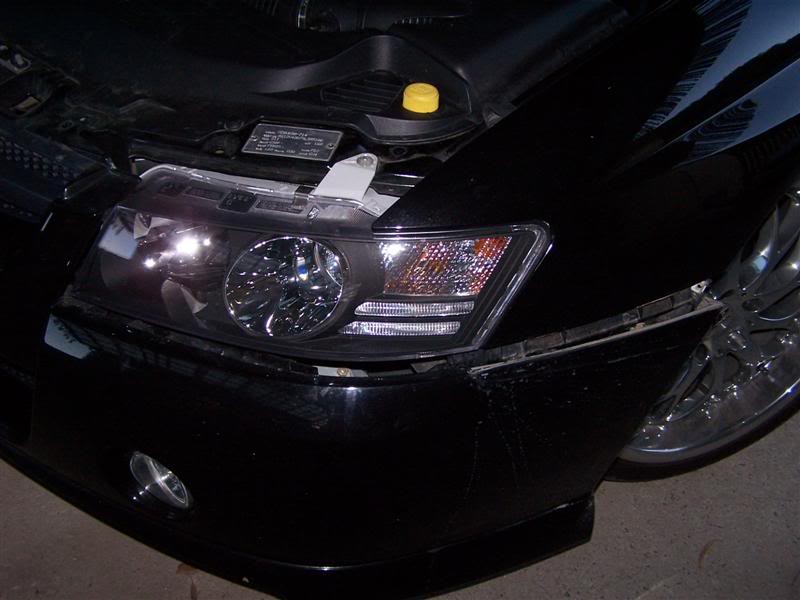
STEP 6
The front bumper should now be sitting like the picture below on both sides.
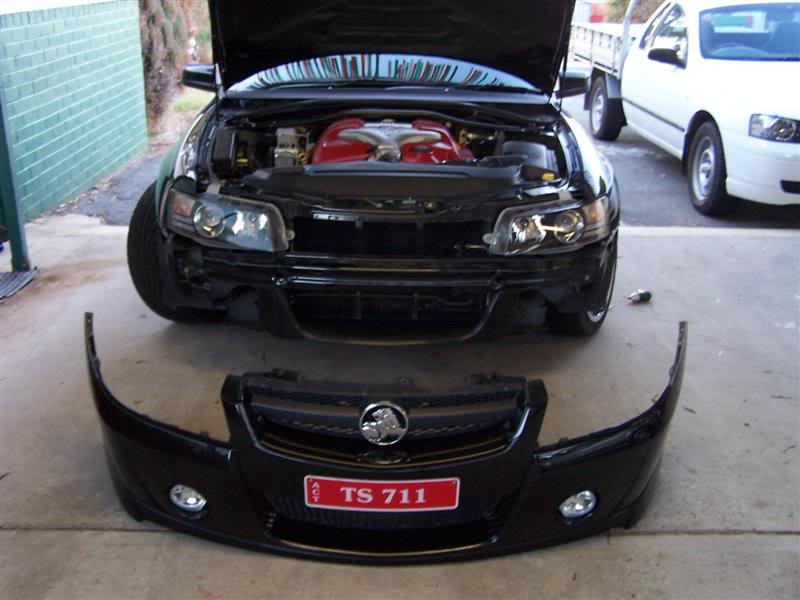
STEP 7
All you need to do now is gently wiggle and pull the bumper until it comes off. You may need to pull the sides out a little more as you do this. This is where two people comes in handy.
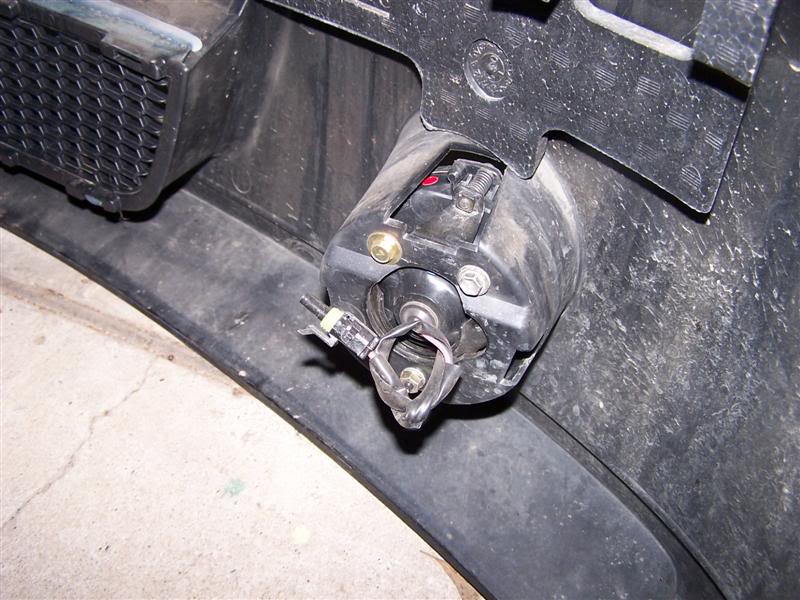
STEP 8
Disconnect fog lights (if fitted). You should have enough length on the wiring to sit the bar on the ground to disconnect the lights (Thanks to VZGEN4 for that info).
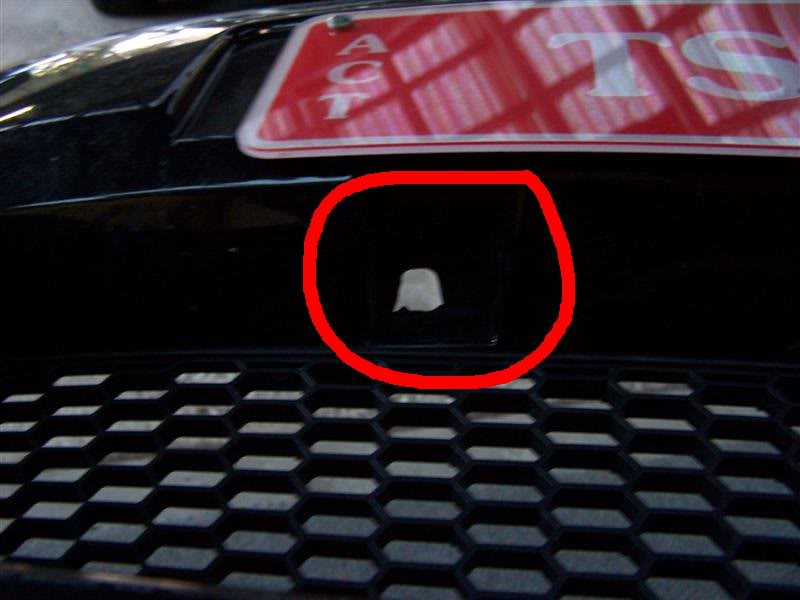
NOTE
Some versions may also be fitted with 2 more screws located underneath the number plate.
REFITTING
Refitting is simple, just reverse the steps shown. To reattach the bumper to the body just get it into position and give it a gentle tap with the bottom of your fist. You should hear 2 snaps as it clips back in.
Please also note that this guide may not work for other bumper versions on the VZ
If you need more information on this, feel free to ask here or send me a PM. If this has helped you in any way, feel free to give me positive feedback points (sorry, I couldn't resist).
Troy711
Removing the front bumper is easier then you think. First time may be a little tricky but once you know how to do it you will be able to remove and refit it yourself in under 15 minutes. The following is a series of pictures taken by me. I will try to describe as best i can, what is happening in each picture and when you need to do.
REMOVAL
STEP 1
Pop the bonnet. Locate and remove the 3 screws as circled in red.
STEP 2
Turn the wheel full lock left (this gives you better access). Locate and remove the 2 screws circled in red. Sorry you can not actually see the screws in the picture, but trust me, they are there!
STEP 3
Turn the wheel full lock right. Locate and remove the 2 screws circled in red. Once again, sorry you can not actually see the screws in the picture.
STEP 4
Put your fingers in between the bumper and plastic inner gaurd (as shown).
Pull back, then away from the car. This may require some force. You should hear it unclip and it should sit as shown in STEP 6.
STEP 5
Repeat STEP 4 with right side of bumper.
STEP 6
The front bumper should now be sitting like the picture below on both sides.
STEP 7
All you need to do now is gently wiggle and pull the bumper until it comes off. You may need to pull the sides out a little more as you do this. This is where two people comes in handy.
STEP 8
Disconnect fog lights (if fitted). You should have enough length on the wiring to sit the bar on the ground to disconnect the lights (Thanks to VZGEN4 for that info).
NOTE
Some versions may also be fitted with 2 more screws located underneath the number plate.
REFITTING
Refitting is simple, just reverse the steps shown. To reattach the bumper to the body just get it into position and give it a gentle tap with the bottom of your fist. You should hear 2 snaps as it clips back in.
Please also note that this guide may not work for other bumper versions on the VZ
If you need more information on this, feel free to ask here or send me a PM. If this has helped you in any way, feel free to give me positive feedback points (sorry, I couldn't resist).
Troy711
Last edited:
 . its a pain cos if i dont come up at the right angle i cant get up at all