HarmlessMuffinMan
Member
- Joined
- Nov 1, 2010
- Messages
- 300
- Reaction score
- 12
- Points
- 18
- Age
- 36
- Location
- Armidale, NSW
- Members Ride
- VX Commodore 2002 Executive v6. Ex Patrol Car
Please note I do not condone working on your car half cast on beer… lol… JK’s
How to install Mace CAI on VT-VY.
Before I start this no doubt epic how to, I want to take a moment to thank Mr Mace for helping me out and being so kind. Getting a cheap high performance product is one thing, but offering the kind of service you do, is a whole other ball park. Mace Engineering group have broken all the rules by offering fast, cheap and high quality service. Name me a better company, and I will call you a liar (Seriously I will… Try it and see what happens)
Now Mace Engineering Group do have installation instructions for all their products, and if you have problems (Like I admittedly done), you can ring them and they will sort them out for you. The Mace instructions for installing this component is available HERE.
I seem to remember something about promising not to be sexist… But seriously, if you are a woman, get a man to do this for you.
What you need.
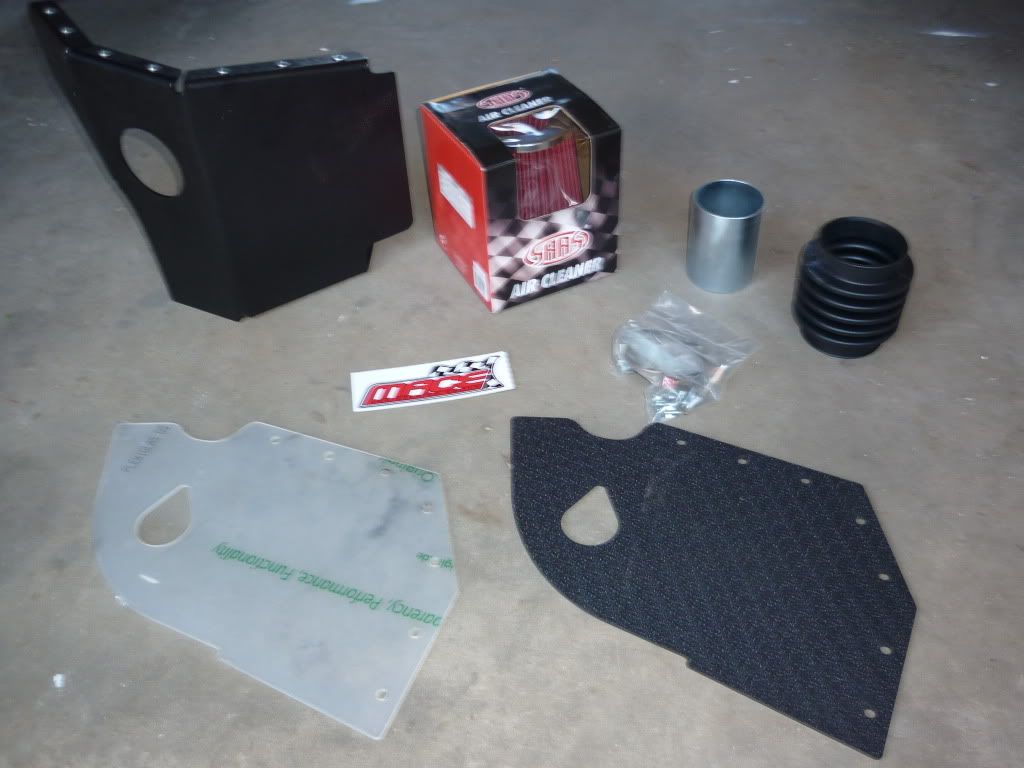
These are the components you get in the Mace Engineering Group Cold Air Intake. They are currently on special from $300, down to $270, and are delivered for $22. I also specked mine with a clear lid (Because I’m a dick head) for an extra $40. The look of it is well worth it (If you’re a ########).
Philips head screw driver
Flat head screw driver
Long nose pliers
T30 star head Allen key (Whatever they are called)
And an Allen key set (Because I have no idea what size it is… And SURE! I could go check in the Mace installation, but I don’t want too… So shut up)
Damp cloth
Small zip ties
Beer
Optional:
Electrical contact cleaner (Spray form, get it from Dick Smith… lol @ Dick)
More Beer
The following is how I installed the Mace Cold Air Intake… If you #### up your car, don’t blame me, if you’re a woman and you #### up your car, I tried to warn you. –Insert stuff that doesn’t make me liable-
Step One:
BEER! We all know how healthy it is to start one of these jobs with an ice cold longie of beer. We also know that people who drink and drive are #### heads, and deserve to be wrapped around a pole at 100k’s +. So in the interest of safety, please skip this step.
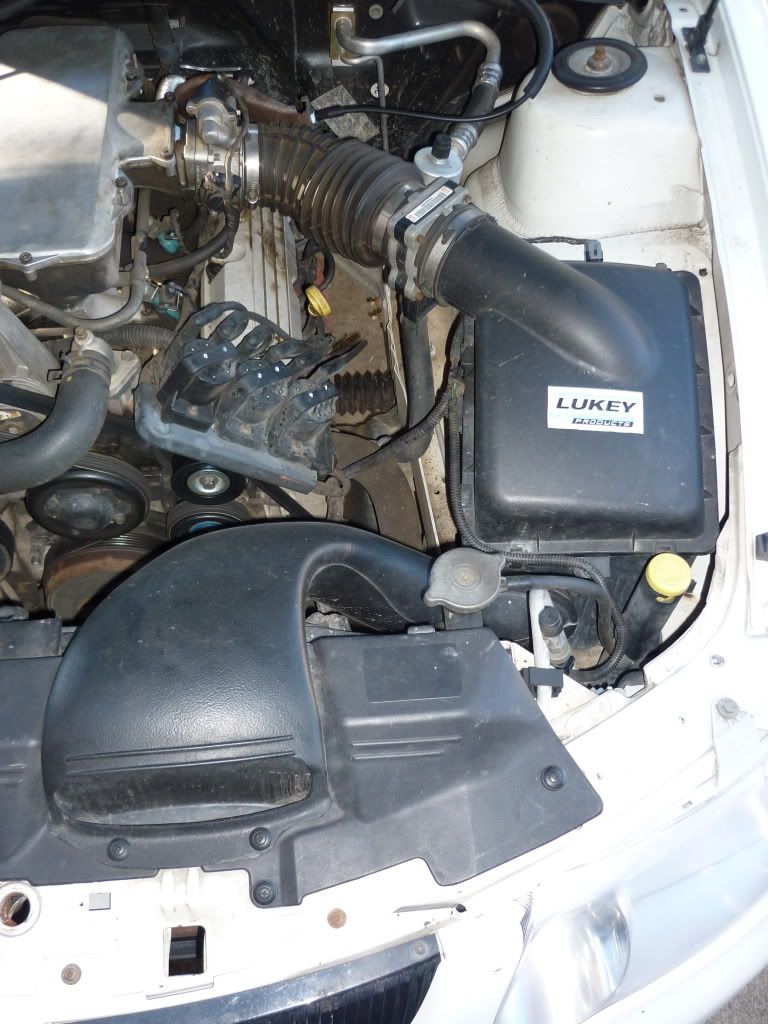
Your cold air intake before you install the mace one
Step Two:
Take your Philips head screw driver, and undo the plastic screws that sit at the front of your OTR cold air intake scoop, and then just pull it up and out. And yes, I know, it’s damn stupid of Holden to make plastic screws. What the HELL were they thinking… wankers. These screws won’t screw all the way out, there is a clip at the bottom that expands as they screw in, and so once they are high enough, it should just ‘pop’ out with some persuasion (Now is not the time to be a wanker and just yank it out.).
Those two screws at the front

Le screws out, and the scoop removed… like a BOUSE. What cha gonna do NOW!
Step Three:
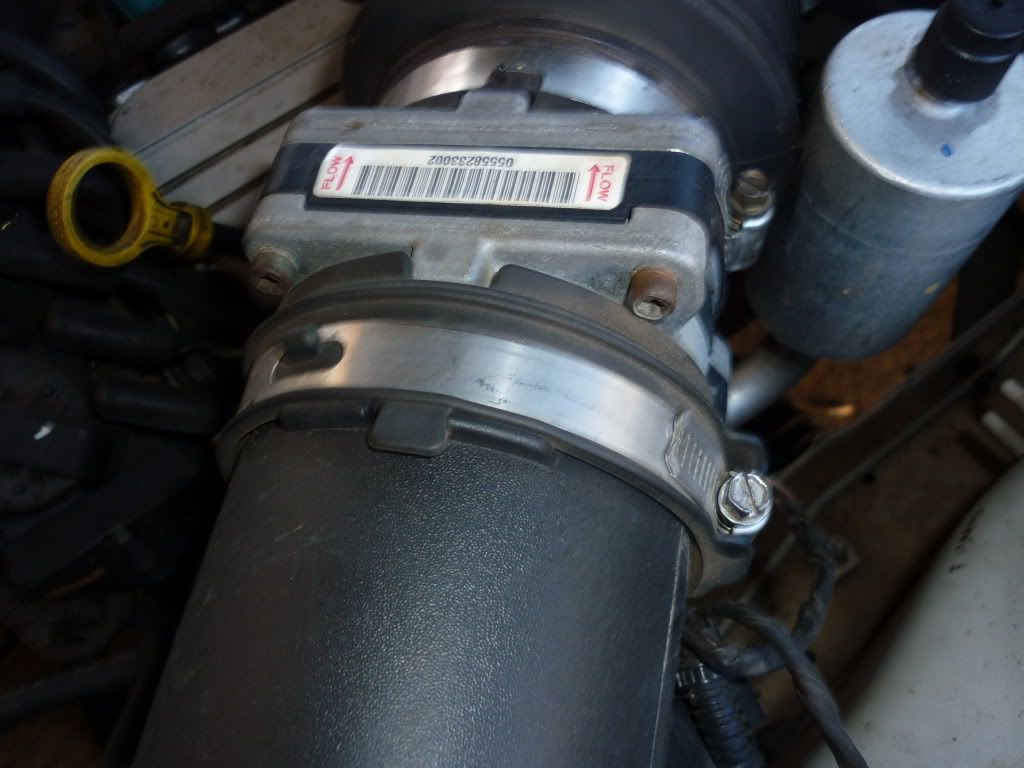
This first hose clamp. What you ought to do is undo it. Now don’t pull anything off, just loosen it.
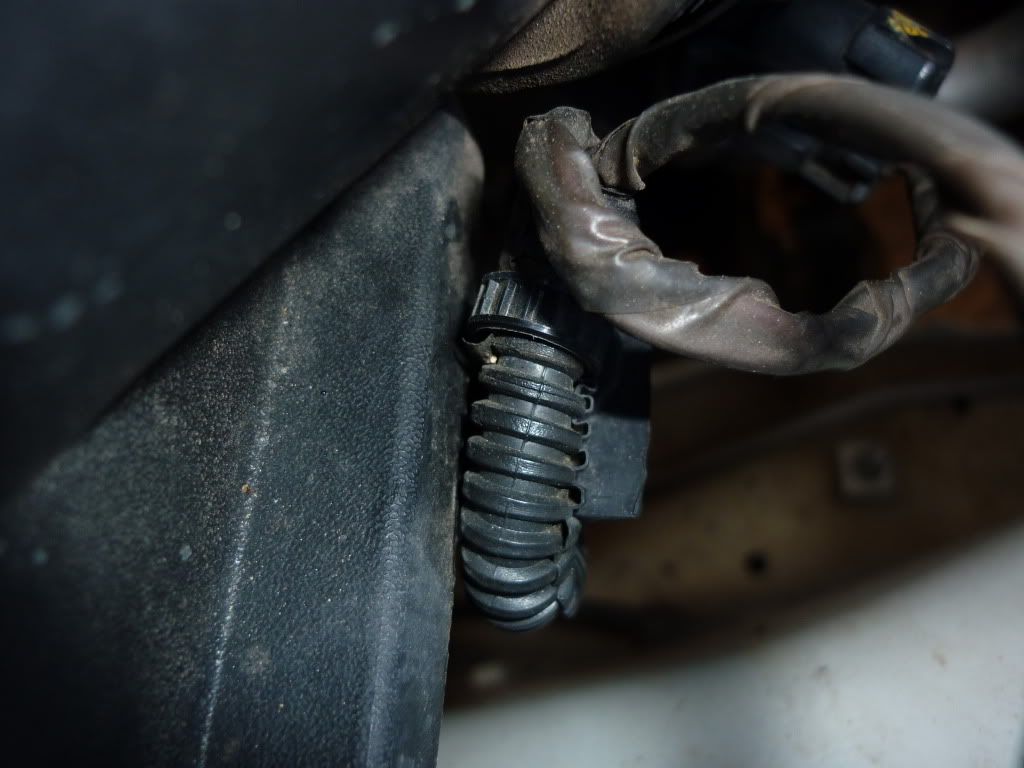
Step Four:
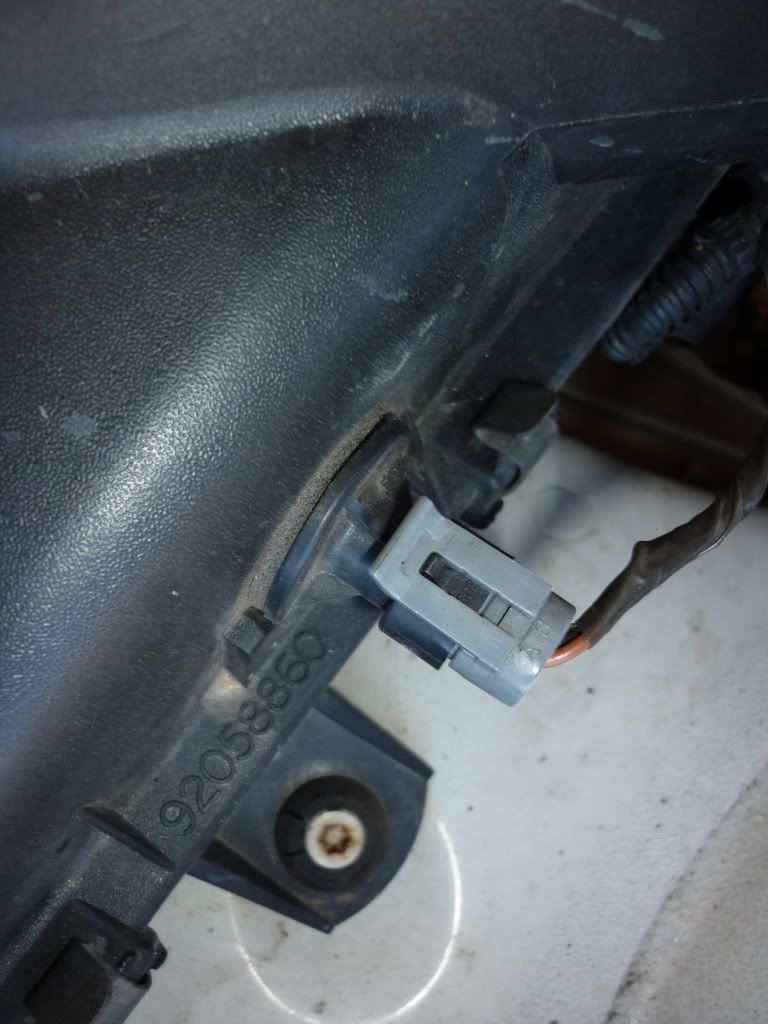
Now grasping the tab at the top of the sensor, pull it up, and slide the device out. They have a neoprene lining on them, so you might need to give it a tender pull. Just make sure you have the tab elevated up all the way, else you are going to break it like a tangible wanker.
Step Five:
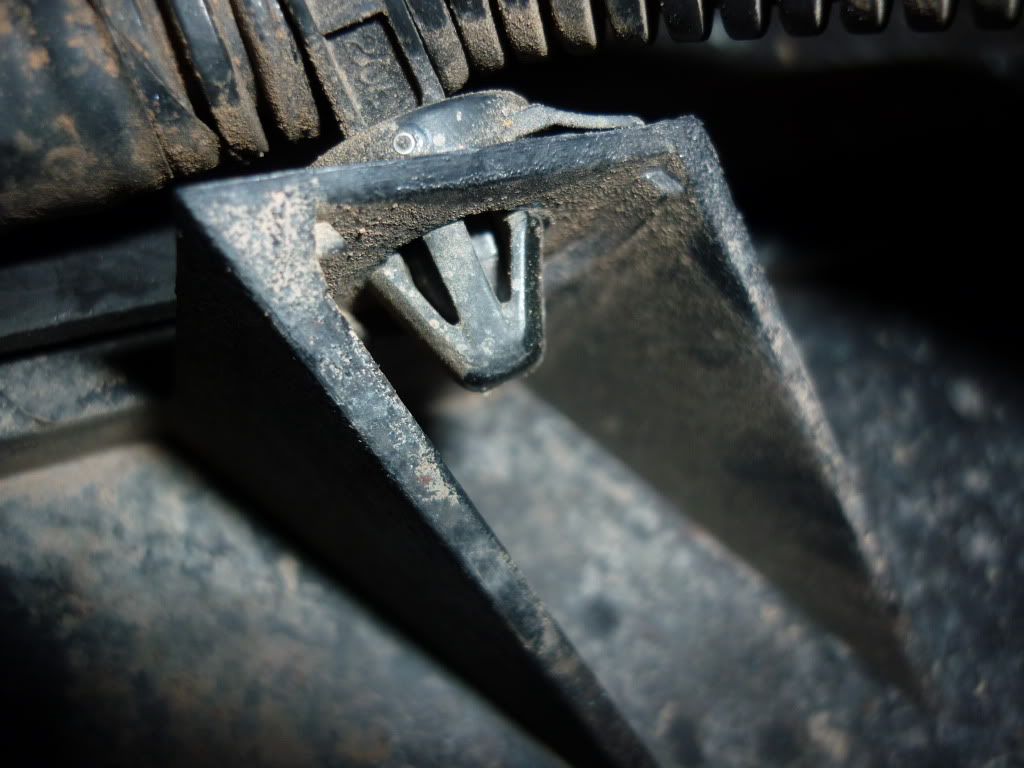
There are three of these clips on the wires that go around your cold air intake. You need to remove these to remove your current air box. Now they have a little clip beneath them that you need to squeeze with long nose pliers at the base and push them up and out. However you want rip them out if you don’t mind damaging the clips. Just be sure not to yank the wires like a complete #### head and #### the wiring loom up. The clips are displayed below:
Step Six:
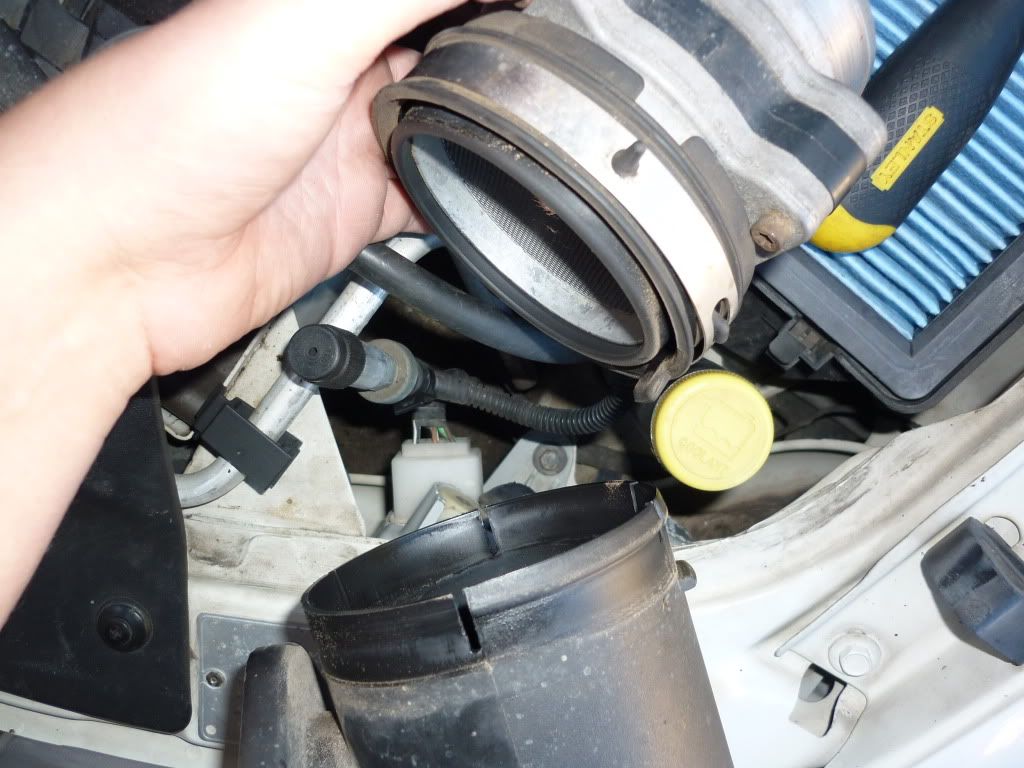
Undo the residual clips holding the top to the bottom, and then eradicate the lid of the box. You will need to force the top part off the MAF, and then it will be free! Place this on the ground out of the way so you don’t have an expedition over it like a factual #### sucker.
Should separate like this
Step Seven:
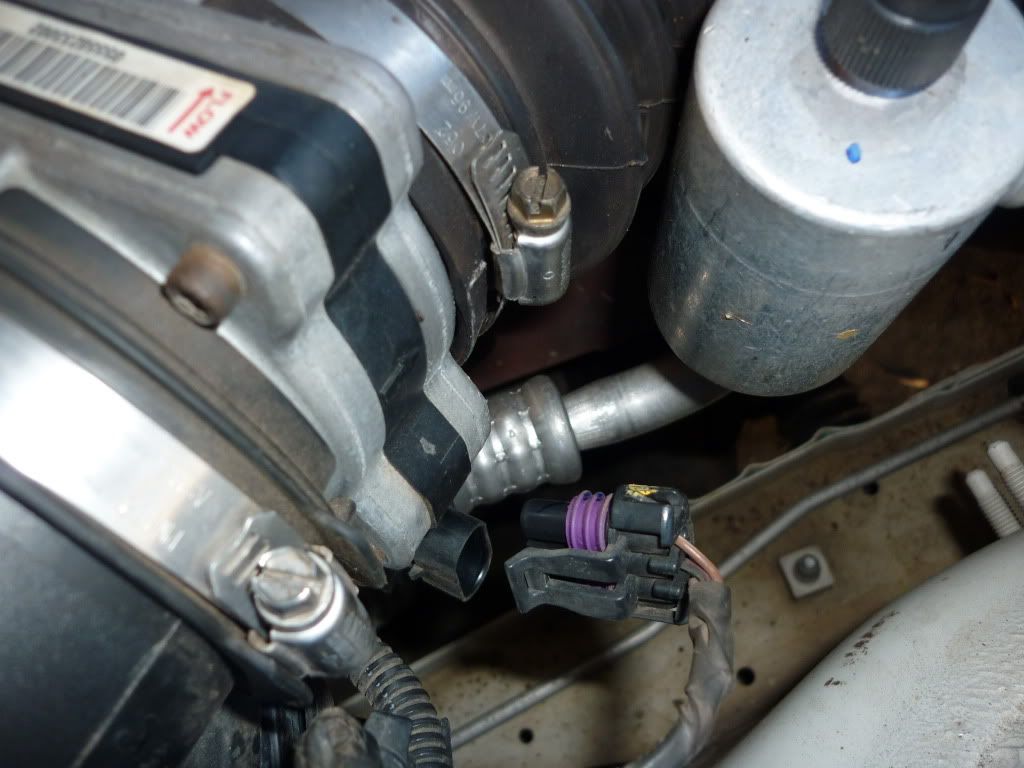
Nothing like an employee, you should now remove the sensor clip from the MAF. Do this the same way as the sensor on the box, holding the tab up and sliding out. Again it has a rubber gasket on it, so may been a gentle pull.
Step Eight:
Grab the bottom of your box, and pull it directly up. Be tender at first (Like it’s a titty), do not yank it.. Rather start to relate more and more force until it pops off.
You will notice that the screws holding it in place have rubber around them. The box ‘clips’ into them, so you can confiscate the box before you remove the screws, which makes things VERY easy. You will need to use your t-30 hex Allen key thiny-ma-bob for this. Now remove the screws pl0x.
Step Nine:
Now loosen the hose clamp from behind the MAF, and slide the MAF off, then remove the rubber ring from the front of the MAF. You also need the hose clamp, so make sure you pull that off. Coming soon: Step eleven… Where **** gets real!
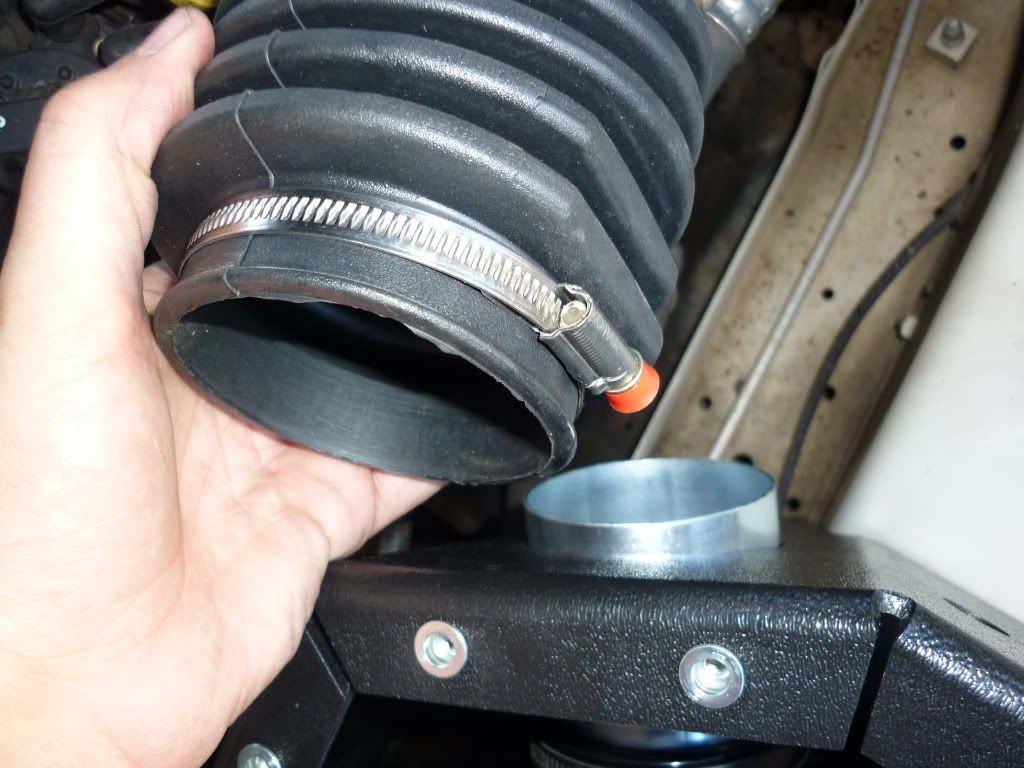
Step Ten:
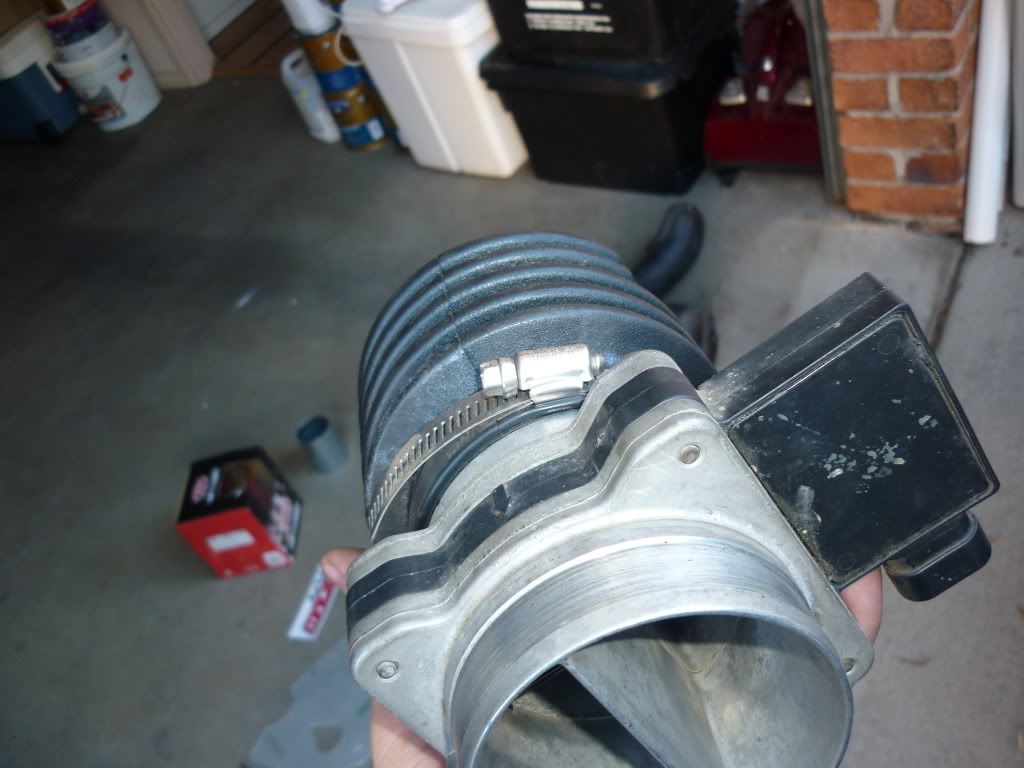
On the end fronting the front of the car (Where you detached the rubber ring), place the piece of tubing you get in the compendium from Mace. Tauten with the hose clamp that you pulled off the neoprene band. Doesn’t matter which way it faces… Tolerable? Virtuous!
Next: Step eleven… Where **** is genuine!
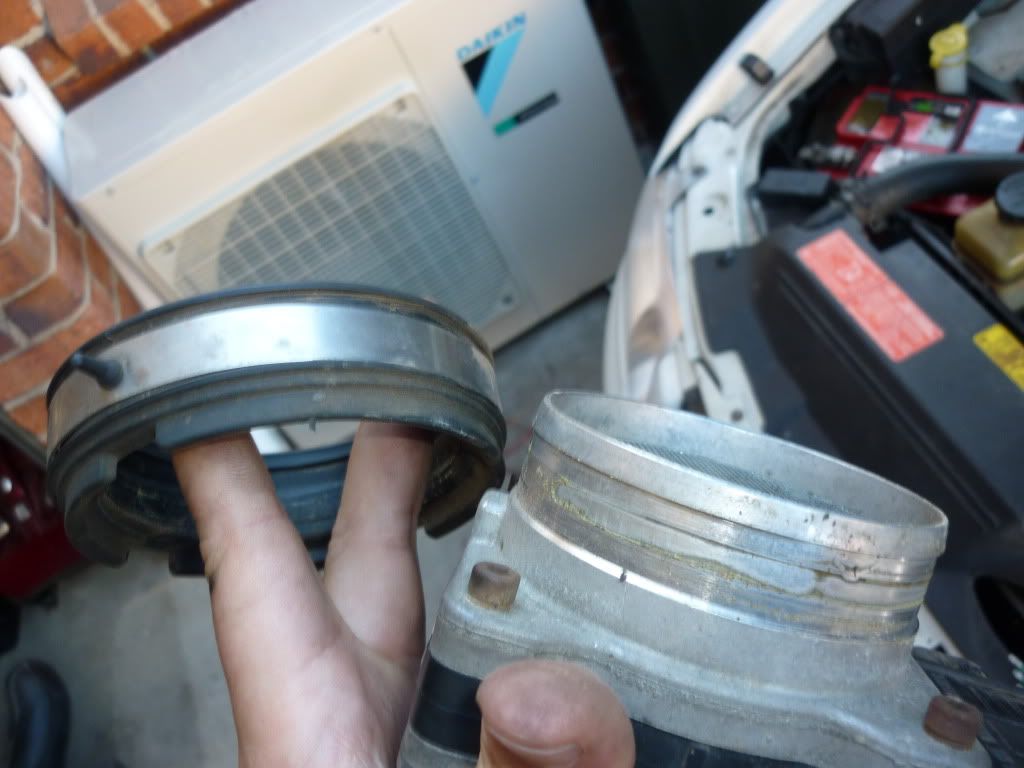
Step Eleven:
Your MAF does need to go in sideways so it doesn’t touch the pipe below it. So do that! Now the following is really optional... But I did it because I wanted everything to sit perfect. What you do, is insert it sideways (also a good move in bed. Check your karma sutra), and mark the side of the hose and cut out the section so the MAF sits in all the way. Per below:
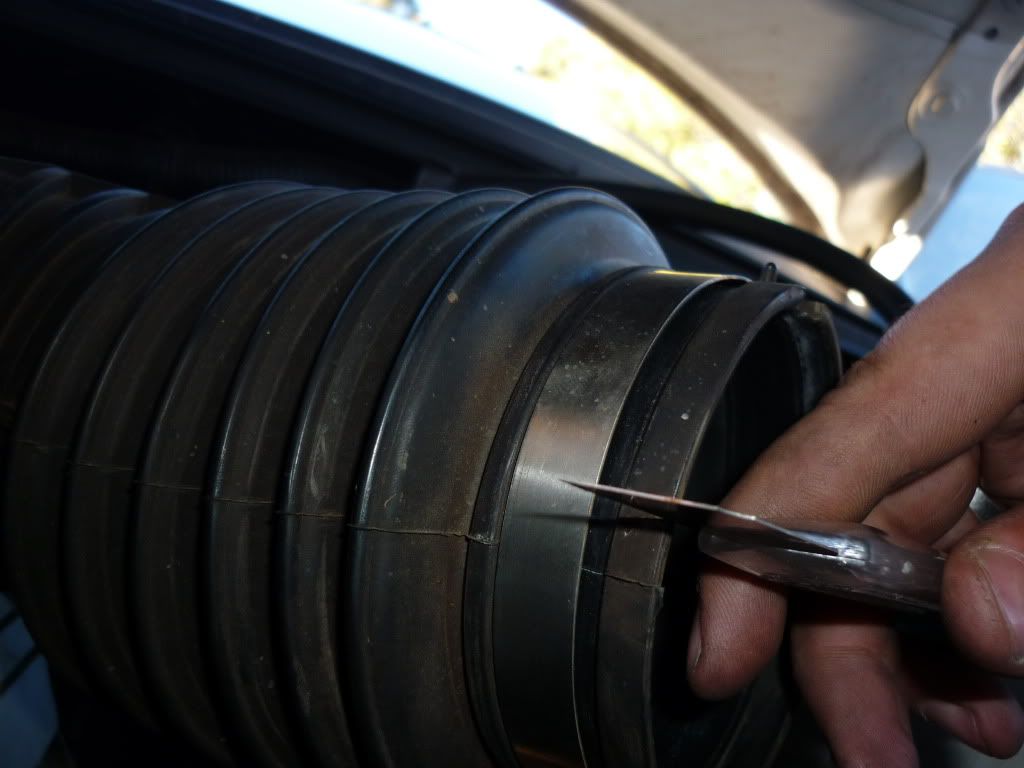
Afore.
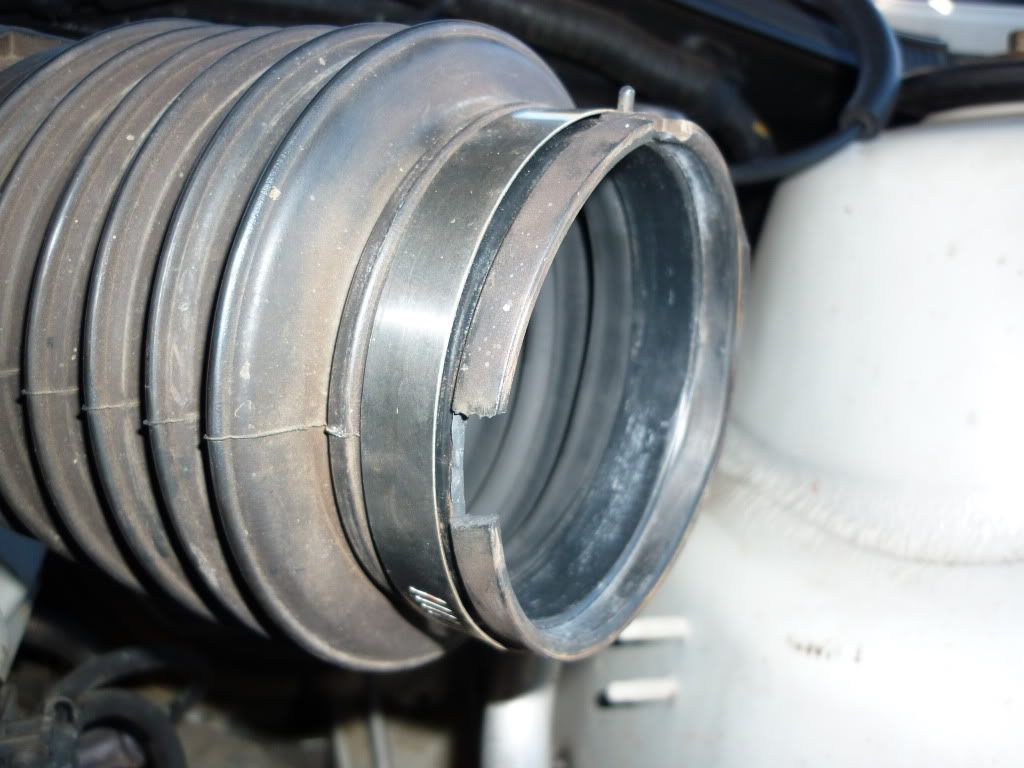
Subsequently.
Step Twelve:
Now you need to put in the Main part of the CAI into place. For some reason I didn’t take a picture of this, but seriously if you can’t figure it out, you are probably a woman… AND I THOUGHT I SAID TO GET A MAN TO DO THIS FOR YOU!... #### me…
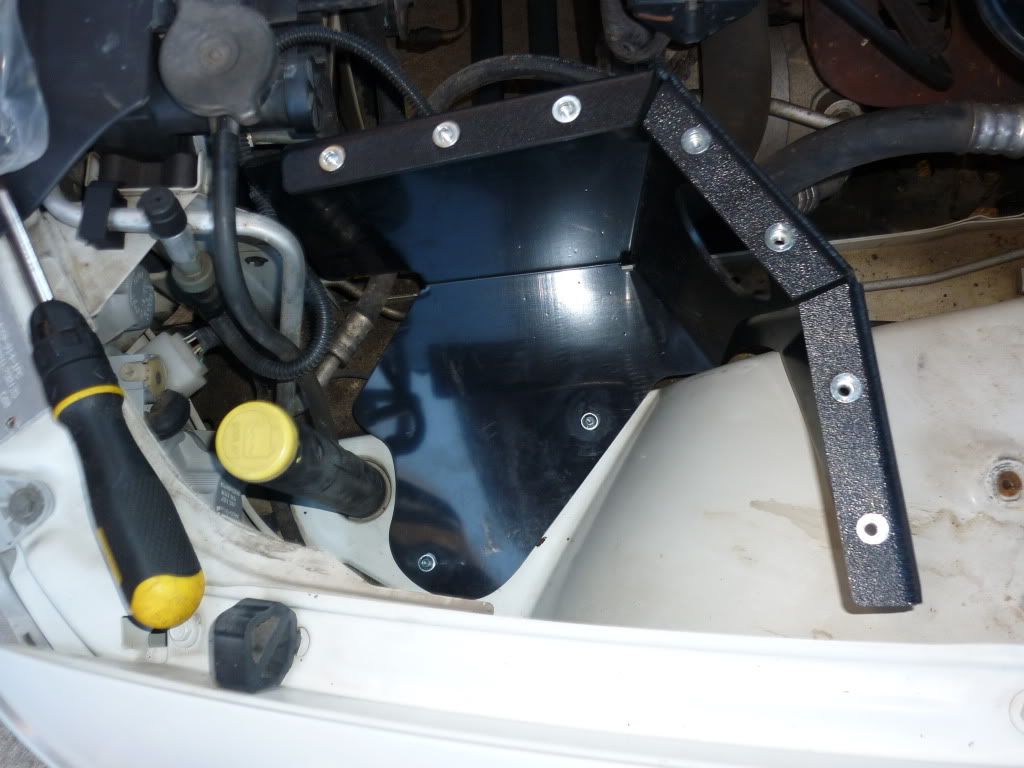
Oh! I found the picture, as you can see, tighten up the screws (With washers to prevent plastic scratch) at the bottom of it! Don’t put on the brace bar just yet yeah cuz?
Step Thirteen:
Some people are superstitious. Which is a stupid bloody thing to be for the record, however because I respect people no matter what their age/sex/sexuality/religion/dumb ass beliefs, I will skip this step.
Step Fourteen:
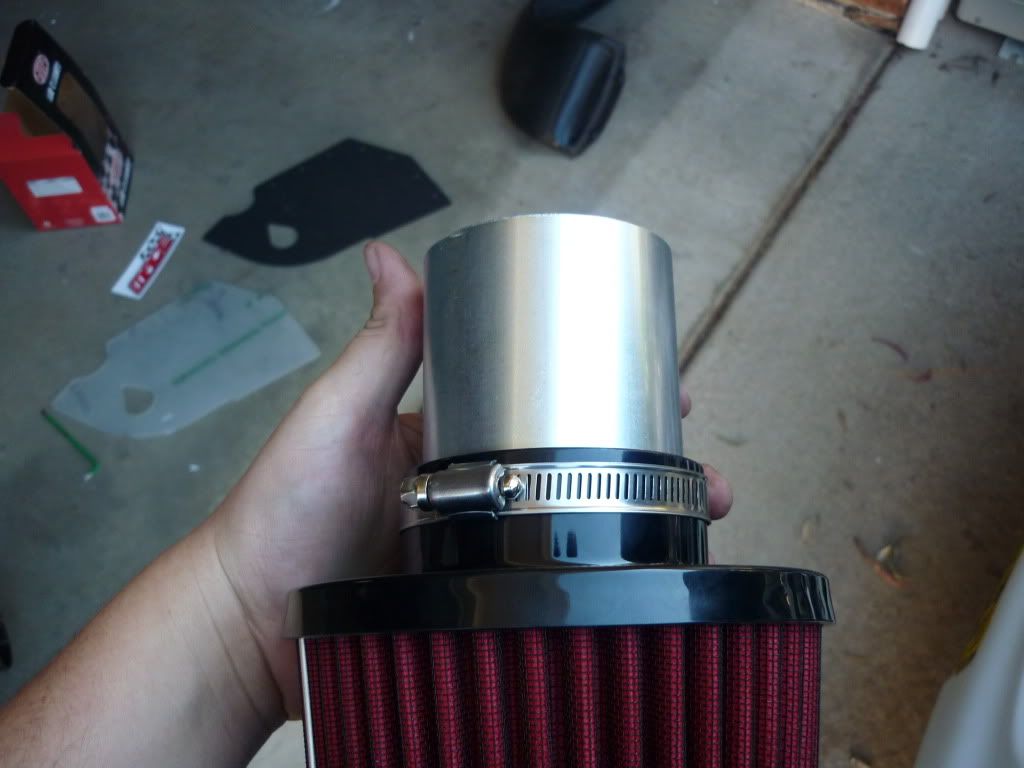
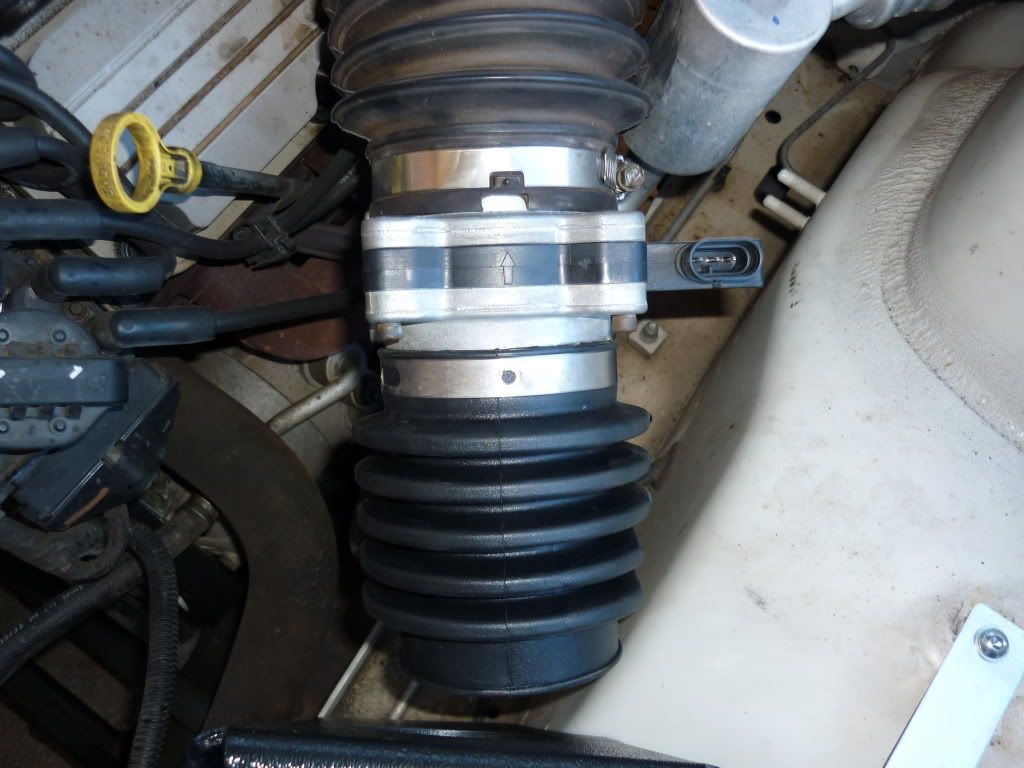
Slide the metal pipe, onto the pod filter. This should be in far enough so it doesn’t restrict airflow. Ie, inside you should feel the plastic curve, and then just behind that is there the metal pipe should be. Kay?
Then tighten the hose clamp on it that came with it.
Step Fifteen:
Chuck ya hose clamp on the rubber thingydo, and then:
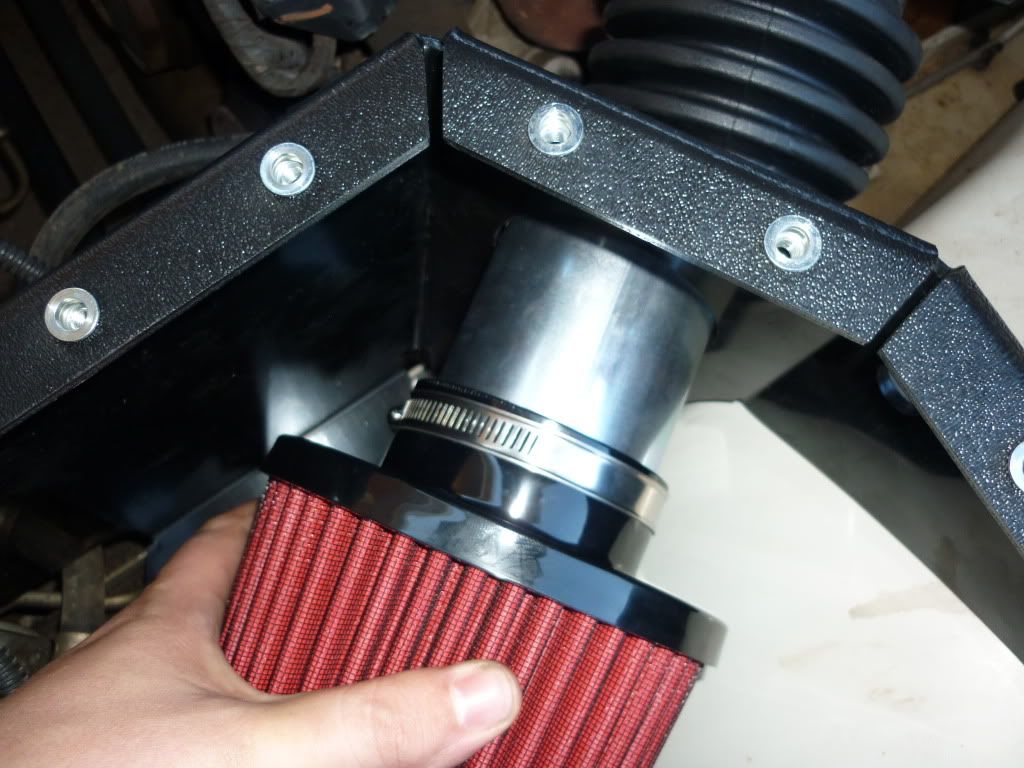
Slide the pod filter in so it’s all nice and sexy and such! Get it right in there like you would ya missus after a fight.
Step Sixteen:
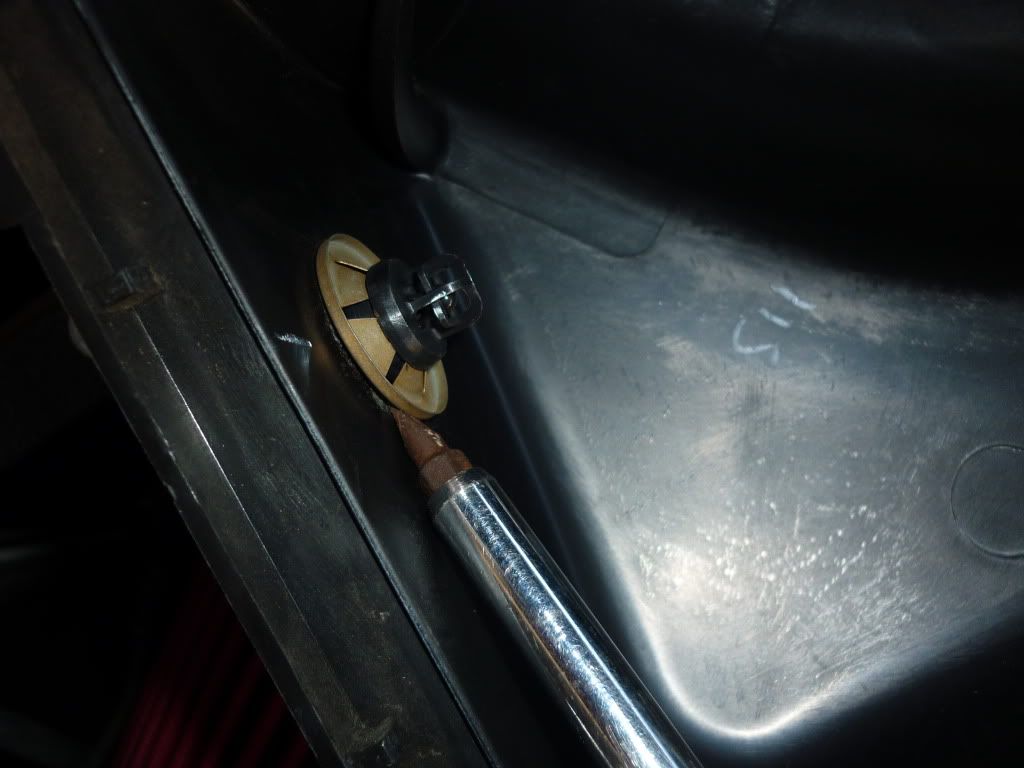
Go to your old box, and pop off this stupid little clip that Holden have used like a bunch of ####ing retarded autistic kids. You are probably going to break it! (Don’t worry though) But if you don’t:
Use the base of a screwdriver to flatten it out again.
Step Seventeen:
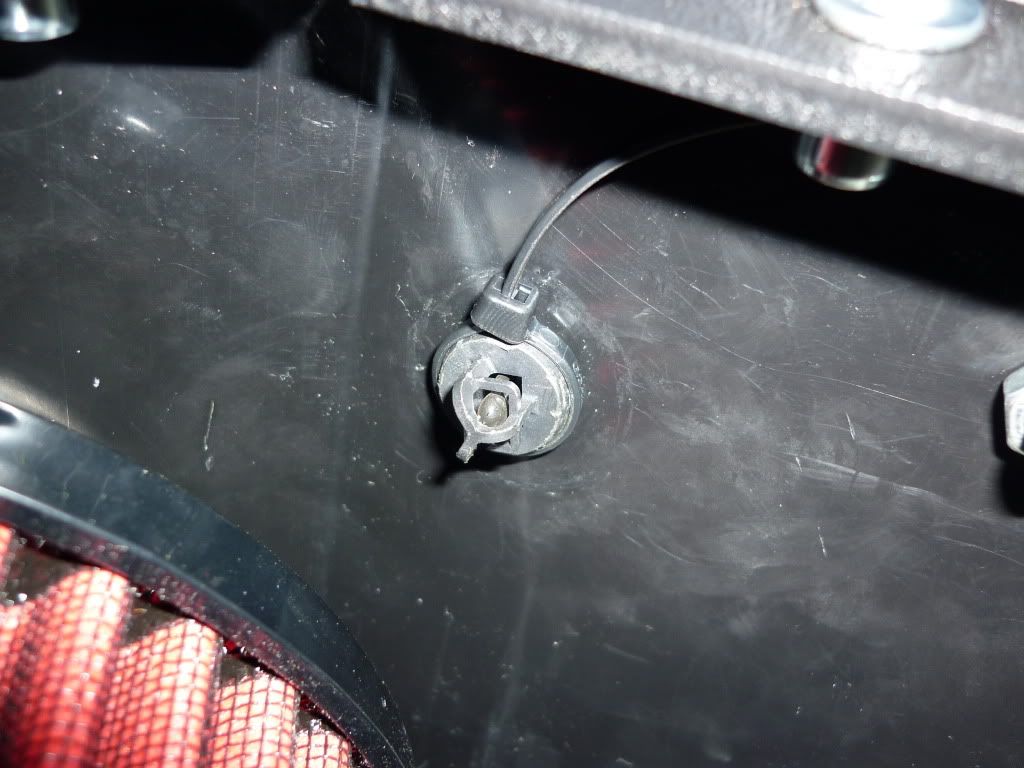
Affix into your new box. As you can see, my clip broke. So if this happens, just tighten it up with a SMALL zip tie (Use a smaller one then I have, it should be small enough to fit into the groove. I have to go buy another one, that one is just temporary). Now CALM THE #### DOWN! I rang Mr. Mace and he was the one that told me to do it... So get ####ed if you think I’m being a cheap ####.
Step Eighteen:
If ya got a Perspex lid like a real ########,
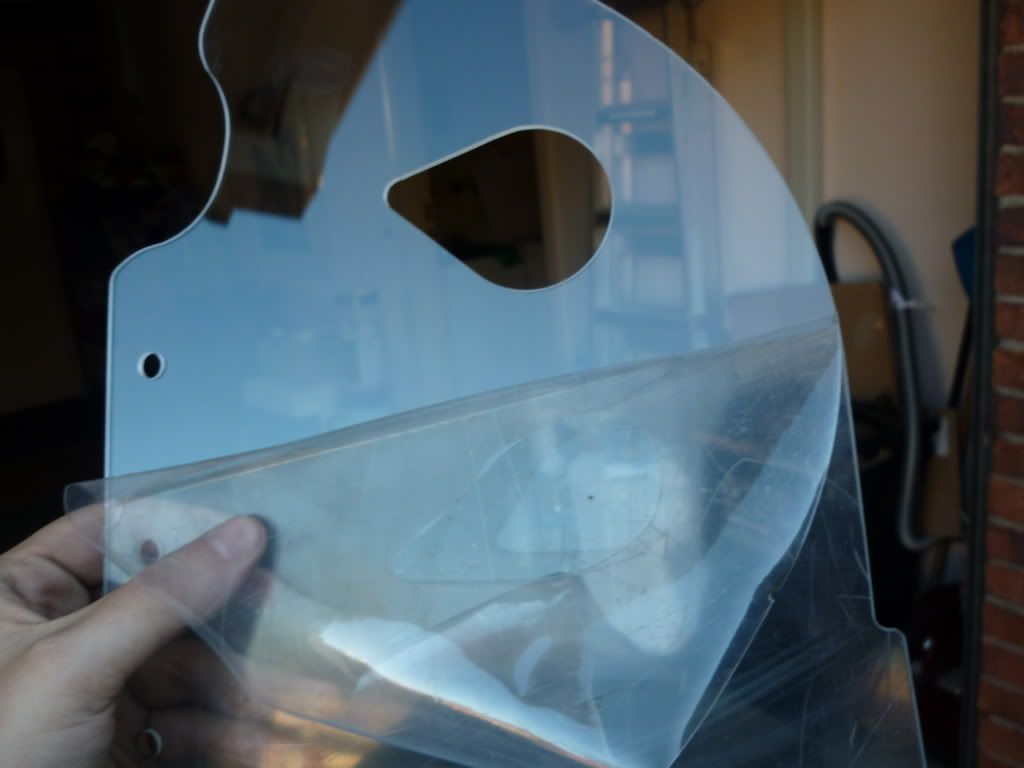
Peel off the protective **** that’s on the top.
Step Nineteen:
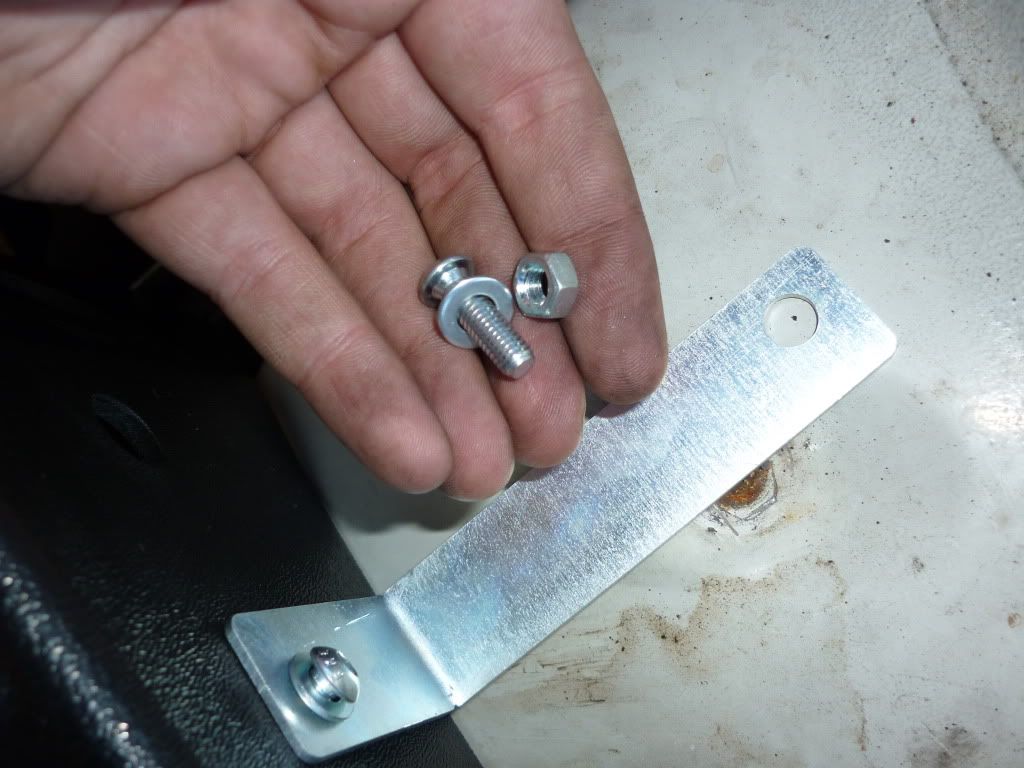
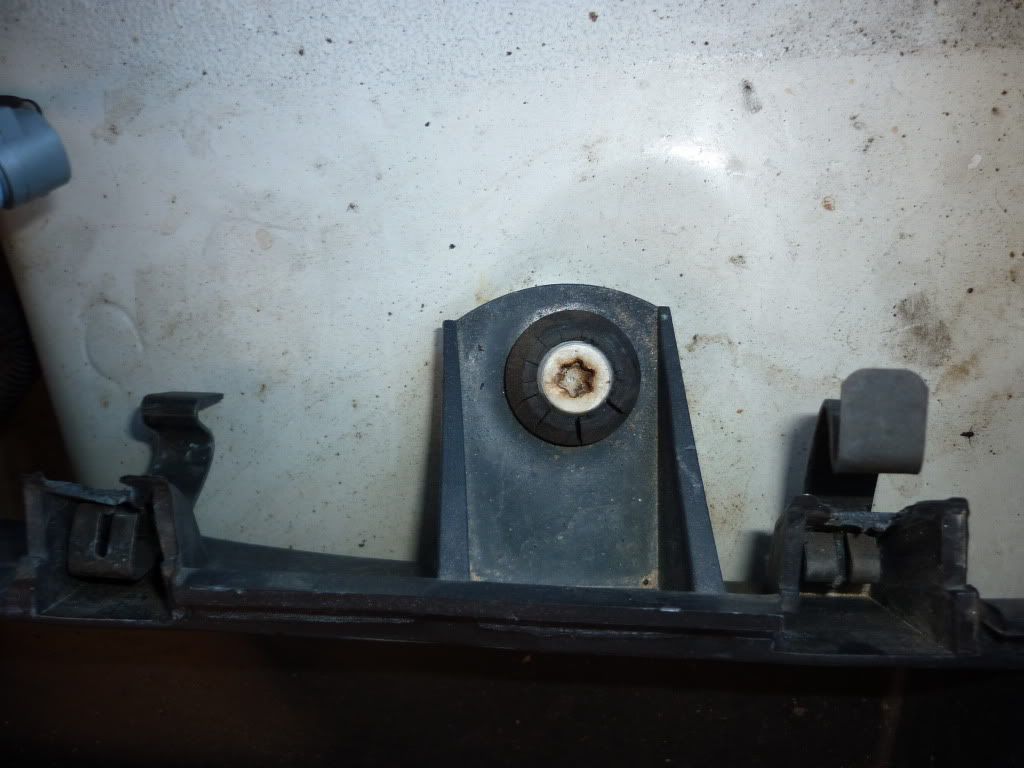
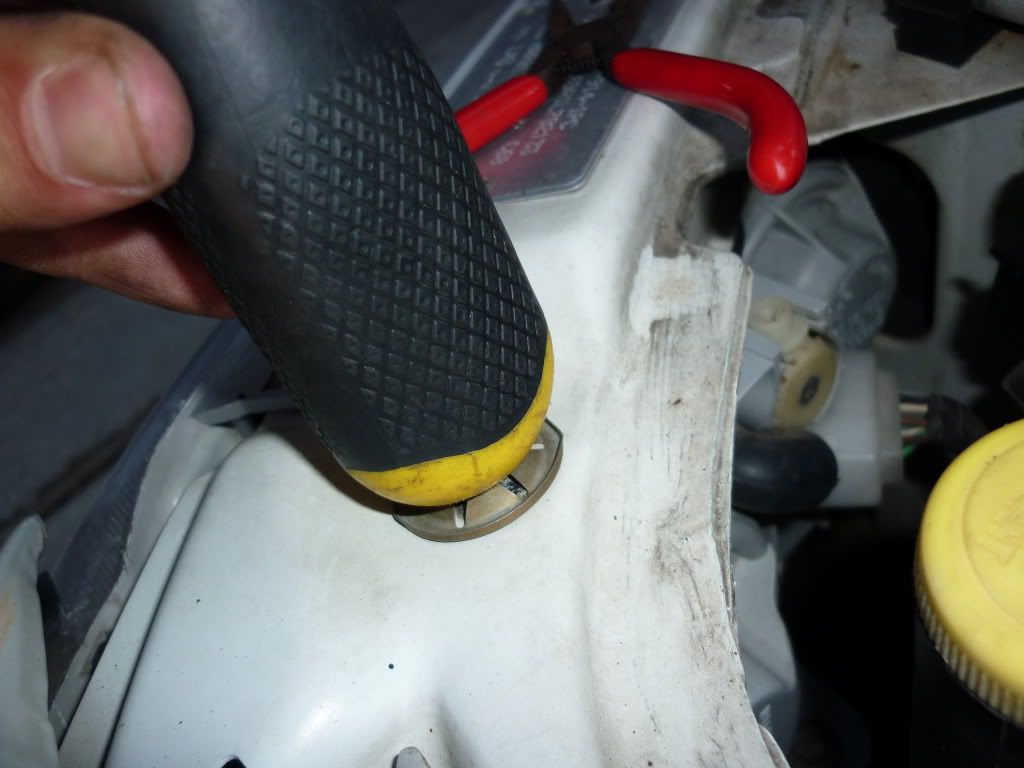
Put this little bracket thing on, but don’t fasten it to the chassis just yet aye. Else you’re a ######## and will have to undo it later on. Seriously though… Don’t
Step Twenty:
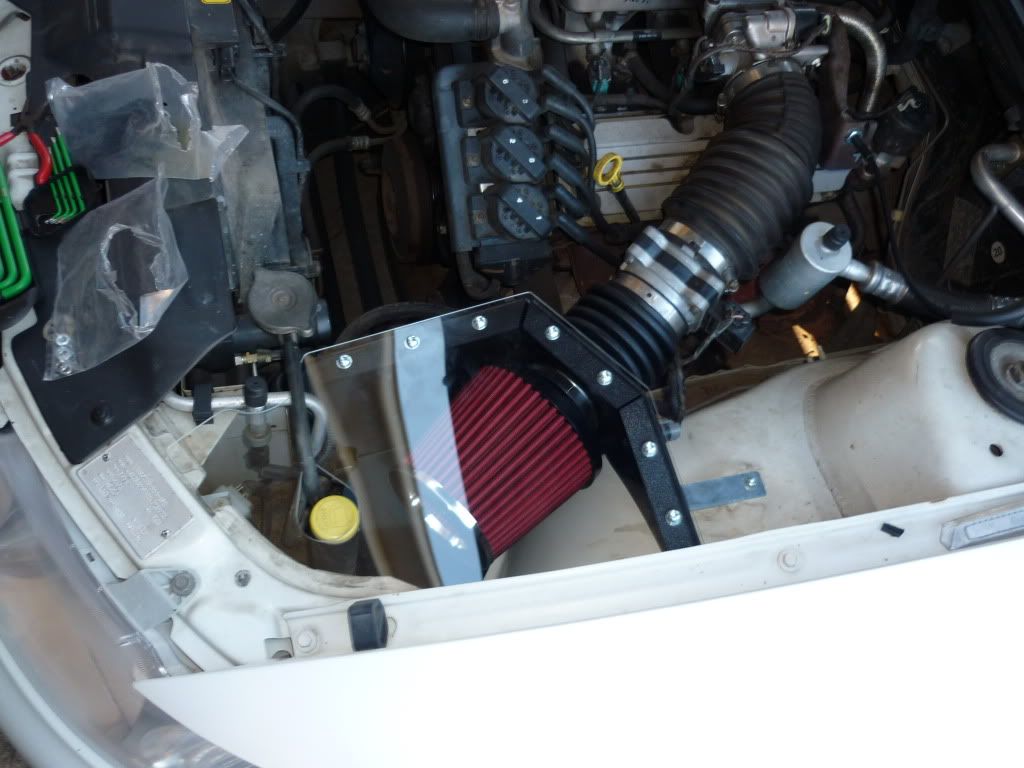
Put the lid on (Will have to fiddle with the box), then tighten up the brace to the chassis and you all finished! Congratulations! Now go hoon and get your licence taken off you
Alright. From here, do the #### whatever you want. I really don’t care.
Uh, if you are interested, will make throttle response a bit better, also makes engine work easier thus chews less fuel. Sounds ok, doesn’t make you sound like a ricer. And supposedly adds more power.. Guess I can feel it… But only that my car loses traction faster when I punch it around a corner like a real hero.
Right. Questions, Comments. Post em below and I will try my best to ignoor them.
Have a very ####ing nice day
And on a serious note: Big thanks to Mr Mace. You're awesome
How to install Mace CAI on VT-VY.
Before I start this no doubt epic how to, I want to take a moment to thank Mr Mace for helping me out and being so kind. Getting a cheap high performance product is one thing, but offering the kind of service you do, is a whole other ball park. Mace Engineering group have broken all the rules by offering fast, cheap and high quality service. Name me a better company, and I will call you a liar (Seriously I will… Try it and see what happens)
Now Mace Engineering Group do have installation instructions for all their products, and if you have problems (Like I admittedly done), you can ring them and they will sort them out for you. The Mace instructions for installing this component is available HERE.
I seem to remember something about promising not to be sexist… But seriously, if you are a woman, get a man to do this for you.
What you need.
These are the components you get in the Mace Engineering Group Cold Air Intake. They are currently on special from $300, down to $270, and are delivered for $22. I also specked mine with a clear lid (Because I’m a dick head) for an extra $40. The look of it is well worth it (If you’re a ########).
Philips head screw driver
Flat head screw driver
Long nose pliers
T30 star head Allen key (Whatever they are called)
And an Allen key set (Because I have no idea what size it is… And SURE! I could go check in the Mace installation, but I don’t want too… So shut up)
Damp cloth
Small zip ties
Beer
Optional:
Electrical contact cleaner (Spray form, get it from Dick Smith… lol @ Dick)
More Beer
The following is how I installed the Mace Cold Air Intake… If you #### up your car, don’t blame me, if you’re a woman and you #### up your car, I tried to warn you. –Insert stuff that doesn’t make me liable-
Step One:
BEER! We all know how healthy it is to start one of these jobs with an ice cold longie of beer. We also know that people who drink and drive are #### heads, and deserve to be wrapped around a pole at 100k’s +. So in the interest of safety, please skip this step.
Your cold air intake before you install the mace one
Step Two:
Take your Philips head screw driver, and undo the plastic screws that sit at the front of your OTR cold air intake scoop, and then just pull it up and out. And yes, I know, it’s damn stupid of Holden to make plastic screws. What the HELL were they thinking… wankers. These screws won’t screw all the way out, there is a clip at the bottom that expands as they screw in, and so once they are high enough, it should just ‘pop’ out with some persuasion (Now is not the time to be a wanker and just yank it out.).
Those two screws at the front
Le screws out, and the scoop removed… like a BOUSE. What cha gonna do NOW!
Step Three:
This first hose clamp. What you ought to do is undo it. Now don’t pull anything off, just loosen it.
Step Four:
Now grasping the tab at the top of the sensor, pull it up, and slide the device out. They have a neoprene lining on them, so you might need to give it a tender pull. Just make sure you have the tab elevated up all the way, else you are going to break it like a tangible wanker.
Step Five:
There are three of these clips on the wires that go around your cold air intake. You need to remove these to remove your current air box. Now they have a little clip beneath them that you need to squeeze with long nose pliers at the base and push them up and out. However you want rip them out if you don’t mind damaging the clips. Just be sure not to yank the wires like a complete #### head and #### the wiring loom up. The clips are displayed below:
Step Six:
Undo the residual clips holding the top to the bottom, and then eradicate the lid of the box. You will need to force the top part off the MAF, and then it will be free! Place this on the ground out of the way so you don’t have an expedition over it like a factual #### sucker.
Should separate like this
Step Seven:
Nothing like an employee, you should now remove the sensor clip from the MAF. Do this the same way as the sensor on the box, holding the tab up and sliding out. Again it has a rubber gasket on it, so may been a gentle pull.
Step Eight:
Grab the bottom of your box, and pull it directly up. Be tender at first (Like it’s a titty), do not yank it.. Rather start to relate more and more force until it pops off.
You will notice that the screws holding it in place have rubber around them. The box ‘clips’ into them, so you can confiscate the box before you remove the screws, which makes things VERY easy. You will need to use your t-30 hex Allen key thiny-ma-bob for this. Now remove the screws pl0x.
Step Nine:
Now loosen the hose clamp from behind the MAF, and slide the MAF off, then remove the rubber ring from the front of the MAF. You also need the hose clamp, so make sure you pull that off. Coming soon: Step eleven… Where **** gets real!
Step Ten:
On the end fronting the front of the car (Where you detached the rubber ring), place the piece of tubing you get in the compendium from Mace. Tauten with the hose clamp that you pulled off the neoprene band. Doesn’t matter which way it faces… Tolerable? Virtuous!
Next: Step eleven… Where **** is genuine!
Step Eleven:
Your MAF does need to go in sideways so it doesn’t touch the pipe below it. So do that! Now the following is really optional... But I did it because I wanted everything to sit perfect. What you do, is insert it sideways (also a good move in bed. Check your karma sutra), and mark the side of the hose and cut out the section so the MAF sits in all the way. Per below:
Afore.
Subsequently.
Step Twelve:
Now you need to put in the Main part of the CAI into place. For some reason I didn’t take a picture of this, but seriously if you can’t figure it out, you are probably a woman… AND I THOUGHT I SAID TO GET A MAN TO DO THIS FOR YOU!... #### me…
Oh! I found the picture, as you can see, tighten up the screws (With washers to prevent plastic scratch) at the bottom of it! Don’t put on the brace bar just yet yeah cuz?
Step Thirteen:
Some people are superstitious. Which is a stupid bloody thing to be for the record, however because I respect people no matter what their age/sex/sexuality/religion/dumb ass beliefs, I will skip this step.
Step Fourteen:
Slide the metal pipe, onto the pod filter. This should be in far enough so it doesn’t restrict airflow. Ie, inside you should feel the plastic curve, and then just behind that is there the metal pipe should be. Kay?
Then tighten the hose clamp on it that came with it.
Step Fifteen:
Chuck ya hose clamp on the rubber thingydo, and then:
Slide the pod filter in so it’s all nice and sexy and such! Get it right in there like you would ya missus after a fight.
Step Sixteen:
Go to your old box, and pop off this stupid little clip that Holden have used like a bunch of ####ing retarded autistic kids. You are probably going to break it! (Don’t worry though) But if you don’t:
Use the base of a screwdriver to flatten it out again.
Step Seventeen:
Affix into your new box. As you can see, my clip broke. So if this happens, just tighten it up with a SMALL zip tie (Use a smaller one then I have, it should be small enough to fit into the groove. I have to go buy another one, that one is just temporary). Now CALM THE #### DOWN! I rang Mr. Mace and he was the one that told me to do it... So get ####ed if you think I’m being a cheap ####.
Step Eighteen:
If ya got a Perspex lid like a real ########,
Peel off the protective **** that’s on the top.
Step Nineteen:
Put this little bracket thing on, but don’t fasten it to the chassis just yet aye. Else you’re a ######## and will have to undo it later on. Seriously though… Don’t
Step Twenty:
Put the lid on (Will have to fiddle with the box), then tighten up the brace to the chassis and you all finished! Congratulations! Now go hoon and get your licence taken off you
Alright. From here, do the #### whatever you want. I really don’t care.
Uh, if you are interested, will make throttle response a bit better, also makes engine work easier thus chews less fuel. Sounds ok, doesn’t make you sound like a ricer. And supposedly adds more power.. Guess I can feel it… But only that my car loses traction faster when I punch it around a corner like a real hero.
Right. Questions, Comments. Post em below and I will try my best to ignoor them.
Have a very ####ing nice day
And on a serious note: Big thanks to Mr Mace. You're awesome
Last edited: