Welcome to Just Commodores, a site specifically designed for all people who share the same passion as yourself.

New Posts Contact us

Just Commodores Forum Community

It takes just a moment to join our fantastic community

Register

Corey's Edge Barracuda Buggy

C B

Member
Joined
Aug 28, 2015
Messages
93
Reaction score
2
Points
8
Location
Victoria, Australia
Members Ride
04 VY II Storm Ute
Hi guys, I know this isn't a car, or powered by a car engine (well nothing at the moment haha) but I've seen people post threads about boats and stuff so here it goes :)

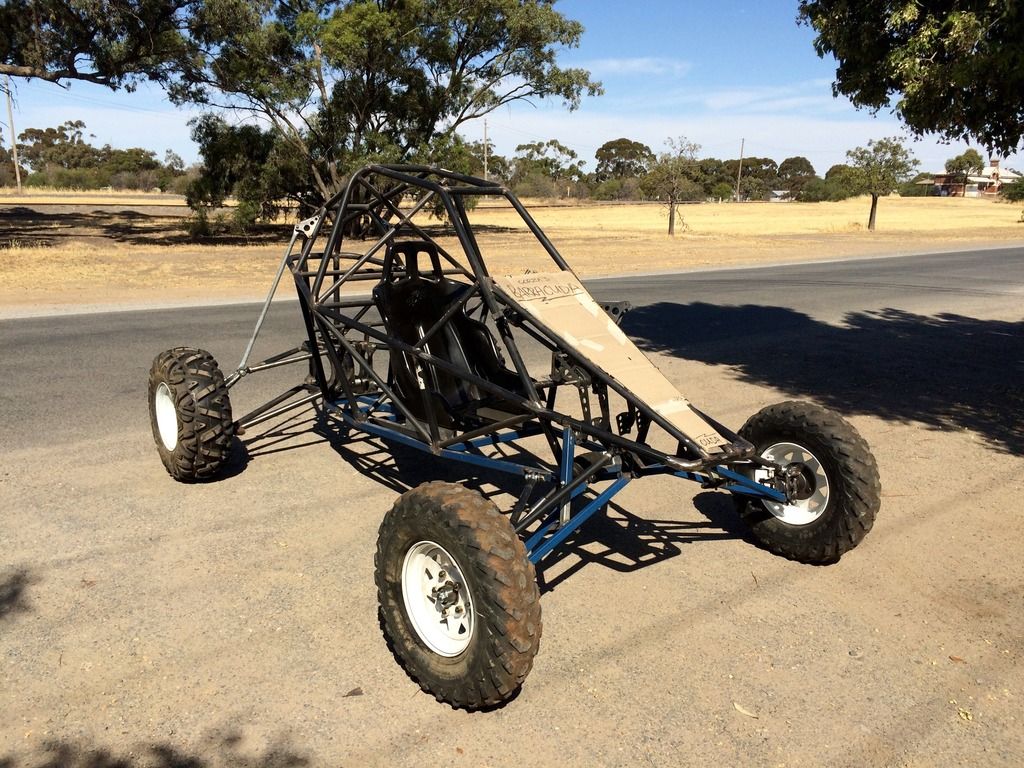
"The Edge Products" is a company from Perth who sells plans for multiple buggies, and all the required parts needed, I first saw a picture of the Barracuda on the internet back in July 2014, and ever since then I had to have one. So I got the plans for 2014 Christmas, and then in January I started to build my Edge Barracuda Buggy.

These buggies are powered by motorcycle engines, and the Barracuda is suited for any 600cc - 1400cc motorbike engine, the Cuda has 20" front suspension travel, and 16" rear travel. They weigh around 500kg, and when powered by a Suzuki GSXR1300 Hayabusa (200HP), can accelerate to 100kph in about 4.5 seconds.

I have a full build thread on the Edge Forums www.EdgeBuggyForums.com • View topic - Corza's Barracuda Build but it's pretty quite nowadays and I thought I'd get more of a response on here :)
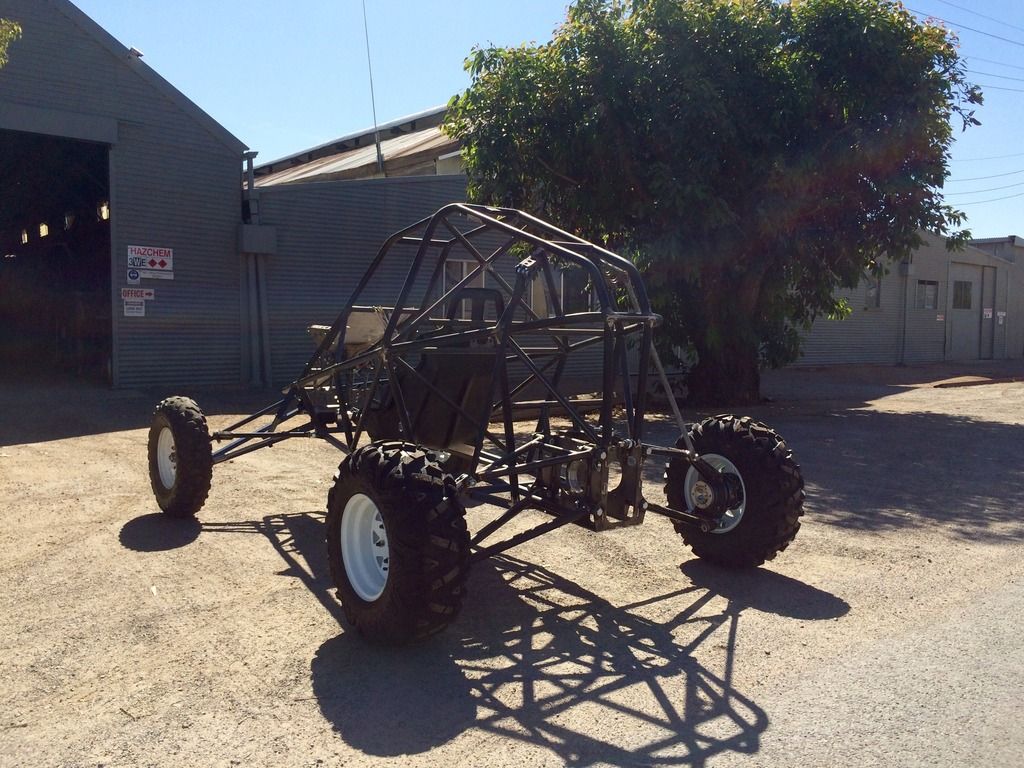
So here is my buggy currently :) I just got it to the "rolling" stage on Saturday (5/12/15).


Thanks for looking guys
-Corey
 
Last edited:

lemusa

Unmotivated Enthusiast
Joined
Jan 2, 2010
Messages
150
Reaction score
1
Points
18
Location
Christchurch, NZ
Members Ride
...
Just checked out the other thread. Impressive build quality especially considering your age. Keep it up and post updates here.

Is this for recreational fun or is there a class that runs these things?
 

TI3VOM

Active Member
Joined
Feb 25, 2009
Messages
2,281
Reaction score
17
Points
38
Location
Here there and everywhere.
Members Ride
VT Commodore
I have always wanted one of these buggy's, especially one with a turbo Hayabusa engine.

Keep up the good work.
 

C B

Member
Joined
Aug 28, 2015
Messages
93
Reaction score
2
Points
8
Location
Victoria, Australia
Members Ride
04 VY II Storm Ute
Just checked out the other thread. Impressive build quality especially considering your age. Keep it up and post updates here.
Is this for recreational fun or is there a class that runs these things?
Thanks man! I'm trying my best:D Mine will be for recreation, but in Kneyton outside of Melbourne, TORC Of Road Racing Club, have events where there is a class for these buggies, but some changes to chassis must be made to meet CAMS requirements... There is other clubs around obviously, but this is closet to me:)

TI3VOM said:
I have always wanted one of these buggy's, especially one with a turbo Hayabusa engine. Keep up the good work.
Thanks mate :) Yeah a turbo Busa would be awesome!:spot on:

Cheers guys
 

C B

Member
Joined
Aug 28, 2015
Messages
93
Reaction score
2
Points
8
Location
Victoria, Australia
Members Ride
04 VY II Storm Ute
Well been off the forums for a while but back now. I'll post the updates from the EDGE forums on here as requested... These are just copied from other forum, so context is little dodgy... haha

Tony said:
Looking reeeaal good !
Thank you Tony :mrgreen: So glad I saw/found a picture of one on the internet, and then be able to build it myself :p They are such a tuff looking machine!

Well today it was about 43 degrees here, so it was bloody hot in the workshop but we persisted!
I (with a bit of help from dad...) started on the proper lower front a arms. I already had most of the bits cut, just needing the "outside" pieces with the bend at the end. Dad helped me make up a bit of jig, similar to the one we made for the rear arms.

Picture time! :p


To get the angle of 26 degrees for the adjuster nut housing, we used the same method for the rear, cutting a piece of RHS to the angle, then tacking the flat bar to it etc....


I first was thinking these would be a pain to make, but from the small amount achieved today, I think the pictures make them look more complicated then they actually are :lol:

Thanks
-Corey
 

C B

Member
Joined
Aug 28, 2015
Messages
93
Reaction score
2
Points
8
Location
Victoria, Australia
Members Ride
04 VY II Storm Ute
Well not much to update, should have been working on the lower front arms but been doing other stuff instead :lol:

Finally welded in the cross in the engine bay, I had to cut the tacks and position it again, as when the straight edge was on top, there was a 1mm gap in a couple spots. It's all good now, just need to weld the underside :lol:


Cleaned up the nerf bar bits as there was a heap of swarf/sharp edges from being laser cut :shock:


Today I pressed the bearings into the ali housings, then pressed the CV's into them. After freezing the bearings, they pressed in easily with no need to heat the aluminium... I then started to bolt the whole centre cartridge together :p Those circlips are dangerous! :lol:


I've also done a few other jobs, I plasma cut a hole in the sheet metal thing for the brake light, I had the seat out, and drilled some 30mm holes in the 50x25 ali spacers (printed off a CAD drawing and then used a punch to get centres...) but I managed to wreck the hole saw, and only get one of them done :roll: :lol:

Thats about it for now
-Corey

EDIT, not worth a new post...
Today I finished assembling the centre cartridge, what a wonderful piece it is! :p


I did put it in the chassis, but forgot to take a photo...

Cheers
 

C B

Member
Joined
Aug 28, 2015
Messages
93
Reaction score
2
Points
8
Location
Victoria, Australia
Members Ride
04 VY II Storm Ute
Well over the last two days I've done a bit; mainly just got the steering sorted out :p

I made up a rack adapter as per plans, fits perfectly onto the rack, no play or movement at all 8)


Found two old masters to put in place, just to see the room I have. Also you can see the lower part of the steering column welded up with uni attached. I also noticed the pushrod was about 50mm too short :cry: These are just old trailer ones, do I have to fabricate my own to the right length or something?


Chopped up some 125x75 RHS and made a little bracket for the second column bush, you can make some pretty cool pieces with just a bit of RHS :p


Steering column all in, no movement and it's great!


Aaand lastly I made a dash board, did this so I could see where the dash would probably sit in relation to the steering wheel, so I could chop the column down if I had to...


I would like the dash to be set up like that, but dad says I should just use the bike dash so the loom doesn't have to be changed to much etc... but we will see :lol:

Cheers
-Corey
 

C B

Member
Joined
Aug 28, 2015
Messages
93
Reaction score
2
Points
8
Location
Victoria, Australia
Members Ride
04 VY II Storm Ute
Yeah, well I've gotta get one first :lol:

Well I got a few presents yesterday, one of which was the two front brake callipers :p


Now I'll have to machine some off the hubs, make a collar and press fit it all together etc so I can bolt the brake discs on...

Cheers
-Corey
 

C B

Member
Joined
Aug 28, 2015
Messages
93
Reaction score
2
Points
8
Location
Victoria, Australia
Members Ride
04 VY II Storm Ute
Well nothing has happened over the last week, been away. Before we left I did get some work done.

Bolted on the callipers, found some capscrews which were luckily the right size


Welded up all the pedals finally


Welded the pedal boxes as well, only had time to clean one up (pictured)


And a better picture showing the RHS bracket for the second steering column bush.


Cheers
-Corey
 

C B

Member
Joined
Aug 28, 2015
Messages
93
Reaction score
2
Points
8
Location
Victoria, Australia
Members Ride
04 VY II Storm Ute
Got a little bit done yesterday

Mostly finished off my steering wheel, just need to make some "end caps" now to make it look a little nicer.

I started by bending the pipe in 3 spots, bending a bit then checking to see if it was the right shape, then bend some more etc... They aren't quite exactly the same, but close enough for what it is. Once happy with shape, I clamped them in the vice, first cutting a slit with a cut off wheel, then using a grinding wheel to make it bigger so the steering wheel would fit through.
Pipes bent and cut


Welded on and ends chopped off


Back on the buggy


Cheers
 
Top