Welcome to Just Commodores, a site specifically designed for all people who share the same passion as yourself.

New Posts Contact us

Just Commodores Forum Community

It takes just a moment to join our fantastic community

Register

custom sub install

taylormade93

Member
Joined
Feb 8, 2012
Messages
372
Reaction score
20
Points
18
Location
Adelaide
Members Ride
VE SSV WAGON Series 2
Hi Guys,
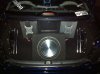
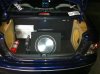
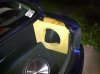
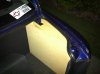
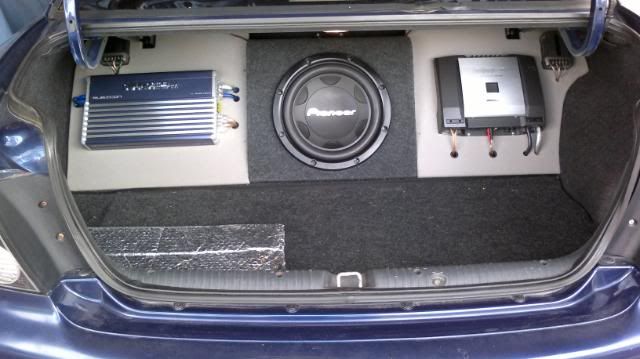
This is what boot boot install currently looks like:
http://s1264.photobucket.com/albums...aylormade93/?action=view&current=IMG_0111.jpg

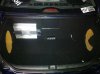
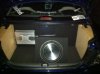
But i want it to look something like this:
http://s1264.photobucket.com/albums...aylormade93/?action=view&current=100_0350.jpg

Is anyone able to send me a "how to" guide for doing this or linking me to where one is? i searched but couldnt find anything. Will it be as simple as getting the plywood cutting holes for th subs then angle the subs with wood underneath them, or will they need to come out of their boxes?
Just want the false wall not the amp mounted on the side, thinking of mounting it to the back of the seats?
Any help or info would be greatly appreciated.
Cheers
 

Killr6

tutut
Joined
Sep 14, 2010
Messages
1,033
Reaction score
3
Points
38
Location
Hervey Bay QLD
Members Ride
BA XR6T
hey mate that's my old commodore looks good yeah...was a bit of surprise to see it there.

i had a friend build the whole boot install for me.

but it wasn't as simple as just cutting wood and making holes, we used MDF wood, not plywood. we made templates from cardboard, before we cut any wood at all so we knew what fit where.

but since you only really want the back wall part, which was the most easiest part of the install it should not be to hard if you have the right tools and knowledge on this sort of stuff.

the subs are made into a custom box we built, so if you want to go with this install you will need to take them out of there boxes.

something like this but just the parts where the subs are?

100_0470.jpg
 

taylormade93

Member
Joined
Feb 8, 2012
Messages
372
Reaction score
20
Points
18
Location
Adelaide
Members Ride
VE SSV WAGON Series 2
Hey man, yeah pinched the pic from your rides thread haha
Damn that sounds a bit complicated for me, might just leave it as is. Just thought if it was easy id give it ago!
Cheers Man
 

SE85VT

LOVE MY VT LOVE AUSTRALIA
Joined
Jan 14, 2012
Messages
149
Reaction score
0
Points
0
Age
28
Location
Newcastle NSW Australia
Members Ride
1998 V6 VT BERLINA
i built this for mine wasnt to hard took about 2 weeks but just got mdf and carboard boxes from work to make templates then built wall and side faces then later built boxes around them i have an lpg tank behind the wall thats why i put the subs on the sides the third sub will soon be sunk down into the spare tyre well with perspex over the top so i have atleast some boot space.
 

Attachments

  • IMG_1343.jpg
    IMG_1343.jpg
    166.6 KB · Views: 942
  • IMG_1268.jpg
    IMG_1268.jpg
    166 KB · Views: 636
  • IMG_1249.jpg
    IMG_1249.jpg
    163.8 KB · Views: 2,287
  • IMG_1245.jpg
    IMG_1245.jpg
    168.7 KB · Views: 1,001
  • IMG_1241.jpg
    IMG_1241.jpg
    128.6 KB · Views: 597
  • IMG_1239.jpg
    IMG_1239.jpg
    159 KB · Views: 1,057

SE85VT

LOVE MY VT LOVE AUSTRALIA
Joined
Jan 14, 2012
Messages
149
Reaction score
0
Points
0
Age
28
Location
Newcastle NSW Australia
Members Ride
1998 V6 VT BERLINA
and i had another better looking grill on there to find a day later that it had broken and was jammed between itsself and my sub really should stop gunning it around corners lol
 

wrx884

WA's ASR Rep
Joined
Mar 28, 2006
Messages
3,687
Reaction score
38
Points
48
Age
39
Location
Perth
Members Ride
VT Exec/ VT L67 Spac, 5L VP Calais, 77 TC Gemini
urs could b done quite simple and easy if u dont wanna take up 2 much boot space. heres mine

04092011187.jpg


as u can see really theres not alot of curvature work required and if u only have the 1 amp from wat i can see u should have planty of room 2 put 1 in the middle of the 2 subs?
 

wrx884

WA's ASR Rep
Joined
Mar 28, 2006
Messages
3,687
Reaction score
38
Points
48
Age
39
Location
Perth
Members Ride
VT Exec/ VT L67 Spac, 5L VP Calais, 77 TC Gemini
pretty much centred the sub box and screwed a block of timber on either side of the sub box 4 the false walls 2 screw 2 which follows the same angle on the sub boxes face, then got some 3mm mdf i had laying around (cardboard would b cheaper if u have 2 go buy it) and pretty much measured from the box 2 the wheel well humps and just did some rough sketches, trial and error cut and fit with the jigsaw until it fit the shape of the boot. made some cut outs 4 the gas struts on the false walls and thats pretty much it. As bu can see its really only the drivers side that needs the most work, the passenger doesnt need much shaping. mine was a nice snug fit so nothing moves either way which is good.

i also hinged the floor so it could lift up infront of the set up 4 the spare tyre 2 come out 2. this is the 2nd time its been recovers tho since i upgraded my system so the old covering i had on had 2 come off which was just ur coloured hood lining stuff but now its got high grade pool table cloth only coz i had mountains of the stuff at my old work :) haha

would have done more but i use the boot 2 much so needed the most space i could get and yeah this seemed simple and effective.


Edit: 4got 2 mention i only used 9mm MDF board 4 the amps 2 mount 2 as thats all that was needed, used the 3mm board after gettin the shaping right and then just transfered the cut out onto the 9mm board.
 
Last edited:
Top