Welcome to Just Commodores, a site specifically designed for all people who share the same passion as yourself.

New Posts Contact us

Just Commodores Forum Community

It takes just a moment to join our fantastic community

Register

Drift SS Ute

Harris2

Member
Joined
Feb 28, 2017
Messages
42
Reaction score
37
Points
18
Age
33
Location
Brisbane
Members Ride
VU SS Drift Ute
Well i'm finally taking the motor down to the engine builders this arvo, Get it machined/honed etc. Probably be a standard bottom end freshen up with new bearings and regapped rings and Bolts. The head will get a freshen up With the Kelford cam, springs, pushrods, retainers. I'll get the shop to order in ARP studs rocker trunion upgrade kit and heavy duty lifters. I've also got a double row timing chain coming. Will be getting a slightly thicker head gasket as well as a few other things gaskets/sensors etc.

I'll need to strip the high volume oil pump off my current motor along with the underdriven crank pulley and take that down to him at some point.

I've ordered my second turbo and a new NPC clutch/flywheel and slave. I've got some pricing for my Fuel system one guy came in at 3k and someone came in at 2.5k... That's a new fuel cell, lift pump. sump with 2 pumps inside it. Filter fuel pressure reg/guage, fuel rail and new 1000cc injectors and a few brackets and adaptors etc. Will be going e85. I also got pricing on external gates as my builder reckons I should go twin hypergate 45mms with 10psi springs rather then the twin 38's. So I have a turbosmart 38mm gate with 12psi spring for sale if anyone is interested.

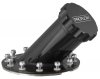
I cut the new tailgate up, unsure if its to busy and hard to read with the big holes. Wondering if I should change it to two rows of small holes to make the word and yes it says U MAD... haha... thinking of adding a "?" to the end of it yet. I've drilled a single row of holes along the bottom as well just haven't got a photo of it. I've also started to remove the seam sealer from inside the cab... What a Sh*T job it is and I swear a 3yr old applied the seam sealer with a spatula its f**king everywhere. Also organised to get the glass removed sometime in the next week.
18698922_1499573193440737_1823672812_o.jpg
18697467_1499573170107406_1055695676_o.jpg
18697792_1499573006774089_201440764_o.jpg
 

Gaiter

Active Member
Joined
Sep 8, 2015
Messages
245
Reaction score
31
Points
28
Location
Brisbane
Members Ride
VZ SS Thunder
Yea, hate to tell you. I didn't see U MAD until you pointed it out.

Edit: Colleague said from where he is (2 metres from screen), he can see it. So will probably be right for where it will be
 

Harris2

Member
Joined
Feb 28, 2017
Messages
42
Reaction score
37
Points
18
Age
33
Location
Brisbane
Members Ride
VU SS Drift Ute
Haha its all good, i'm leaning towards changing it. tailgates are cheap. Just gonna put some flyscreen behind it and put it on the car to get a final look before I decide to turf it or not.
 

Harris2

Member
Joined
Feb 28, 2017
Messages
42
Reaction score
37
Points
18
Age
33
Location
Brisbane
Members Ride
VU SS Drift Ute
Few things to update.

Front is full stripped and just finalising the stitch welding then prepping for paint.
I've also cut and move my steering rack 30mm forward. Should hopefully correct the bind in my steering due to my modified knuckles. Just need to decide how to extend my steering column. Thinking I might just bend up some 5mm plate and extend the bottom section that bolts to the steering rack.
19048321_1515794815151908_1513753399_o.jpg

19048694_1515794831818573_1102253472_o.jpg


Also heres a photo of my shed and where I work on my ute. Pretty messy at the moment Room mate is moving out in a few weeks so the entire shed will get rearranged. I've taken the photo in the back corner standing on my shelves, which will probably relocate to the other shed and the ute will go where the pool table is at the moment.
18922624_1511687198896003_6991562519455317259_o.jpg


My second turbo arrive, clutch/slave/flywheel. My cam, pushrods, springs/retainers and double row timing chain also arrived last week. Solid engine mounts. I've drilled holes in the sump and valve covers for weld on AN fittings which is getting welded up this week hopefully.
 

Gaiter

Active Member
Joined
Sep 8, 2015
Messages
245
Reaction score
31
Points
28
Location
Brisbane
Members Ride
VZ SS Thunder
Oh, that's a pool table under there somewhere lol
 

Harris2

Member
Joined
Feb 28, 2017
Messages
42
Reaction score
37
Points
18
Age
33
Location
Brisbane
Members Ride
VU SS Drift Ute
I measured a mates Stock height VZ Spac, so I could work out how far I should raise the diff. and I'm guessing I've lowered my ute around about 150mm somewhere, maybe even more... Which should give you a solid indication as to why I break CV's all the time and how low my ute is. So I've now cut up my rear cradle to raise the diff. I considered cutting it all out and making new mounts but I thought it'd be eaiser to just cut the section out raise it and reweld it.

I've cut 5mm out so that I can run 5mm plate down to weld onto the entire bottom cut section of the cradle and the top section. Kinda hard to explain without a photo. More so then just plate that butts into the top of the cradle. I'll also weld in some tube to brace it up some more. The diff is being raised 90mm.

The current tube in the photos is just there to hold the piece in the correct spot while I brace it up. Will be removed once finished.

I had a bit of a look above the diff before removing it and there MIGHT be just enough room to not cut the floor out. I'm wanting to avoid cutting this section as its where my fuel cell will sit and want to make sure that its protected. The reason I've cut it how I have is so that the CV's will clear cradle now that the diff is higher. It will also allow me to brace it better.

I'll also need to make up a custom rear sway bar.
19197742_1525994490798607_961028883_o.jpg
19349262_1525994507465272_1243866454_o.jpg
 

Harris2

Member
Joined
Feb 28, 2017
Messages
42
Reaction score
37
Points
18
Age
33
Location
Brisbane
Members Ride
VU SS Drift Ute
Cradle completed and painted. Swaybar has been modified to suit. I've decided i'm going to cut a heap out above the cradle and tube that section of the car. I've made the sway bar a lot higher as at full extension it only clears by 1inch at that height. Also makes it easier to get to the diff bolts.

Its a little on the piss as it was a right pain in the ass trying to make up and weld up. As my mates welder only has the magnet and holding it in place and getting the earth touching was a pain. Its not as bad as it looks in that photo though.

19490236_1533406076724115_732624984_o.jpg
19478538_1533406166724106_828035875_o.jpg


Next plan is to actually cut the floor out and brace it.

Motor build starts next week at the shop. Getting the works.
Good news it the engine buy has said my motor is in amazing condition and doesn't even need to oversize it. Joys of a 86xxx km motor out of a auto stato.

Blueprinted
Balanced
hone/bored to fix up GM's shitty machine job from factory.
block/head Decked
Acid dipped/wash block/head
Crank polished
Pistons cleaned up as reusing same pistons.
Probably something else
Valves cleaned and reseated.
Heads given a freshen up

upgraded Parts
All bearings, main/big end etc
Rings
APR headstuds/rod bolts crank bolt etc
Thicker head gaskets/ new gaskets all round
valve springs, retainers, pushrods to suit cam.
I don't actually even know the specs but its something like a custom grind 228/238
LS7 Lifters.
Builder says my rockers are in that good of a nick he reckons not to even worry about upgrading them. I'd of thought do them now, but he knows more then me so yeah.
Double row timing chain.
Probably missed stuff but you get the idea.

Will be on e85 will be aiming for around the 600hp mark somewhere. He's been told to tune it to a nice reliable bash on it everyday tune. Should have it back in 3weeks or so.
 

Harris2

Member
Joined
Feb 28, 2017
Messages
42
Reaction score
37
Points
18
Age
33
Location
Brisbane
Members Ride
VU SS Drift Ute
I think I've got a serious problem with my grinder. Someone come take it away from me.

I have welded a plate above the tunnel and I plan to run tubing from the end of the chassis rails to that plate, also into the bottom corners. From the bottom of the wheel arches to that plate and across to eachother to tie the car together again.

Once I do that i'll see what else I feel it needs
19495687_1534390579958998_378580824_o.jpg


The below photo is a example of something I might do with the tube work. Yellow being what i'll probably be doing and green i'm unsure of yet as the cradle needs to be bolted in to check clearances. I wont be doing all of the green just 1 pair of them. So either the outside two or pick 1 type of the middle two and do 2bars like that (two diagonals or two down the middle, Sorry half asleep this morning). The middle green lines will be coming off the factor rail that crosses between the car. Not my tube work.
19495687_1534390579958998_378580824_o1.jpg

I plan to keep that factory infill panel in that originally sits above the fuel tank and putting the fuel cell on top of it to protect it. Otherwise i'm going to have to build some sort of protective panel to shield from rocks or anything like that and if the tailshaft decides to let go.

A lot of my car is overkill/pointless but its good for learning and practicing to say the least.
 

Harris2

Member
Joined
Feb 28, 2017
Messages
42
Reaction score
37
Points
18
Age
33
Location
Brisbane
Members Ride
VU SS Drift Ute
Bought some of the fuel system yesterday. Not running a surge as the cell is baffled and will be running Fuel foam with it as well. Going to be running a remote filler and having a hose run up to the top of the hard lid so can fill easily. Its only a 38L tank but I can always throw fuel in when I put new tires on.
19619668_1538933449504711_1820915558_o.jpg


Pulled the pieces out last night and already discovered two annoyances. First being that the pumps when in the bracket are wider then the two exits on the fuel cell. Pretty annoying as then I can't just run everything connected to the tank and have to run a hose. Not a big issue just adds extra cost as now I need 2 extra fittings and hose.
19648166_1538933446171378_884847261_o.jpg


Second being a huge pain... The nuts to the fuel filler panel aren't welded to the inside of the tank. Making getting it open a right pain in the ass. Going to have to get the missus to get her hand in the tiny gap with a spanner. So I can open it to get the foam inside. Doable but a pain. I need to double check but I swear my remote filler neck has loose bolts and its not on a plate so getting that on will be impossible.
 

Attachments

  • 581733_1.jpg
    581733_1.jpg
    51.1 KB · Views: 252
Top