sp001in
vyma100
Bought some HID lights off ebay for my ute yesterday.
Link: H11 8000K HID Philips PL Kit - MALOO/MONARO/VY/VZ/HSV - eBay Headlights, Lights, Indicators, Car Parts, Accessories, Cars, Bikes, Boats. (end time 26-Jun-10 06:30:14 AEST)
8000k are The whitest white you can get with the slightest tint of blue, anything higher starts going purple which may look good, but actually gives less light.

As the instruction manual is rather vague, I thought I put a walkthrough up.
Complete HID H11 kit. low beam only
Normall H11 55k bulbs, with blue vision bright parkers.
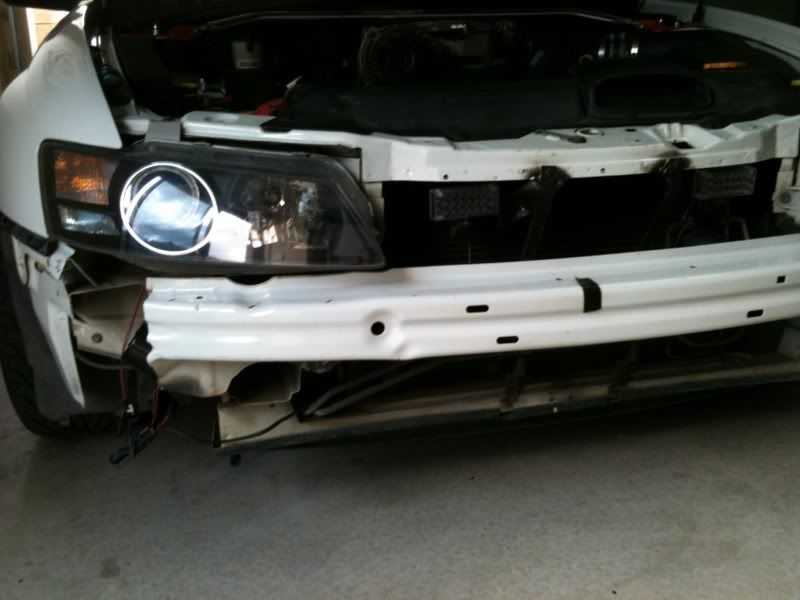
Remove the front bar so you can acces all the bolts holding the lights in.
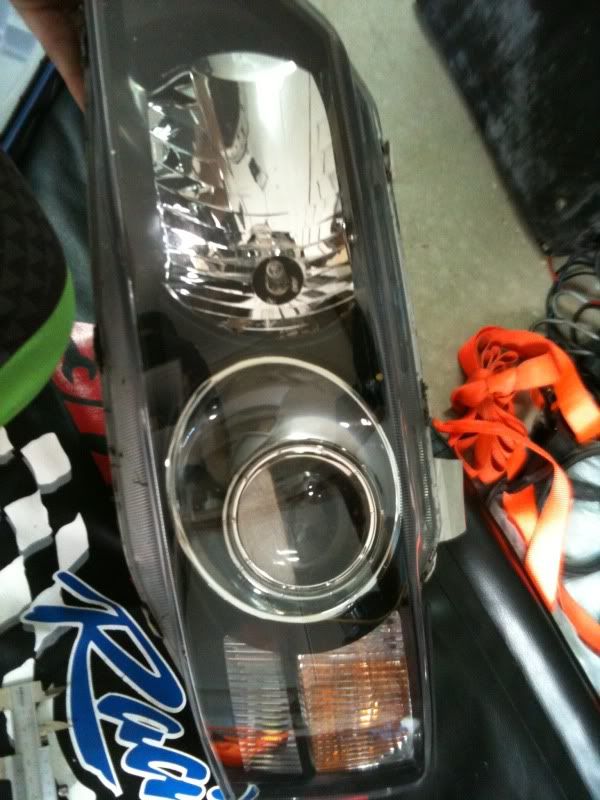
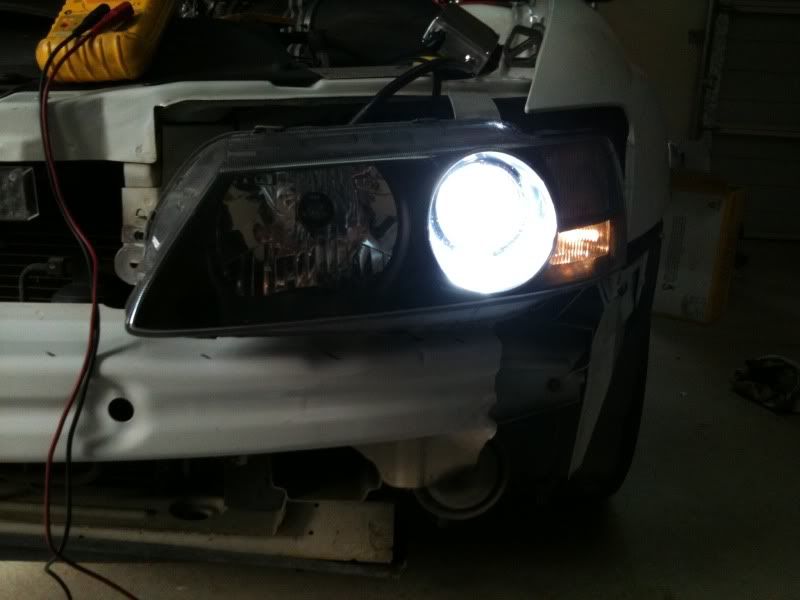
Vy Calais headlight with projector beams.
One I prepared earlier. this is with the blue vision parker, which I replaced with the SMD parker.
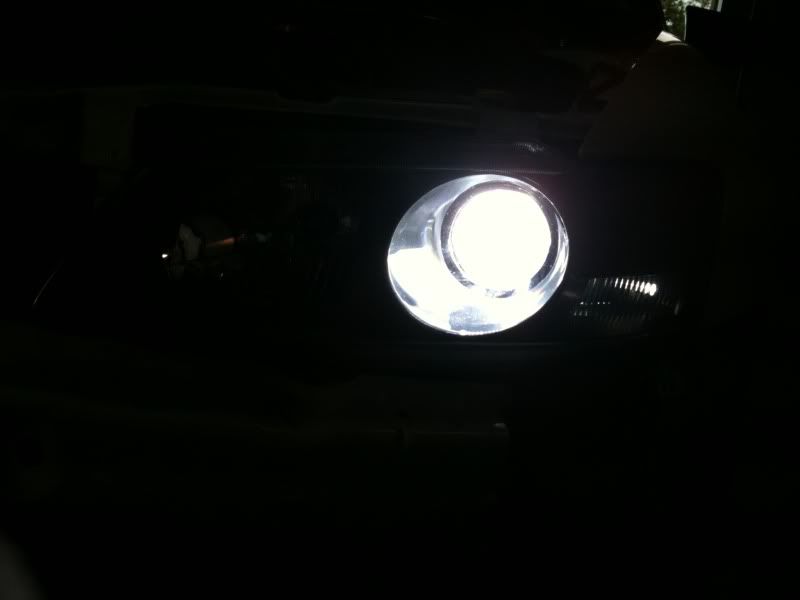
8000k headlight with SMD parker. very similar in spectrum colour
comparison, Left is standard H11 55k with blue vision parker. right is HID 8000k with SMD parker
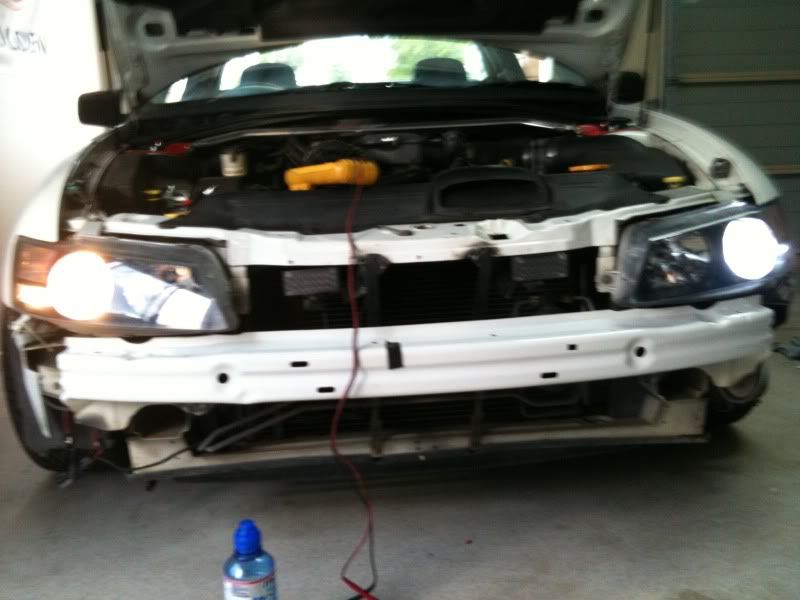
Now back to the walkthrough, remove your headlight from the vehicle.
We are going to work on the low beam light (which is closest to the indicator)
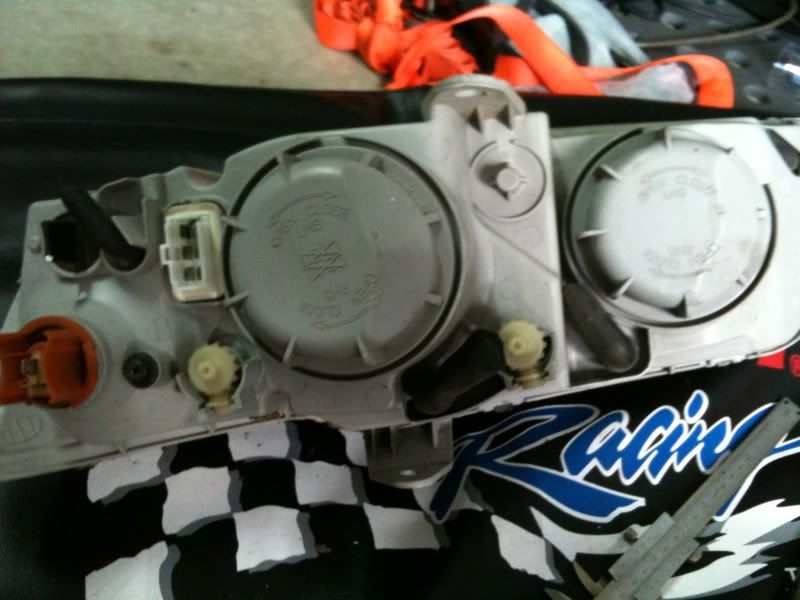
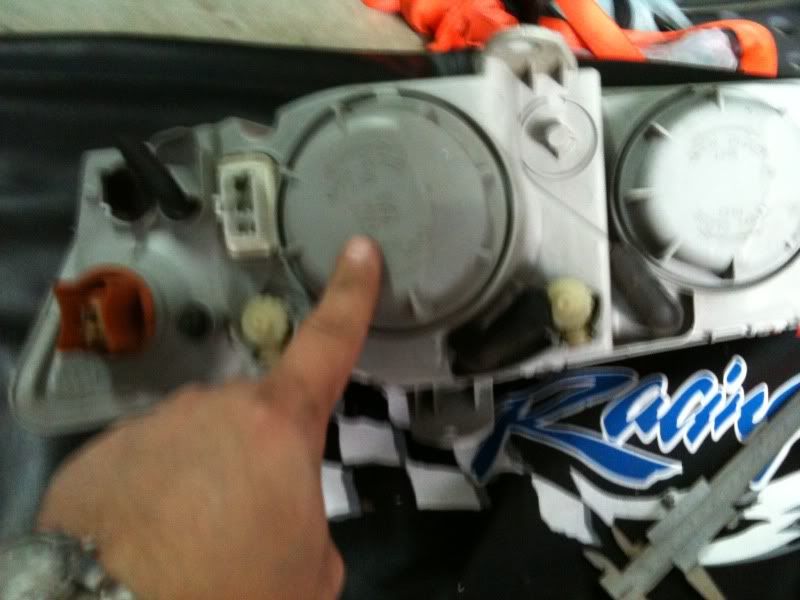
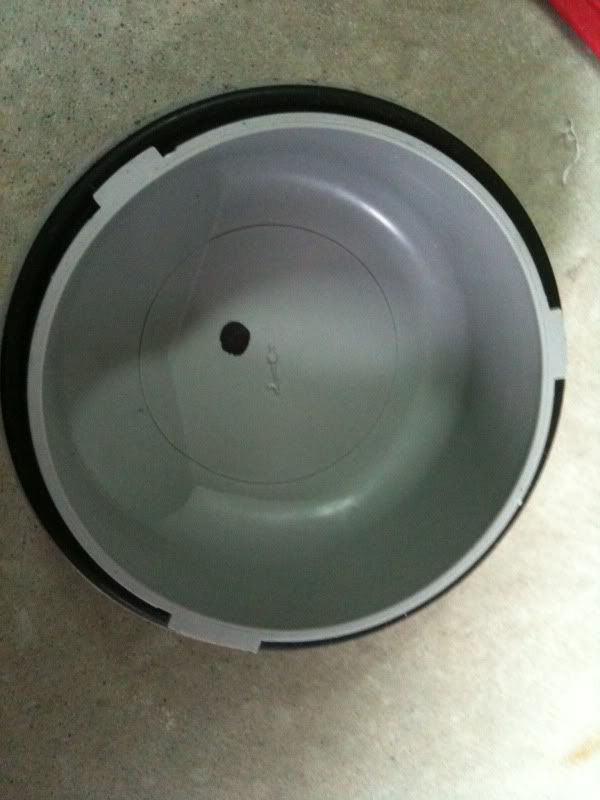
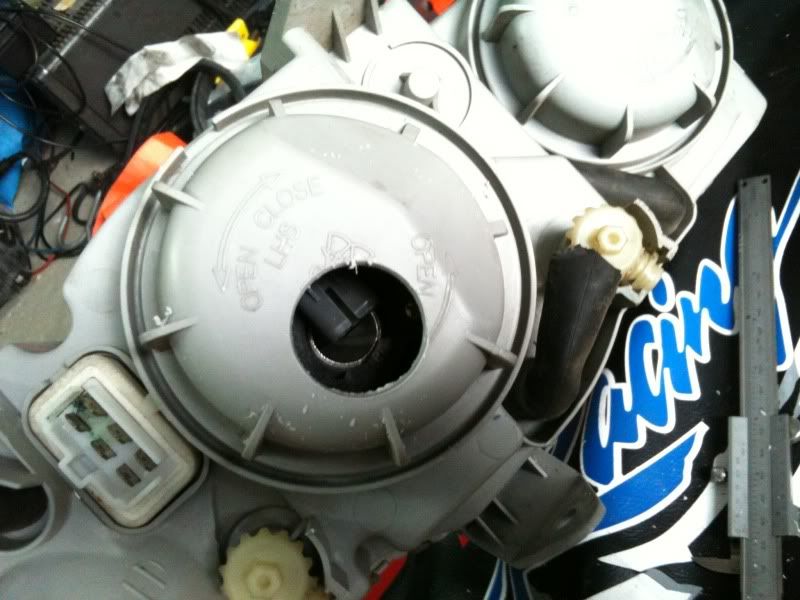
Remove the access panel
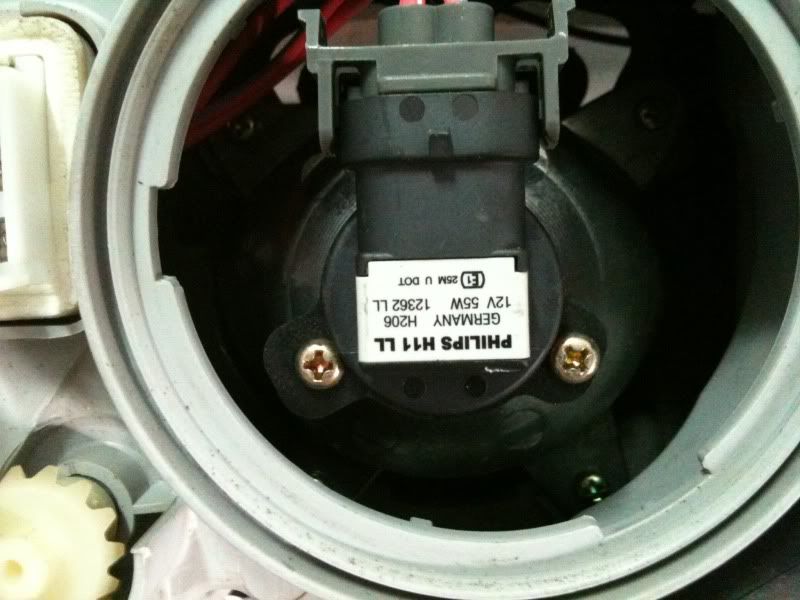
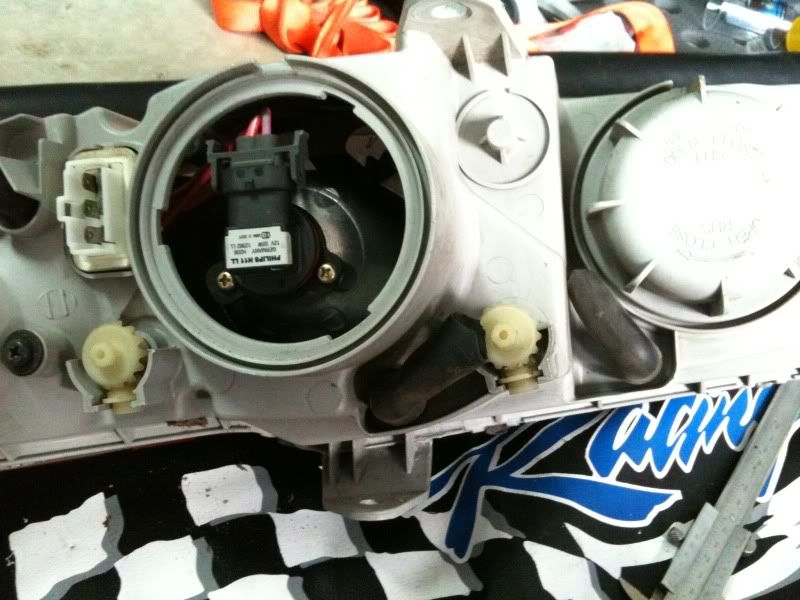
Standard light 55k H11 phillips light
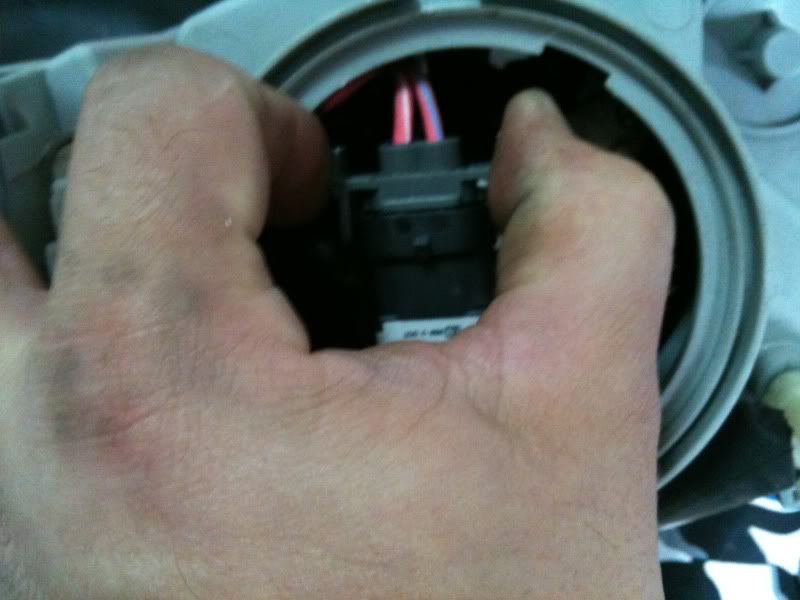
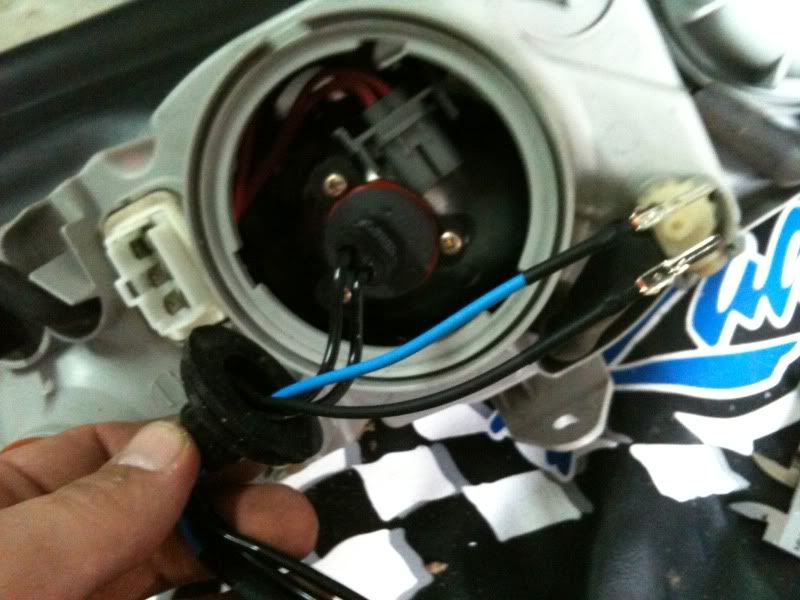
remove the connection harness, squeeze the tabs
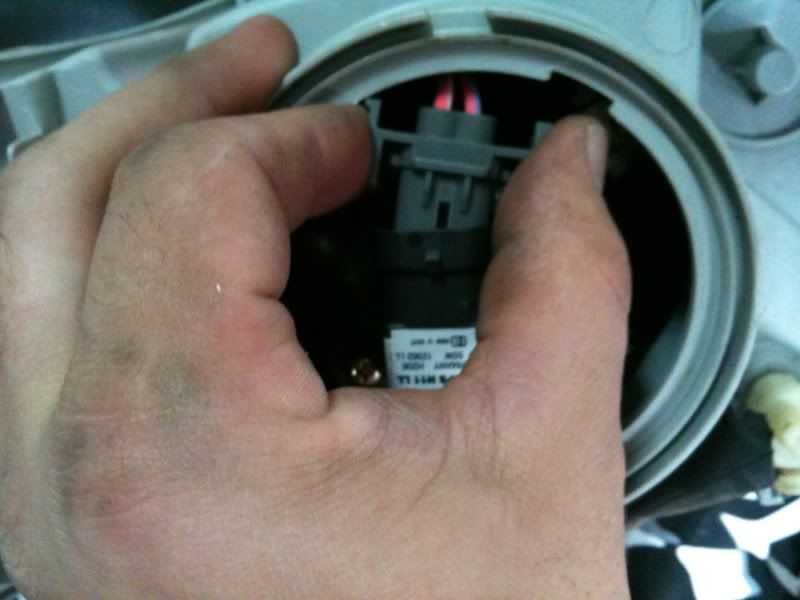
pull away from the globe
clear away from the globe
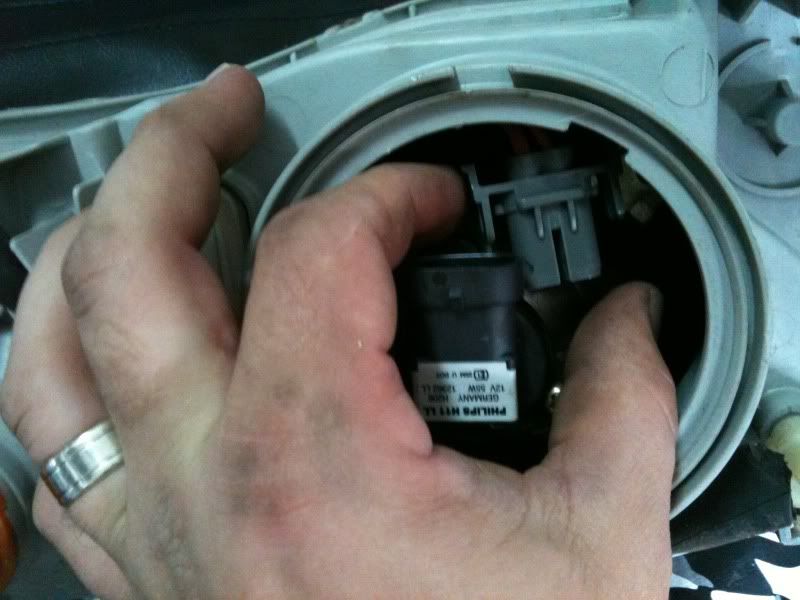
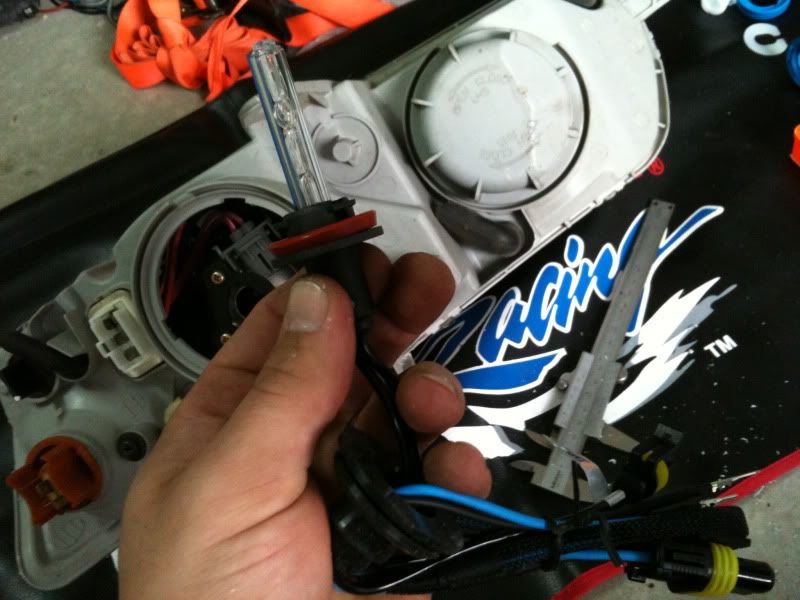
remove the globe, grab a hold of globe firmly
turn anti clockwise
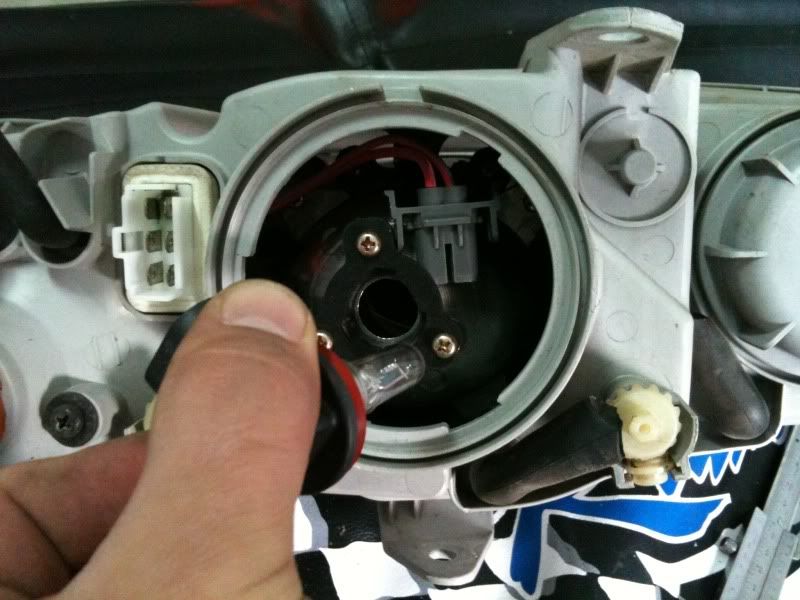
pull out of unit
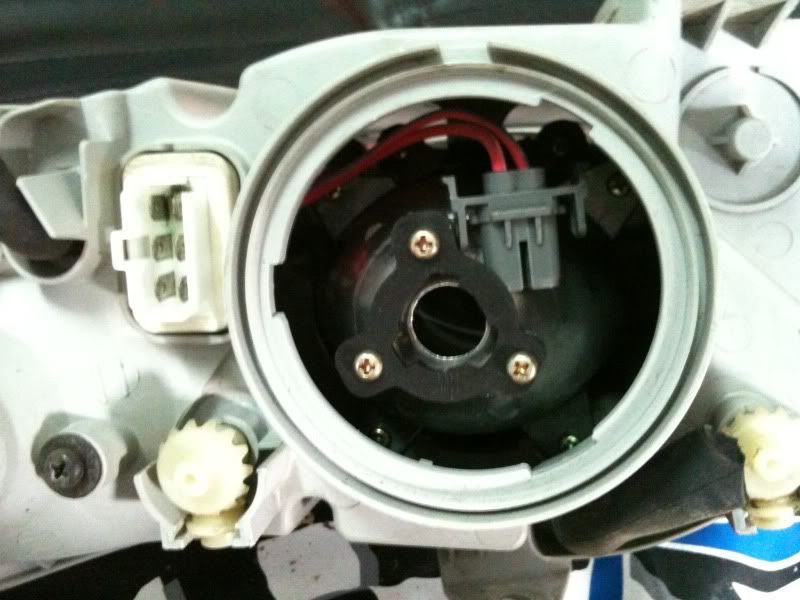
ready for installation of HID globes.
mark the centre point of the hole for the globe on the cover ready to drill the hole.
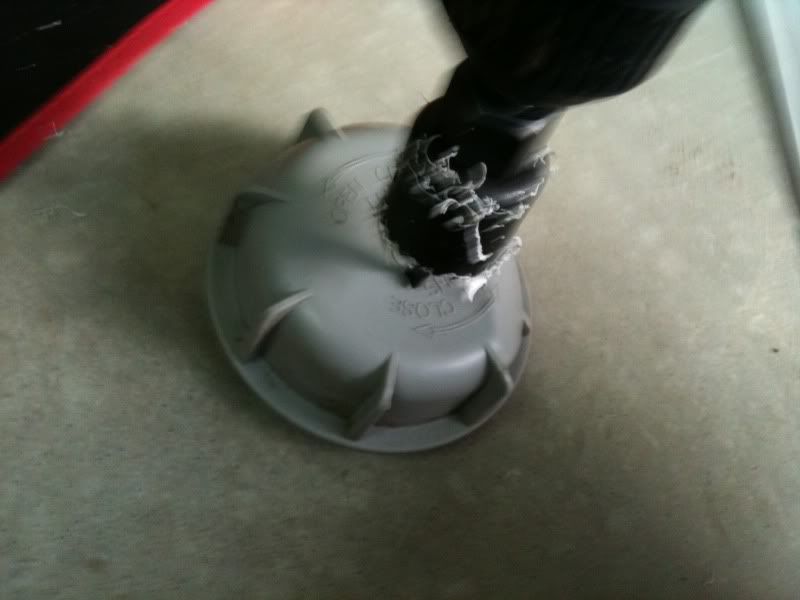
Using a 25-29mm hole saw to cut the hole for the wires.
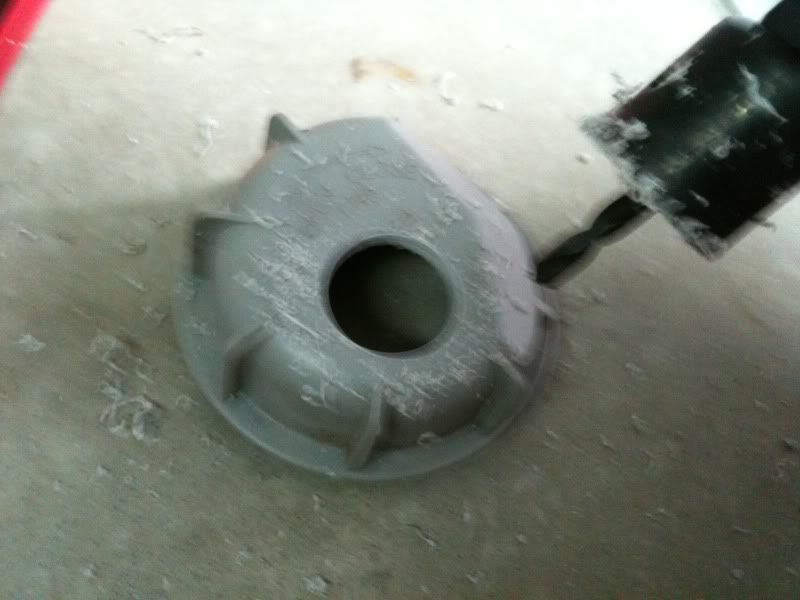
cover with 28mm hole cut out.
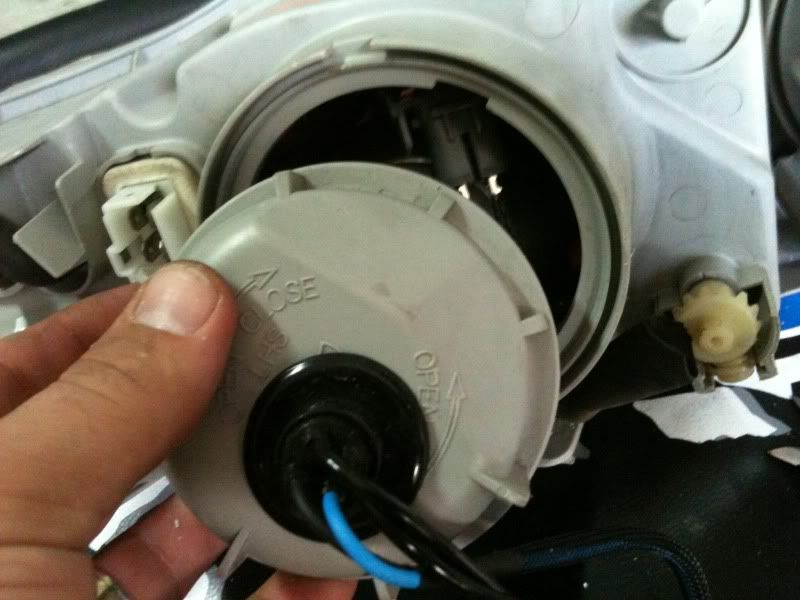
see how the hole lines up with the hole for the globe (THIS IS CRUCIAL!)
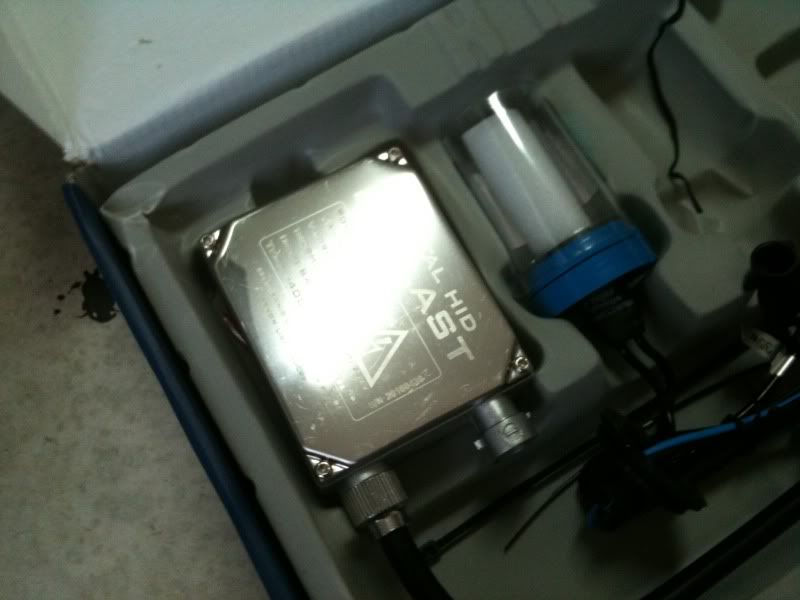
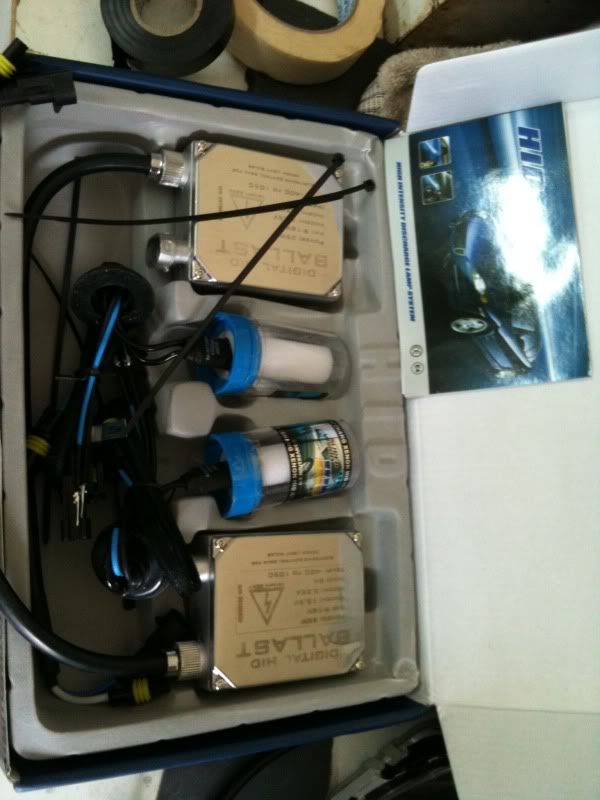
HID lights and ballast, remove from box
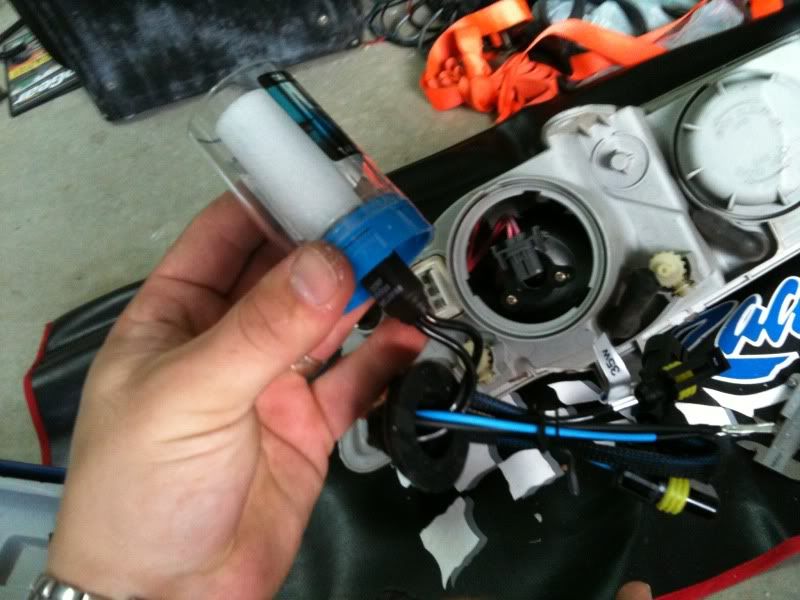
remove the globes protective packaging
HID globe ready for installation, DO NOT TOUCH THE GLOBE if you do accidently, use metho to clean.
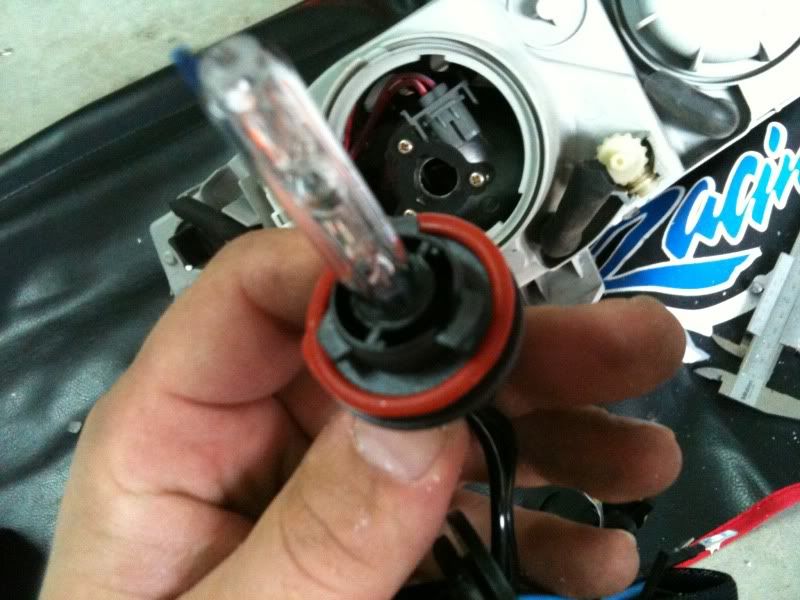
Close up.
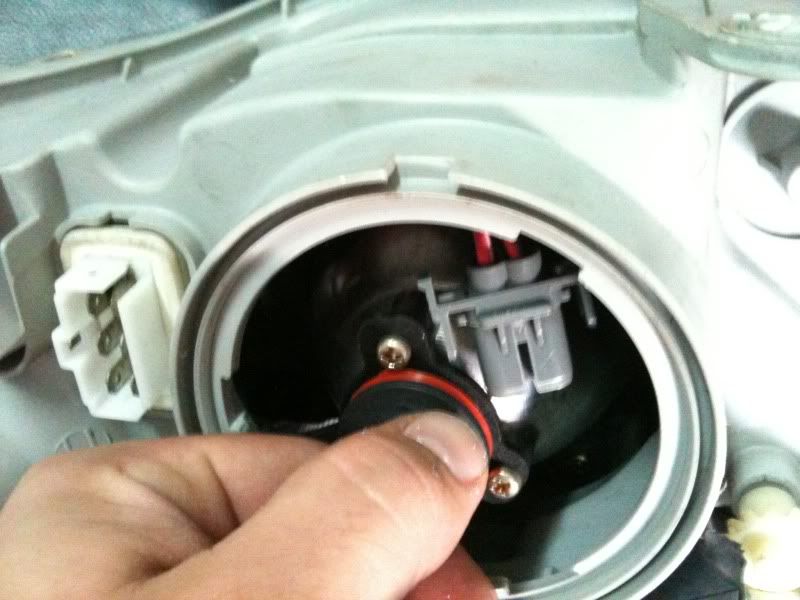
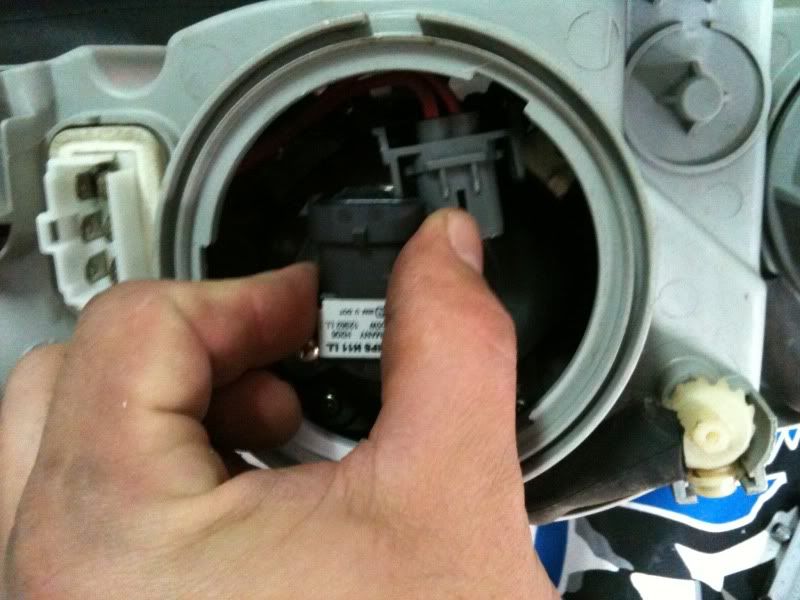
insert globe into unit, without touching the edges (remember the game Operation?).
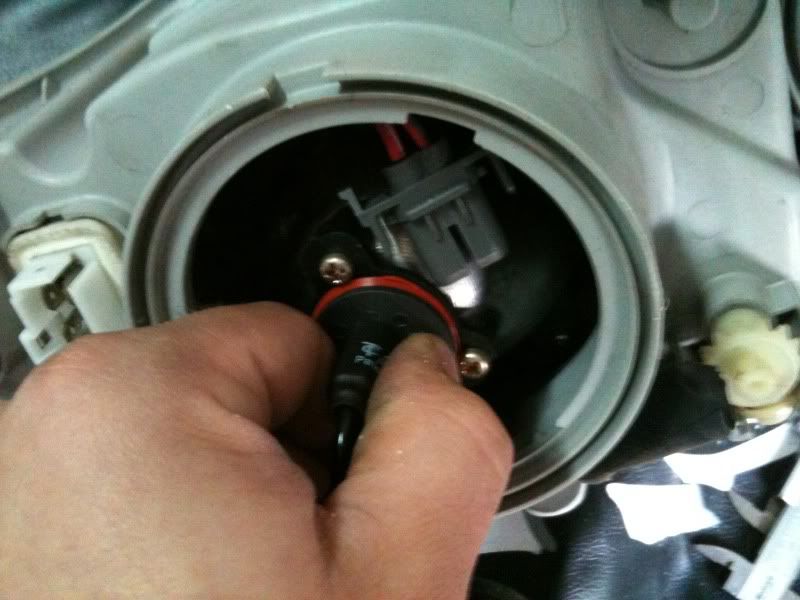
turn clockwise to lock the globe into place.
globe installed.
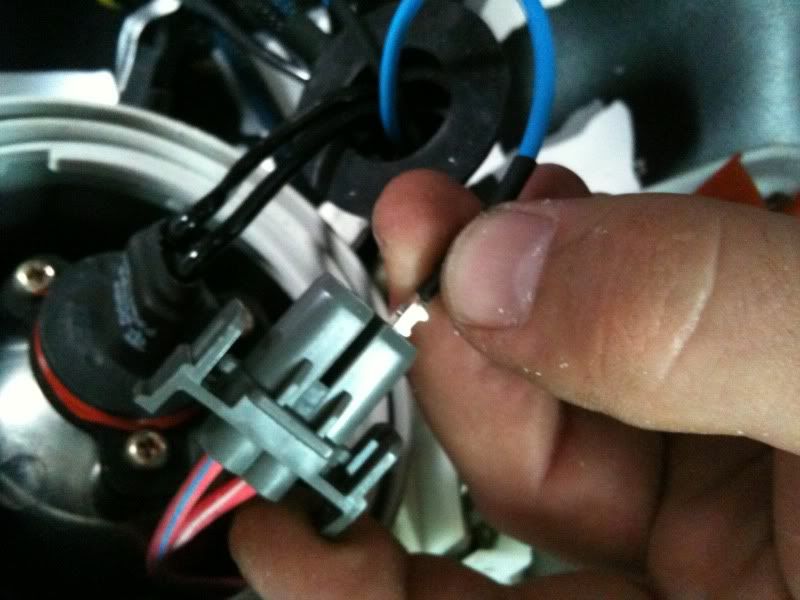
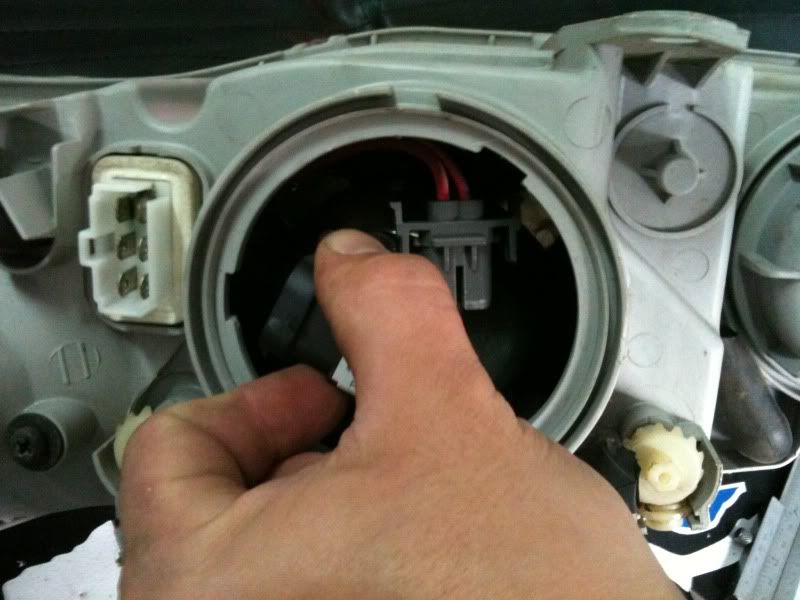
insert the + HID wire (blue) into the + wire in the unit (red with white stripe)
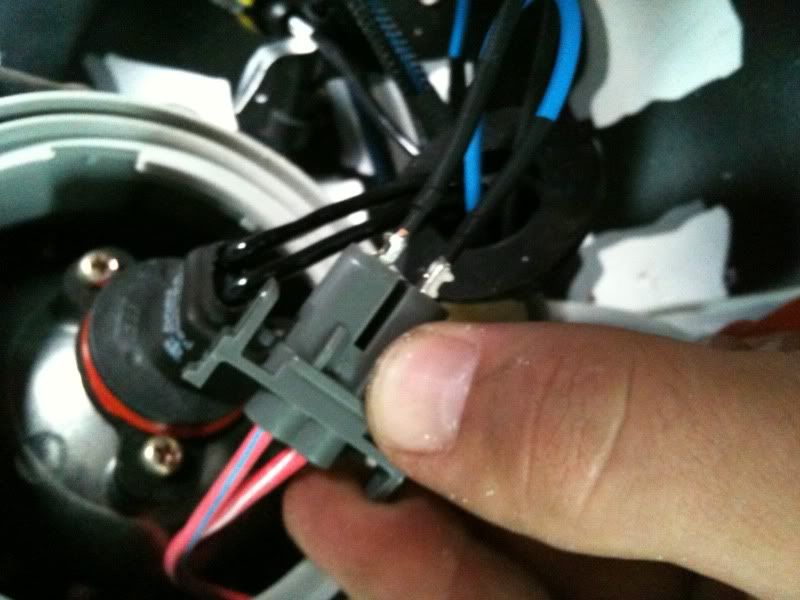
insert the - HID wire (black) in the - wire in the unit (red with blue stripe)
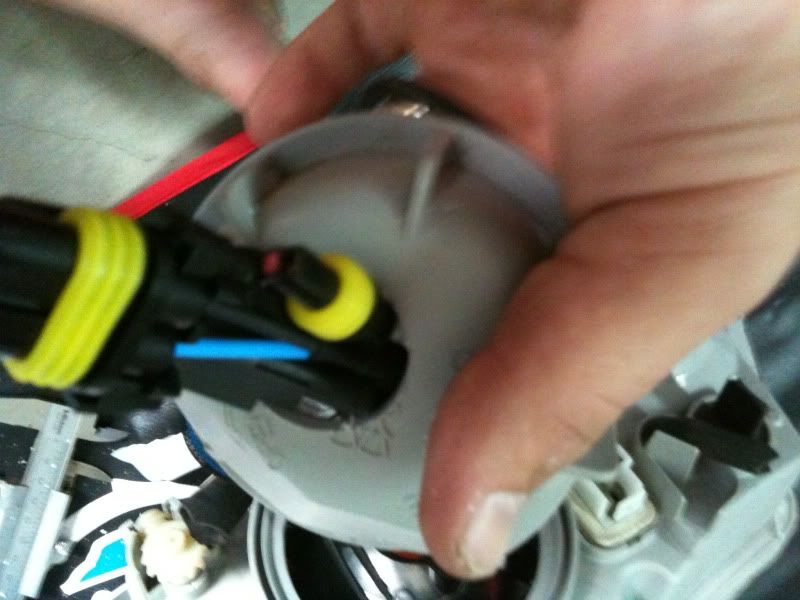
thread HID wires through the hole in the cover
pull the wires through up to the gromet
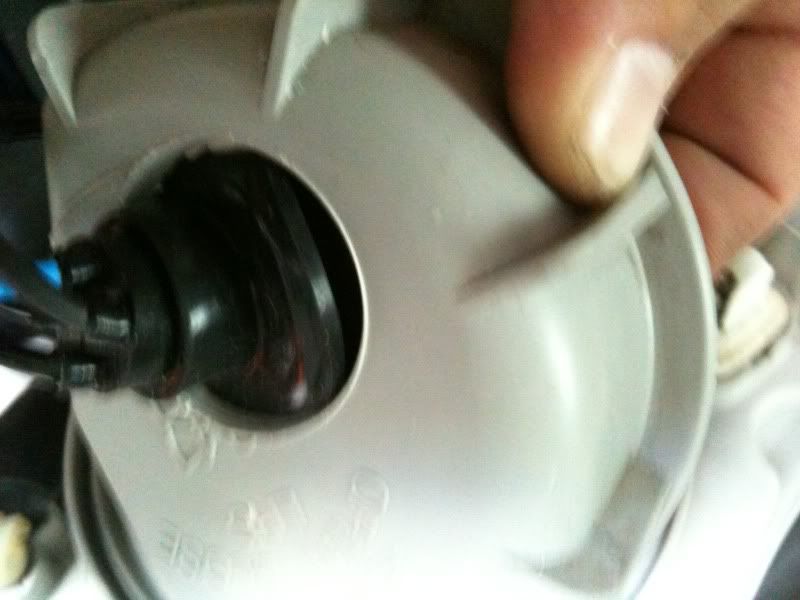
Pull the top of the gromet through the hole
make sure there a no folds in the gromet, and it is flush with the cover
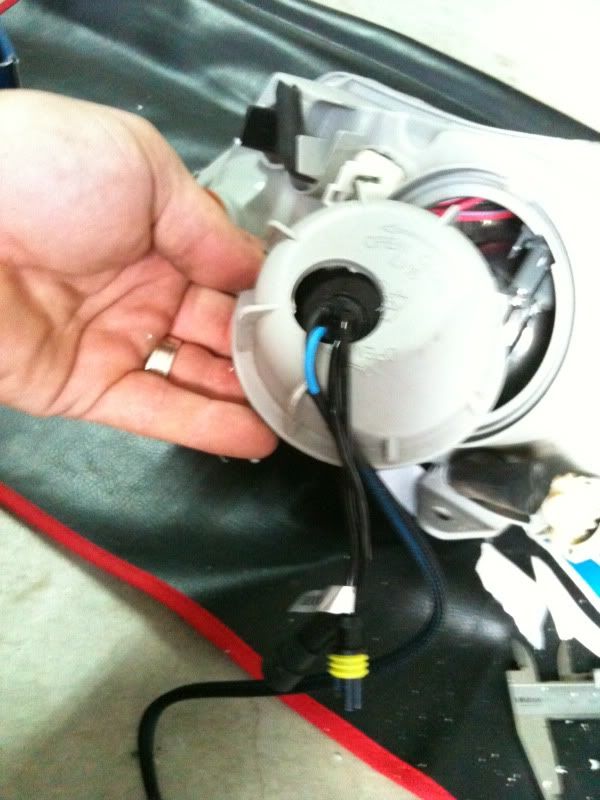
HID light fully installed, replace the cover making sure all wires inside are clear or the cover
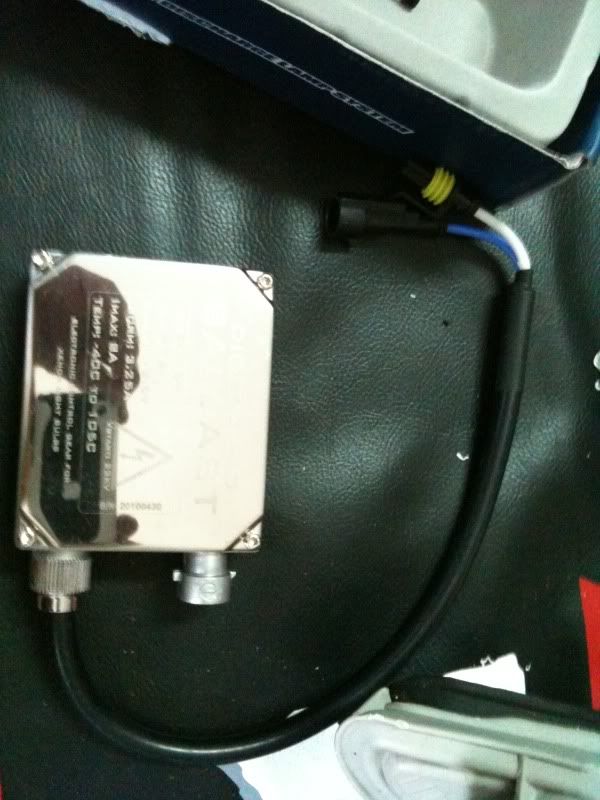
Remove Ballast from box

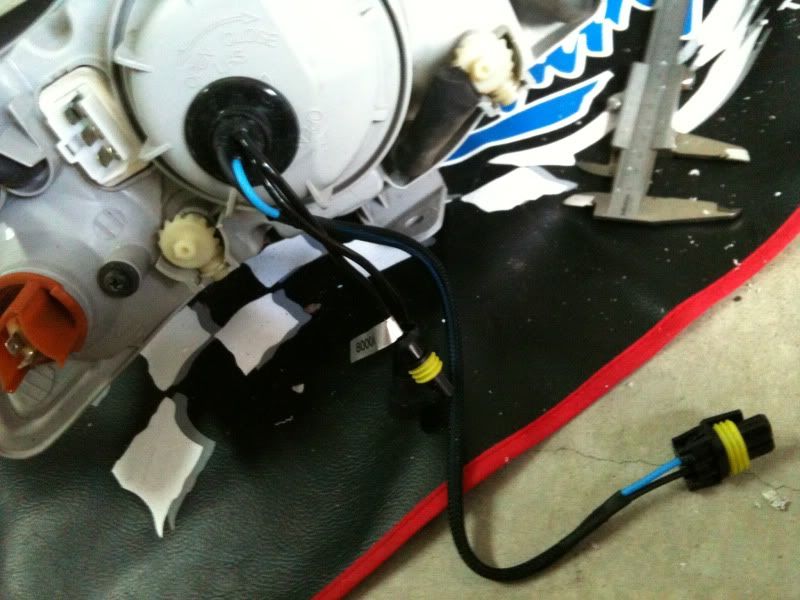
Connect the ballast to the HID wiring.
Mount the ballast on a firm surface on the inner guard, run the wires and keep them
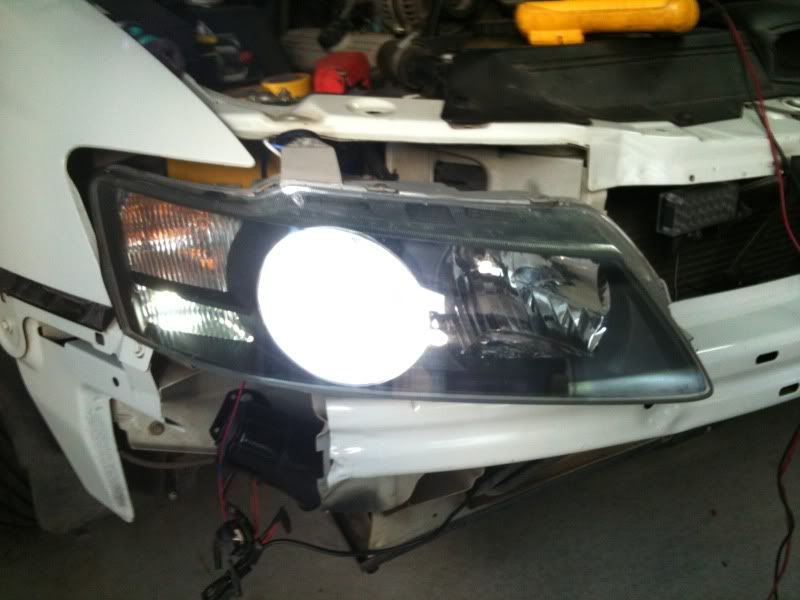
neat with zip ties, connect the headlight and indicator to the vehicles wiring harness and test.
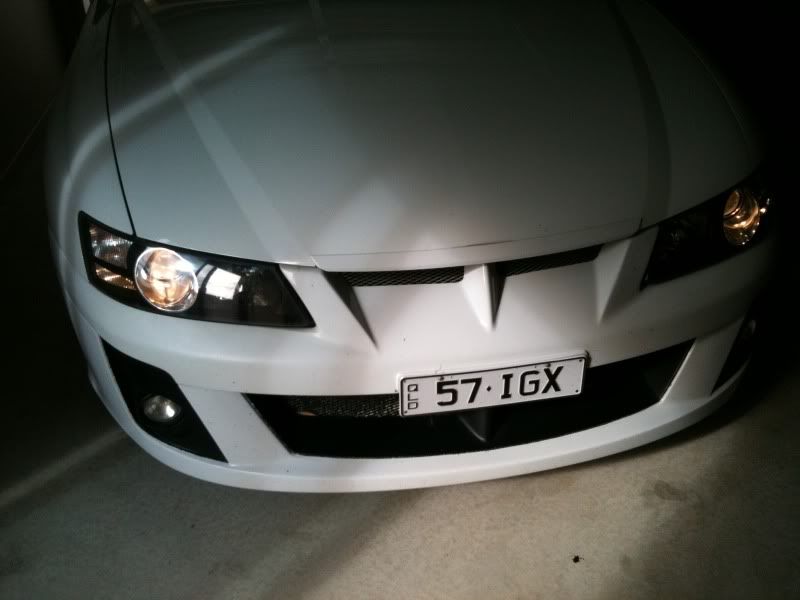
If the lights all work refit the lights, and bumber.
when the lights first turn on there will be a buzzing sound and flicker of the light while it warms up.
It will be more noticeable if the engine is not running, and the alternator not providing power to the battery.
It takes about 20-30seconds for the light to warm up, over that time it will become brighter.
I used SMD parker globes as the normal globe looked very dull compared to the HID globe.
White SMD Hi Power LED FIT Commodore VY 02 03 04 Parker - eBay, Other, Car Parts, Accessories, Cars, Bikes, Boats. (end time 13-Jun-10 02:53:19 AEST)
Hope this helps anyone else out there looking to do the conversion
Link: H11 8000K HID Philips PL Kit - MALOO/MONARO/VY/VZ/HSV - eBay Headlights, Lights, Indicators, Car Parts, Accessories, Cars, Bikes, Boats. (end time 26-Jun-10 06:30:14 AEST)
8000k are The whitest white you can get with the slightest tint of blue, anything higher starts going purple which may look good, but actually gives less light.
As the instruction manual is rather vague, I thought I put a walkthrough up.
Complete HID H11 kit. low beam only
Normall H11 55k bulbs, with blue vision bright parkers.
Remove the front bar so you can acces all the bolts holding the lights in.
Vy Calais headlight with projector beams.
One I prepared earlier. this is with the blue vision parker, which I replaced with the SMD parker.
8000k headlight with SMD parker. very similar in spectrum colour
comparison, Left is standard H11 55k with blue vision parker. right is HID 8000k with SMD parker
Now back to the walkthrough, remove your headlight from the vehicle.
We are going to work on the low beam light (which is closest to the indicator)
Remove the access panel
Standard light 55k H11 phillips light
remove the connection harness, squeeze the tabs
pull away from the globe
clear away from the globe
remove the globe, grab a hold of globe firmly
turn anti clockwise
pull out of unit
ready for installation of HID globes.
mark the centre point of the hole for the globe on the cover ready to drill the hole.
Using a 25-29mm hole saw to cut the hole for the wires.
cover with 28mm hole cut out.
see how the hole lines up with the hole for the globe (THIS IS CRUCIAL!)
HID lights and ballast, remove from box
remove the globes protective packaging
HID globe ready for installation, DO NOT TOUCH THE GLOBE if you do accidently, use metho to clean.
Close up.
insert globe into unit, without touching the edges (remember the game Operation?).
turn clockwise to lock the globe into place.
globe installed.
insert the + HID wire (blue) into the + wire in the unit (red with white stripe)
insert the - HID wire (black) in the - wire in the unit (red with blue stripe)
thread HID wires through the hole in the cover
pull the wires through up to the gromet
Pull the top of the gromet through the hole
make sure there a no folds in the gromet, and it is flush with the cover
HID light fully installed, replace the cover making sure all wires inside are clear or the cover
Remove Ballast from box
Connect the ballast to the HID wiring.
Mount the ballast on a firm surface on the inner guard, run the wires and keep them
neat with zip ties, connect the headlight and indicator to the vehicles wiring harness and test.
If the lights all work refit the lights, and bumber.
when the lights first turn on there will be a buzzing sound and flicker of the light while it warms up.
It will be more noticeable if the engine is not running, and the alternator not providing power to the battery.
It takes about 20-30seconds for the light to warm up, over that time it will become brighter.
I used SMD parker globes as the normal globe looked very dull compared to the HID globe.
White SMD Hi Power LED FIT Commodore VY 02 03 04 Parker - eBay, Other, Car Parts, Accessories, Cars, Bikes, Boats. (end time 13-Jun-10 02:53:19 AEST)
Hope this helps anyone else out there looking to do the conversion
Last edited:
")