Welcome to Just Commodores, a site specifically designed for all people who share the same passion as yourself.

New Posts Contact us

Just Commodores Forum Community

It takes just a moment to join our fantastic community

Register

How to fix yellowing headlights

Shaunaf

New Member
Joined
Aug 9, 2016
Messages
6
Reaction score
0
Points
1
Location
Rockhampton
Members Ride
99 vt commodore
THE BEST ONE TO YOUSE IS "TURTLE WAX HEADLIGHT RESTORATION" BOUT $56 FROM SUPERCHEAP AUTO YOU GET 1.SPRAY.
2. 2 WET SANDPAPER PADS.
3. CLEAN AND SEAL SCRATCH TUBE OF SOMETHING.
4. 2 LITTLE SATCHEL WIPES
******WITH DIRECTIONS OF STEP BY STEP IN THIS ORDER I JUST EXPLAINED BEST STUFF AROUND
 

EYY

Well-Known Member
Joined
Mar 6, 2011
Messages
5,754
Reaction score
2,036
Points
113
Location
Vic
Members Ride
VS Statesman
The BEST way to do it is to sand the lens with 800-1200g wet sandpaper and then clear coat the headlights to prevent them yellowing again. The kits are fine but car polish does the same thing.
 

STREETWISE

New Member
Joined
Dec 11, 2018
Messages
4
Reaction score
0
Points
1
Age
73
Location
Nambucca Heads
Members Ride
2002 VY Holden Commodore manual 6 cylinder ute
Are you headlights currently hazing over or going yellow? Well I have found a guide/product which fixes this problem.

For months I wondered how I could fix this problem & actually was about to buy all the individual pieces required to perform this. In comparison my headlights are not as bad as some I have seen but I am very picky with this sort of thing.

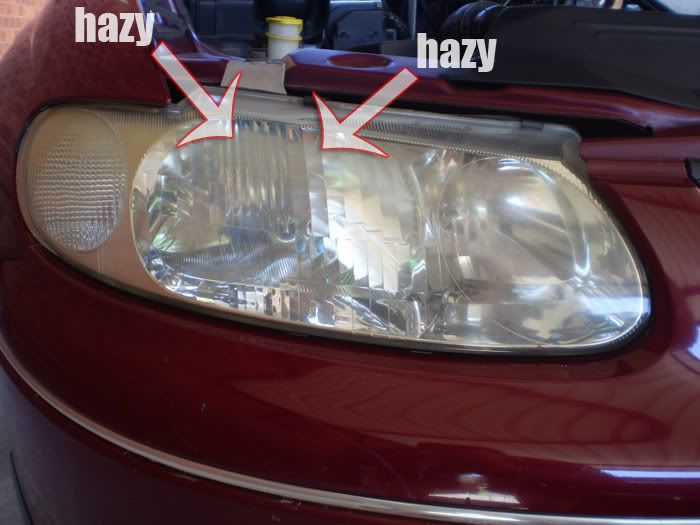
Just to give you an idea, below is what headlights looked like before I started.

beforeleft1.jpg


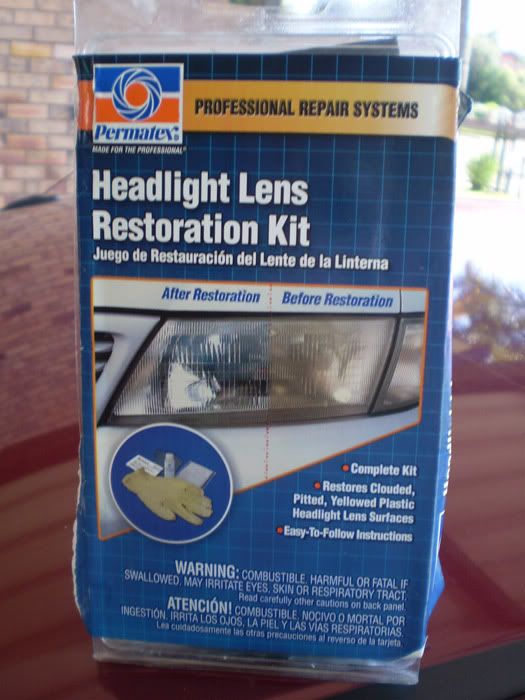
This is the actual kit I purchased, I found it through Autobahn but I am assuming you can pick from most car accessory retailers.

Permatex - Headlight Lens Restoration Kit which includes:

- 1 sheet each of the following grit wet/dry sandpaper (1000,1500,2000,2500 - Lower the number, the rougher the grit)
- Soft Cloth
- Plastic Polish (doesn't specify exactly what sort of polish)
- Rubber Gloves

P3221061.jpg


Steps Required:

1. You need to decide first of all how bad the damage is on your headlights, in my case the headlights where just yellow but not badly scratched so I didn't need to use the rougher grit paper. So I started with the 2000 grit paper.

Soak the paper in water for a good 5-10 minutes just to make sure it is completely wet. Failure to do so can mean causing more damage to your headlight, making possibly worse than when you started.... Be sure to also wet the lens of the headlight to keep lubrication at a maximum.

2. With your roughest sandpaper(lowest # grit, IE 1500) Rub the sandpaper in one direction IE. left --> right until you have a uniform finish and keep dipping the paper into water so you don't clog up the sandpaper.

3. Re-lubricate the headlight and change the water which you dip your sandpaper into so make sure you don't contaminate the new paper. Then start to rub a higher grit sandpaper IE. 2000 in one direction again, this time top to bottom or visa-versa.

4. Follow the same process again this time with a higher grit again IE. 2500 and change the direction in which you are rubbing the headlight again IE left ---> right again.

NB: Make sure that you are regularly dipping the sandpaper into water to clear off any mass attracted by the sandpaper

Also note, at this stage you will not see the headlight clear up.


5. Clean the headlight with water and dry off with a clean cloth.

6. Once dry, use a soft clean cloth + the polish provided & rub whilst applying pressure in a circular motion over the entire headlight. Once applied please allow the polish to dry. Once the polish is set rub the polish off with a clean cloth.

7. If the lens of the headlight still hasn't cleared up, then re-apply step 6.

8. If you notice any spots which have not cleared up, then re-polish these particular areas.

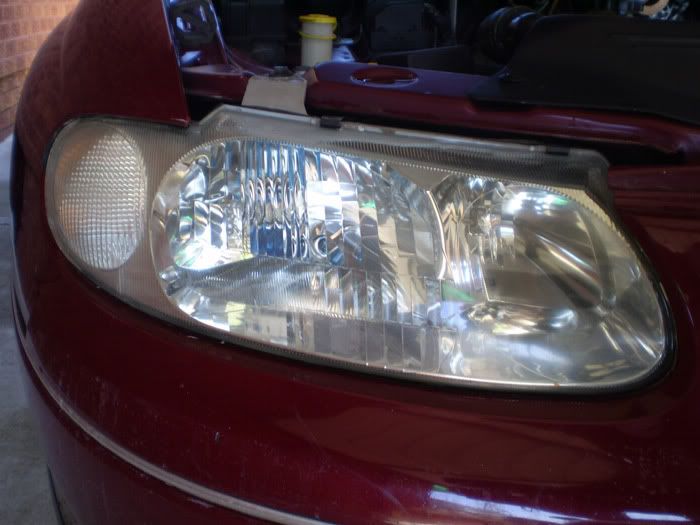
And after all of this, it should look like this.

afterleft.jpg


All up this process took me between 30-45 minutes to complete and the kit cost about $30. I know it my case I completely happy with this outcome. :thumbsup:

Hope it helps guys, any questions please let me know.
 

STREETWISE

New Member
Joined
Dec 11, 2018
Messages
4
Reaction score
0
Points
1
Age
73
Location
Nambucca Heads
Members Ride
2002 VY Holden Commodore manual 6 cylinder ute
Another way which is cost effective is, I use Mirca 800 grit paper ,on a 6" soft backing plate 6" air sander, after masking the the edges of the lights,to prevent paint being sanded, when this is done, I wash the lens down and buff the headlights, with a high quality lambswool pad,using, a buffing compound, I always use the Farecla G3 Compound, they come up a treat, about 15-20 minutes labor. This passes for a rego inspection certificate, Safest way is to get a professional Spray Painter or Detailer to do this,do not use a foam pad on the buffer, it is not as good as the Lambswool pad, and It will not burn or harm the Polycarbonate Lenses.
 

mpower

Well-Known Member
Joined
Jan 22, 2007
Messages
5,078
Reaction score
1,713
Points
113
Location
Brisbane
Members Ride
V2 CV8 Monaro and VF SSV Redline
buy new ones while you still can. the sanding and buffing thing is a very short term fix that needs to be repeated often.
 

sleepa

Shiny...
Joined
Feb 23, 2010
Messages
923
Reaction score
32
Points
28
Location
Brisbane
Members Ride
2010 VE SS Sportwagon, Audi A4, Combo work hack
Another way which is cost effective is, I use Mirca 800 grit paper ,on a 6" soft backing plate 6" air sander, after masking the the edges of the lights,to prevent paint being sanded, when this is done, I wash the lens down and buff the headlights, with a high quality lambswool pad,using, a buffing compound, I always use the Farecla G3 Compound, they come up a treat, about 15-20 minutes labor. This passes for a rego inspection certificate, Safest way is to get a professional Spray Painter or Detailer to do this,do not use a foam pad on the buffer, it is not as good as the Lambswool pad, and It will not burn or harm the Polycarbonate Lenses.

Not bad, similar to what I do. But I do have to say that a Lambswool pad CAN burn the lenses if you leave it on a spot slightly too long, learnt that years ago on a practise headlight.

Depending on how bad they are, I go with wet and dry paper, anyway from 800g to 120g on the most horrible lens. Low grit by hand, 600+ on a mini 3 inch rotary with soft backing pad.
I also work my way up to around 1500-2000g before cutting.

Then Menzena compound and a medium/hard foam cutting pad, followed by Menzerna Medium Cut and a medium foam cutting pad, followed by Menzerna Finishing Polish and a soft foam pad, and if I feel like it another soft foam pad with either Purple polish or Meguiar's Plastic Polish on it.
By this point they look pretty damn good.

They don't last forever, usually 6 months before going yellow again (in QLD) so I have also played around with some coatings on them, Gyeon Trim works well, Gyeon Cancoat lasts about a year. But really mpower said it best.

buy new ones while you still can. the sanding and buffing thing is a very short term fix that needs to be repeated often.

Totally agree, if you want perfect headlights then just get new ones.
 

figjam

Donating Member
Joined
May 14, 2013
Messages
3,246
Reaction score
8,547
Points
113
Location
Far Kurnell
Members Ride
FJ
Yep. Toothpaste, and elbow grease every 6-12 months.
Headlight protectors seem to cut down the fading/yellowing problems.
 

Semi Driver

New Member
Joined
Jul 30, 2017
Messages
9
Reaction score
0
Points
1
Age
68
Location
Quambatook, Victoria
Members Ride
VT 3800 Series ii Sedan
I had the same prob when i got my VT.
I used the same steps as rch-13z with 2 exceptions.
1/- I used 200, 500, 1000, and 1500 grade wet and dry sandpaper
2/- When i completed the polishing (sanding) i used a clear paint to spray the headlights.
Since then (3 years down the track) my headlights are still the same as the day i completed the polishing.
 

lowphat

New Member
Joined
May 27, 2019
Messages
3
Reaction score
0
Points
1
Age
27
Location
darwin
Members Ride
VU SS
thanks for the info, i will give this kit a go. Ive tried toothpaste and and other methods, didn't seem to work at all. Not even a little bit better, any chance they are too far gone? I'll try the kit anyway see how it goes. If not time for newbies i think.
 
Top