DUK13Y
When in doubt, slide it out
- Joined
- Nov 4, 2007
- Messages
- 793
- Reaction score
- 6
- Points
- 18
- Location
- Sydney, Australia
- Website
- www.facebook.com
- Members Ride
- VEII SSV, VYII Berlina, '97 Lancer
This is probably the cheapest bang for your buck mod you can do. It costs you about $10 and will make your car look mint.
In this tutorial i will give you a quick run down on how to paint your brake calipers.
Equipment needed:
Brake caliper paint or engine enamel (high heat) of your choice of colour
Protective gear - glasses and face mask
High speed power drill
Wire brush head
Newspaper
Tape - Masking or electrical
Car jack and Wheel brace
Method:
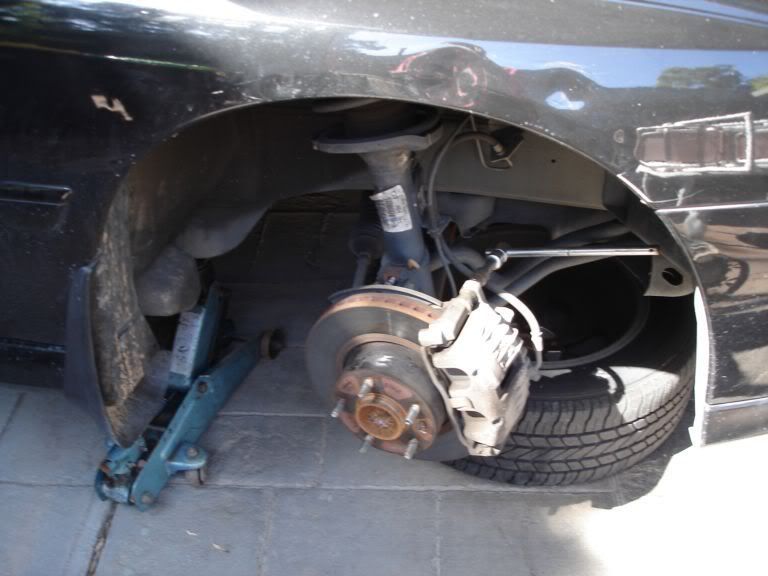
Step 1: After you have all your equipment in one nice handy spot, pick a tyre and pull it off. If you have more than one jack, pull more off but be sure that the car is stable. I put the wheel under the car so that if the car was to fall, it would hit the wheel rather than a bit further and crush my hand. Just a small safety precaution.
Step 2: Remove your brake pads by taking off the two bolts on the rear of the caliper. This will let you pick up the caliper and move it around but do not let it rest on the brake lines. Always keep it supported. Pull out the pads and keep them somewhere safe. Using two spanners (if you don't have the real tool like most people), jimmy the piston back in by putting each spanner on opposite sides and resting the middle(ish) bit of the spanner on the caliper. Use them like jimmy bars aka crowbars and apply even pressure to make sure it goes in straight. It will not go in if it isn't straight so don't worry about "what if they aren't straight and I won't be able to brake". It will not go in unless straight. May take a while if not used to it but shouldn't take to long if you have your spanners in the right spots. You may need to move them around a bit to keep even pressure for the full circumference of the piston. All this will let you put your pads back in properly. You now no how to change your brake pads too.
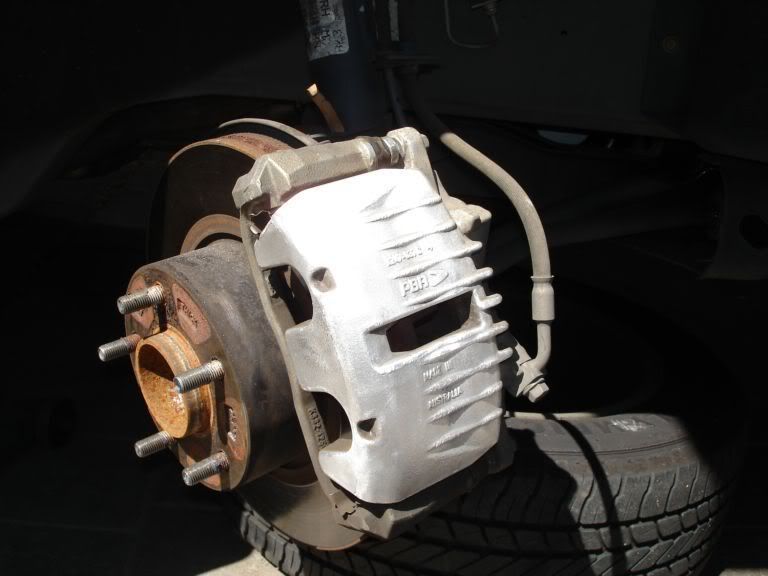
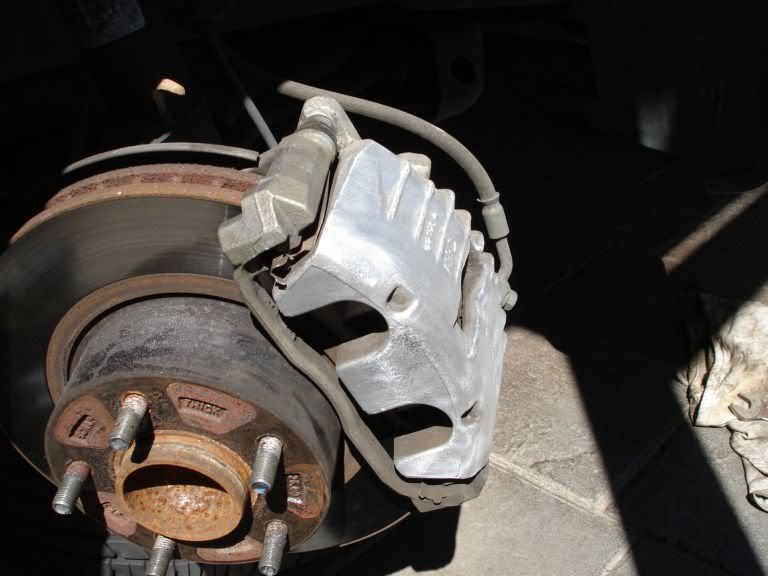
Step 3: Now that you have the tyre(s) off, you can plug in your drill, put in the wire head and begin to clean the caliper. Use protective gear as the wire can often fly off and hit your eye and the brake dust can be harmful if inhaled in concentration. To make life easier, turn the wheel to the side you are working on. For e.g. If you are working on the right caliper, turn right. This will let you get right to the back off the caliper. Spend a lot of time on this step. Your caliper must be clean otherwise the paint will adhere to the dust which is highly likely to come off. Once done, your caliper should look a bit like this.
Step 4: Unless you don't care about over spray, you will need to cover the whole wheel arch and probably the surrounding panels. You will need to tape up any lines you don't want paint on. I used a plastic bag to cover the rotor. If windy, cover the majority of the car. The last thing you want is to have unwanted paint on your car. Remember this, whatever isn't covered will probably get paint on it.
Step 5: Now your finally ready to paint. Paint in light coats but not to light. Light enough to cover the surface but remember that you are doing at least 3 coats. The light coat prevents runs which look very cheap and nasty. Allow about 10-15 minutes in between coats. If you have more than one wheel off and ready to paint, start to paint it while you are waiting for the paint to dry on the first caliper.

Step 6: Once all your paint is dry (about 30-40 minutes should do) replace the wheel but be careful not to disturb the caliper. Then just stand back and admire your work.
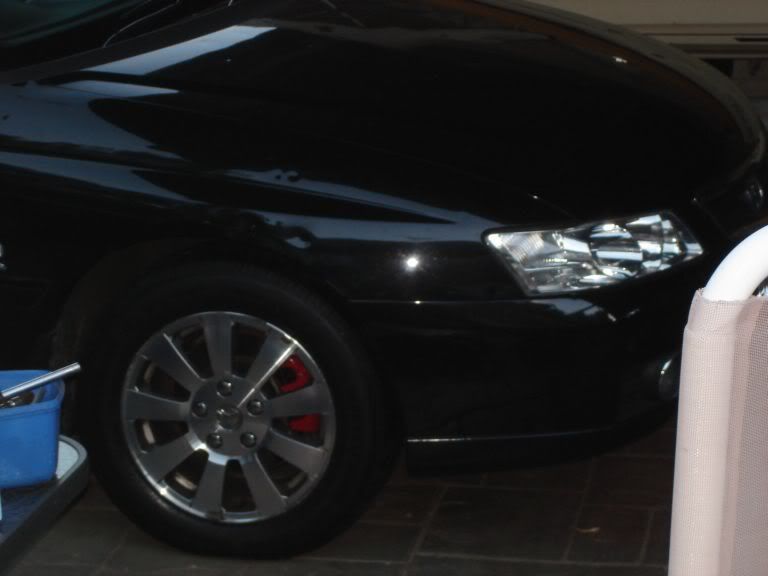
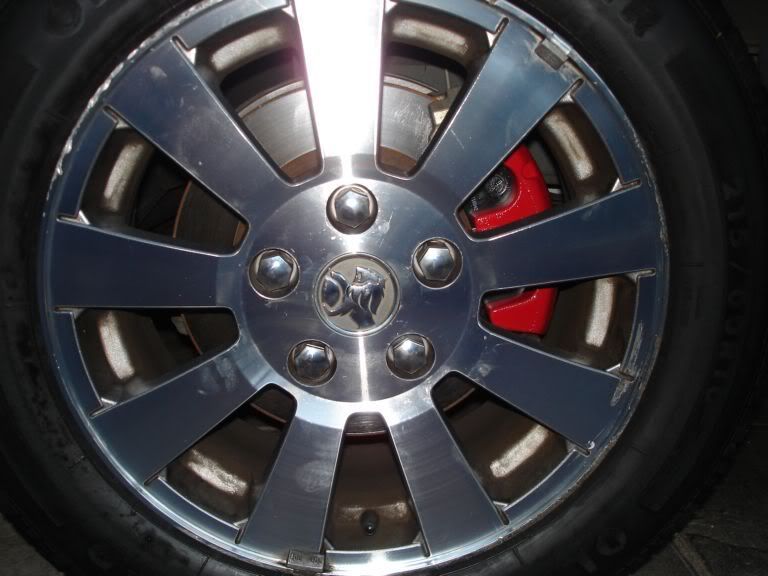
Works well with 5-spoke wheels but I think they look good on any alloy rim type. Not bad for $10 ey? Do not use your car for at least 12 hours after painting as the paint will not have completely dried. You can also remove the caliper from the car completely but this will mean you have to bleed the lines and replace the fluid and can often be a pain. On the rotor work is quite easy anyway.
THIS IS ONLY A GUIDE AND I TAKE NO RESPONSIBILITY FOR ANY DAMAGE OR INCONVENIENCE BY FOLLOWING IT.
In this tutorial i will give you a quick run down on how to paint your brake calipers.
Equipment needed:
Brake caliper paint or engine enamel (high heat) of your choice of colour
Protective gear - glasses and face mask
High speed power drill
Wire brush head
Newspaper
Tape - Masking or electrical
Car jack and Wheel brace
Method:
Step 1: After you have all your equipment in one nice handy spot, pick a tyre and pull it off. If you have more than one jack, pull more off but be sure that the car is stable. I put the wheel under the car so that if the car was to fall, it would hit the wheel rather than a bit further and crush my hand. Just a small safety precaution.
Step 2: Remove your brake pads by taking off the two bolts on the rear of the caliper. This will let you pick up the caliper and move it around but do not let it rest on the brake lines. Always keep it supported. Pull out the pads and keep them somewhere safe. Using two spanners (if you don't have the real tool like most people), jimmy the piston back in by putting each spanner on opposite sides and resting the middle(ish) bit of the spanner on the caliper. Use them like jimmy bars aka crowbars and apply even pressure to make sure it goes in straight. It will not go in if it isn't straight so don't worry about "what if they aren't straight and I won't be able to brake". It will not go in unless straight. May take a while if not used to it but shouldn't take to long if you have your spanners in the right spots. You may need to move them around a bit to keep even pressure for the full circumference of the piston. All this will let you put your pads back in properly. You now no how to change your brake pads too.
Step 3: Now that you have the tyre(s) off, you can plug in your drill, put in the wire head and begin to clean the caliper. Use protective gear as the wire can often fly off and hit your eye and the brake dust can be harmful if inhaled in concentration. To make life easier, turn the wheel to the side you are working on. For e.g. If you are working on the right caliper, turn right. This will let you get right to the back off the caliper. Spend a lot of time on this step. Your caliper must be clean otherwise the paint will adhere to the dust which is highly likely to come off. Once done, your caliper should look a bit like this.
Step 4: Unless you don't care about over spray, you will need to cover the whole wheel arch and probably the surrounding panels. You will need to tape up any lines you don't want paint on. I used a plastic bag to cover the rotor. If windy, cover the majority of the car. The last thing you want is to have unwanted paint on your car. Remember this, whatever isn't covered will probably get paint on it.
Step 5: Now your finally ready to paint. Paint in light coats but not to light. Light enough to cover the surface but remember that you are doing at least 3 coats. The light coat prevents runs which look very cheap and nasty. Allow about 10-15 minutes in between coats. If you have more than one wheel off and ready to paint, start to paint it while you are waiting for the paint to dry on the first caliper.
Step 6: Once all your paint is dry (about 30-40 minutes should do) replace the wheel but be careful not to disturb the caliper. Then just stand back and admire your work.
Works well with 5-spoke wheels but I think they look good on any alloy rim type. Not bad for $10 ey? Do not use your car for at least 12 hours after painting as the paint will not have completely dried. You can also remove the caliper from the car completely but this will mean you have to bleed the lines and replace the fluid and can often be a pain. On the rotor work is quite easy anyway.
THIS IS ONLY A GUIDE AND I TAKE NO RESPONSIBILITY FOR ANY DAMAGE OR INCONVENIENCE BY FOLLOWING IT.
Last edited: