FLY-VL
New Member
Hey everyone, im new to this fourm. Decided to join up and show off my car thread. Im a big poster on VL forum, calaisturbo.com
Make / Model: 1987 VL SL
Colour: White over MX grey
Bodykit: No way
Engine Type: RB30
Age: 18
Engine Mods: nup
Power: not really.
Exhaust: No name brand extractors, standard cat, 2 1/4 cat back with single muffler, sounds decent.
Gearbox: Factory 5 speed
Diff: Standard
Brakes: Vl Turbo front brakes, drums back
Suspension: Ultra low king springs and Pedders shocks.
Wheels/Tyres: 205 chasers. Chrome dishes and chrome metal centre caps.
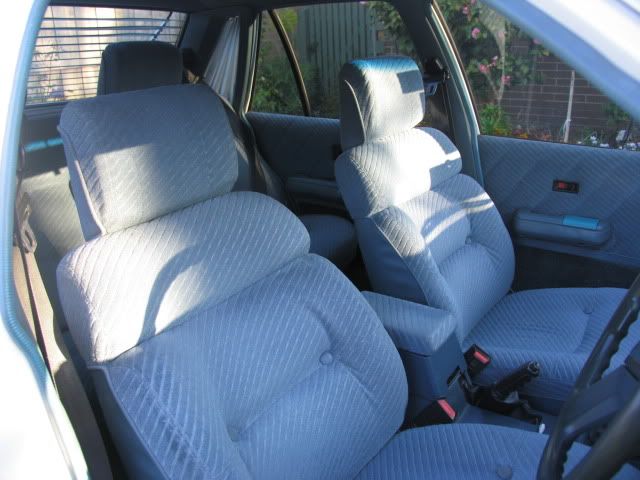
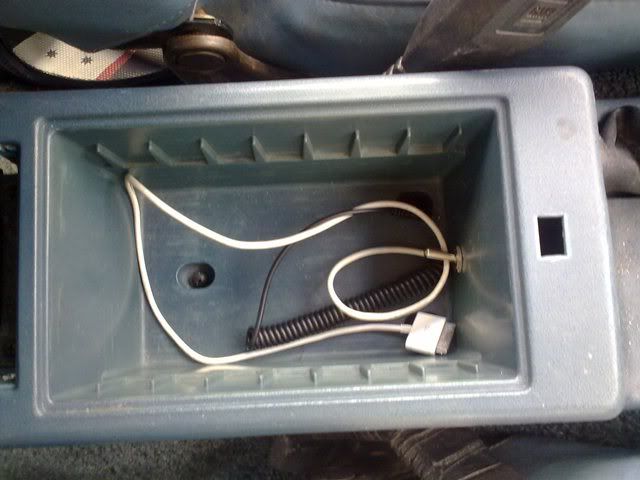
Interior: Clean - factory blue. High rise calais centre console
Stereo: Clarion deck, VR door pods and baskets in front doors with kenwood 6.5", kenwood 6x9s, all 4 running off kenwood 4 channel amp. 160rms to a 12 inch MTX sub in custom fitting VL box.
I bought this car at the old age of 16 - still on my Ls, on the 9/9/09. I always loved VLs, wanted one and it had to be manual.. hate driving autos. I told my oldman and he said i better start working, so i did... i was a labourer when i was about 15 for $100 cash a day working in school holidays. I worked hard and saved it all knowing it'd pay off one day. I called up countless number and test drove around 7 or 8 VLs, all over priced or in crap condition, except for 3. I was going to buy one neat as SL 5 speed from a car yard until the guy backed out on the deal. Another was a hi priced berlina with a calais conversion and 5 speed of ebay untill it was sold it from under me. Third time lucky, i found mine on calais turbo by chance, got it for $2200 in well taken after, yet rusty conditon.


Just leaving from the blokes house to drive back to mine as we jsut signed off the deal. Man - i could not stop smiling, never been so happy.

It runs and drives well. I had to a few things to it when i got it.. reco'd radiator, water pump, timing belt and tensioner a CAS later on as it is afterall a VL lol.
Next was a new stereo... Got a killer deal on 4 speaker, deck, amp and a wiring kit. Bought a 12inch MTX for ebay for $30 and pick up an amp for it.
Made a new parcel shelf out of 15mm MDF upholserted in blue carpet and screwed up from the boot through existing holes, looks neat. Next made a sub box to neatly squeeze in opposite the spare tyre, wedged underneath the boot gutter, also neat

I did a defensive driver training course at eastern creek...

I picked up a cheap exhuast on ebay second hand, 2 1/4 with a single muffler and came with a spare empty cat for $50. Put it on and was impressed with the note!

Then came the body work which it still in process. Getting all of dents straightend out, and cutting out the fairly bad rear rust and welding a new panel in. My panel beater is a lazy **** and only works sundays lol So its coming along slowly. But he does very good work.


Donor panel... absolutely no rust! And i mean not even chipped paint and surface rust.

How it looks at the moment

UPDATE!
All the dents and dings have now been beat, bogged and primered and it is now straight as gun barrel.

The keener eyed ones amongst you will notice its got no boot and for good reason. Started the serious body work today got the rear window and boot lip rist cut out and the panel in.
Got the boot lid off and popped the rear window out, it was not pretty!
Like, bad....
After it had been cut out.

On the donor panel, the glue used to hold the window in was very thick, sticky and moist... on mine it had fully dried out, absorbed moisture and rusted away my window lip
And the car looking like this


Much better - that took no time at all

Yet to be welded in yet, just made to fit and screwed in - thats next week.


How it sits currently.

All bogged up and sanded. Just needs a final sand, paint, and the window to be put back in - and its done No more rust blowing out, no more leeking boot.


Its getting there!
When its done it'll of still worked out to be cheaper then buying other rust free VLs for $4000+ which i was looking at, and now i know its totally rust free and been done properly as im planning on keeping the car for a while...
All bogged sanded and painted. Will be getting a coat of white tomorrow, the window put back in and the boot lid back on. Great success.

Im on school holidays now, being the young punk that i am, and i'm gunna knock up a custom boot layout which im pretty pumped for, should look awesome.
The front is jus starting to blow out.. few bubbles along it so thats next.
I got a few quotes for the front windscreen, and the best was supply of a new front screen, fitment and a new rubber top and bottom all for $200 so ill be chasing that up and itll all be sorted then!
I was hunting around everywhere for a LSD and was almost going to mini spool it when i couldnt find a LSD for less then $300..
Until i found a 2.92 25 spline borgwarner LSD from a 302 XD falcon for $80

Went out to WSID the other night for $50 of fun. Ran 3 16.3's and one 16.2.
Atleast im consistently slow

The car is currently sitting on axle stands with no diff in it as it is in the process of a LSD.
My LSD centre is at the diff shop currently being reco'd with two new bearings and being re shimmed so itll be tight as
Im going to get them to fit it to my stripped diff, then ill come and bolt it all back into the car.
Itll be good fun at an aggressive driver training course that im attending shortly and during '+100hp' wet weather. Hey, im a P Plater.


Started the front windscreen. The rust does look to be nearly as bad as the back (touch wood) but still needs doing.. do it once, do it right.
I took all the plastic trim of and peeled of the rubber molding.
I wanna keep the trim for the OG look and it luckily didnt snap, just broke the plastic tabs underneath. No biggue, ill just glue them back on

Piano wire

WOOOOO
Got the front windscreen out. Not much rust in there, just a few little holes and some rust bubbles. Despite everyone telling me the windscreen would snap, it wouldnt of cracked if i didnt accidentally pinch the glass with a pair if pliers when i was trying to pull out the trim clips. I was quoted $180 for a new screen fitted with a new seal, which isnt bad at all.


Got the front done. Can anyone give me any feedback for putting in a new windscreen... does everything fully get stripped out and new gear put in? The rubber lip visible from the inside of the car with the wire mesh inside it?


Rust free VL? I THINK SO!
Got my new windscreen in today, supplied and fitted for $180, nice.
Used a one piece mould. I wanted to put the factory side plastic trims back on for the original look...
But the new mould is wider then the original one so it looks out of place. No matter! Now i've just gotta bog up the locating holes

Make / Model: 1987 VL SL
Colour: White over MX grey
Bodykit: No way
Engine Type: RB30
Age: 18
Engine Mods: nup
Power: not really.
Exhaust: No name brand extractors, standard cat, 2 1/4 cat back with single muffler, sounds decent.
Gearbox: Factory 5 speed
Diff: Standard
Brakes: Vl Turbo front brakes, drums back
Suspension: Ultra low king springs and Pedders shocks.
Wheels/Tyres: 205 chasers. Chrome dishes and chrome metal centre caps.
Interior: Clean - factory blue. High rise calais centre console
Stereo: Clarion deck, VR door pods and baskets in front doors with kenwood 6.5", kenwood 6x9s, all 4 running off kenwood 4 channel amp. 160rms to a 12 inch MTX sub in custom fitting VL box.
I bought this car at the old age of 16 - still on my Ls, on the 9/9/09. I always loved VLs, wanted one and it had to be manual.. hate driving autos. I told my oldman and he said i better start working, so i did... i was a labourer when i was about 15 for $100 cash a day working in school holidays. I worked hard and saved it all knowing it'd pay off one day. I called up countless number and test drove around 7 or 8 VLs, all over priced or in crap condition, except for 3. I was going to buy one neat as SL 5 speed from a car yard until the guy backed out on the deal. Another was a hi priced berlina with a calais conversion and 5 speed of ebay untill it was sold it from under me. Third time lucky, i found mine on calais turbo by chance, got it for $2200 in well taken after, yet rusty conditon.
Just leaving from the blokes house to drive back to mine as we jsut signed off the deal. Man - i could not stop smiling, never been so happy.
It runs and drives well. I had to a few things to it when i got it.. reco'd radiator, water pump, timing belt and tensioner a CAS later on as it is afterall a VL lol.
Next was a new stereo... Got a killer deal on 4 speaker, deck, amp and a wiring kit. Bought a 12inch MTX for ebay for $30 and pick up an amp for it.
Made a new parcel shelf out of 15mm MDF upholserted in blue carpet and screwed up from the boot through existing holes, looks neat. Next made a sub box to neatly squeeze in opposite the spare tyre, wedged underneath the boot gutter, also neat
I did a defensive driver training course at eastern creek...
I picked up a cheap exhuast on ebay second hand, 2 1/4 with a single muffler and came with a spare empty cat for $50. Put it on and was impressed with the note!
Then came the body work which it still in process. Getting all of dents straightend out, and cutting out the fairly bad rear rust and welding a new panel in. My panel beater is a lazy **** and only works sundays lol
So its coming along slowly. But he does very good work.
Donor panel... absolutely no rust! And i mean not even chipped paint and surface rust.
How it looks at the moment
UPDATE!
All the dents and dings have now been beat, bogged and primered and it is now straight as gun barrel.
The keener eyed ones amongst you will notice its got no boot and for good reason. Started the serious body work today got the rear window and boot lip rist cut out and the panel in.
Got the boot lid off and popped the rear window out, it was not pretty!
Like, bad....
After it had been cut out.
On the donor panel, the glue used to hold the window in was very thick, sticky and moist... on mine it had fully dried out, absorbed moisture and rusted away my window lip
And the car looking like this
Much better
- that took no time at all
Yet to be welded in yet, just made to fit and screwed in - thats next week.
How it sits currently.
All bogged up and sanded. Just needs a final sand, paint, and the window to be put back in - and its done
No more rust blowing out, no more leeking boot.
Its getting there!
When its done it'll of still worked out to be cheaper then buying other rust free VLs for $4000+ which i was looking at, and now i know its totally rust free and been done properly as im planning on keeping the car for a while...
All bogged sanded and painted. Will be getting a coat of white tomorrow, the window put back in and the boot lid back on. Great success.
Im on school holidays now, being the young punk that i am, and i'm gunna knock up a custom boot layout which im pretty pumped for, should look awesome.
The front is jus starting to blow out.. few bubbles along it so thats next.
I got a few quotes for the front windscreen, and the best was supply of a new front screen, fitment and a new rubber top and bottom all for $200 so ill be chasing that up and itll all be sorted then!
I was hunting around everywhere for a LSD and was almost going to mini spool it when i couldnt find a LSD for less then $300..
Until i found a 2.92 25 spline borgwarner LSD from a 302 XD falcon for $80
Went out to WSID the other night for $50 of fun. Ran 3 16.3's and one 16.2.
Atleast im consistently slow
The car is currently sitting on axle stands with no diff in it as it is in the process of a LSD.
My LSD centre is at the diff shop currently being reco'd with two new bearings and being re shimmed so itll be tight as
Im going to get them to fit it to my stripped diff, then ill come and bolt it all back into the car.
Itll be good fun at an aggressive driver training course that im attending shortly and during '+100hp' wet weather. Hey, im a P Plater.
Started the front windscreen. The rust does look to be nearly as bad as the back (touch wood) but still needs doing.. do it once, do it right.
I took all the plastic trim of and peeled of the rubber molding.
I wanna keep the trim for the OG look and it luckily didnt snap, just broke the plastic tabs underneath. No biggue, ill just glue them back on
Piano wire
WOOOOO
Got the front windscreen out. Not much rust in there, just a few little holes and some rust bubbles. Despite everyone telling me the windscreen would snap, it wouldnt of cracked if i didnt accidentally pinch the glass with a pair if pliers when i was trying to pull out the trim clips. I was quoted $180 for a new screen fitted with a new seal, which isnt bad at all.
Got the front done. Can anyone give me any feedback for putting in a new windscreen... does everything fully get stripped out and new gear put in? The rubber lip visible from the inside of the car with the wire mesh inside it?
Rust free VL? I THINK SO!
Got my new windscreen in today, supplied and fitted for $180, nice.
Used a one piece mould. I wanted to put the factory side plastic trims back on for the original look...
But the new mould is wider then the original one so it looks out of place. No matter! Now i've just gotta bog up the locating holes