rch-13z
Former Photoshop Whore
- Joined
- Jan 15, 2008
- Messages
- 626
- Reaction score
- 262
- Points
- 63
- Age
- 38
- Location
- South-West Sydney
- Website
- www.karcreations.com.au
- Members Ride
- VT Exec
Hi All,
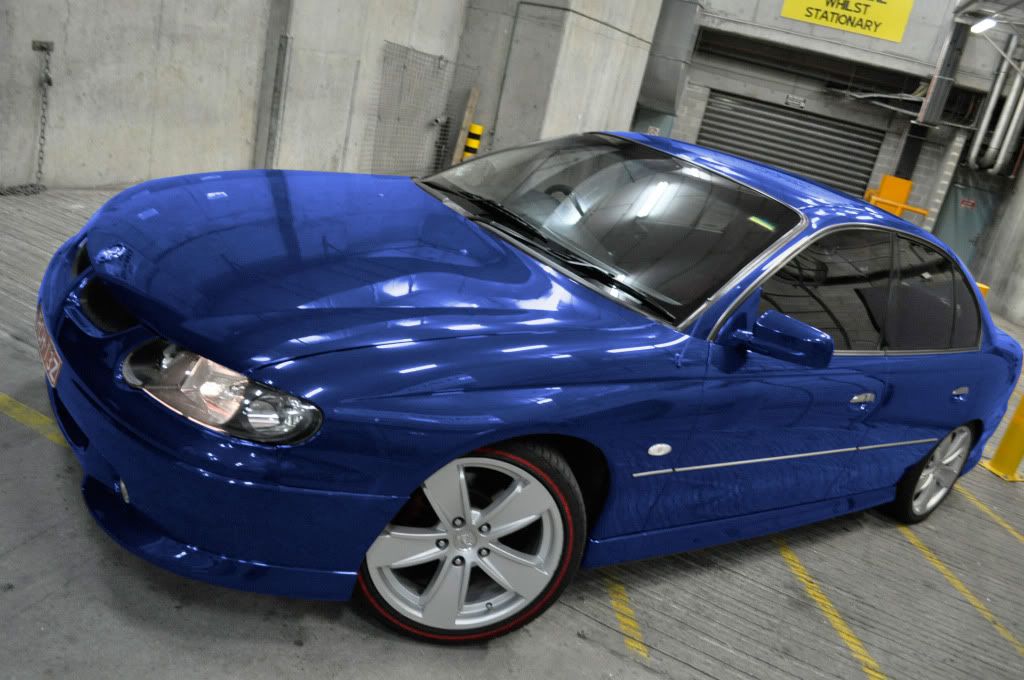
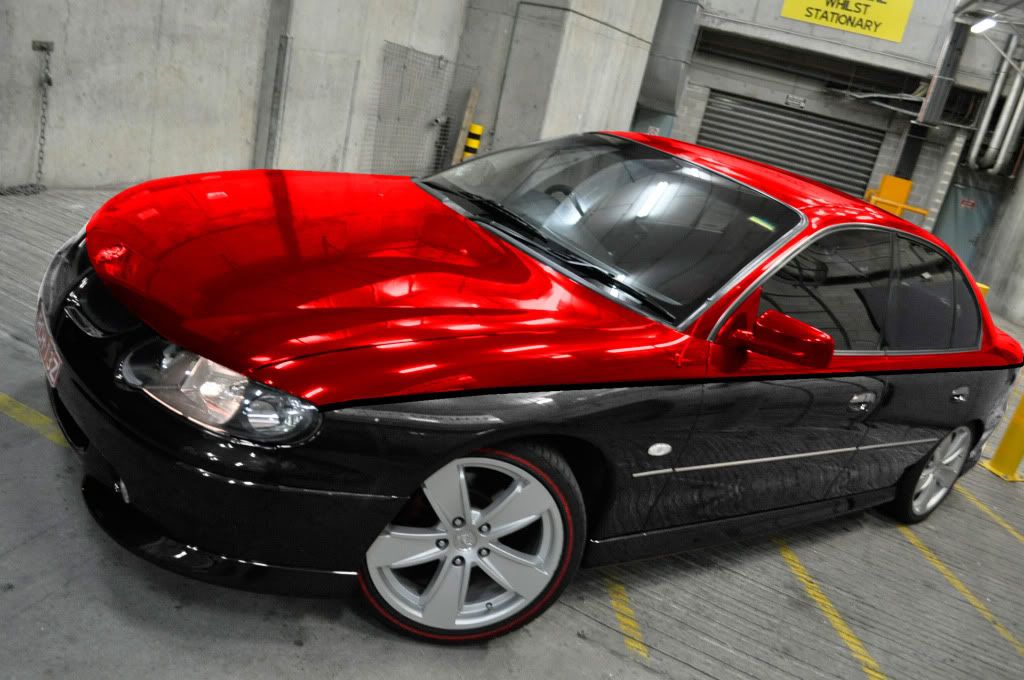
Following on from levymetal's post about lowering and changing rim's I thought I'd do one about changing colours and tone's...
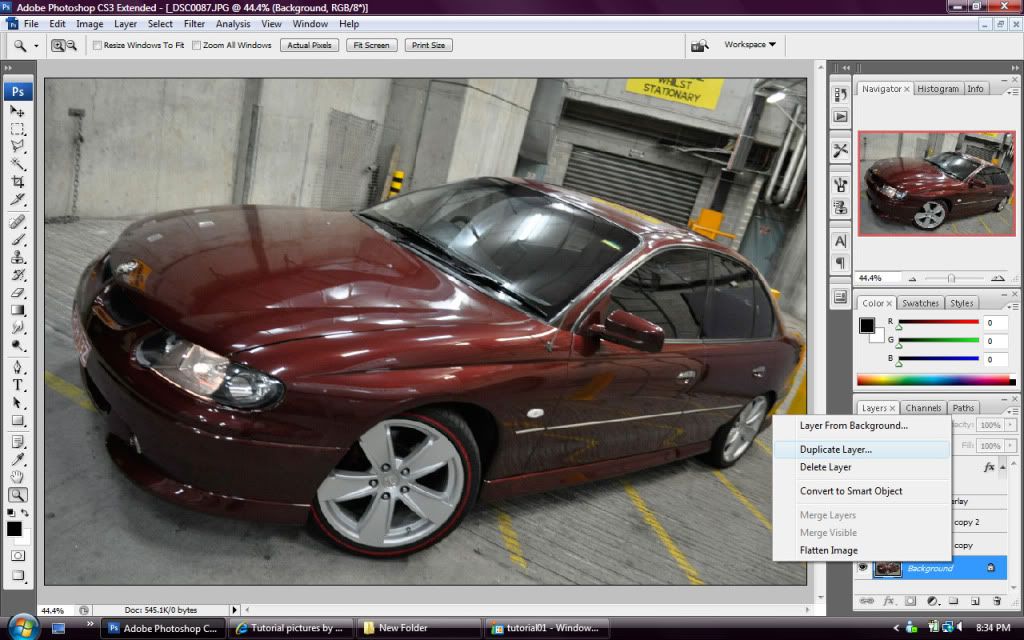
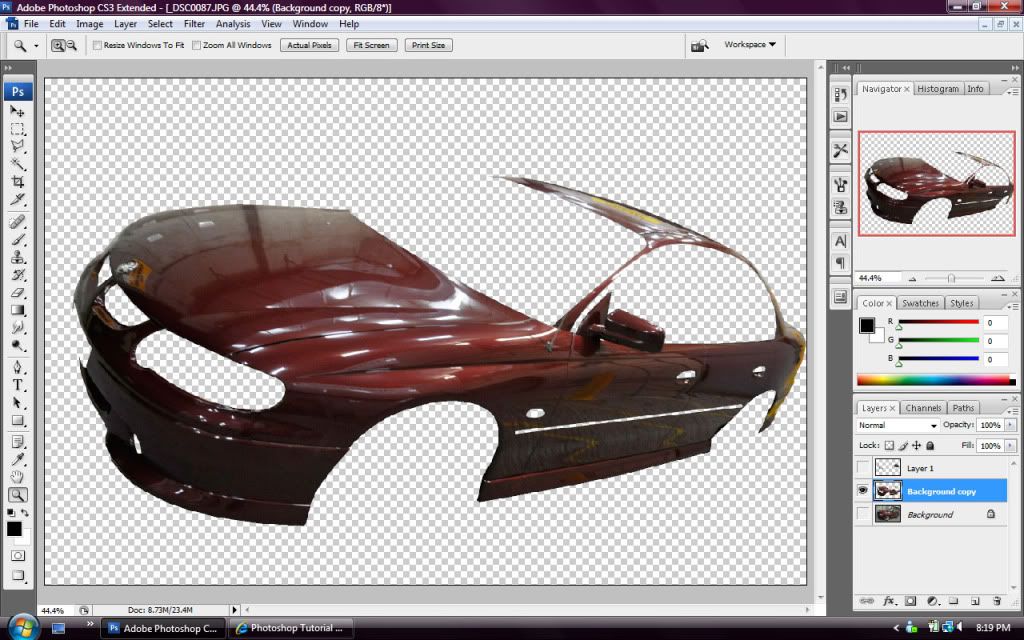
1. Start off with the image in photoshop, then as pictured below create a duplicate layer to cut up.
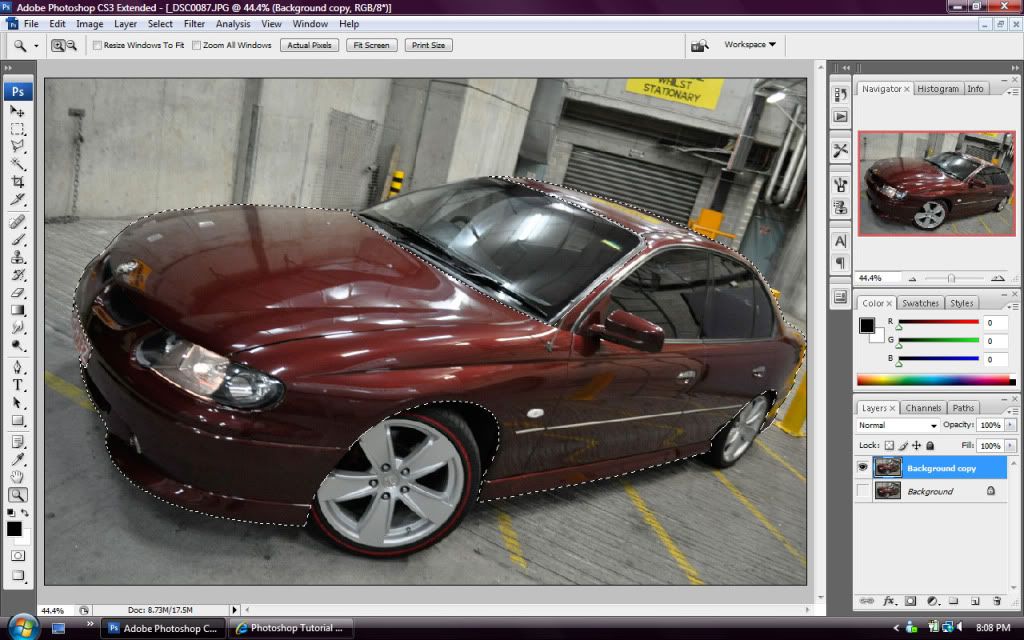
2. Then using the polygonal lasso tool select the outside of the body of the car, in this sort of scenario patience and a steady hand ends up giving you a much better result.
3. Hide the original background layer.
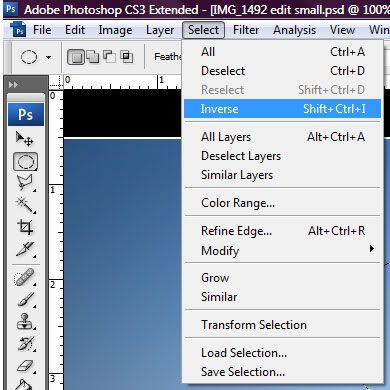
4. Once you've gone around the whole car click Select/Inverse which will highlight the background of the image instead of the car itself. Then use the eraser tool to get rid of the background, this will leave you with the body only on that layer. Because you've created a 2nd layer you'll still have the original background on your hidden layer.
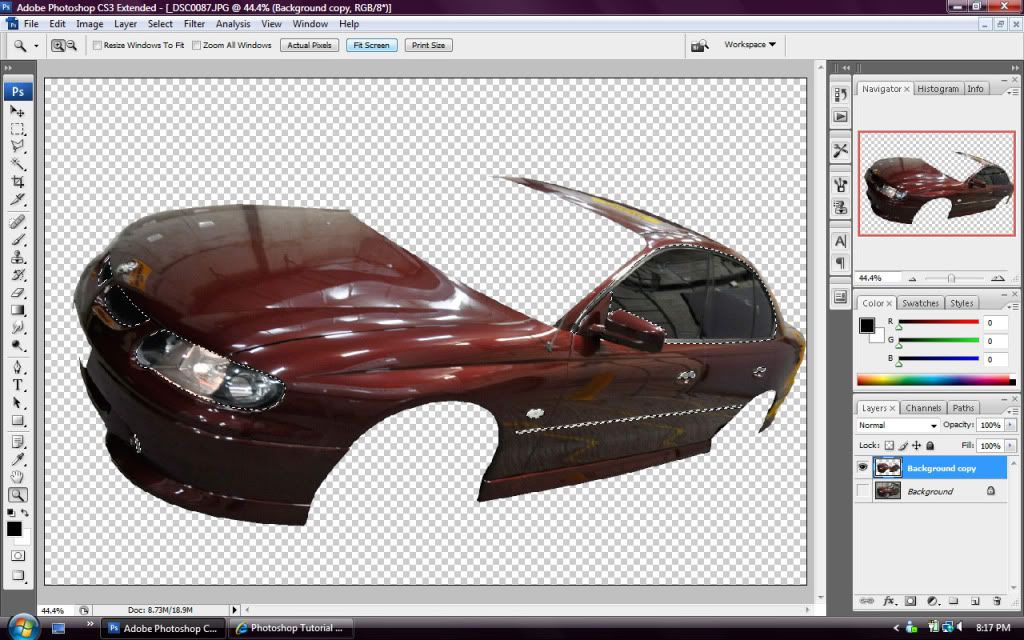
5. Now you can go about using the polygonal lasso tool to select headlights, handles, windows, grills etc etc...... Once you've selected all those things use the eraser tool to wipe it all away.
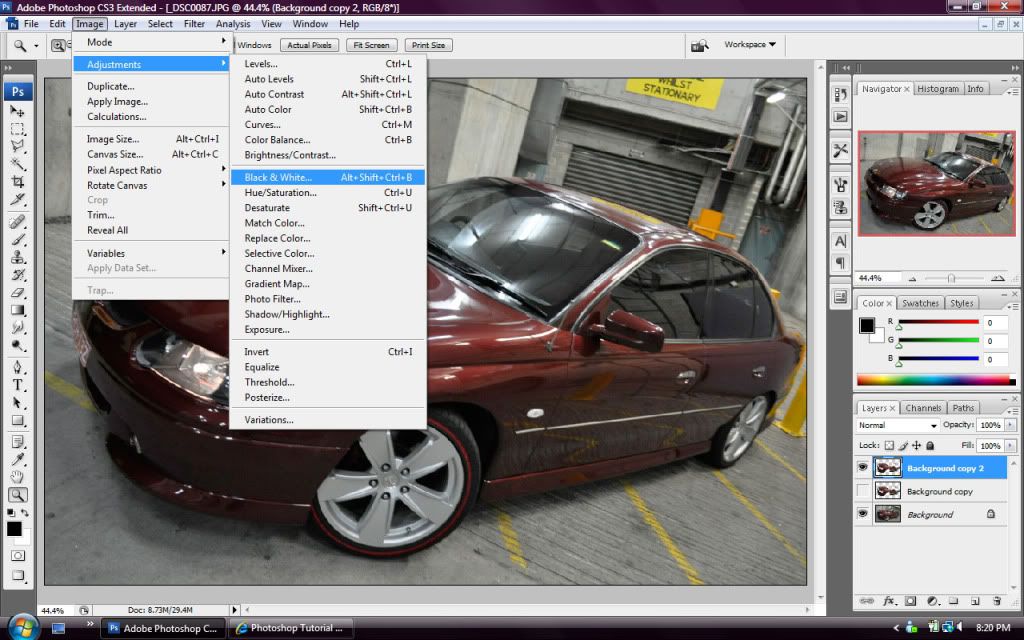
6. Now un-hide the original background layer and your image should look as it was when you started. As pictured click on Image / Adjustments / Black & White. This will mean you start off with a fresh batch of colours instead start with an odd colour (I find it helps to get the actual colour you want)
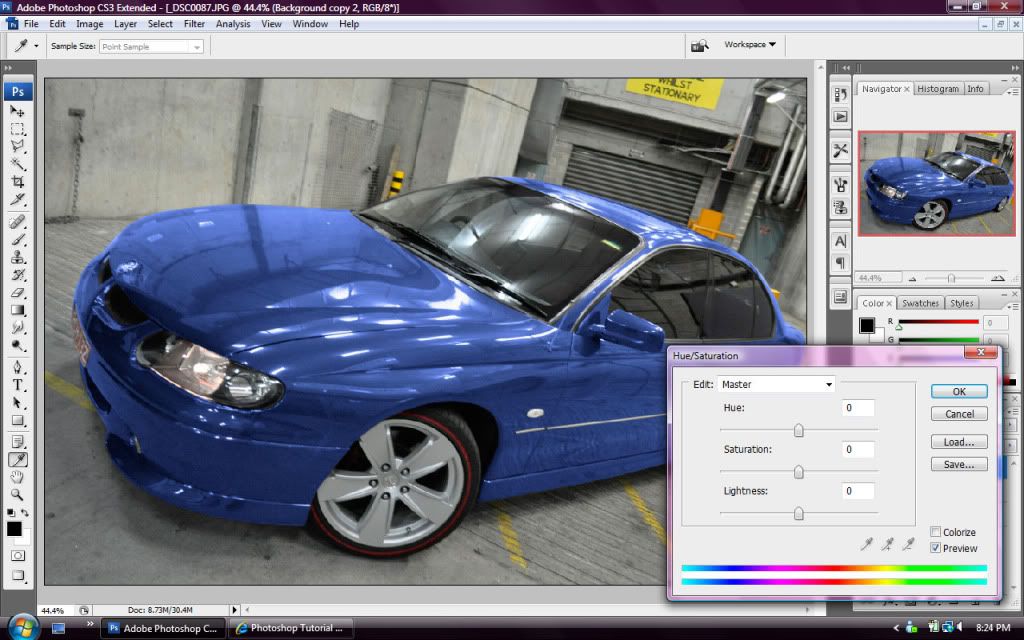
7. The car should not be Black & White but the wheels & background should still be the original colour. Now to get colour click Image / Adjustments / Hue/Saturation.

8. Now the Hue / Saturation should be up, in the bottom ride hand side of the box is should say "colourize" select that option then shift the 3 different options which will change the colour and tones.....
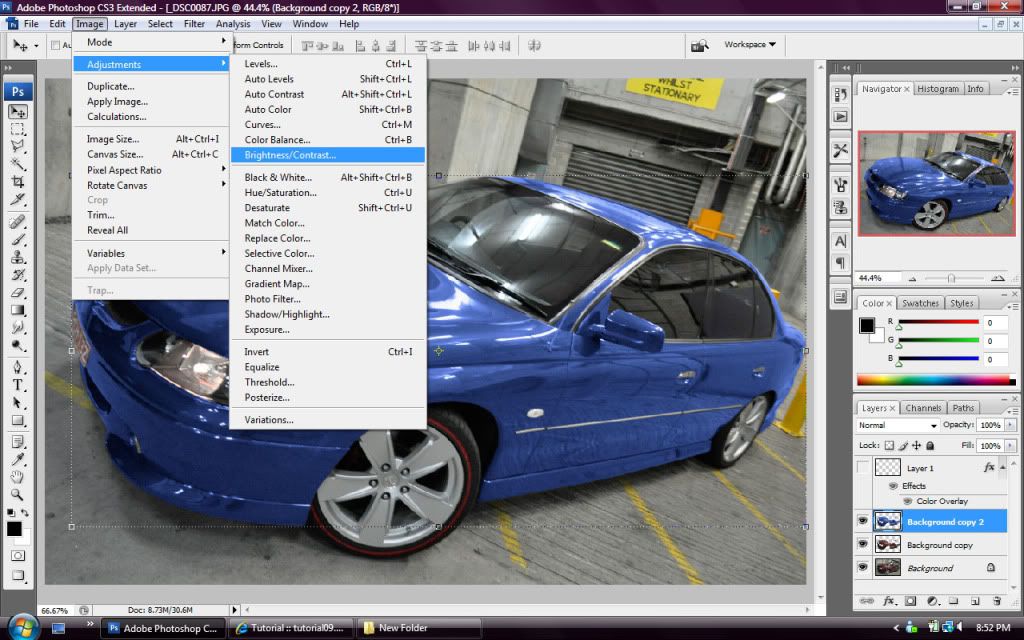
9. Now if you would like to brighten/darken the colour click Image / Adjustments / Brightness & Contrast & then play with the 2 options which can change the darkeness or the colour and contrast.
10. Now you should have the colour you want & your done!
And the tyre walls changed from red to white...

Two-toning etc etc would be as simple as creating extra layers & placing them as you want!
Photoshoppers - Let me know if this makes no sense or if I've missed some essential pieces?
Regards
Richard
Following on from levymetal's post about lowering and changing rim's I thought I'd do one about changing colours and tone's...
1. Start off with the image in photoshop, then as pictured below create a duplicate layer to cut up.
2. Then using the polygonal lasso tool select the outside of the body of the car, in this sort of scenario patience and a steady hand ends up giving you a much better result.
3. Hide the original background layer.
4. Once you've gone around the whole car click Select/Inverse which will highlight the background of the image instead of the car itself. Then use the eraser tool to get rid of the background, this will leave you with the body only on that layer. Because you've created a 2nd layer you'll still have the original background on your hidden layer.
5. Now you can go about using the polygonal lasso tool to select headlights, handles, windows, grills etc etc...... Once you've selected all those things use the eraser tool to wipe it all away.
6. Now un-hide the original background layer and your image should look as it was when you started. As pictured click on Image / Adjustments / Black & White. This will mean you start off with a fresh batch of colours instead start with an odd colour (I find it helps to get the actual colour you want)
7. The car should not be Black & White but the wheels & background should still be the original colour. Now to get colour click Image / Adjustments / Hue/Saturation.
8. Now the Hue / Saturation should be up, in the bottom ride hand side of the box is should say "colourize" select that option then shift the 3 different options which will change the colour and tones.....
9. Now if you would like to brighten/darken the colour click Image / Adjustments / Brightness & Contrast & then play with the 2 options which can change the darkeness or the colour and contrast.
10. Now you should have the colour you want & your done!
And the tyre walls changed from red to white...
Two-toning etc etc would be as simple as creating extra layers & placing them as you want!
Photoshoppers - Let me know if this makes no sense or if I've missed some essential pieces?
Regards
Richard