Irukanji
101% Lunacy
- Joined
- Jan 27, 2012
- Messages
- 111
- Reaction score
- 5
- Points
- 18
- Age
- 33
- Location
- Heathcote
- Members Ride
- 2000 VT Exec LS1 A4
The jelly is back at it, sold the 6 and bought an 8 like every responsible child should. However, being a lead foot has it's disadvantages and with 270000 on the clock, **** breaks.
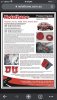
Now, I did a lot of googling and it was the same threads over and over with no real "how-to", so I just winged it. I went with the Nolathane bushes, but the idea is identical to the others.
Tools
600mm breaker bar
18mm socket
15mm socket
Ratchet
Jack and stands
Screwdriver or prybar
Rattle gun (optional)
Torque Wrench
Method
1. With the breaker bar and 18mm socket, crack the big bolts a couple of turns. Don't worry, the brace plate will keep it all there.
2. Chock front wheels with your preferred colour of brick.(to keep the internet OH&S folk happy)
3. Jack car from the diff as high as required to get your stands onto the rear jack point on the sill(the 5mm thick bit, where the boot jack would go on if you have a blow out on the hwy). This is where you realise trigonometry is right and it's pulling the front tyres away from the bricks.
4. Do one side at a time. Bring your jack around to the side you're working on. Jack it up enough to contact the spot just behind the bush where it dips down towards the diff(there are 2 holes drilled there). Use a rag or something if you're worried. You're not trying to lift the car, just hold the arm in position.
5. Unbolt the 3x 15mm bolts and remove the retaining plate. Undo the 18mm bolt you loosened. It's a tight ####er, I just used the breaker bar to get it out a few mm and rattled it out after that.
6. Use the prybar/screwdriver to lever the old bush out. Get it under the lip and work it around. It's not tight, but clearance may be an issue.
7. Wipe the rust/sand/random white stuff/spider eggs out and feel for any burrs.
8. Loosen the jack, the subframe is still held by the other side and the diff mounts so you'll be ok.
9. Stick the top ring on top and work it into the hole. I had to use a small screwdriver to help get it in.
10. Insert the big bushing into the hole.
11. Jack the arm back up gently until the top pad touches the body. Insert the 3 15mm bolts with the plate. Insert the 18mm into the hole. If you do it right, it won't have moved and it will all go in nicely.
12. Tighten the 15mm bolts to "60-70Nm" and the 18mm to "125Nm + 30-40 degrees"
Rinse and repeat for the other side. Take it for a spin and marvel at the improved rear end feel compared to the split, abused rubber ones.
I took photos but they turned out ****, fml. Enjoy.