Welcome to Just Commodores, a site specifically designed for all people who share the same passion as yourself.

New Posts Contact us

Just Commodores Forum Community

It takes just a moment to join our fantastic community

Register

Rusty 66 Chevelle Project

383 hatch

Well-Known Member
Joined
Jun 14, 2005
Messages
3,922
Reaction score
67
Points
48
Age
41
Location
Cowes, Phillip Island
Members Ride
VG Ute 5.0,Torana hatch 383,WB Ute 5.0,VR stato5.0
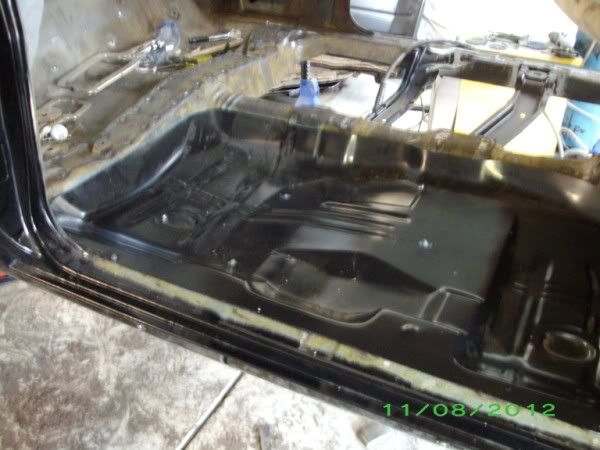
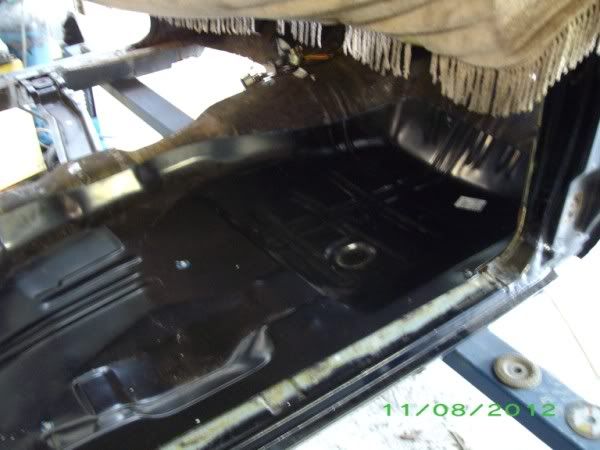
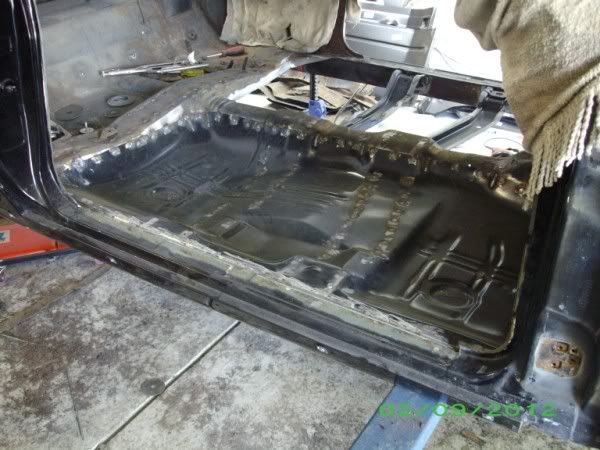
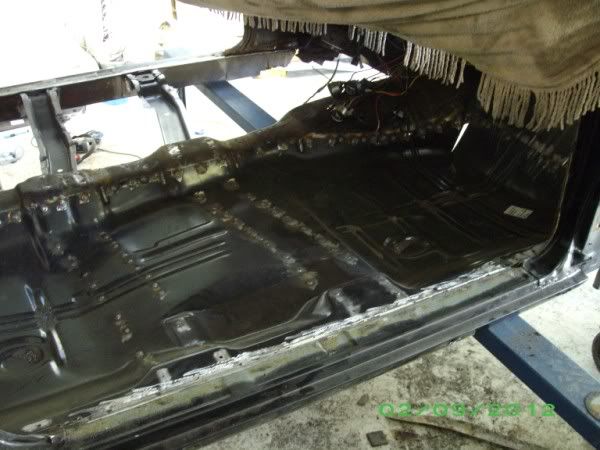
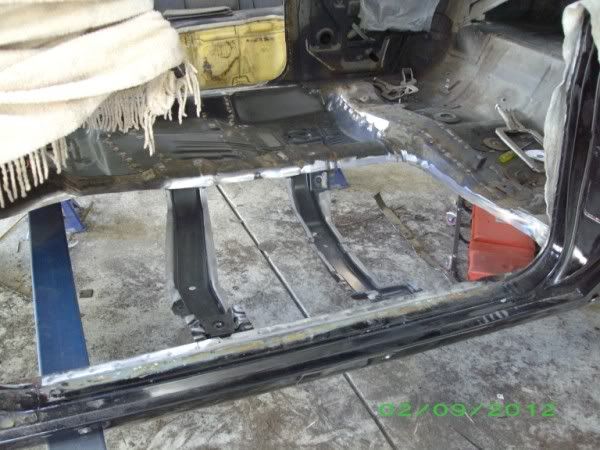
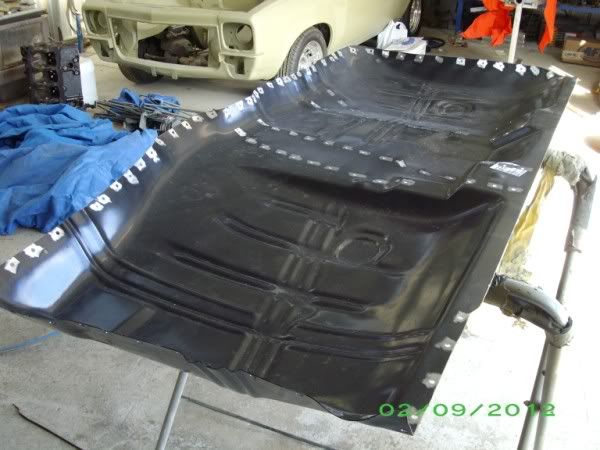
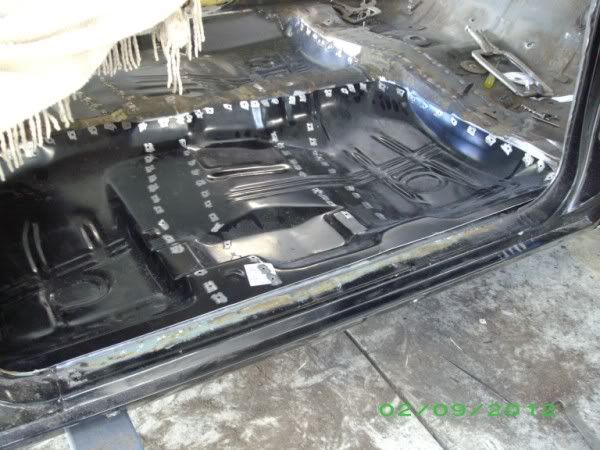
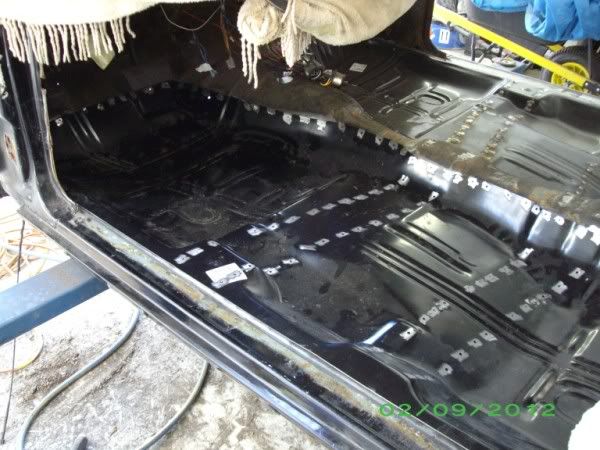
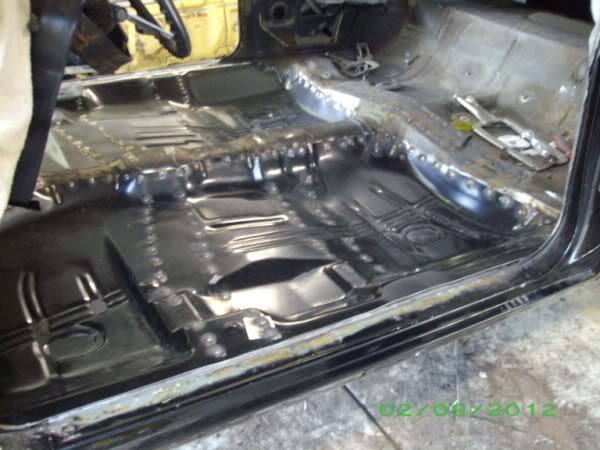
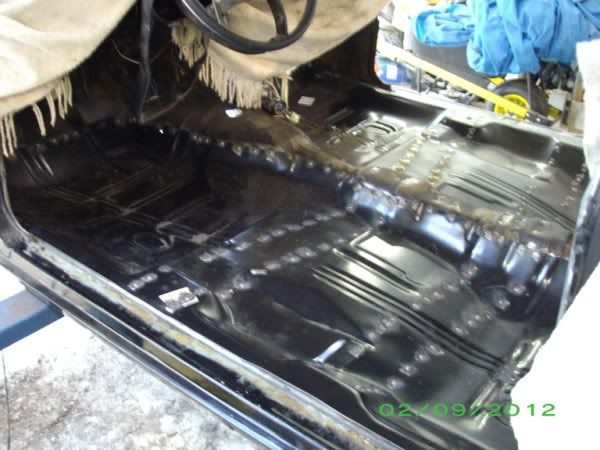
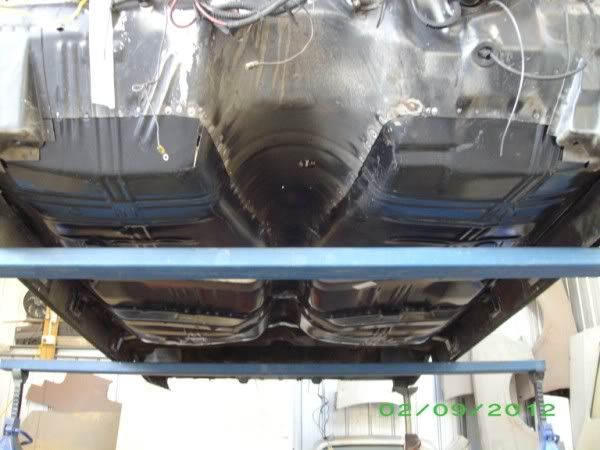
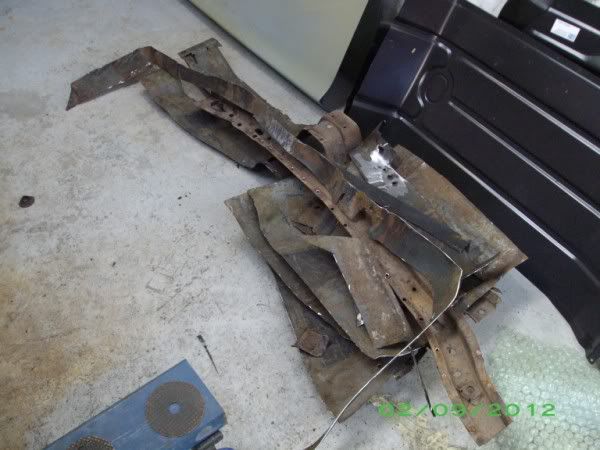
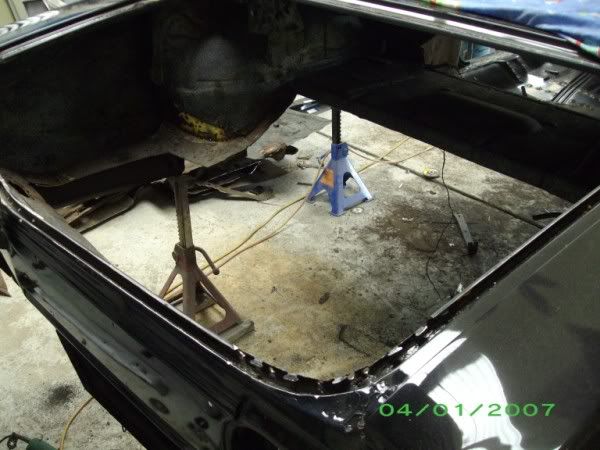
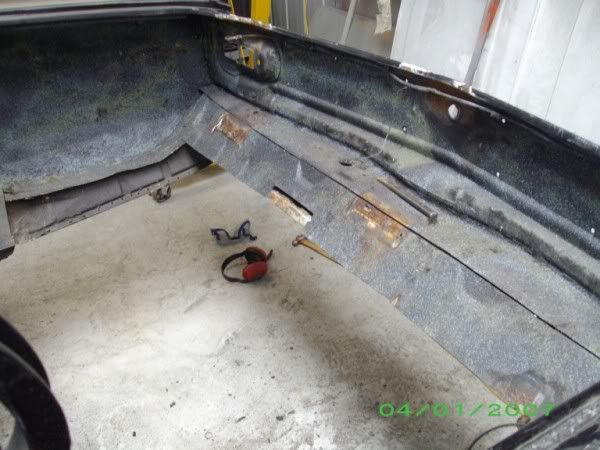
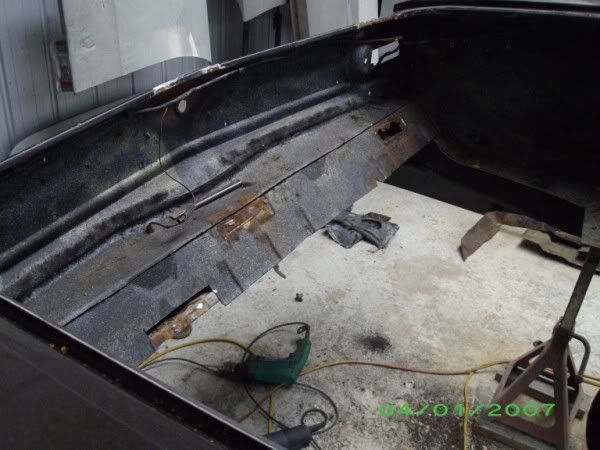
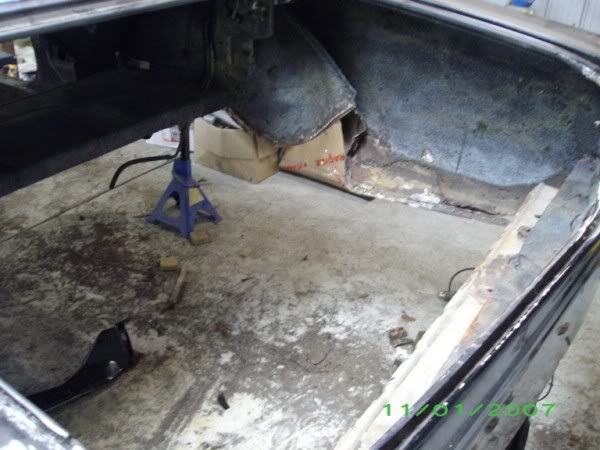
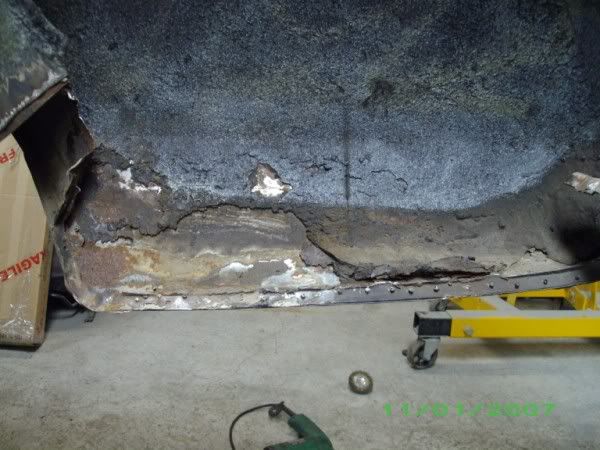
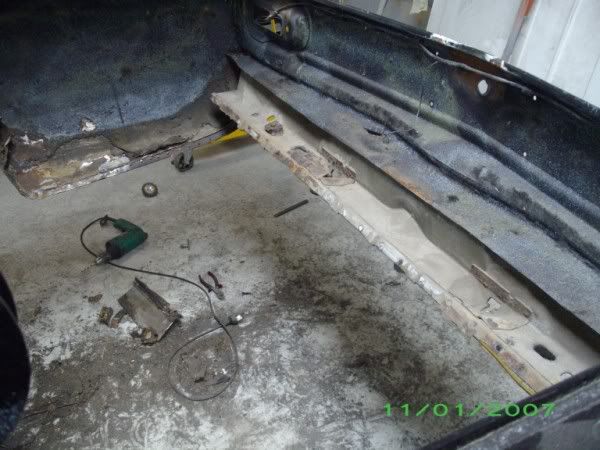
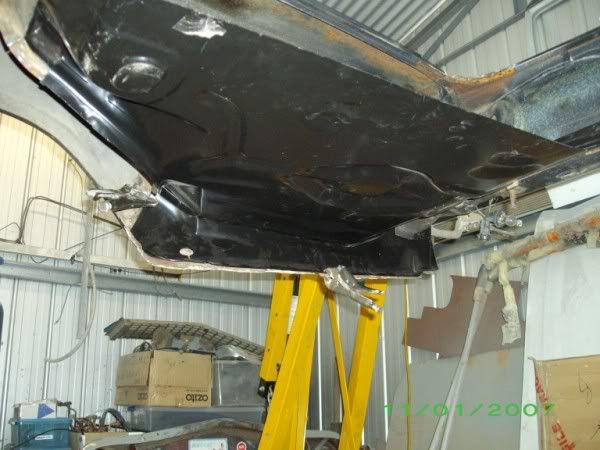
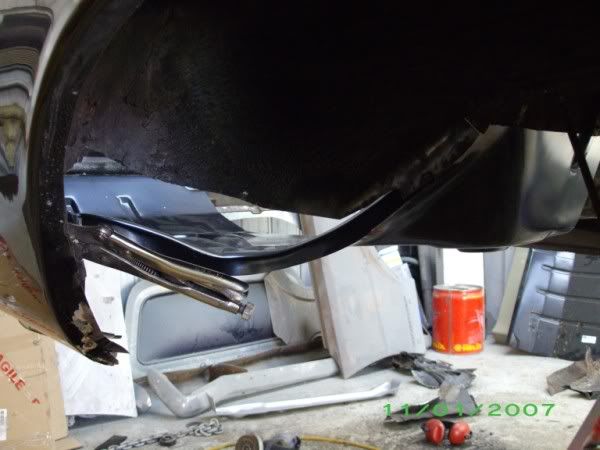
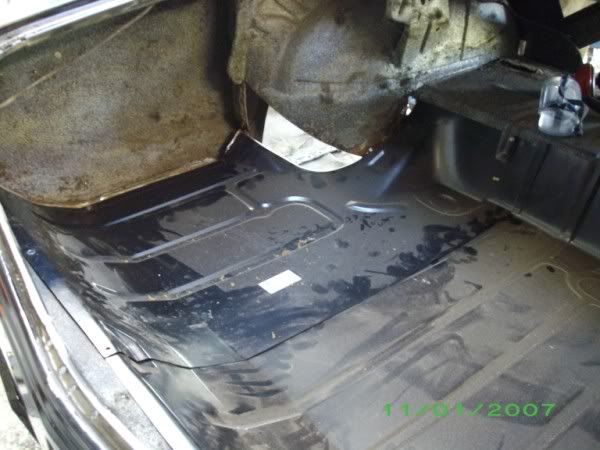
Well, actually the lower part of American cars from a certain year (can't remember exactly what year) are galvanised. This is quiet evident when i have seen inside the sills, the outer and inner skin are still galvanised and still in good condition. Obviously the floor pan isn't galvanised though. It's only rusted in the sills because dirt and water has accumulated behind the body mounts and rusted it away.

In all honesty, had it not been for the galvanising, the rust would have been much more advanced (probably hard to believe, i know).
 

ephect

Donating Member
Joined
Jul 27, 2006
Messages
5,918
Reaction score
15,521
Points
113
Location
Melbourne
Members Ride
VS Acclaim V6
I'm quiet surprised the fitment of the replacement panels fit well, normally (as u'd know) ur massaging it to fit.

Loving the updates and the work u do. :)

Cheers
 

ephect

Donating Member
Joined
Jul 27, 2006
Messages
5,918
Reaction score
15,521
Points
113
Location
Melbourne
Members Ride
VS Acclaim V6
I'm quite surprised the fitment of the replacement panels fit well, normally (as u'd know) ur massaging it to fit.

Loving the updates and the work u do. :)

Cheers
 

GypsyNz

Member
Joined
Oct 3, 2011
Messages
147
Reaction score
18
Points
18
Age
53
Location
New Zealand
Members Ride
Vy Wagon Ls1 & Vn Wagon
I'm sure i'm not alone in saying this.........UPDATES???:yeah:
 

383 hatch

Well-Known Member
Joined
Jun 14, 2005
Messages
3,922
Reaction score
67
Points
48
Age
41
Location
Cowes, Phillip Island
Members Ride
VG Ute 5.0,Torana hatch 383,WB Ute 5.0,VR stato5.0
Well, it's been a little while since i updated this, i've had things to do the last couple of weekends so i havn't touched it.

Today i got some time to work on it.

Last time i worked on it i didn't update so i'll start there. I got the R/H floor section all trimmed and welded in.

Panel sat in place and marked with a paint pen.
IMGP3253600x450.jpg

IMGP3254600x450.jpg


Once i'd done that, i pulled it back out and cut about an inch below the line. This gives me a join to plug weld the new floor panel in. Then i drilled holes all around the edge and where the cross braces go. Then i welded it all in. I forgot to take pics of all those steps, but i did get some of the L/H side.

All welded in.
IMGP3269600x450.jpg

IMGP3270600x450.jpg


Today i did the L/H floor section.

Floor all cut and cleaned back to metal where i need to weld.
IMGP3271600x450.jpg


New panel all drilled and cleaned ready for plug welding.
IMGP3272600x450.jpg


All in place ready to weld.
IMGP3282600x450.jpg

IMGP3283600x450.jpg


Then after a plug welding marathon, mostly welded in.
IMGP3285600x450.jpg

IMGP3286600x450.jpg


Underside.
IMGP3287600x450.jpg


The ever growing pile of rusted out metal.
IMGP3284600x450.jpg


That's about where i got to today, all i have to do now is weld along the sill panel and that side is finished. Then it's time to move on to the boot floor....
 

Pub247

Well-Known Member
Joined
Apr 14, 2006
Messages
3,372
Reaction score
59
Points
48
Location
Melbourne S.E.
Members Ride
Ford Fairmont
what do you do with the lap join just run seam sealer around it?
 

383 hatch

Well-Known Member
Joined
Jun 14, 2005
Messages
3,922
Reaction score
67
Points
48
Age
41
Location
Cowes, Phillip Island
Members Ride
VG Ute 5.0,Torana hatch 383,WB Ute 5.0,VR stato5.0
Thanks Ari.

More progress.

Last Sunday i moved on to the boot floor. Obviously i started by chopping most of it out :p

I was left with this:
IMGP3305600x450_zpsba478a80.jpg

IMGP3306600x450_zpsd7322f5e.jpg

IMGP3307600x450_zpsb7648105.jpg

IMGP3308600x450_zpsbad3966f.jpg


Then today i cut out the R/H drop down panel and rear of the wheel arch. Wheel arch had been "repaired" (lol) before but i cut it all out to start from scratch.
IMGP3316600x450_zps89e36e38.jpg


Which also revealed this tasty repair. New piece of steel pop riveted straight over the old piece of rusted out steel. The usual American work. This will get repaired properly at a later date when the body work is done.
IMGP3317600x450_zps79f1375b.jpg


Then i unpicked the remaining steel at the rear of the floor. This also revealed that the rear body mount is in good nick. The actual body mounts/bolts themselves will get repaired while this is all apart.
IMGP3318600x450_zpsec3052c2.jpg


With all that done, i started to fit the floor pan and drop panel back in place.
IMGP3319600x450_zps07cb3680.jpg

IMGP3320600x450_zps983fee44.jpg


Underneath.
IMGP3321600x450_zps8f4bf77c.jpg


This shows how much of the wheel arch i have to rebuild.
IMGP3322600x450_zps3b323811.jpg


Then i moved on to the other side. Same process, except i didn't replace the drop down panel as it was fine.

Panel back in.
IMGP3323600x450_zps2a996628.jpg


As can be seen i have to rebuild the wheel arch on this side too.

All 3 sections screwed in place.
IMGP3325600x450_zpsbbeaeae4.jpg


That's where i left it for today.
 
Top