Taken from
Auto To Manual!!!! VL Gearbox Changeover [Archive] - calaisturbo.com.au. All credit goes to
Jim and Eddie
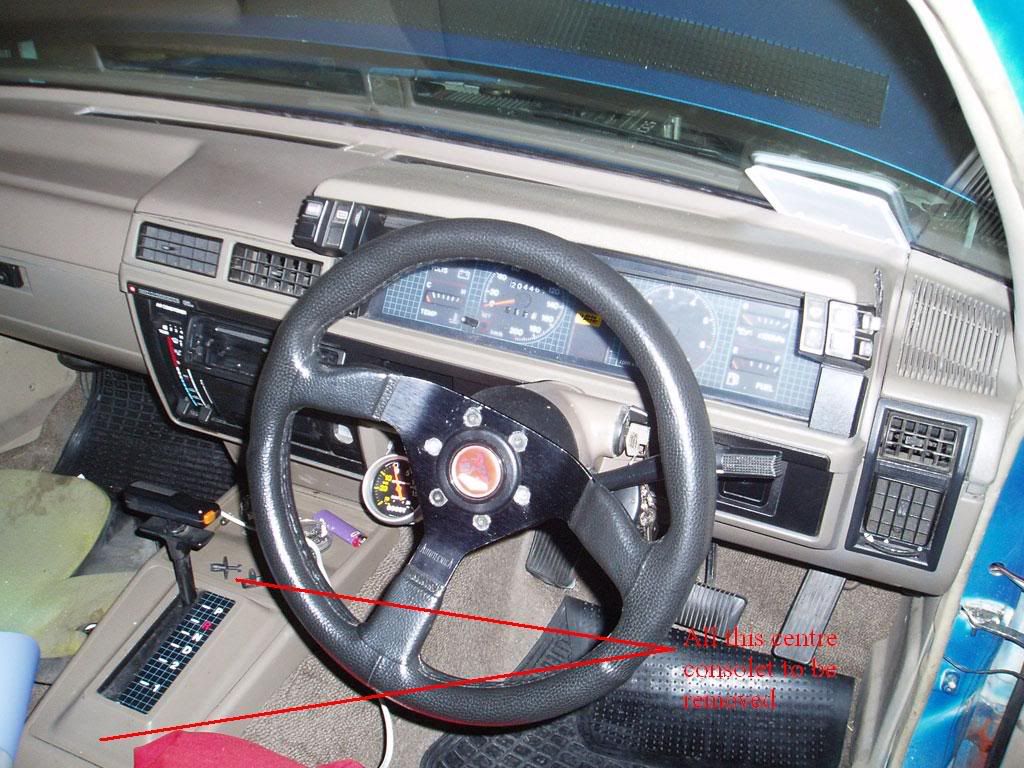
Step 1: Remove the auto shifter and push the Auto selector cable down and out out through the rubber boot in the transmission tunnel.
Drill out the rivets to remove the entire auto shifter and then you will be able to see down and on top of ur current aut gearbox. You will probably need to take out at least half the center console to make it easier to remove the auto shifter and all.
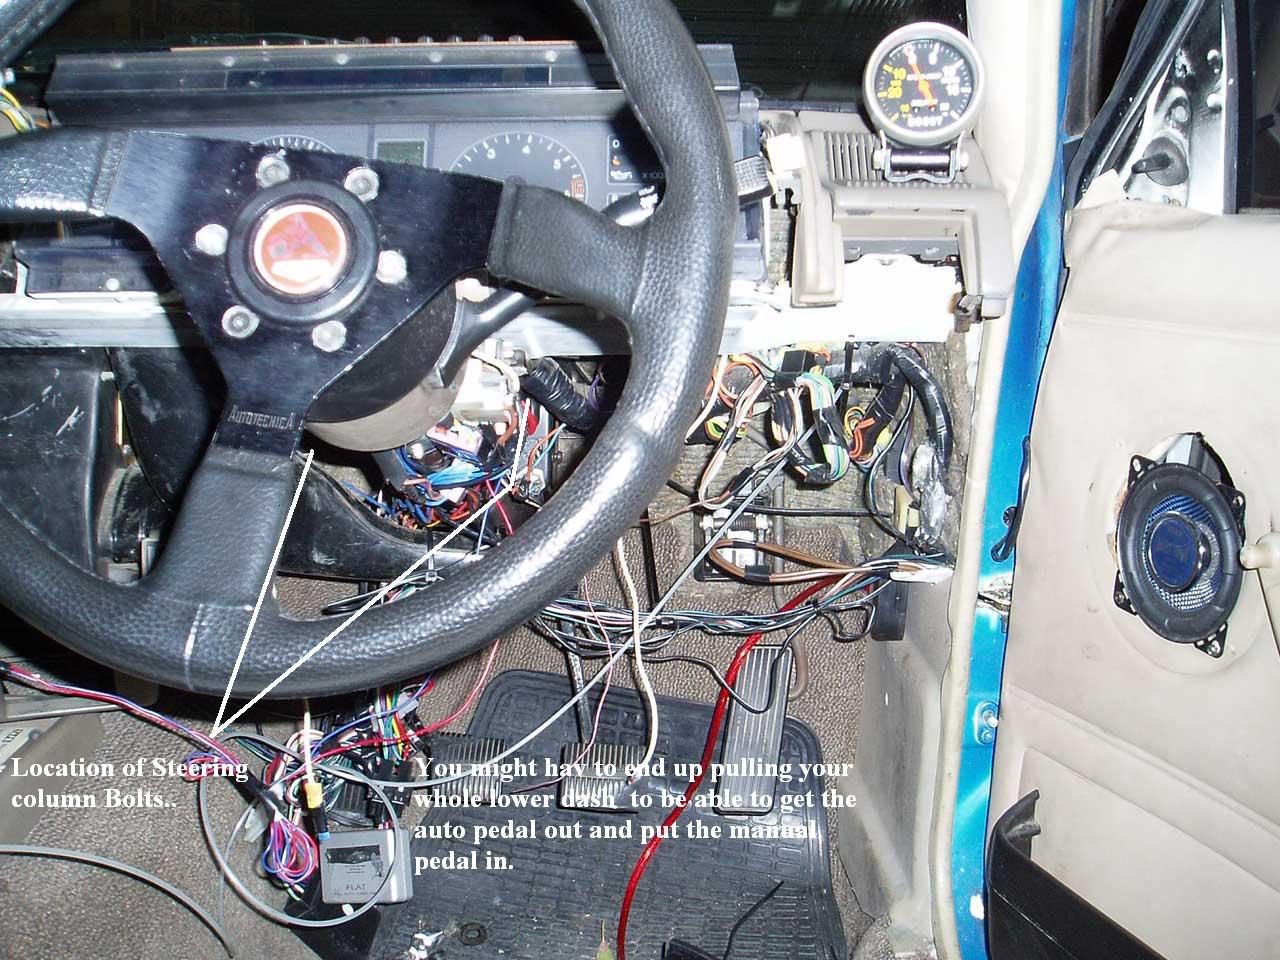
Step 2: Take out the auto brake pedal. Take out the bottom half of the drivers side dash to make it easier later on to put in the manual clutch and brake pedal in. Its just a matter of locating all the bolts that are holding the current brake pedal assembly in. make sure u take out the circlip off the pin that holds the brake pedal to the brake boosters pushrod.
Step 3: Unbolt the starter motor. and every bolt around the bellhousing hardest ones to get to are the ones right behind the head/rocker cover but patience is the key..
while ur up top in the back section of the motor unplug the vaccum line that comes down from the auto gearbox and into the back of the intake manifold. make sure you block the hole on the back of the intake manifold so there is no airleaks.
Step 4: Slide under neath the car and unscrew the speedo drive cable and unplug the wiring harness for the auto gearbox, should be two plugs. DO NOT Unbolt the gearbox mounts as yet!!
Unscrew the transmission cooler lines from the gearbox and the back right hand side of the radiator and pull them out, NOTE: have a bucket ready if you havent already drained the transmission oil.
Step 5: Take out the tailshaft. start unbolting it from the the front of the diff and work your way towards the gearbox. drob the back part of the tailshaft and slide the whole thing out. NOTE: have a bucket ready again, becoz as soon as you pull out that tailshaft more oil will probly come out again..
Step 6: Pull the gearbox out. Place a trolley Jack under the auto gearbox with a flat piece of timber going across the oil pan of the gearbox just so it dusnt get damaged. Unbolt the gearbox mounts a lil so that you can visibly see that the box has lowered. Jack up the gearbox so that the weight is off the gearbox mount nuts. Take off the nuts and lower gearbox. position yourself under the car and behind the gearbox so that you can wiggle and jiggle the gearbox untill it slides out and drops to the floor.
Slide the gearbox out from underneath the car and put it on the side for sale or most likely scrap metal.
Step 7: Take off the torque converter. If it is still on the back part of the engine. Take off the flex plate / Auto Flywheel. Undo the bolts holding on the flexplate and put aside along with your auto gearbox.
Step 8: Inside the crank where the input shaft goes on the auto there will be a little brass spigot bearing/bush, you need to pull this out, which can be a mission, a slide hammer works sometimes, or you can use a whole lot of grease and the input shaft off the auto gearbox. But if all else fails it might require careful work with a die grinder.
The manuals need a different spigot bearing/bush. Should be pretty cheap from repco about 3 to 8 dollars. Just needs to be banged back in, becareful not to mushroom the end of it or there will be dramas getting the manual in.
Step 9: Put the Manual flywheel on. Because its much thicker you cannot use your flexplate bolts (These Bolt will have AT written on the head). Flywheel bolts (These bolts have MT written on them) should be done up very tight preferably with a rattle gun, but dont strip them.
After you fit the flywheel (if its not new or not machined) get some wax and grease remover or even metholated spirits and clean the surface of the flywheel, then get some sandpaper and lightly and evenly sand the surface of the flywheel.
Step 10: Once thats done you need to assemble your clutch, Grab your new clutch plate and pressure plate and put it all together on the flywheel. Do not fully tighten all the bolts around the pressure plate as yet. Use a clutch alligning tool to centre the clutch plate. Now tighten the bolts around the presure plate really tightly but again not too much so that you de-thread the bolts. Pull out the clutch alligning tool.
Place the metal gasket on the back of the engine.
Step 10: Get your manual gearbox and If it hasn't been done yet, put the throw-out bearing and clutch fork on the box and check to make sure it works the right way. Fit the slave and pushrod onto the manual box aswell.
Step 11: Remove shifter from the top of the box so that it is way easier to lift up and slide in the transmission tunnel (car).
This is where you might need a pretty strong/muscly mate for some help.
Step 12: Hav a mate lie underneath the car and place the gearbox up on his chest and yourself behind the gearbox (or vice versa). Lift up the gearbox and slide in. Should go in easily, I say this but its always a drama, If it is and doesnt go in all the way wiggle it a lil bit intill in goes in all the way. From memory you have to turn the gearbox anti clockwise a little bit when your standing under the car facing the motor. No more than 90deg. When you get it up turn it back up and push it on the dowels.
Step 13: Do up the bolts on the bellhousing and the engine, put the starter motor back in, bit of a hassle this too but like i said: patience is the key.
jack the gearbox up a little bit so that you can put the shifter in easily enough to screw the bolts back in.
Step 14: Slide the tailshaft in and bolt it back up onto the car. and onto the diff.
Step 15: Put the manual pedal box in. This is a headache for some ppl but i put it in within 30 mins. You will have to drop the steering column down and maybe even have to remove it if still too hard. Place manual pedal box in and bolt it up with the bolts off the old auto brake pedal. line up brake pushrod with the brake pedal slide pin in and click circlip on.
Step 16: Mount the clutch master and line up the clutch puchrod with the clutch pedal and just like the brake pedal put it all together.
Fit the hydralic line from the master cylinder to the slave cylinder and Bleed the system using dot 4 brake fluid or clutch fluid.
Step 17: Hook up the lines on the gearbox for the reverse lights. On the brake pedal hook bac up the plug that was conncted to the brake pedal for the brake lights and hook up the starter motor wires if they hav been disconnected.
Step 18: Change the auto computer with the manual one. If you dont hav a manual computer locate the relay next to the battery and the guard with four wires goin to it of which two are purple, cut the purple wires off, join them/solder them together, tape them.
Step 19: Start her up and enjoy the extra power and luxuries of a manual VL.