Welcome to Just Commodores, a site specifically designed for all people who share the same passion as yourself.

New Posts Contact us

Just Commodores Forum Community

It takes just a moment to join our fantastic community

Register

[General] [VS-VY] How to change Crank Angle Sensor (CAS) with PICS

Don Graham

New Member
Joined
Sep 8, 2017
Messages
2
Reaction score
0
Points
1
Age
56
Location
Qld
Members Ride
Vs series 3 ute
Great info. In the VS model there is ample room to work without removing fan etc,.
I did put a piece of ply in between, up against the radiator, in case any thing flew forward during removal
 

24auhr

New Member
Joined
Feb 19, 2015
Messages
3
Reaction score
1
Points
1
Location
toongabbie
Members Ride
VY Commodore ute
Hi all
i know this thread has been gone for a long time but it seems very usefull .
could someone re-upload the pictures used ?


Hi people,

I noticed there is not a how-to thread for replacing crank angle sensors on the ecotec, yet how popular CAS issues are, I thought I would write one up after recently replacing the CAS in my ute.

What you will need:

Socket set (make sure you have a 24mm for the harmonic balancer bolt)
Assorted tools (screwdrivers, breaker bar etc)
New crank angle sensor - Repco have these for about $70, genuine is about $130 from memory
Harmonic Balancer removal tool - pick one of these up from Supercheap, or repco, for about $20
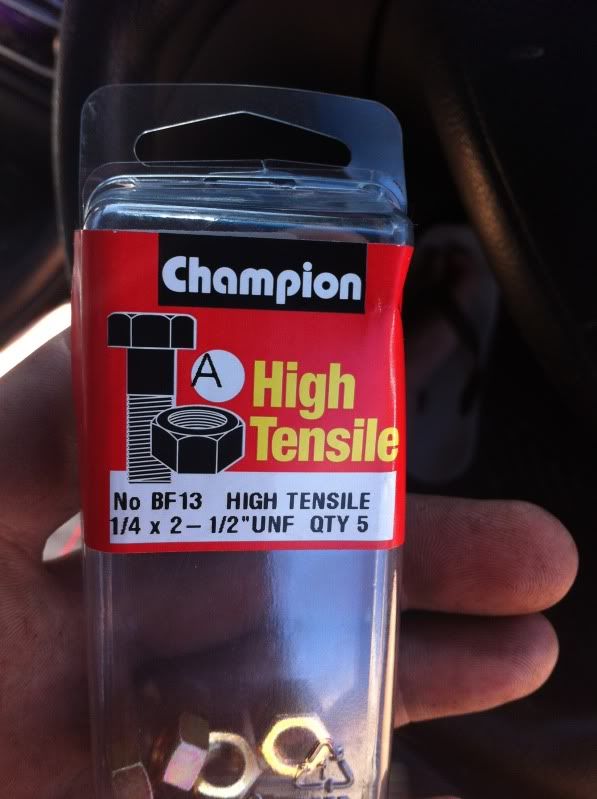
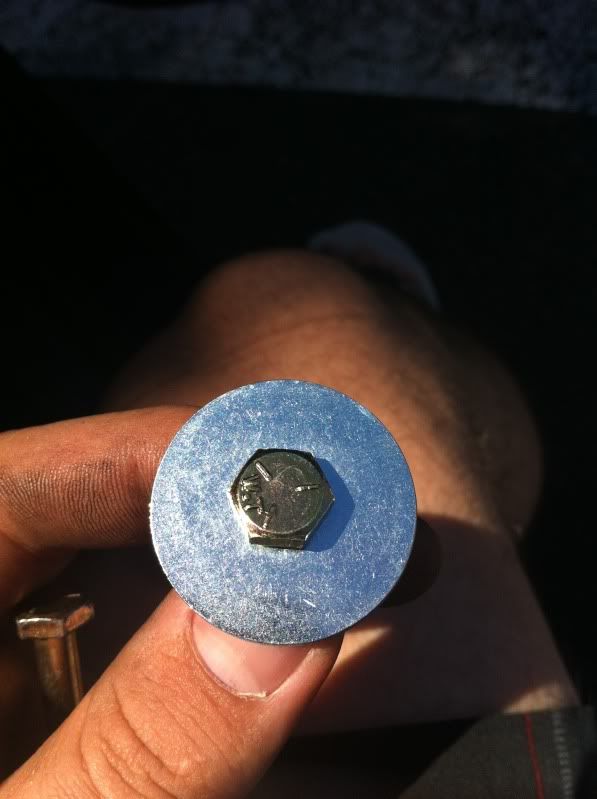
1/2" unf bolts (as pictured below) these are used for removing the balancer as the bolts that come with the tool will not suffice.
Washers, as listed below
Silicone Sealant

IMG_2493.jpg

IMG_2491.jpg


Time taken

Approximately 60 mins

Why would you replace your cas?

If you are getting error code 47, random stalling, car wont start etc, there is a high possibility that you need a replacement CAS

Firstly, check the condition of your serpentine belt (fan belt) if it looks like any of the ribs are worn, or is starting to crack, you may as well replace it while you are at it. Secondly check your oil pressure switch, if its leaking you may want to replace it at the same time - they are very cheap!

Directions

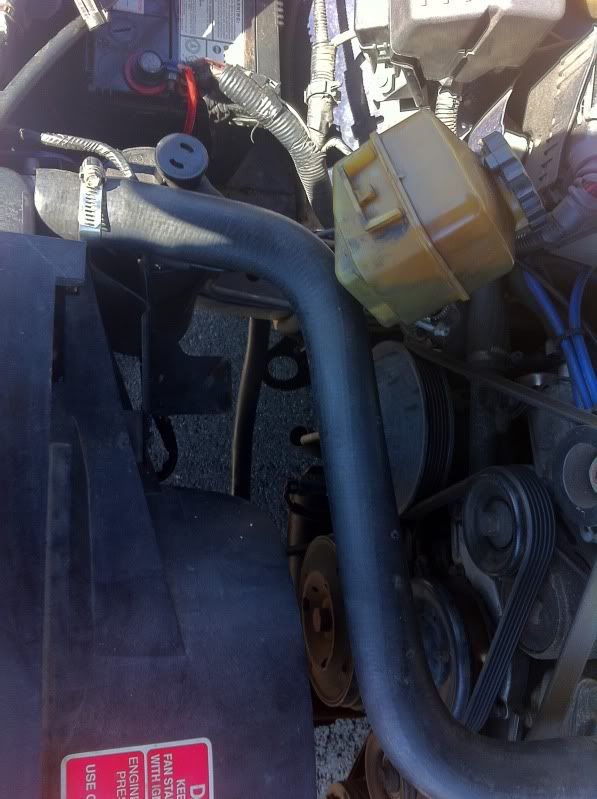
Slide the power steering reservoir upwards, releasing it from its mount, tuck it behind the top radiator hose so it is out of the way. Take care to not damage any power steering lines.

IMG_2485.jpg


un-clip the thermo fan wiring connector plug from the bottom of the power steering pump mounting bracket and un-clip.

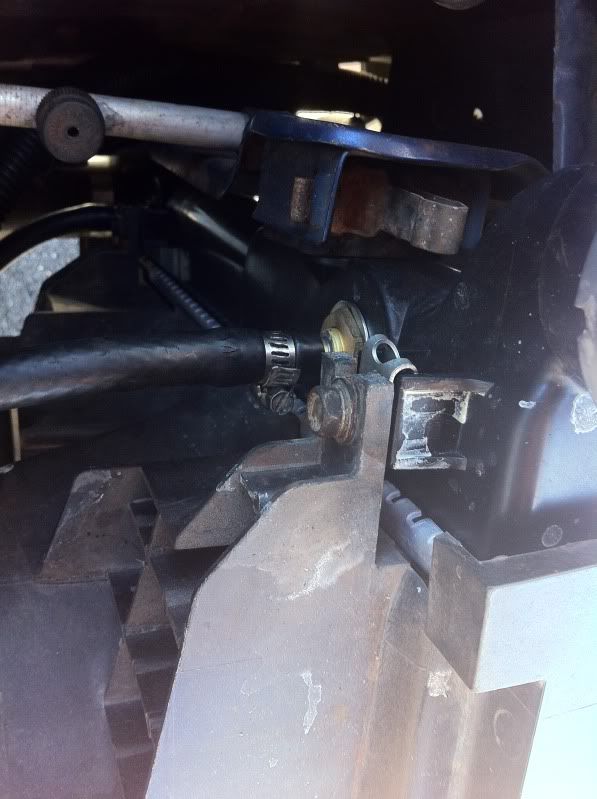
Undo the 10mm bolt holding the power steering pump mount to the thermal fan assembly and remove.

Locate the 4 10mm bolts that are holding the thermo fan and shroud to the radiator and remove them.

IMG_2484.jpg


Taking care not to damage the radiator, remove the thermo fan assembly from the car.

IMG_2486.jpg


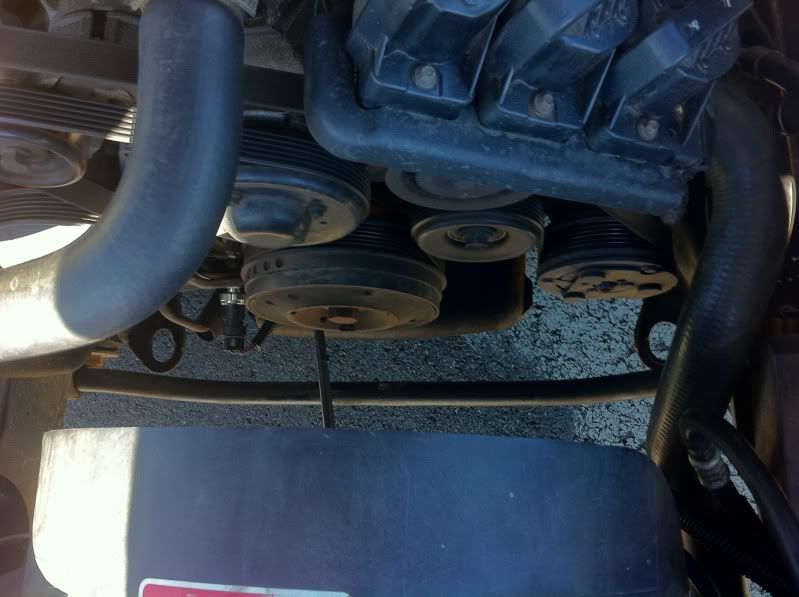
Using a 24mm socket, and a breaker bar, put the breaker bar onto the harmonic balancer, with the bar resting against the top of the passenger side chassis rail, this is very important you get this right, the motor spins in a clock wise direction. In order to loosen the harmonic balancer pulley bolt, you are going to crank the engine so that the breaker bar hits the chassis rail and therefore loosening the bolt. Ensuring that you have got this step correct, remove the EFI relay from the relay box inside the engine bay, and give the engine a couple of quick cranks. Ensure that the EFI relay is removed as you do not want the engine starting, potentially causing damage.

IMG_2486EDITED.jpg


After a couple of cranks, check the harmonic balancer bolt, if it is loose, continue to the next step, crank another couple of times till it loosens up.

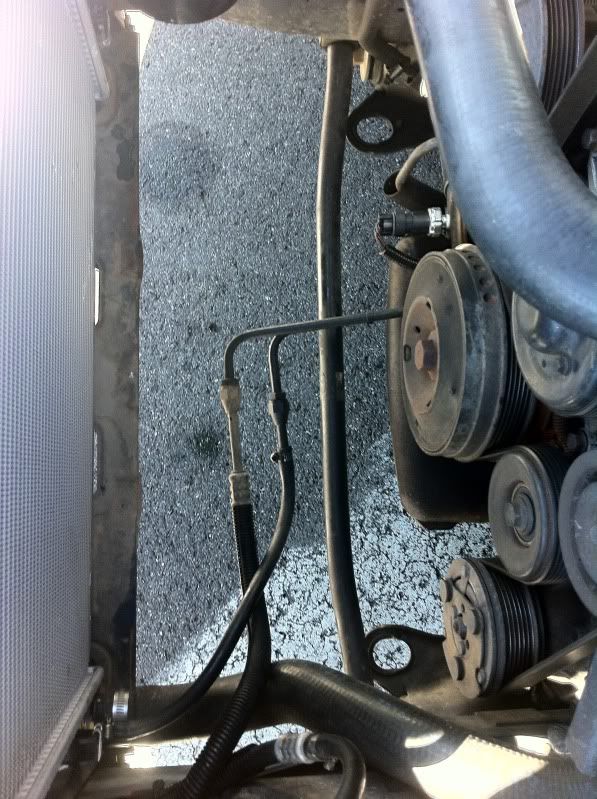
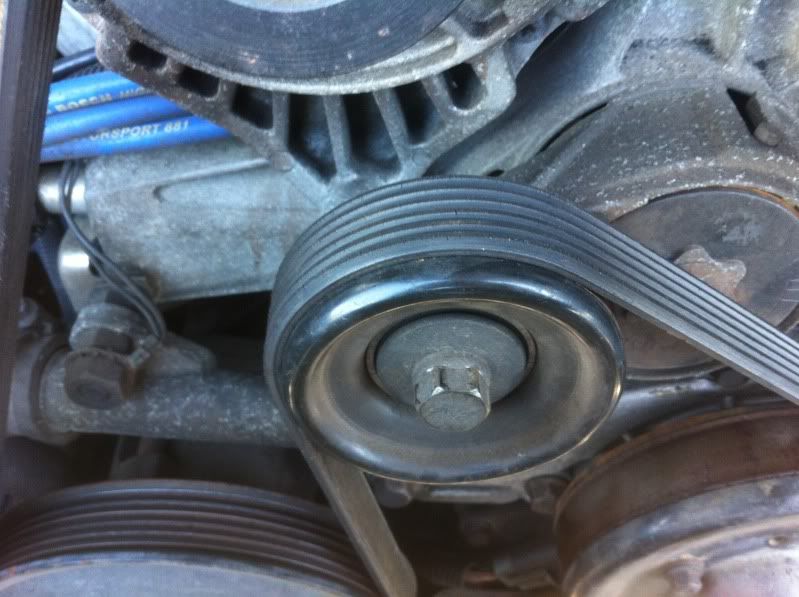
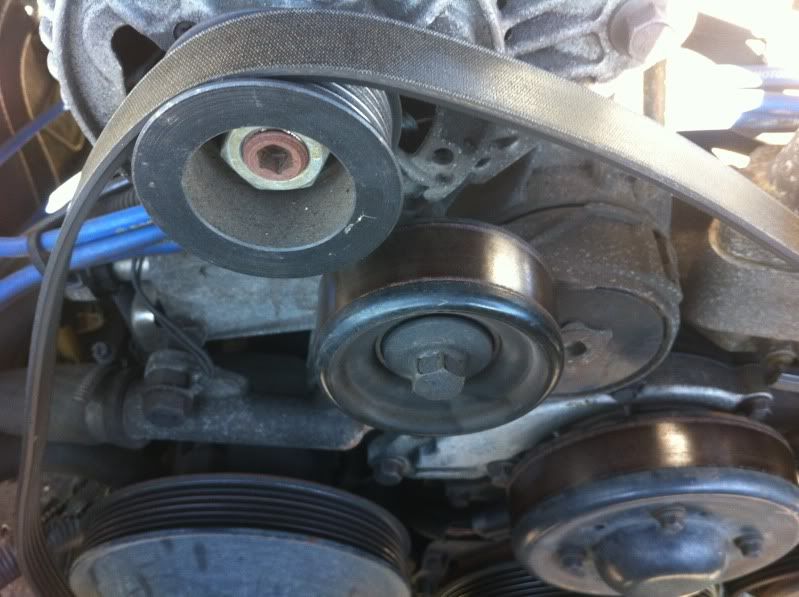
locate the second highest pully (tensioner) and using a 15mm socket, apply force in an anti-clockwise direction. The pulley is spring loaded, this will loosen the tensioner and enable you to remove the serpentine belt from it.

IMG_2506.jpg


IMG_2487.jpg


Remove the belt from the harmonic balancer.

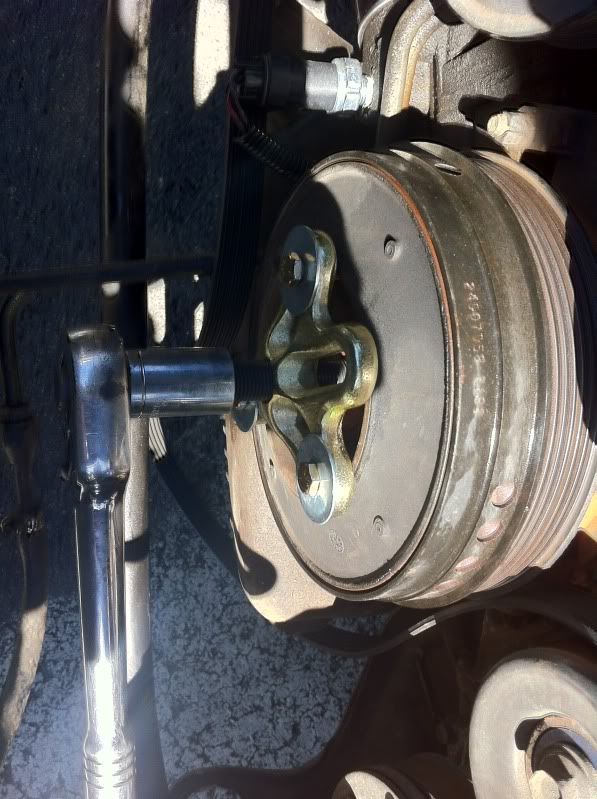
Continue to remove the harmonic balancer bolt.

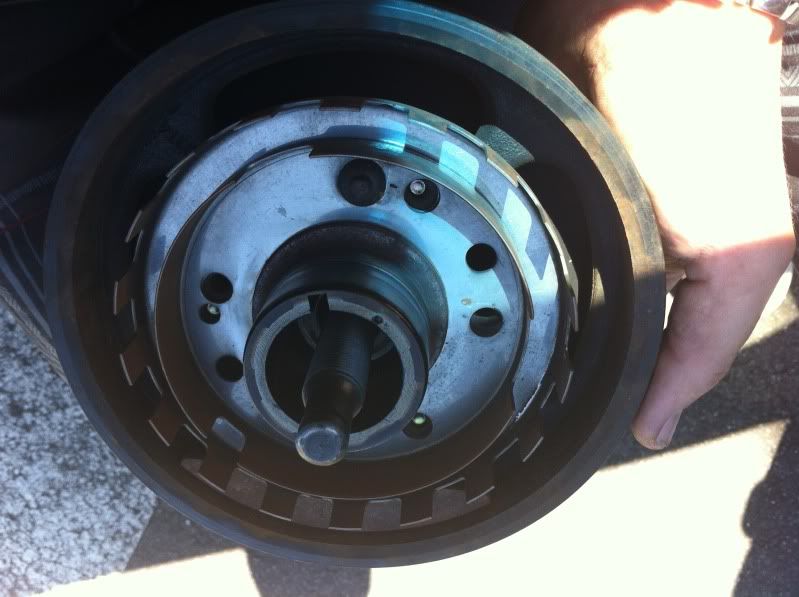
Using the washers, thread the 1/2" unf bolts through the washers and attach the bolts to the harmonic balancer. If you do not use the washers, then the bolts under tension will simply pull through the puller, possibly damaging the thread inside the harmonic balancer.

IMG_2495.jpg


You should now be able to pull the harmonic balancer, using the removal tool (may take some elbow grease)

IMG_2497.jpg


IMG_2482.jpg


IMG_2500.jpg


Remove the dust cover, there should be 3 locator pins that it is simply pressed onto, using a flat head screwdriver it is quite easy to remove.

IMG_2499.jpg


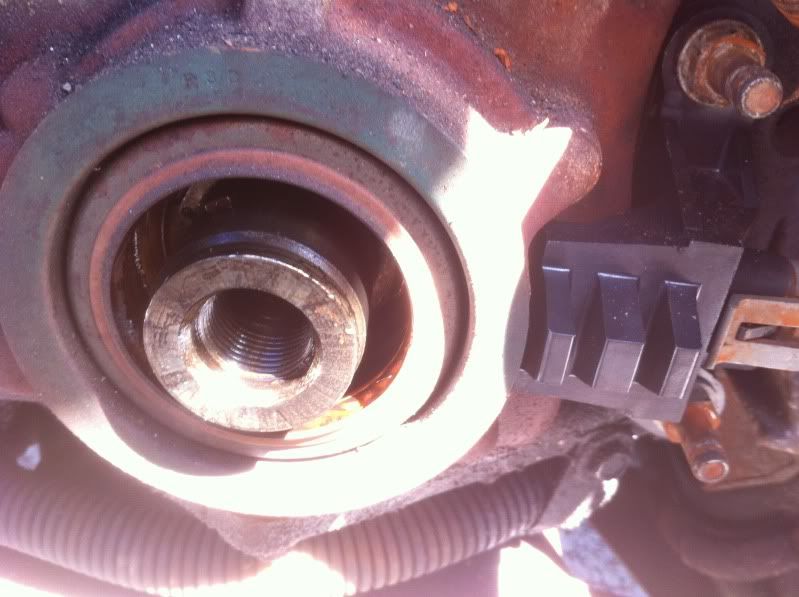
Undo the CAS wiring connector

Remove the 2 bolts holding the crank angle sensor in place.

IMG_2504.jpg


Install your new crank angle sensor and plug connector into loom.

Refit the dust cover onto the 3 locator pins

Slide the harmonic balancer back onto the shaft, note the key on the back of the puller, this has to match up with the key on the crank. Remove existing sealant from key/Key way and apply fresh sealant. turn the harmonic balancer on the shaft until you can feel it lock back into place.

Using a 24mm socket, tighten the harmonic balancer. You will notice that the balancer will not line up with the other pulleys initially, when tightening it will pull it closer to the block and you will see it eventually start to line up.

Additional Information regarding tightening harmonic balancer

Courtesy of Cheap6 (thanks mate) I have included the quotes below:


I had a piece of 10mm box about 500mm long, with 2 holes that lined up with the holes in the balancer however I did not get any pics of this. I have also done it with an old belt in the past and 5 years later everything is still fine.


Fit the sepentine belt back onto the pulleys as per the picture below. Remember to use the tensioner.

ecotecv6.jpg


Retighten the harmonic balancer bolt using a 24mm socket.

install the thermal fan assembly, power steering mount bracket, power steering reservoir and EFI relay back to the car.

Retighten the harmonic balancer bolt using a 24mm socket.

check you have removed all tools from the engine bay and start the car.

Cheers Mick
 

ephect

Donating Member
Joined
Jul 27, 2006
Messages
5,918
Reaction score
15,519
Points
113
Location
Melbourne
Members Ride
VS Acclaim V6
Thanks for the write up, after 300k mine began stalling randomly, got code 46. Quick search lead me here. Grabbed to tools and cas, replaced in an hour.

Quick cheat, give the store the part numbers off the bolt pack bf13, Repco had them out the back.

Thermo can come off, but leave the rad, no coolant mess.

My HB bolt wouldn't crack, I removed the belt then spun it again with no accessories, and she come off no worries.

I didn't have a tourque wrench, so I marked the HB and bolt and got it back inline.
 

Roger.T.

New Member
Joined
Jul 25, 2019
Messages
1
Reaction score
0
Points
1
Age
75
Location
Sunshine Coast
Members Ride
VY Commodore Executive
When you say the key has to match up what do you mean? I had a dodgy mechanic come out and removed the balancer from my ute. He told me the balancer was stuffed, only to find out from another mechanic that there is nothing wrong with the balancer. So due to the fact I have no idea when key is where, how do I go about refitting the balancer?

I hope you understand my lack of Mechanical knowledge.

Thanks
 

rubberneckin

New Member
Joined
Jul 30, 2014
Messages
1
Reaction score
0
Points
1
Location
Australia
Members Ride
steam train
Dude the watermarks are all over the photo. Kind of hard to see with those watermarks. You gotta remove them
 

Immortality

Can't live without smoky bacon!
Staff member
Joined
Apr 15, 2006
Messages
22,584
Reaction score
20,364
Points
113
Location
Sth Auck, NZ
Members Ride
HSV VS Senator, VX Calais II L67
Dude the watermarks are all over the photo. Kind of hard to see with those watermarks. You gotta remove them

No offense dude but look at the watermarks, they have been added by the host site and not the person who took the original photos. Be happy they are still online as photobucket stopped allowing linked photo's from their site for a long time.

Watermarks or no photos at all, which do you prefer?
 

Mad101

New Member
Joined
Feb 26, 2017
Messages
4
Reaction score
1
Points
3
Age
61
Location
Townsville
Members Ride
VX Commodore
Hi everyone. Great write up on how to remove and replace the Cam Angle Sensor. I will be replacing mine in the next few days. What I am wondering is Why No One Mentioned the Replacing of the Front Crank Shaft Seal while the Harmonic Balancer is off?. It's a $35 Seal unless you buy it from a Seal Shop. Then its cheaper still. A quick and easy cheap seal to change while everything is off.. Just use a Screw driver to lever and the remove old front seal. from the housing.
Clean up the shaft. Remove any oil and dirt etc. Anything the New seal can catch on etc. Lightly oil the Crank Shaft and seal seat in the front housing.. The New Seal goes in Flat Side Out. You slip the New Seal over the Crank Shaft until it is against the face of the housing. Now slip the Old seal onto the shaft flat side in. When the Two seals are together. Use a steel or plastic tube just bigger than shaft size. Slide it over the shaft up to the old seal. I use the old seal as a buffer so as not to damage the surface of the New seal.
Tap lightly until the Seal is back in place. Remove old Seal.
It just seems like a lot of work to do twice if you don't pick up the front engine seal was damaged or had a slight weap starting. It's a 5 min job once you get everything else off.
It's about a $35 seal for piece of mind.
Thanks. I hope it helps someone.
 

Attachments

  • Screenshot_20210927-200758_Samsung Internet.jpg
    Screenshot_20210927-200758_Samsung Internet.jpg
    94.4 KB · Views: 241

losh1971

Well-Known Member
Joined
Jan 17, 2010
Messages
22,594
Reaction score
22,339
Points
113
Location
North Tas
Members Ride
VE Series I SS Ute
Hi everyone. Great write up on how to remove and replace the Cam Angle Sensor.

Don't you mean Crank Angle Sensor?
 

bwt

New Member
Joined
Feb 19, 2023
Messages
4
Reaction score
0
Points
1
Age
59
Location
Western Australia
Members Ride
VS S3 Ute
HI Guys and Girls, i understand this is an old post, but used it to replace the CAS on my VS ute, thank you to the author and all others that had some input, it made life easy. I about to put the HB back on, but noticed some discussion about applying some sealant to the front oil seal and crankshaft keyway, could someone please provide some detail of exactly where the sealant should be placed. Thank you in advance for your help on this.
 
Top