HQ2VL
New Member
Removing VZ V6 Sump
This job sucks but if you're going to do it you may as well do the timing cover, engine mounts and control arm bushes all at the same time!!!
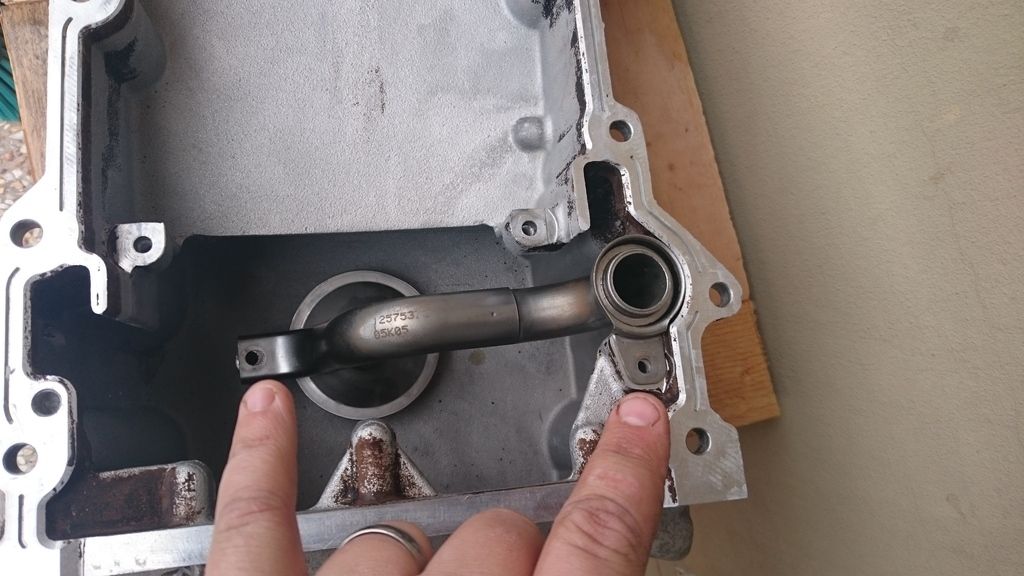
Also the oil pickup is bolted to the sump and connected to the oil pump via an o-ring so it just comes out with the sump.
Do at you own risk, I'm not a mechanic this is just how I have done it!!!
Also you will need a torque wrench to put Harmonic balancer back on and a new bolt, apparently it is a single use item. 100NM + 150 Degrees
0. Drain oil from vehicle.
1. Raise vehicle on jack stands at the front, take wheels off and put behind jack stands just incase!!!
2. Undo strut top plates, you will need 24mm spanner and what seems to be a 10.5mm socket to hold the inner most part of the strut!
(I used a single hex 11mm socket also helps to remove Z bars from control arms 24mm 30mm and 4x13mm per Z bar)
3. Loosen off steering knuckle just above steering rack this is a 13mm bolt I think (put seat belt through steering wheel to hold it straight)
4. Undo engine mount to K-frame bolts (18mm) one each side.
5. Remove Harmonic Balancer, you will need a 19mm socket, breaker bar and 3 claw pulley puller (about $70-$80 from Repco)
you will also have to STOP engine from turning over while you are undoing this bolt.
6. Remove the 3 bottom bolts on the Timing cover (13mm)
7. Remove the 2x10mm bolts holding the power steering line to the sump and oil sensor plug.
8. Undo and remove dipstick 1x10mm
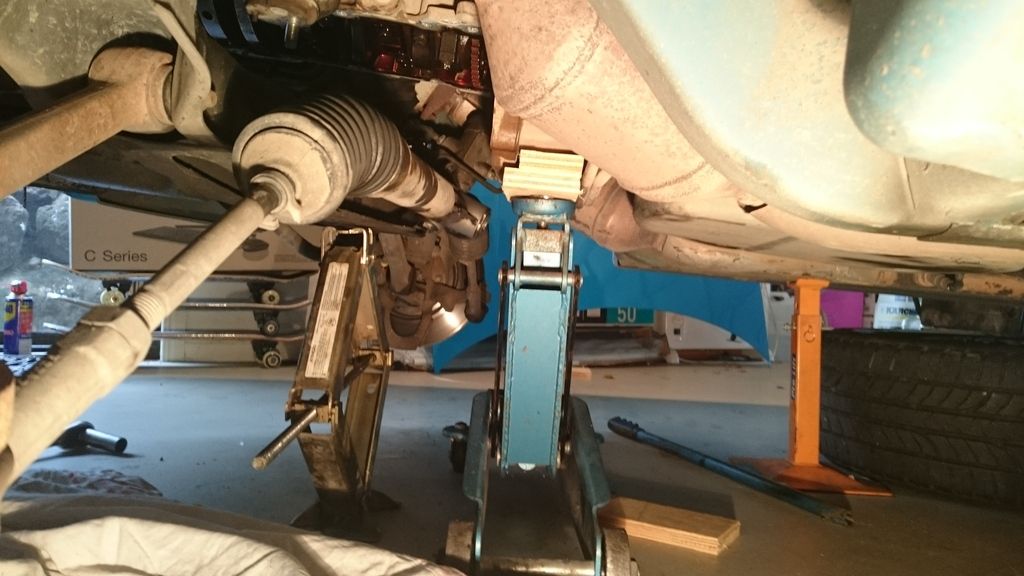
9. Place jack under bellhousing of gear box and jack up engine off mounts to highest point, note not to lift vehicle off stands
also place piece of wood between jack and bellhousing to spread the load.
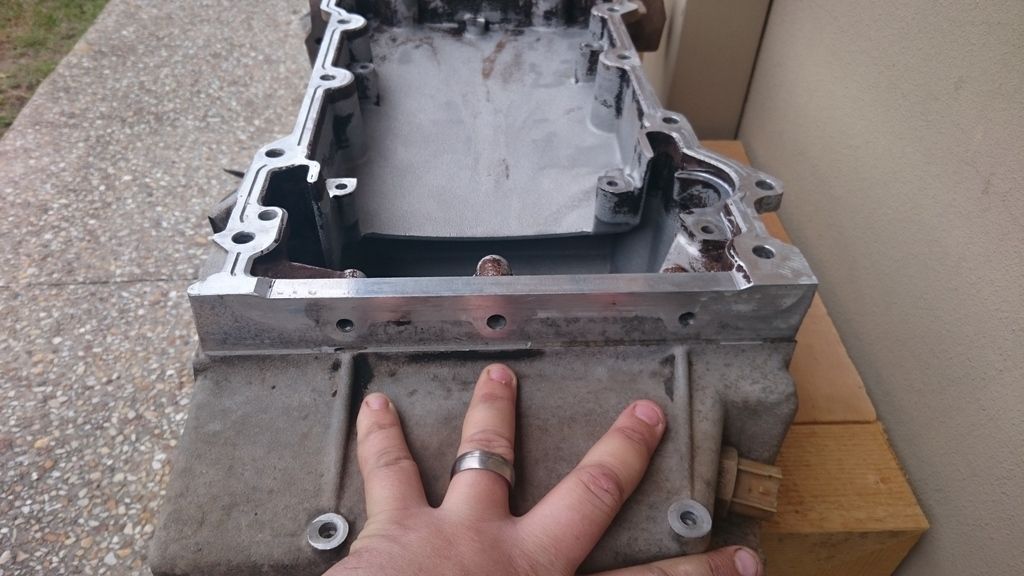
10.Undo the four bottom bellhousing to sump bolts, these are the two outside holes each side in the picture the middle one is not used.
note these are E14 Torx bolts, I bought a set from Super Cheap for $35
11.Remove the rear main oil seal bolts 2x10mm
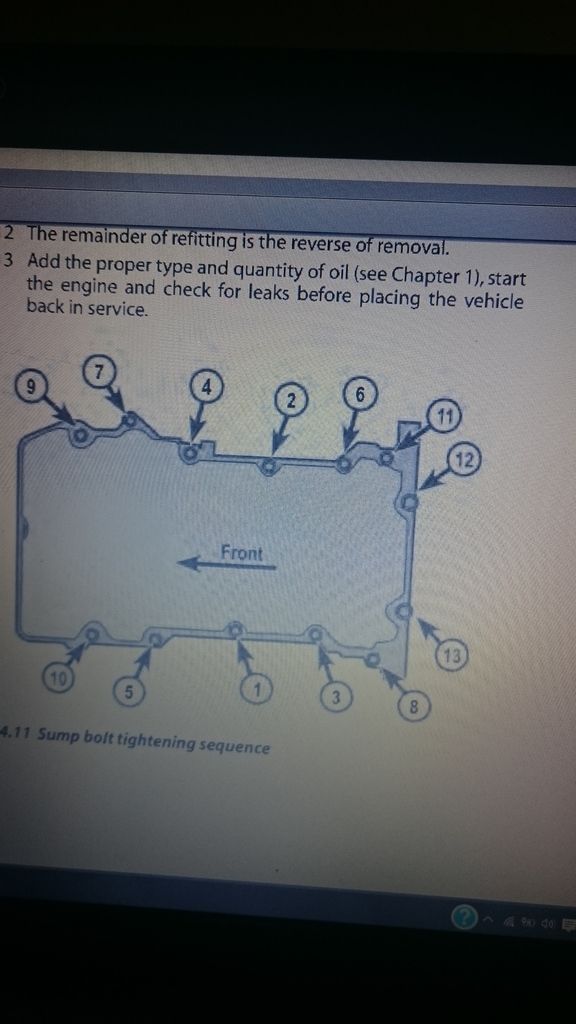
12.Remove all sump bolts there should be 11x13mm
13.Lower engine back onto mounts to take tension off sump as it gets a bit squashed between timing cover and bellhousing.
14.Pry sump from block at passengers side nearest to the back, and drivers side at the front with a large flat head screwdriver.
15.Lift engine from bellhousing back to full height, again make sure your not lifting the vehicle from jack stands!!!
16.Put another jack under K-frame then undo rear K-frame bolts 2x18mm
17.Loosen front K-frame bolts 2x16mm (I left mine in but just undid them till they were nearly out)
18.Lower K-frame down until you can remove sump, I had to turn the crank by hand to make clearance between the sump and crank.
19.Scrape old gasket goo off with a razor blade and degrease sump and oil pickup.
20.MAKE SURE YOU REPLACE OIL PICK SEAL, IF YOU DONT YOU WILL SUCK AIR INTO THE OIL PUMP AND THROW A CHECK OIL WARNING EVERY TIME YOU GO UPWARD OF 1500RPM
($8 off eBay) the new ring seats in the top of the oil pickup. also note the two holes where the oil pickup bolts in.
21.Lower engine back onto mounts to spread the timing cover to bellhousing gap again.
22.Put new goo on sump and bottom of timing cover, I found it was easier to press the front of the sump into the timing cover and then wedge the back up into the bellhousing.
23.Tighten sump bolts then reverse pretty much everything above and your done.
Sorry for the pictures but I wasn't really planning on doing this thread, Hope they help anyway!!
If I missed anything fell free to add it!
This job sucks but if you're going to do it you may as well do the timing cover, engine mounts and control arm bushes all at the same time!!!
Also the oil pickup is bolted to the sump and connected to the oil pump via an o-ring so it just comes out with the sump.
Do at you own risk, I'm not a mechanic this is just how I have done it!!!
Also you will need a torque wrench to put Harmonic balancer back on and a new bolt, apparently it is a single use item. 100NM + 150 Degrees
0. Drain oil from vehicle.
1. Raise vehicle on jack stands at the front, take wheels off and put behind jack stands just incase!!!
2. Undo strut top plates, you will need 24mm spanner and what seems to be a 10.5mm socket to hold the inner most part of the strut!
(I used a single hex 11mm socket also helps to remove Z bars from control arms 24mm 30mm and 4x13mm per Z bar)
3. Loosen off steering knuckle just above steering rack this is a 13mm bolt I think (put seat belt through steering wheel to hold it straight)
4. Undo engine mount to K-frame bolts (18mm) one each side.
5. Remove Harmonic Balancer, you will need a 19mm socket, breaker bar and 3 claw pulley puller (about $70-$80 from Repco)
you will also have to STOP engine from turning over while you are undoing this bolt.
6. Remove the 3 bottom bolts on the Timing cover (13mm)
7. Remove the 2x10mm bolts holding the power steering line to the sump and oil sensor plug.
8. Undo and remove dipstick 1x10mm
9. Place jack under bellhousing of gear box and jack up engine off mounts to highest point, note not to lift vehicle off stands
also place piece of wood between jack and bellhousing to spread the load.
10.Undo the four bottom bellhousing to sump bolts, these are the two outside holes each side in the picture the middle one is not used.
note these are E14 Torx bolts, I bought a set from Super Cheap for $35
11.Remove the rear main oil seal bolts 2x10mm
12.Remove all sump bolts there should be 11x13mm
13.Lower engine back onto mounts to take tension off sump as it gets a bit squashed between timing cover and bellhousing.
14.Pry sump from block at passengers side nearest to the back, and drivers side at the front with a large flat head screwdriver.
15.Lift engine from bellhousing back to full height, again make sure your not lifting the vehicle from jack stands!!!
16.Put another jack under K-frame then undo rear K-frame bolts 2x18mm
17.Loosen front K-frame bolts 2x16mm (I left mine in but just undid them till they were nearly out)
18.Lower K-frame down until you can remove sump, I had to turn the crank by hand to make clearance between the sump and crank.
19.Scrape old gasket goo off with a razor blade and degrease sump and oil pickup.
20.MAKE SURE YOU REPLACE OIL PICK SEAL, IF YOU DONT YOU WILL SUCK AIR INTO THE OIL PUMP AND THROW A CHECK OIL WARNING EVERY TIME YOU GO UPWARD OF 1500RPM
($8 off eBay) the new ring seats in the top of the oil pickup. also note the two holes where the oil pickup bolts in.
21.Lower engine back onto mounts to spread the timing cover to bellhousing gap again.
22.Put new goo on sump and bottom of timing cover, I found it was easier to press the front of the sump into the timing cover and then wedge the back up into the bellhousing.
23.Tighten sump bolts then reverse pretty much everything above and your done.
Sorry for the pictures but I wasn't really planning on doing this thread, Hope they help anyway!!
If I missed anything fell free to add it!
Last edited:
")