Hey all, someone asked me how to do this via PM so thought i'd make a How-To of it.
Alright, first things first. Dont blame me if you stuff **** up. This mod does carry a small amount of risk, in damage to your seat leather/cloth. But as long as you are patient and careful, it should all be fine!
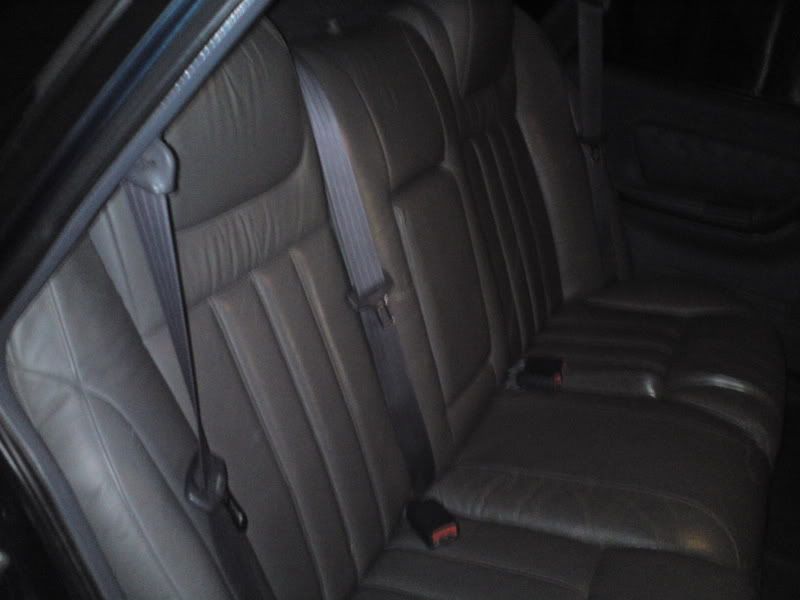
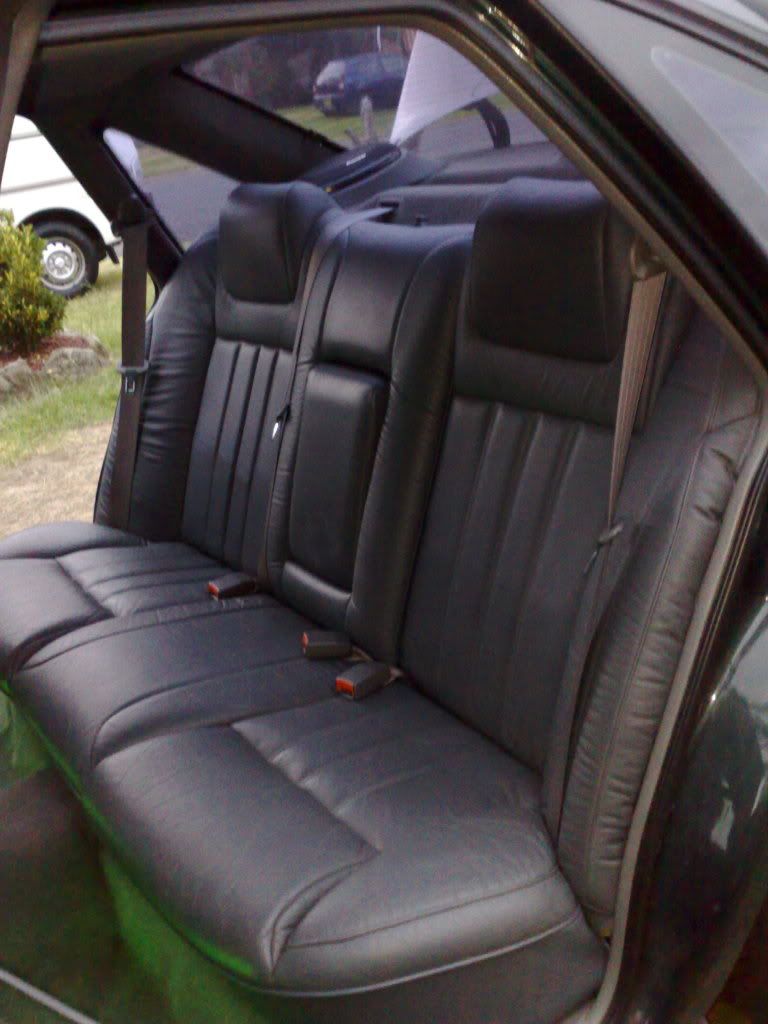
OK this mod was done by me, installing a VS stato rear seat into my VS exec. These seats will also directly fit into a VR, but unsure if other mods will be necessary to fit to VN or VP. In addition, caprice rear seats into any VN-VS that wasnt originally a caprice (yes i know VN/VP this was the VQ), will need another modification to fit the height adjustable head rests. The mod described below will however also be applicable for caprice rear seats. Please check what you're getting into first if unsure. My seats are leather, and the mod should still apply and work fine for cloth seats, just be careful!
Now when putting stato/caprice seats into regular sedans, some people prefer leaving the side bolsters sticking out, but not me! After installation, you may notice though that to the left of the passenger side's headrest and to the right of the driver's side headrest there may be a small gap between the backrest and the parcel shelf which can look a bit dodgy. Not really noticeable but if you're an anal bastard like me you'll want to close up the gaps! While the seats are out you could try packing in some sponge under the leather to close up the gap.
All you need is some long nose pliers, some long zip ties of decent thickness and a scalpel/GEM blade. Yes there are probably better ways of doing this, but this is how I did it and wasn't too hard, and I achieved my desired result.
Alright, these pics were apply for when I did the passenger side bolster:
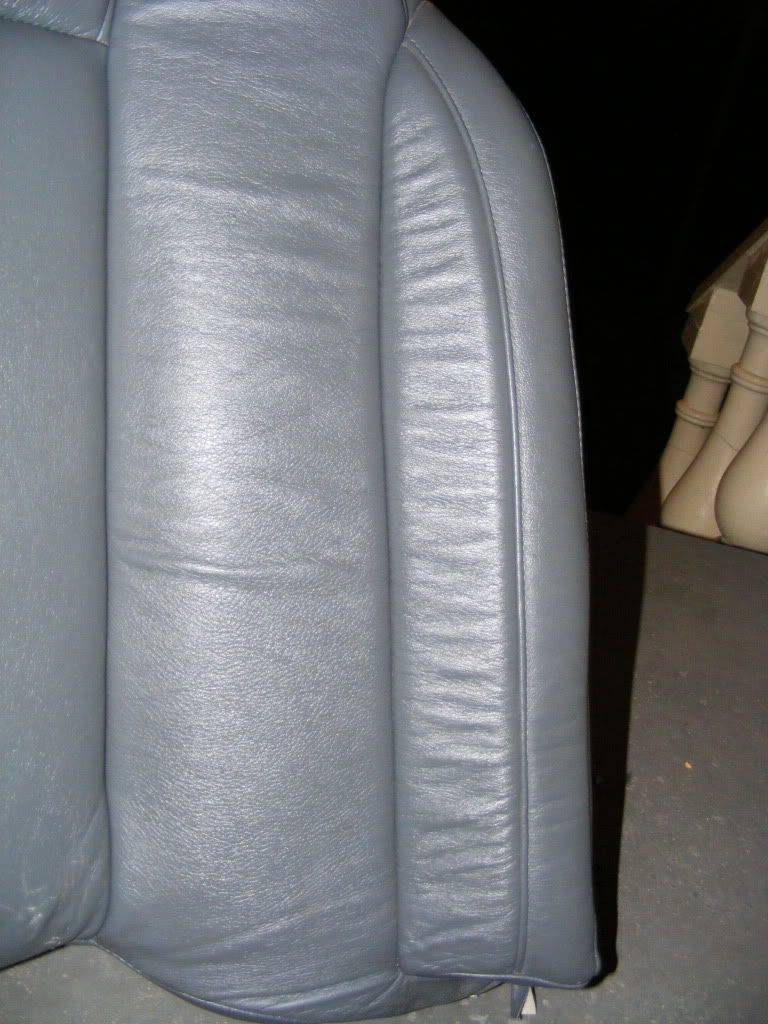
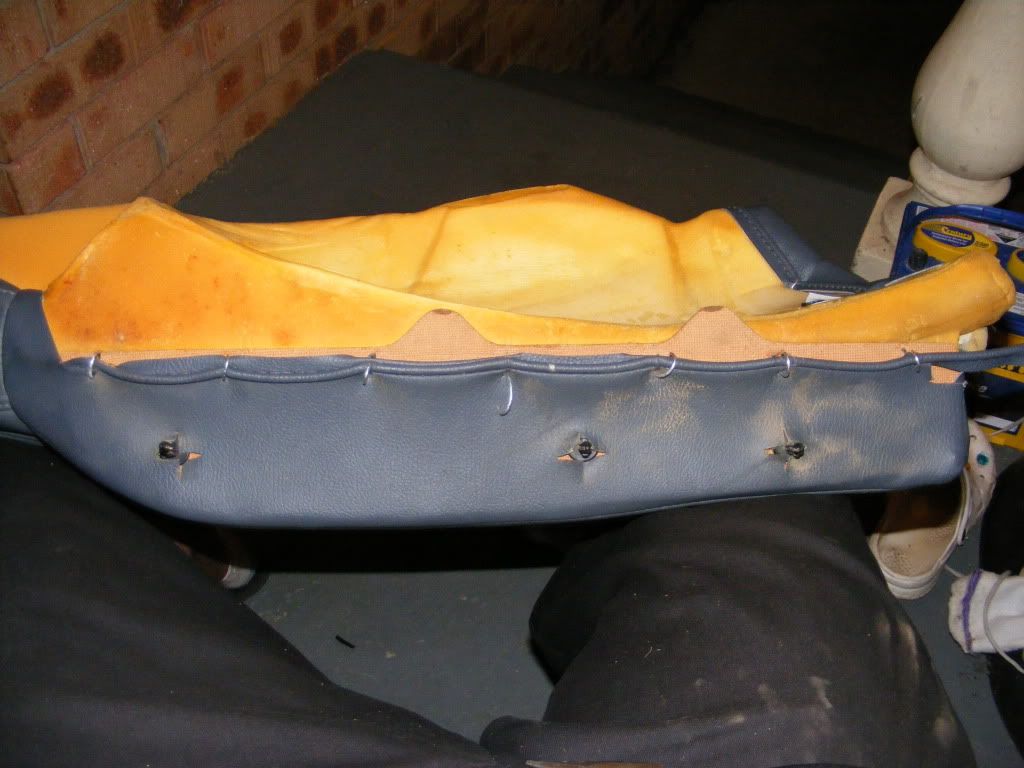
When you lay the back rest leather side down, you should see 7 metal rings holding the seat leather to the masonite piece held inside:
Grab some pliers and stick them inside the metal clip loops and open them up to undo them.
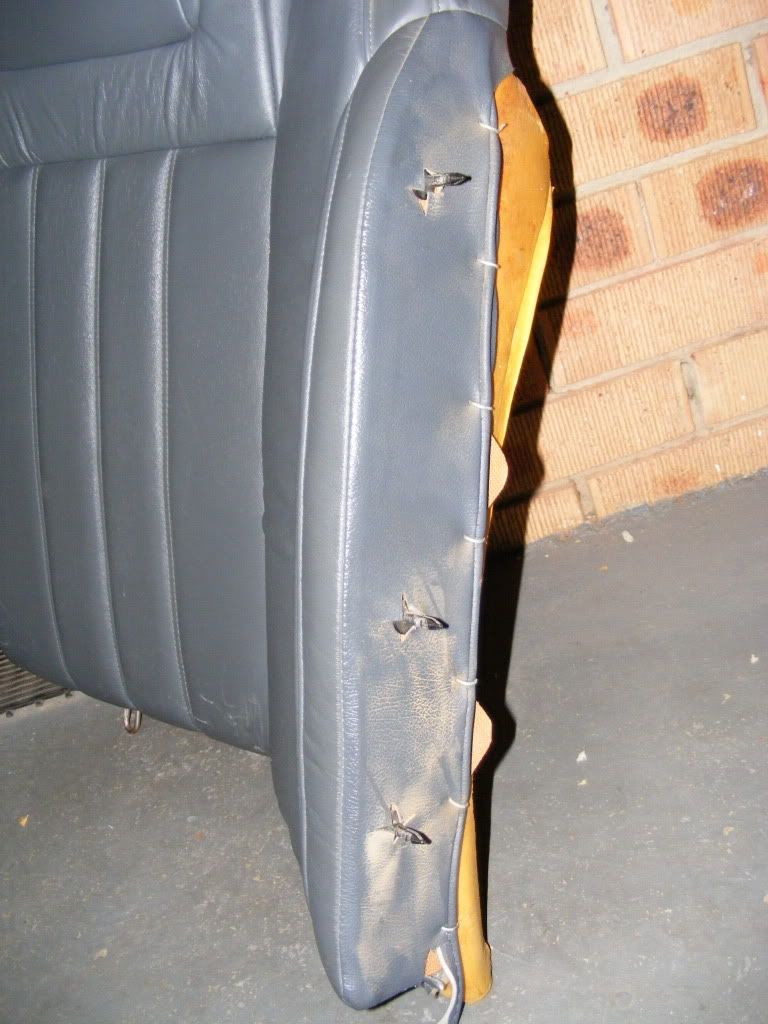
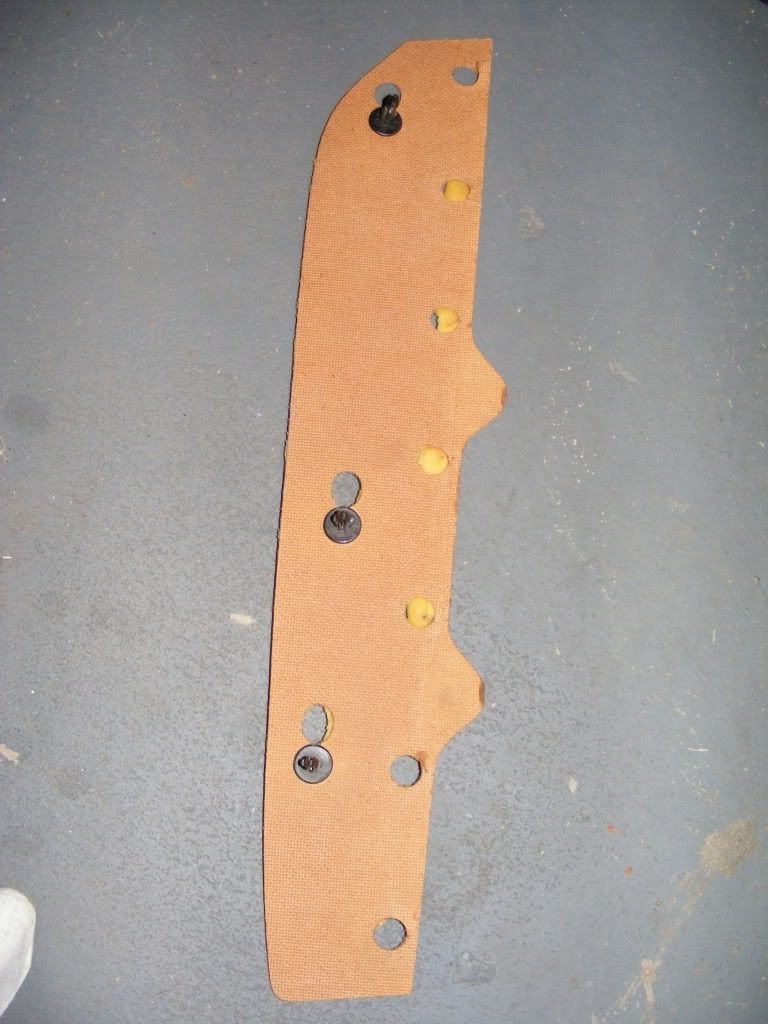
Now, carefully lift the side bolster leather up over the 3 plastic clips that are held to the masonite piece, and gently work the masonite free from the seat sponge, as it's likely it'll be stuck. After its fully unstuck, slide the masonite piece out from between the leather and the sponge. At this stage you should have successfully removed this:
These bits are of no use to us now.
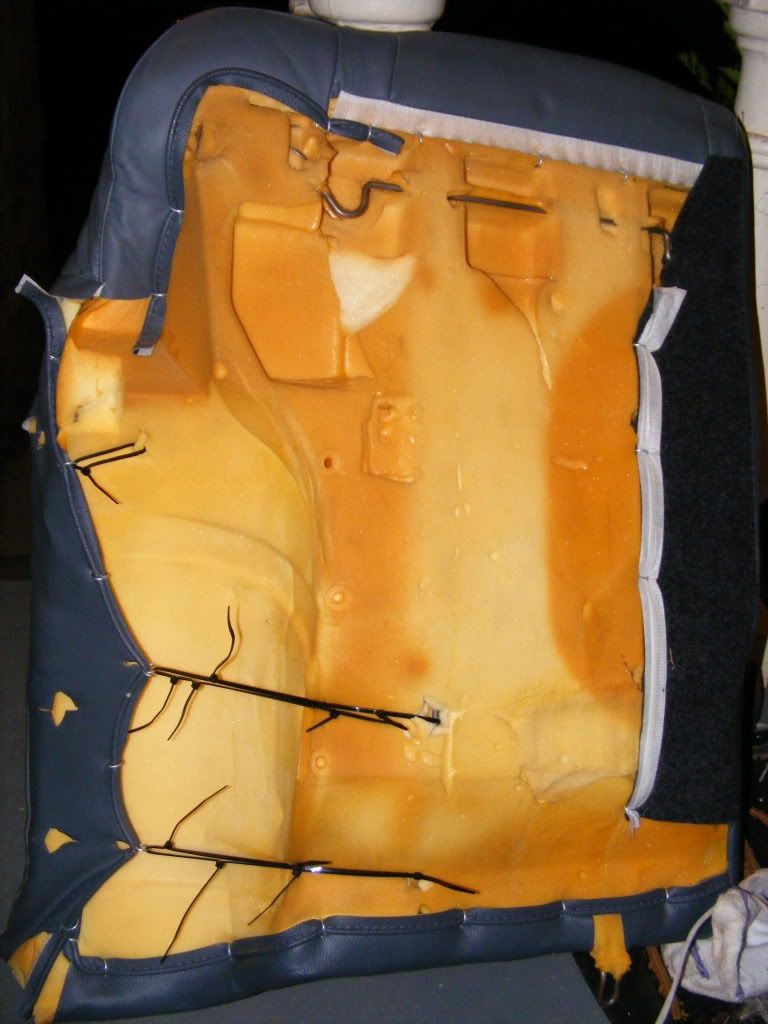
Now, proceed to put at least 3 of the metal ring clips back in, in holes 2, 4 and 6 (obviously counting up or down, doesnt matter!), and do them up nice and tight, making sure the piping at the edge of the leather passes through the ring clip. This is to ensure strength for the next step.
Now, ultimately it'd be easier having someone help you with this part, but i managed to do it myself! Grab a handful of zip ties that will be capable of handling substantial tension, preferably quite long if you can. Going off the following pics and relative vertical location, cut away a small amount of seat sponge to expose a small section of the back rest's metal skeleton, just enough so you can thread a zip tie under and around it. Thread the other end through the metal ring clips you re-fastened into the holes.
By the pics i obviously had to use quite a few zip ties per loop, except for the top one.
From the front side of the back rest, have someone lean on/squeeze the side bolster sponge towards you (at the back of the back rest) while you fasten up the zip ties until you have pulled the leather back far enough, or until the zip ties are done up fairly tight. Sneak up on it, dont just go pulling it back as far as you can in one go. The best thing to do is already have your old seats out of the car, so you can go and test fit the seat in the car and make adjustments to the zip ties until you're happy with it.
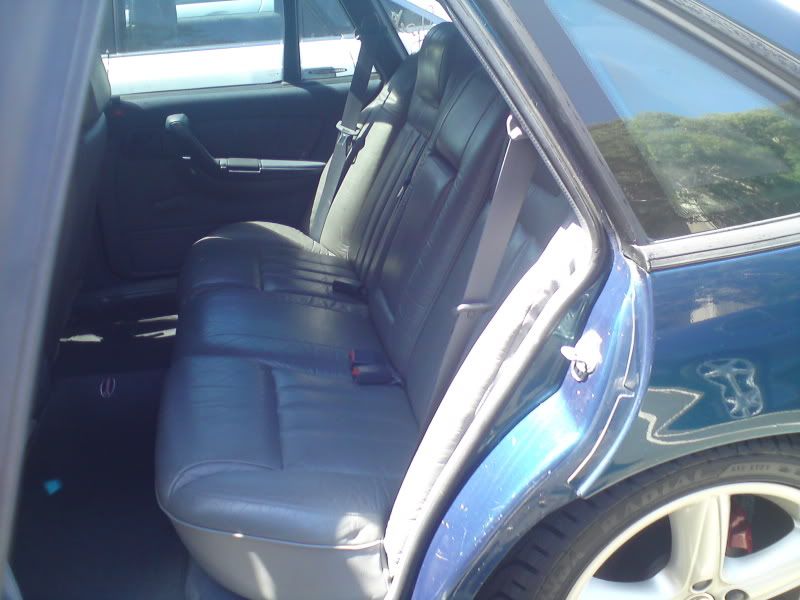
The side bolsters still stuck out a little, but I'm really happy with how they came out!
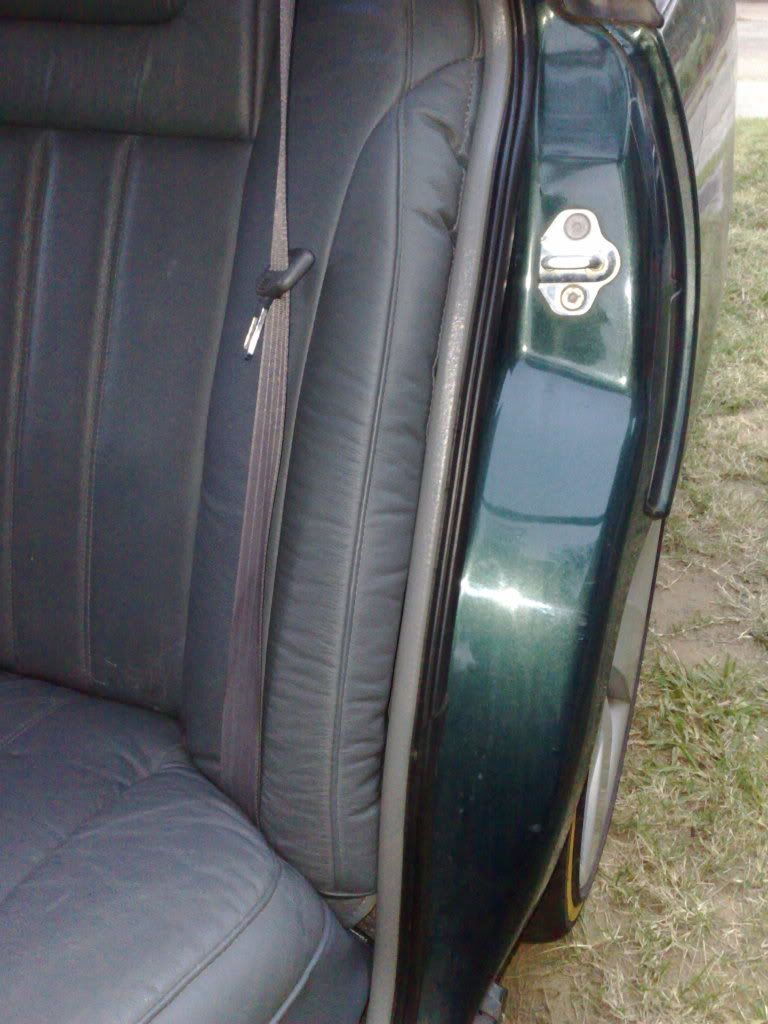
This is how the passenger side finished up, to give you some idea about how far to pull the leather back:
Before the final installation of the back rests and if it bothers you, trim off the excess tails on the zip ties, but i'd probably leave enough on at least one per loop, should you ever need to tighten the zip tie again easily. Providing you use strong enough zip ties and haven't overtightened them, they should really never need future attention! Mine have been installed and in use for more than 9 months now without a problem.
After this, enjoy your new stato rear seat!
Good luck!
Dan :thumbsup:
") Yeah door trim just rests on the side bolster, not hard, just perfectly lined up! Very happy with it!
Yeah door trim just rests on the side bolster, not hard, just perfectly lined up! Very happy with it!