smidey
Member
- Joined
- Jun 18, 2012
- Messages
- 222
- Reaction score
- 2
- Points
- 18
- Location
- Northland, New Zealand
- Members Ride
- VN SS WM 6L
I couldn't find much info on doing this so i took pics when i did mine, i hope this is useful to someone.
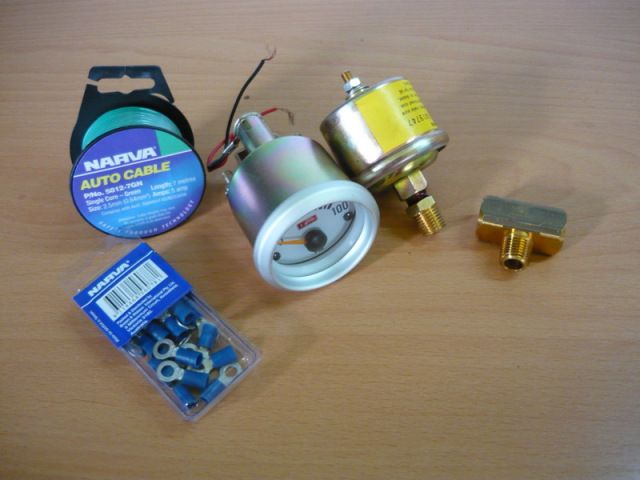
I got an electrical Auto Gauge oil pressure gauge cheap so i thought i'd throw it on.
I used electrical wire, connectors, T fitting, sender unit and gauge and thread lock on the threads.
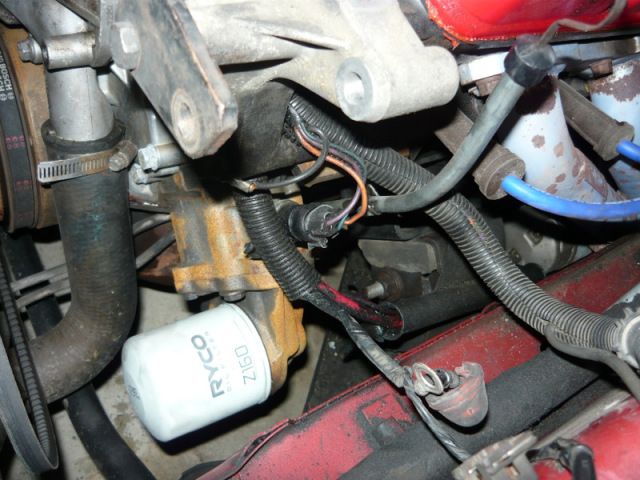
I removed the alternator so it gave me easy access to the oil pump. Here's the factory oil pressure sensor in it's original place.
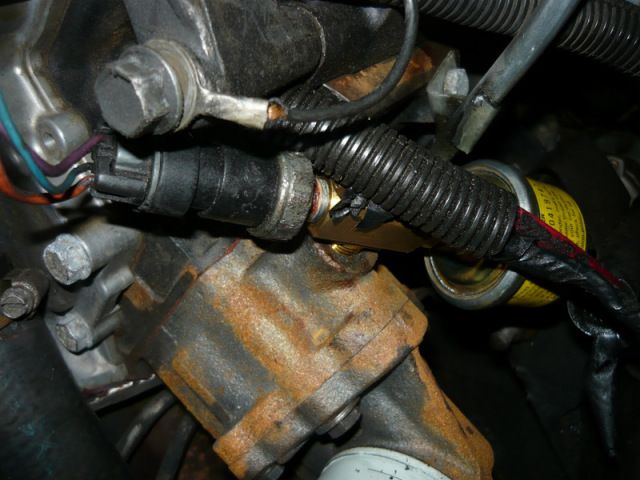
I decided to use a T adaptor so I could still run the factory oil pressure sensor so also have a cluster warning light. Note the angle the T piece is sitting, that is so the large sender unit could fit with the dip stick being in the way. I also need to pull some extra length of the oil pressure sensor wire out of the loom bundle as it wasn't long enough to reach the new position. To achieve that I had to remove the alternator bracket which also required me to remove the throttle body. I'm not sure that this type of sender unit will fit replacing the factory sensor in the factory position with the alternator, it may do but will be very close. A elbow fitting may be required anyway, the T piece cost me $20 so i think it's worth retaining the factory sensor.
i then ran a wire from the drivers seat to the sender unit. I used a length of fencing wire to push through a fire wall bung and down where i could see it near the floor, it came out near the foot rest. I tied the sender wire to the end of the fencing wire and pulled it through the fire wall. I then pulled through enough to reach the sender unit, fitted a clip and attached it to the sender unit. I chose to run the wire down the passenger side, around the air con unit and across to the fire wall bung. I placed the wire in the conduit where i could and cable tied it elsewhere.
The gauge requires a Ignition wire so i ran a wire to my radio and connected it to the radio ignition wire. This means the light will always be on.
The gauge requires an earth so ran one to a piece of steel.
The gauge has an illumination bulb, i coupled the positive for the bulb to the ignition wire and the negative to the earth wire. I am not very good with wiring so that was easier for me, you could connect it to a dash light wire or similar so it only illuminates when the lights are on.
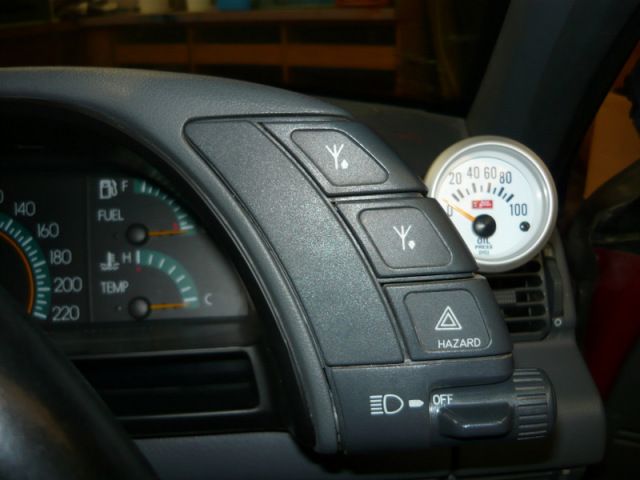
I then connected the sender, ignition and earth wires to the gauge, i used a cup mount so had to send the wires through that before connecting them to the gauge. I chose to put it on the RH side of the dash, it's ricey but i like it. You can choose where you want yours.
I got an electrical Auto Gauge oil pressure gauge cheap so i thought i'd throw it on.
I used electrical wire, connectors, T fitting, sender unit and gauge and thread lock on the threads.
I removed the alternator so it gave me easy access to the oil pump. Here's the factory oil pressure sensor in it's original place.
I decided to use a T adaptor so I could still run the factory oil pressure sensor so also have a cluster warning light. Note the angle the T piece is sitting, that is so the large sender unit could fit with the dip stick being in the way. I also need to pull some extra length of the oil pressure sensor wire out of the loom bundle as it wasn't long enough to reach the new position. To achieve that I had to remove the alternator bracket which also required me to remove the throttle body. I'm not sure that this type of sender unit will fit replacing the factory sensor in the factory position with the alternator, it may do but will be very close. A elbow fitting may be required anyway, the T piece cost me $20 so i think it's worth retaining the factory sensor.
i then ran a wire from the drivers seat to the sender unit. I used a length of fencing wire to push through a fire wall bung and down where i could see it near the floor, it came out near the foot rest. I tied the sender wire to the end of the fencing wire and pulled it through the fire wall. I then pulled through enough to reach the sender unit, fitted a clip and attached it to the sender unit. I chose to run the wire down the passenger side, around the air con unit and across to the fire wall bung. I placed the wire in the conduit where i could and cable tied it elsewhere.
The gauge requires a Ignition wire so i ran a wire to my radio and connected it to the radio ignition wire. This means the light will always be on.
The gauge requires an earth so ran one to a piece of steel.
The gauge has an illumination bulb, i coupled the positive for the bulb to the ignition wire and the negative to the earth wire. I am not very good with wiring so that was easier for me, you could connect it to a dash light wire or similar so it only illuminates when the lights are on.
I then connected the sender, ignition and earth wires to the gauge, i used a cup mount so had to send the wires through that before connecting them to the gauge. I chose to put it on the RH side of the dash, it's ricey but i like it. You can choose where you want yours.