Welcome to Just Commodores, a site specifically designed for all people who share the same passion as yourself.
You are using an out of date browser. It may not display this or other websites correctly.
You should upgrade or use an alternative browser.
You should upgrade or use an alternative browser.
HOW TO replace headlining - Very detailed
- Thread starter COINERS
- Start date
DannyboyDS
Just hand me the pliers.
- Joined
- Feb 26, 2007
- Messages
- 2,255
- Reaction score
- 38
- Points
- 0
- Age
- 39
- Location
- Melbourne
- Members Ride
- VS Berlina
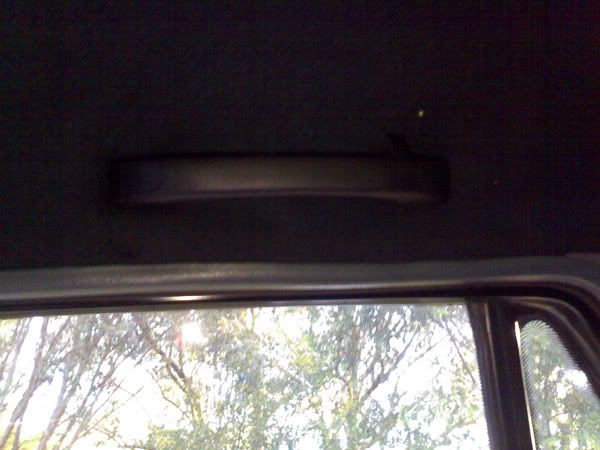
the front "plastic bits" on either side that run from the consolt to the roof are held in by clips, best bet is a pair of LONG! pinty nose pliers, you will break your clips if you are not 200% carefull.
and then you will end up roaming the wasteland of holden wreckers for weeks alone, stranded in a world without clips that arn't broken like I was
and then you will end up roaming the wasteland of holden wreckers for weeks alone, stranded in a world without clips that arn't broken like I was
diablous77
New Member
- Joined
- Feb 6, 2008
- Messages
- 1
- Reaction score
- 0
- Points
- 0
Excellent Guide Mate, Well Done.
EXCELLENT GUIDE MATE!! A+
i registered to this forum purely to say thanks for the step-by-step guide.
i have a vs wagon with the same problem.
i fixed it and re-installed mine all in a few hours.
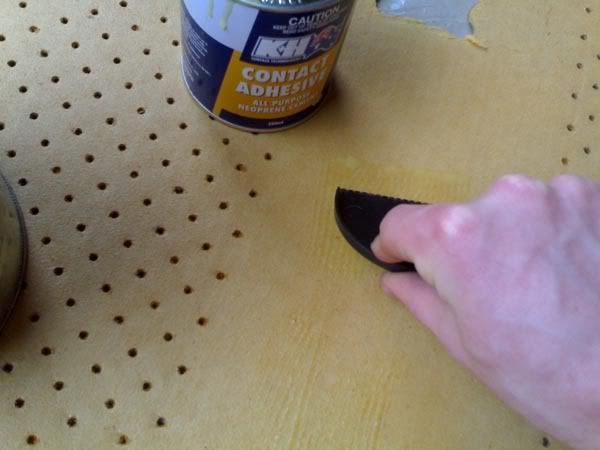
i purchased a 4l tin of contact adhesive from bunnings, used about 3/4 of it.
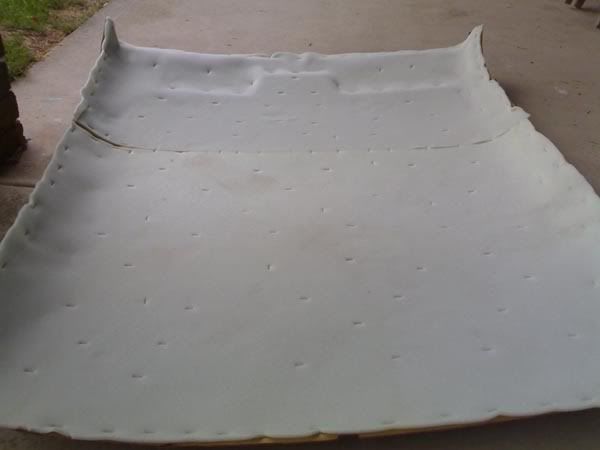
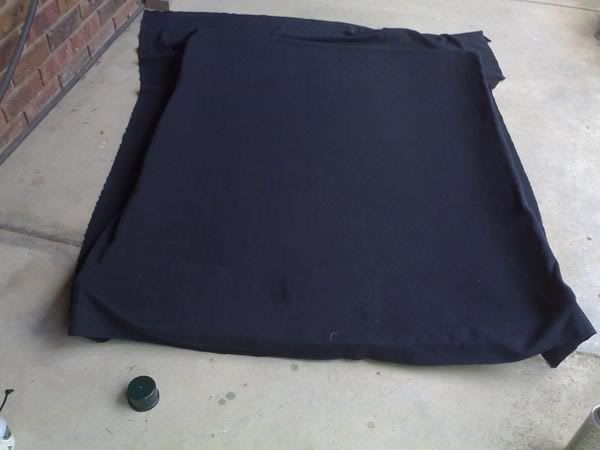
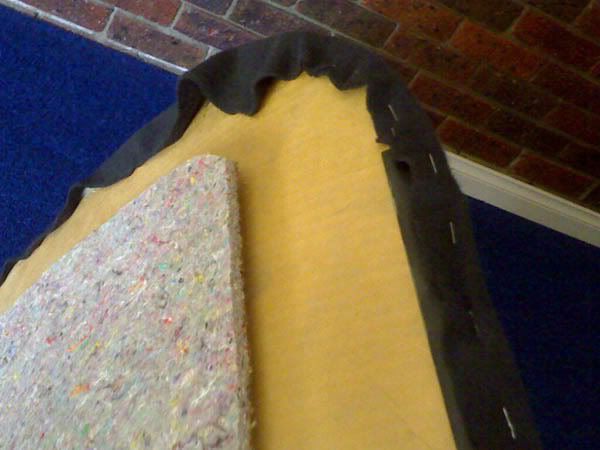
i purchased medium thickness fabric - almost like carpet from Laverton market (VIC). i purchased about 4m, and had a bit left over. i didn't pre cut the shape. i stuck the fabric down over the board, then cut the shape around the board later. i cut it a bit larger, then wrapped it around the edges to the back, and glued them in.
the whole board is now a lot thicker, but the rubber around the doors and trims still covers the edges. looks fine.
a tip for the glueing with contact adhesive - spread the glue nice and thick on BOTH surfaces, and leave to rest for about 2 to 3 mins. then stick the 2 surfaces together. once the glue starts to go off, it sticks much better and stronger. just make sure you're sure about the position you stick it, because it doesn't come off very easily after that! this especially useful when wrapping the fabric around the edges.
I didn't spread glue on both surfaces when i layed the main fabric on the side you see in the car. therefore I encountered some bubling up. but once the glue started to go off, i kept pressing down the fabric to the board and it eventually stuck.
CAREFUL WHEN REMOVING PLASTIC TRIMS - I WAS TOO ROUGH, AND I BUSTED A FEW.
WELL DONE MATE - THANKS!!! :yeah:
EXCELLENT GUIDE MATE!! A+
i registered to this forum purely to say thanks for the step-by-step guide.
i have a vs wagon with the same problem.
i fixed it and re-installed mine all in a few hours.
i purchased a 4l tin of contact adhesive from bunnings, used about 3/4 of it.
i purchased medium thickness fabric - almost like carpet from Laverton market (VIC). i purchased about 4m, and had a bit left over. i didn't pre cut the shape. i stuck the fabric down over the board, then cut the shape around the board later. i cut it a bit larger, then wrapped it around the edges to the back, and glued them in.
the whole board is now a lot thicker, but the rubber around the doors and trims still covers the edges. looks fine.
a tip for the glueing with contact adhesive - spread the glue nice and thick on BOTH surfaces, and leave to rest for about 2 to 3 mins. then stick the 2 surfaces together. once the glue starts to go off, it sticks much better and stronger. just make sure you're sure about the position you stick it, because it doesn't come off very easily after that! this especially useful when wrapping the fabric around the edges.
I didn't spread glue on both surfaces when i layed the main fabric on the side you see in the car. therefore I encountered some bubling up. but once the glue started to go off, i kept pressing down the fabric to the board and it eventually stuck.
CAREFUL WHEN REMOVING PLASTIC TRIMS - I WAS TOO ROUGH, AND I BUSTED A FEW.
WELL DONE MATE - THANKS!!! :yeah:
ZEDELEVEN
New Member
- Joined
- Mar 20, 2008
- Messages
- 1
- Reaction score
- 0
- Points
- 0
- Members Ride
- 97 vs series 2
It works great my mate paid 200 to get his fixed it averaged about 60 todo it yourself ,Ok so my project was changing the head liners in my car. And colour coding the sun visors and handles on the roof… Was over all very worth while as I got to customize the fabric to the colour I wanted and as im planing on doing up my cabin a bit. This was a great place to start…
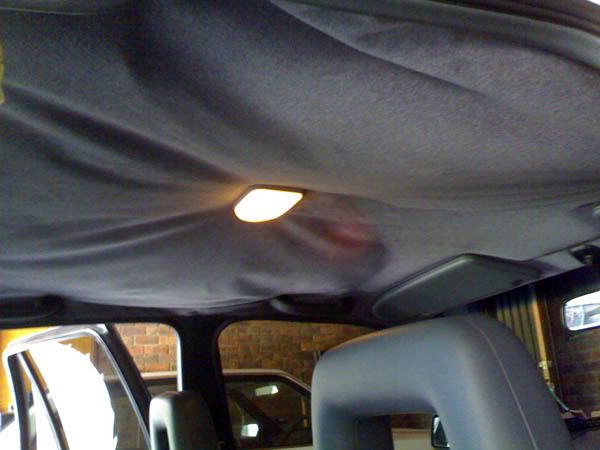
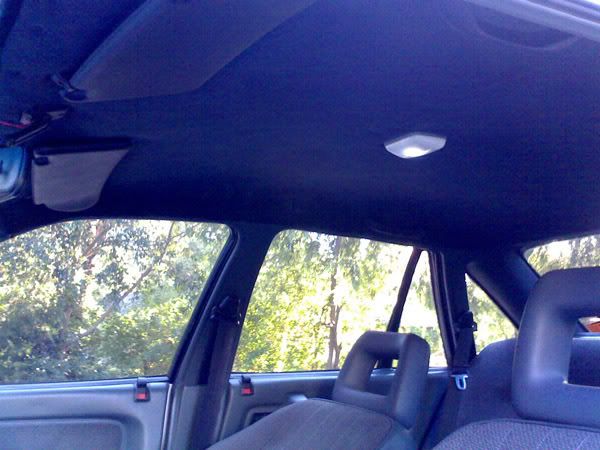
As you can see it got to the point where I could no longer just use pins to keep the fabric up…
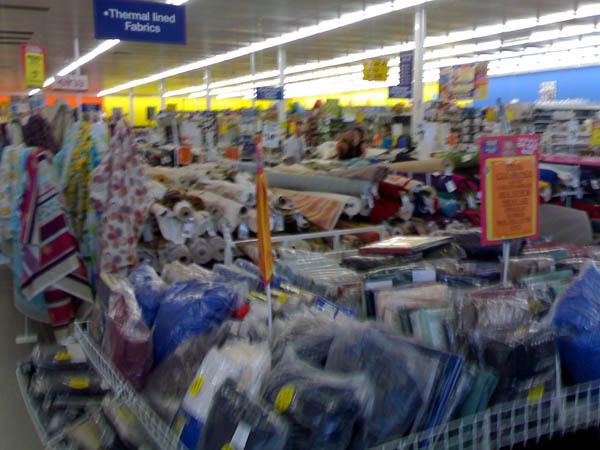
Ok so first I went to spot light and found some fabric that I liked. As you can see in the photo took me about a hour to find something I liked. Hence the massive amount of fabric spot light offers.
Ok so what I did
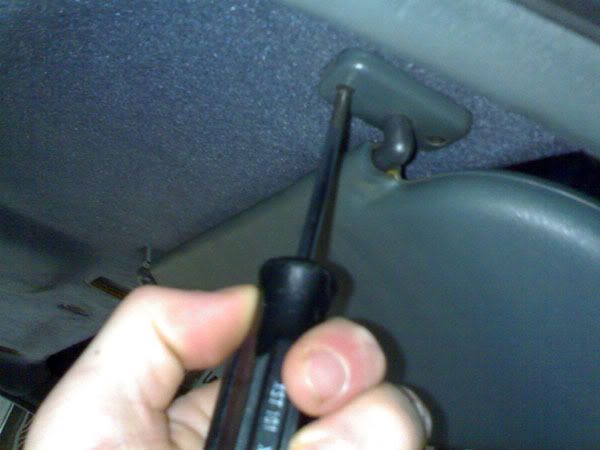
1) Unscrew the roof handles. And Sun visors and roof light. So as you can see. Pretty much the fabric just fell from the roof once I unscrewed the handles and sun visors.
2)Untuck the cardboard from around all the trims. This took me a while as I didn’t want to mess up the cardboard. But take your time so you don’t snap clips and trims
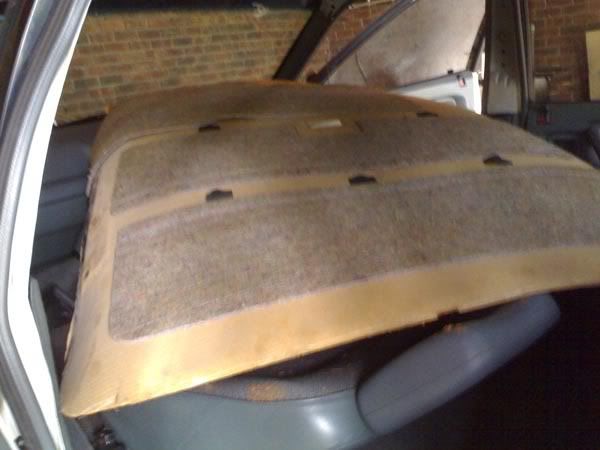
3)To get the roof out of the car. I slightly rolled it and took it out of the front passengers door.
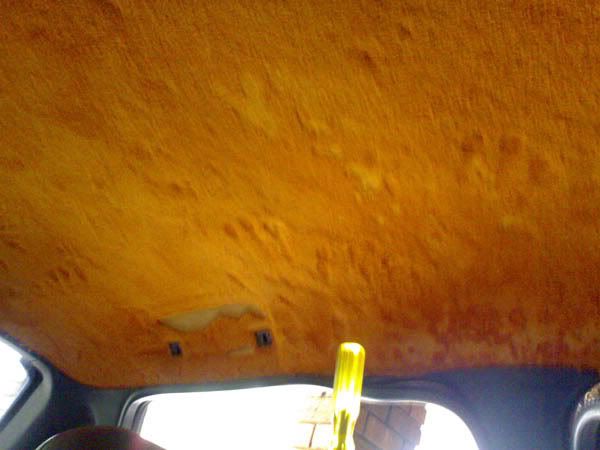
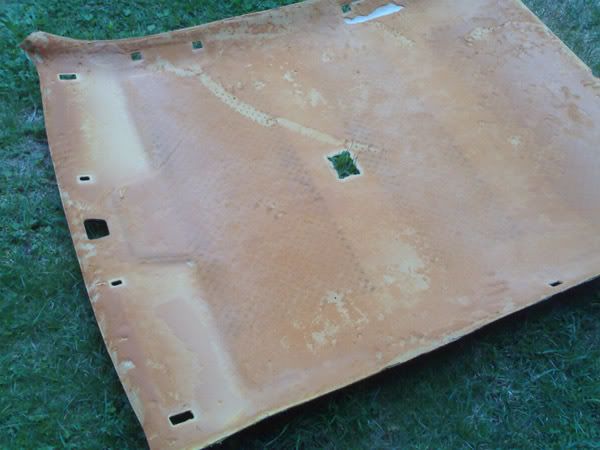
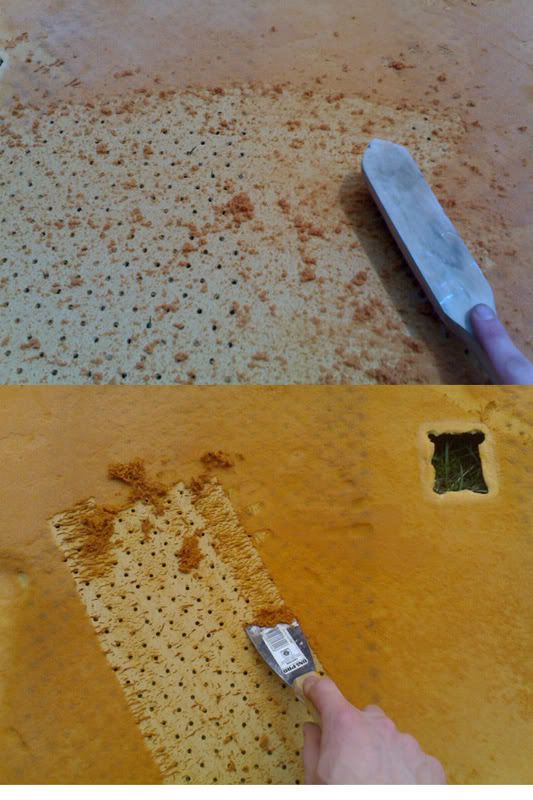
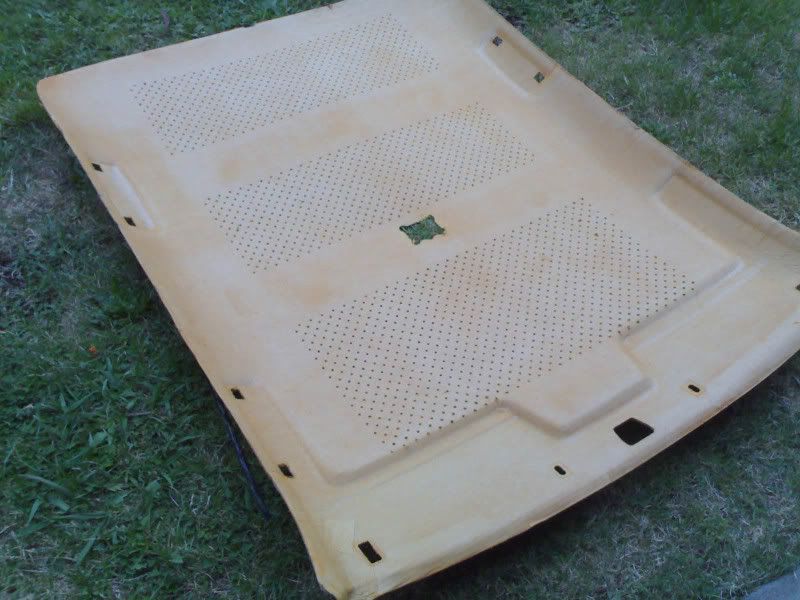
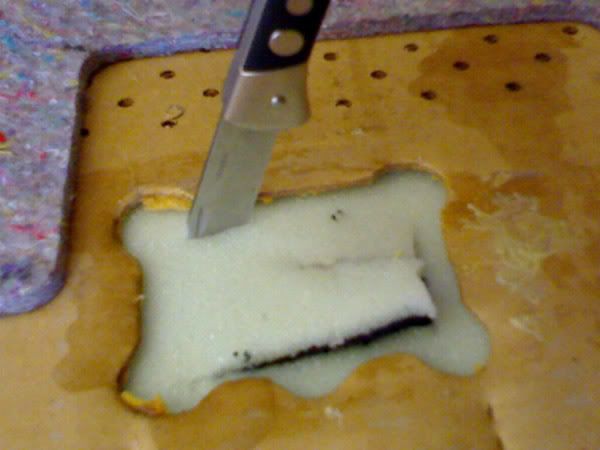
4)Place cardboard on ground and scrap and scrub the yucky orange foam off. I used a wire bush and a paint scraper. Took me maybe 30 mins to get it perfect.
5)Once clean I put contact adhesive on the board and placed some new foam.
6)Then I stapled the **** outta it to ensure it was going to stick
7)Once I trimmed it all down. I sprayed the material and the foam with spray adhesive
8)Waited 5 mins for both sides to become sticky then bonded both together… then got a clean paint roller and smoothed it out
9)Then stapled the left over material to the back of the board
10)Then cut out the holes for the roof light and roof handles
Then reinstall it back in the car. Was a pain in the arse but with 2 people putting it back in the car will prob take around half a hour. Hardest past is lining up all the screws with screw holes. Don’t do this on a hot sticky day. I did and I wanted to kill my self.
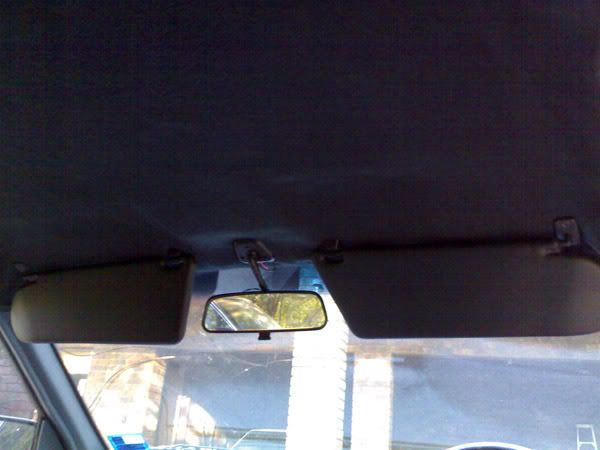
Over all think it looks great and was worth all the effort
Colour coding Sun visors and roof handles.
1.I got a can of VHT vinyl die and a tin of wax and grease remover.
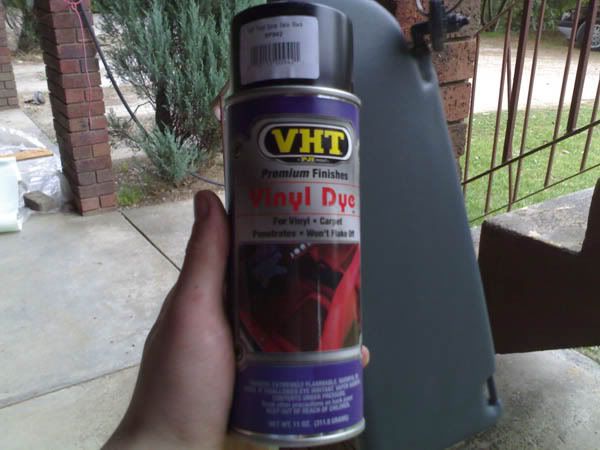
2.Gave the sun visors and handles a good clean with wax and grease remover then hanged them up on some coat hangers
3.gave them about 3 or 4 light sprays
4.Screw back in to roof.
OK guys I hope that helped you all out.
But whats the go with holden using Ford interior lights i unscrewed the light to get the lining out and there it was a big old dirty ford badge on it .
Youngblood
New Member
na, cant say I ever noticed a ford badge or wording anywhere, if I did I would have cremated her in the drive way, lol, but all bull**** aside,if you can change a spare wheel or wipe your arse yourself you can can do a roof lining, dont need to be a rocket scientist to do this one. no hard feelings if you cant or dont try though. lol.
jas98
Active Member
- Joined
- Nov 12, 2006
- Messages
- 1,661
- Reaction score
- 9
- Points
- 38
- Age
- 34
- Location
- maryborough QLD
- Members Ride
- vs commodore V6 S2 and a BA XR6T
i to have noticed that some fords use the same shaped interior lights as holdens.....which ford has ford on them and holden has some other name ....BUT its true ford used the same lights as holden on the ea? i think i saw em on not sure but it was one of them
blueholden
New Member
- Joined
- Jan 11, 2006
- Messages
- 63
- Reaction score
- 0
- Points
- 0
- Members Ride
- VN
If you want something a lil more flash you can also get some cardboard and cut out shapes sutch as flames or holden symbols. Just stick your cutout to the roof linning cardboard before the material. Then cover with glue and material then just push it all down hard especially around your cutout's edges.
You then have an embosed roof linning for the extra cost of some card board
You then have an embosed roof linning for the extra cost of some card board