Welcome to Just Commodores, a site specifically designed for all people who share the same passion as yourself.

New Posts Contact us

Just Commodores Forum Community

It takes just a moment to join our fantastic community

Register

My Torana Rebuild

Zeussy

SSM11K
Joined
Dec 26, 2008
Messages
1,298
Reaction score
14
Points
38
Location
Central Coast
Members Ride
Gen-F Clubsport, Rodeo 2.8 TD 4x4
Yeah man, just a little while! Again, this is the first thread I posted in, couldn't resist...

Nah, no scoop, no hole in bonnet, all under neath, with clean and simple lines! (If possible).

Waiting patiently..! :D
 

383 hatch

Well-Known Member
Joined
Jun 14, 2005
Messages
3,922
Reaction score
67
Points
48
Age
41
Location
Cowes, Phillip Island
Members Ride
VG Ute 5.0,Torana hatch 383,WB Ute 5.0,VR stato5.0
Ok, so here we go.

So, i bought another block and had it bored as i said in my previous post. Then after i dummied it up i had it decked .010 and new cam bearings fitted. I got it back this weekend and last night i set up the ring gaps. That's about as far as i got, because today was a Chevelle day.

Some pics:

The block. Hot tanked, bored and honed, decked, new cam bearings.
IMGP3273600x450.jpg

IMGP3274600x450.jpg

IMGP3275600x450.jpg


Oil returns cleaned up, these were nearly blocked with casting.
IMGP3276600x450.jpg


Some external castings removed.
IMGP3277600x450.jpg

IMGP3278600x450.jpg


Just a couple of pics with a head sat on...
IMGP3279600x450.jpg

IMGP3280600x450.jpg


Rings all gapped up ready to go.
IMGP3281600x450.jpg


That's about it for now, just have to give the block a final wash and i can start assembly.
 

383 hatch

Well-Known Member
Joined
Jun 14, 2005
Messages
3,922
Reaction score
67
Points
48
Age
41
Location
Cowes, Phillip Island
Members Ride
VG Ute 5.0,Torana hatch 383,WB Ute 5.0,VR stato5.0
So this weekend i decided i might start to put the 383 together.

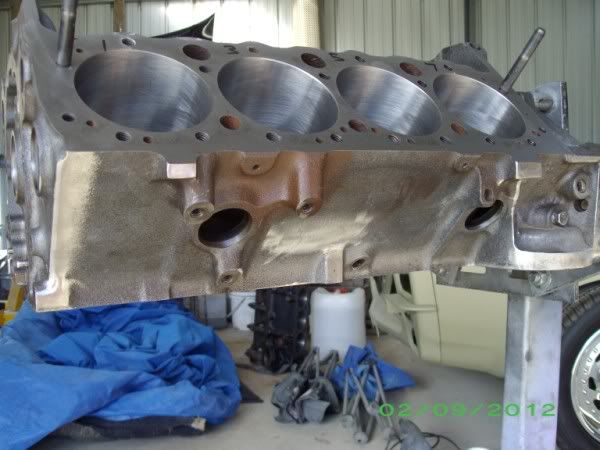
I gave the block a final steam clean at work on Friday, it'd been washed by the machinist, but i always give the block a good steam clean myself before i put it together.

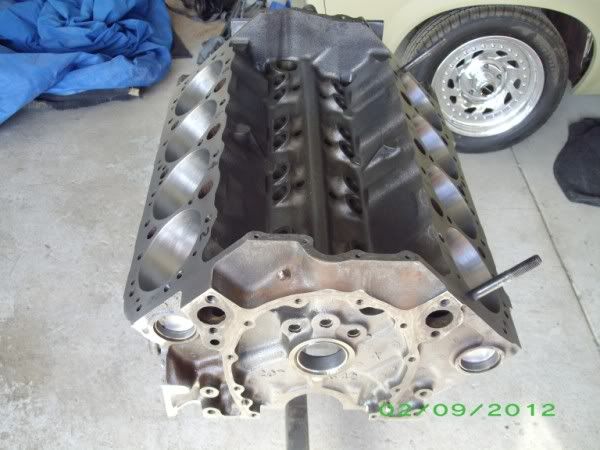
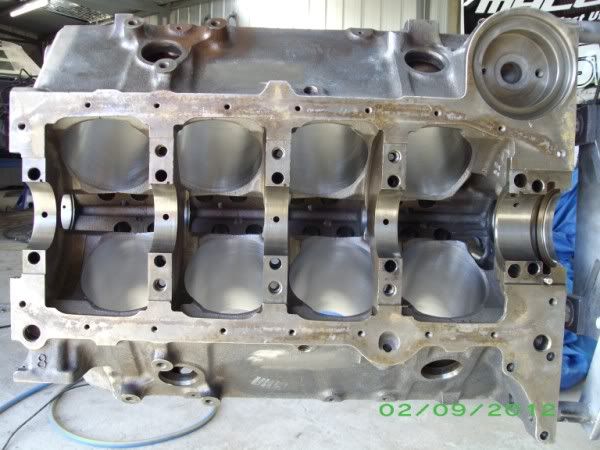
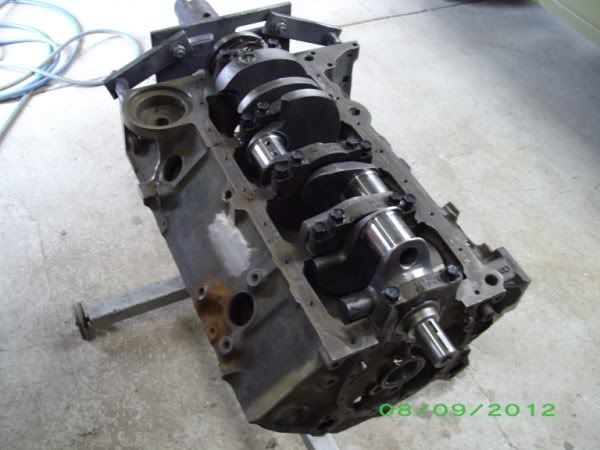
So, first thing is first, crank in.
IMGP3289600x450.jpg

IMGP3290600x450.jpg

That went in nicely and spins freely.

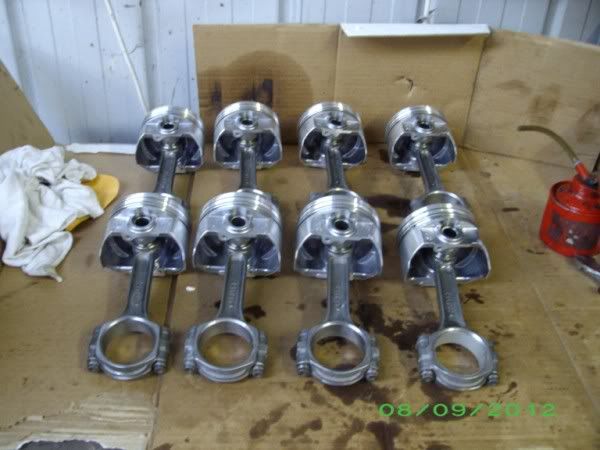
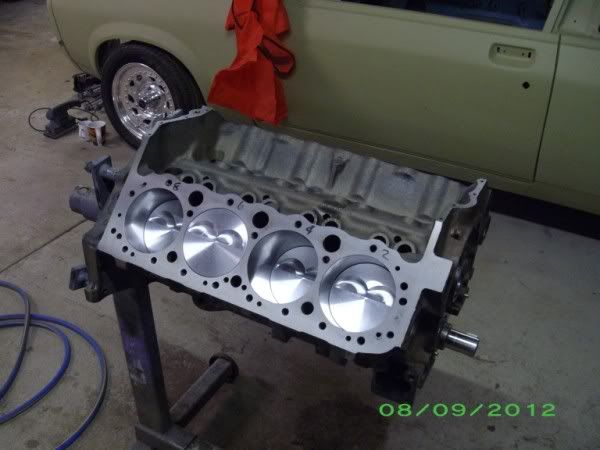
With that in, i fitted the pistons to the rods. These are full floating rods, so i can fit them myself without much trouble (don't need to be pressed in like press fit rods). They have whats known as a spirolock to hold the gudgeon pin in the piston. One each side. I havn't done these for a while, they are a bit tedious, but once i'd done a couple i got the hang of it again. However, once i'd done it 16 times, i was a bit over it :p

Done.
IMGP3291600x450.jpg


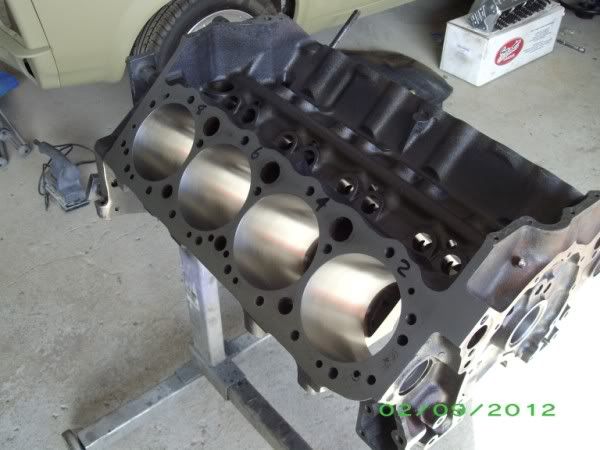
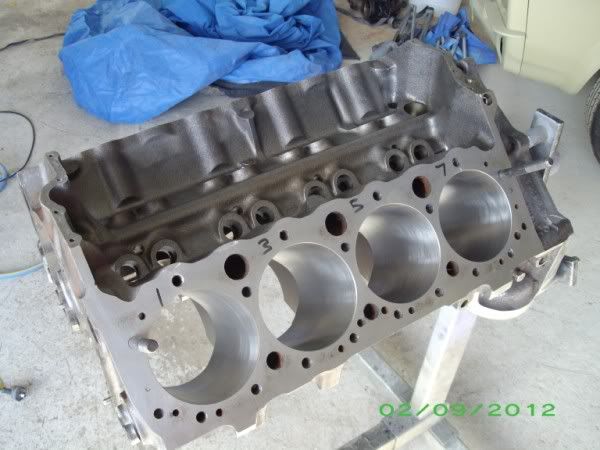
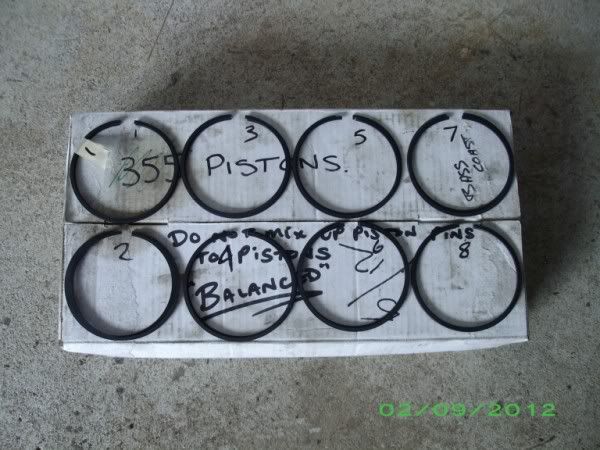
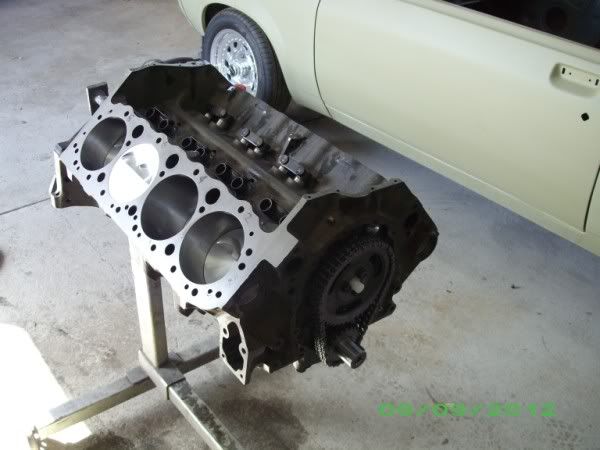
Then i fitted the rings (no pics, not really much to see) and banged the pistons in the holes.
IMGP3295600x450.jpg

IMGP3296600x450.jpg


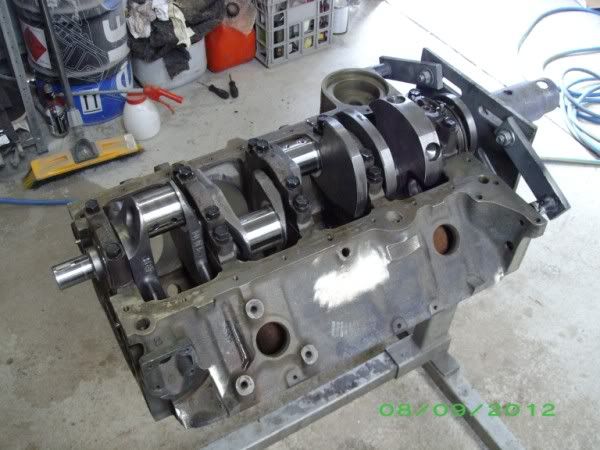
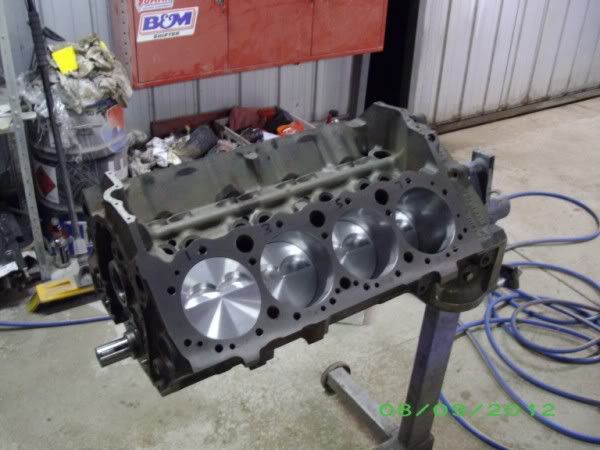
That's about where i left it last night, all went well.

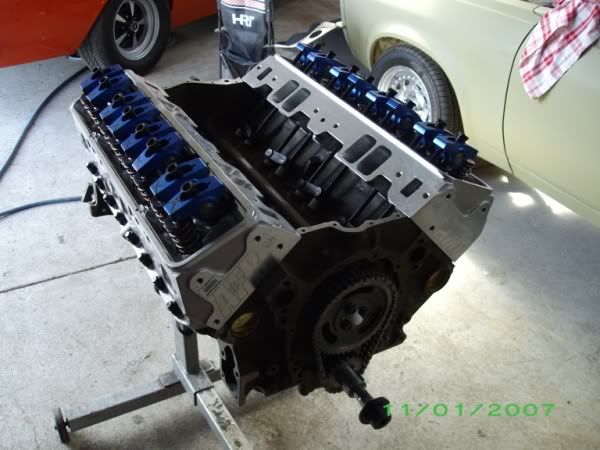
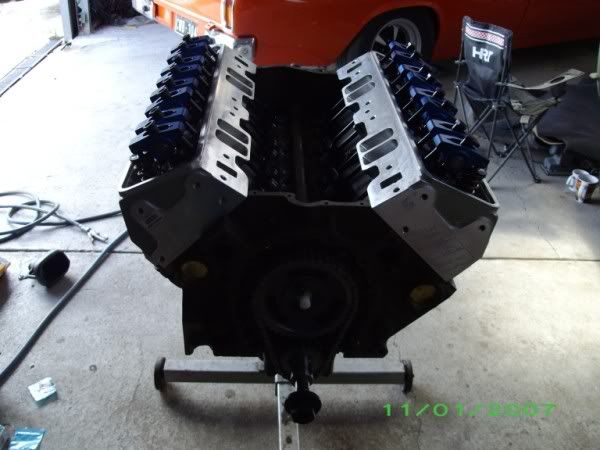
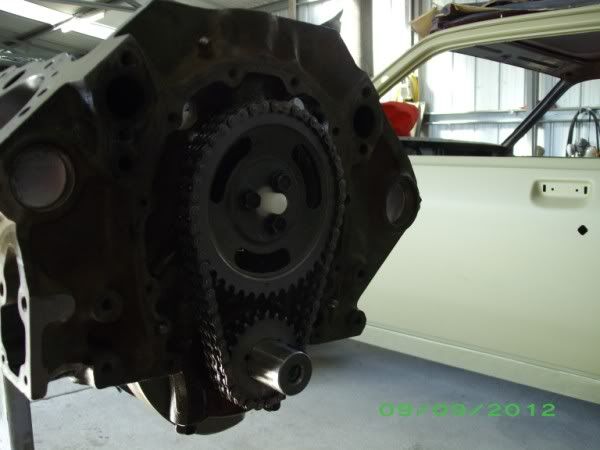
Then this morning, i fitted the camshaft, timing chain and roller lifters. Note the bars holding the lifters together to stop them turning around, this is because it's an early block and the lifters are what's known as retrofit roller lifters. Factory roller cam engines don't have this (Holden or Chev), they have a different set up. Also note the cam button to stop the cam walking out, again this is because it's retrofitted.

IMGP3299600x450.jpg

IMGP3300600x450.jpg

IMGP3301600x450.jpg


And that is where i hit my first hitch of the build. Turned the crank slowly about 1 and a half revolutions and it stopped turning. Number 2 rod touched one of the front cam lobes. This is pretty common on 383 stroker Chevs, depending on the set up, it might not happen, but on mine it did. It only *just* clipped the lobe. It was so minute it didn't even mark the lobe or the rod. So, i blued up the cam lobe and brought it around slowly again and i found where it hit. So, back out with number 2 piston and rod for a light bit of clearancing. Took a tiny bit off the rod (only where the back of the rod bolt is), cleaned and fitted it again, problem solved. All the rest of the rods and lobes clear fine.

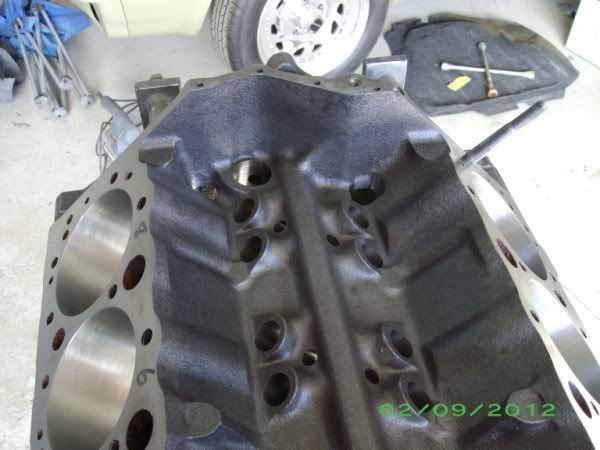
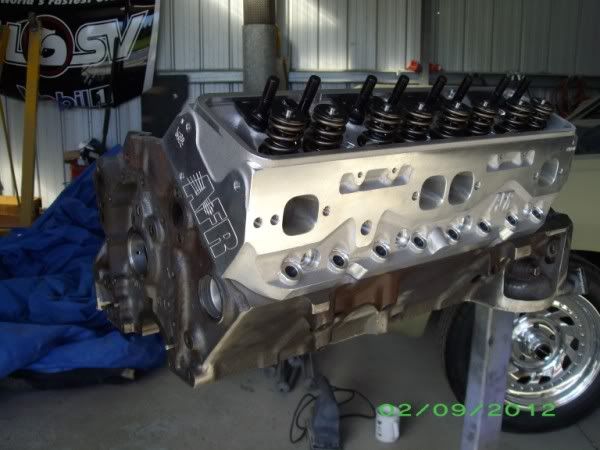
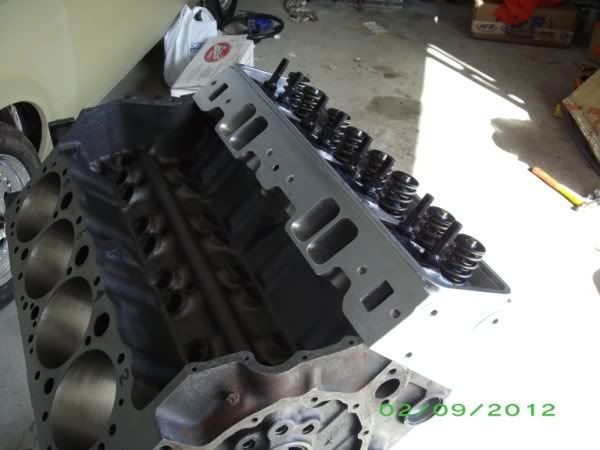
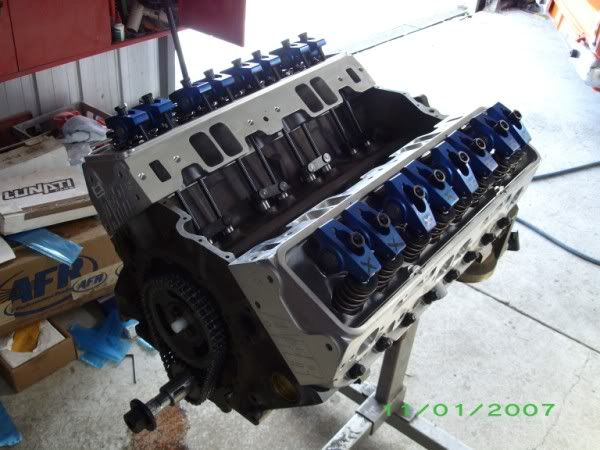
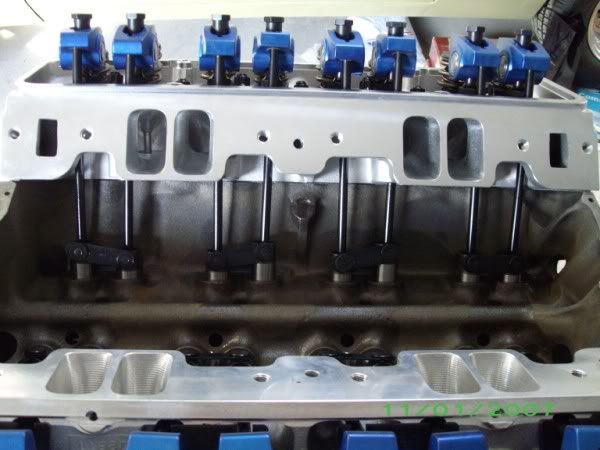
With that all done, i sat a head on and loosely bolted it down. Put the pushrods in (supplied in the cam kit) on number 1 cylinder, fitted the rockers and found the pushrods are too short (i was 99% sure they wouldn't fit, i don't even know why they are supplied in the kit as there are so many variables), so now i need to measure up for the right pushrods. That's where i left it today as i don't have an adjustable pushrod here, we have one at work. Stay tuned, i'll be doing that this week.
 

GTS-Replica

Full Members
Joined
Jul 22, 2011
Messages
1,319
Reaction score
6
Points
38
Location
Sydney NSW
Members Ride
VE Calais V International / VS GTS-R Replica!
Thats the toughest uc i have seen! enough said...!
 

383 hatch

Well-Known Member
Joined
Jun 14, 2005
Messages
3,922
Reaction score
67
Points
48
Age
41
Location
Cowes, Phillip Island
Members Ride
VG Ute 5.0,Torana hatch 383,WB Ute 5.0,VR stato5.0
So, yesterday i finished building the 383. I'll just post some pics, they tell all :)

IMGP3309600x450_zpsecb5b7d7.jpg

IMGP3310600x450_zpse83b64dc.jpg

IMGP3311600x450_zpsd1a88964.jpg

IMGP3312600x450_zps2b6ab42b.jpg

IMGP3313600x450_zps8a0ab8fe.jpg

IMGP3314600x450_zpse3730cee.jpg

IMGP3315600x450_zps86b42fa0.jpg


It's up to the point where i am ready to paint it (just the block, not the heads obviously), and also paint the sump, timing cover and water pump. Then i can finish putting it together. The manifold is also just sat in place as i need to do something about making it look a bit nicer.

Trying to make a decision on colour atm.
 

383 hatch

Well-Known Member
Joined
Jun 14, 2005
Messages
3,922
Reaction score
67
Points
48
Age
41
Location
Cowes, Phillip Island
Members Ride
VG Ute 5.0,Torana hatch 383,WB Ute 5.0,VR stato5.0
But, the car isn't going to be black? It's going to be blue again, probably a slightly different blue to what it was but very similar.

At this point, i'm thinking either gunmetal grey or body colour. I think body colour could work with the alloy heads and black rocker covers.
 
Top