JoshSvc
New Member
- Joined
- Oct 15, 2008
- Messages
- 144
- Reaction score
- 2
- Points
- 0
- Location
- Central Coast, NSW
- Members Ride
- VN Sedan - The Beige Bandit!
I was sick of putting my drink in the compartment under the arm rest in the centre console, so i decided to put one in beside the hand brake, this is what i did.
Yes i know afew of you have done stuff similar to this but thought i would post a how-to for those who haven't.
You will need,
Flat blade screw driver
Philips Head screw driver
Hair dryer or heat gun
Cold water tap near by
Cup Holder itself - Pic Below
Adhesive - I used liquid Nails
Plastic spray paint
Hole Saw Bits
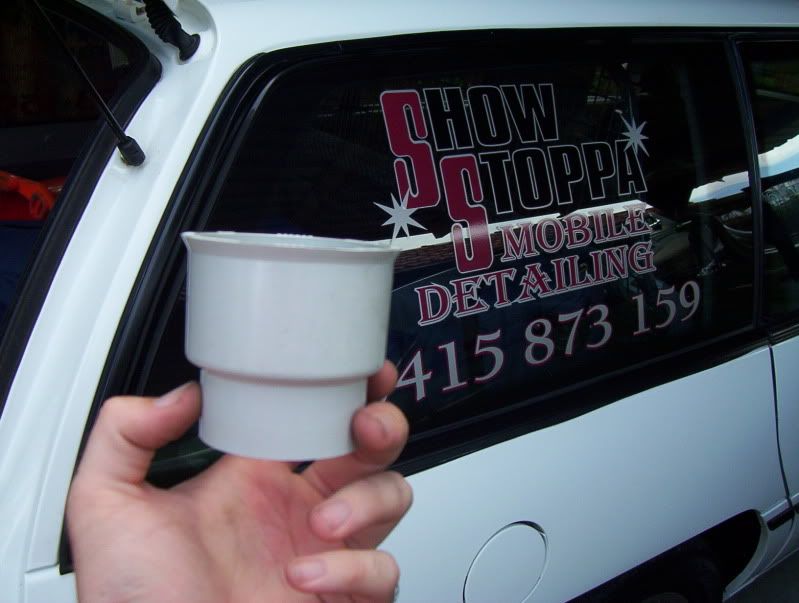
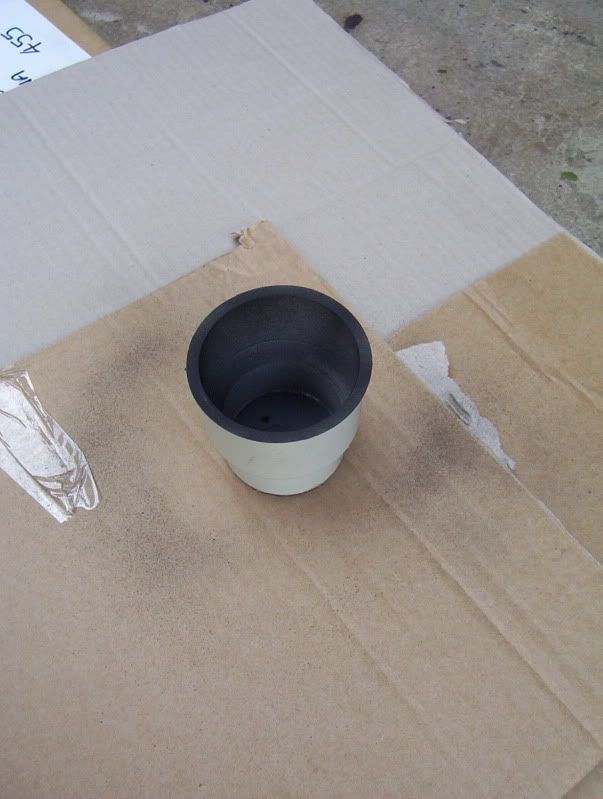
This is the plumbing fitting i am going to be using, bought it from bunnings, cost $3 max, what ever you use make sure a drink fits in it, can etc, dont just guess.
#1 Remove the Centre Console
#2 Remove the Arm rest from the centre console, i only did this as it makes it easier to work on the console.
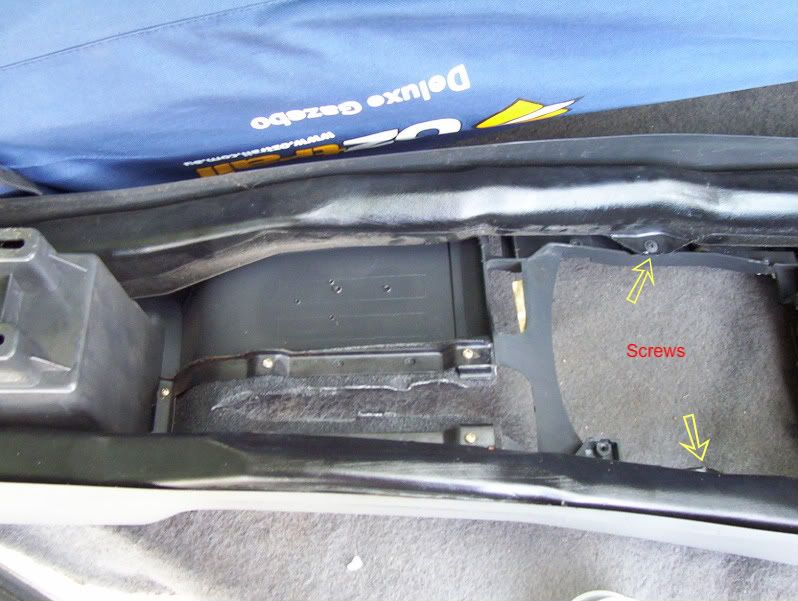
#3 You need to remove the vents at the back of the console in order to take out the air ducting which runs up both sides of the console, once you have taken the vents out undo the 2 screws ( 1 each side ) of the console and the plastic ducting will come out.
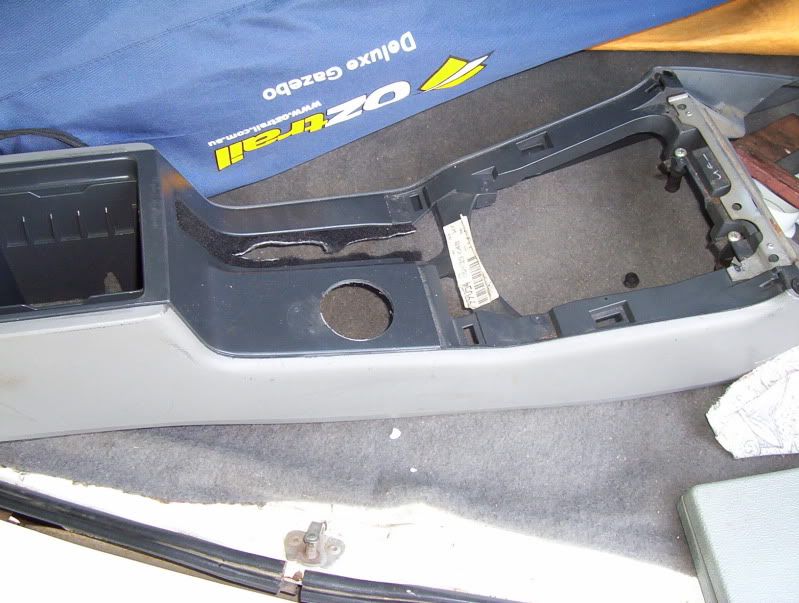
#4 Now with that out, mark where you want your cup holder, you SHOULD be able to fit 2 of these in 1 behind the other, but my console has holes drilled in it from a mobile phone cradle and i put mine in a location abit further back than i would of with a undamaged console. Keep in mind the ducting has to go back in.
#5 Get your hole saw and make sure the blade is slightly smaller than the pvc cup holder BUT still big enough to fit a can etc. and start cutting, double checking your drilling in the right spot. Go slow as you dont want to damage the console EG crack it. Once you have cut the hole DONT throw out the off piece as that comes into use later.
#6 Once the hole is cut tidy the edges up with a small file etc if needed, now put the cup holder into position to make sure its a nice fit.
Give the top of the cup holder abit of a scuff up with some sand paper so the glue has something to stick to, if your cup holder has embossed writing on it like mine did on the top make sure you take that off too.
Now get the offcut and give it a good clean as well as the base of the cup holder, My offcut fit perfectly on the base of the cup holder, so i used it as the base. Simply glue it in place.
Allow the glue to dry give the whole lot a clean and then give it afew coats with your plastic paint.
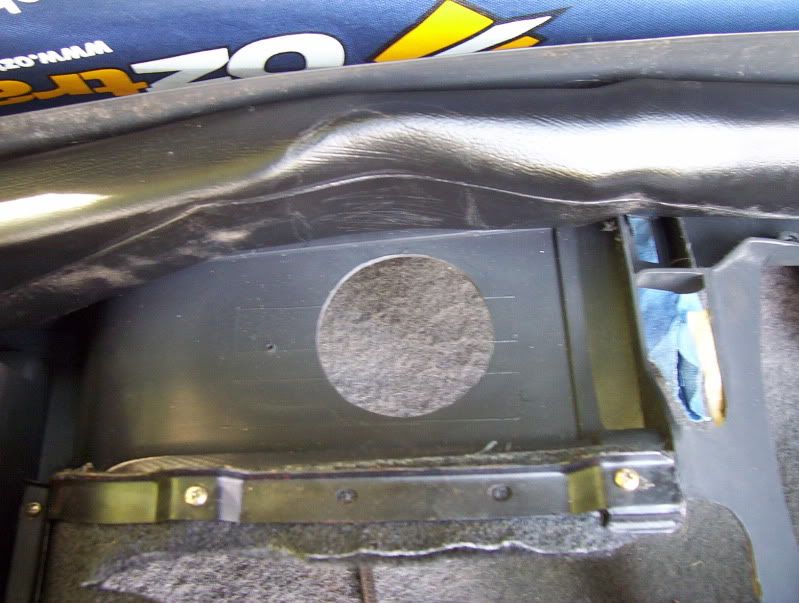
#7 Now put the ducting back into position and test fit your cup holder, mine was hitting on the ducting so i used a Hair Dryer ( No its not mine ) to soften the ducting up where the cup holder was hitting it and moulded it to suit, This took afew goes to get right and make sure you put it under cold water when you are finished as that will harden the plastic back up and it should retain its shape.
This was my first go at the ducting, i had to give it 3 more goes before i was happy. You could cut the section out that hits the cup holder and drill some holes into the holder itself so that when you put the a/c on it cools your drink at the same time, i think this would work as long as the holes lined up with the section you cut out.
#8 Put the Ducting back in and put plenty of adhesive around the top of the cup holder and clamp it into place. Let it dry, this can take anywhere from an hour to afew days depending what you use.
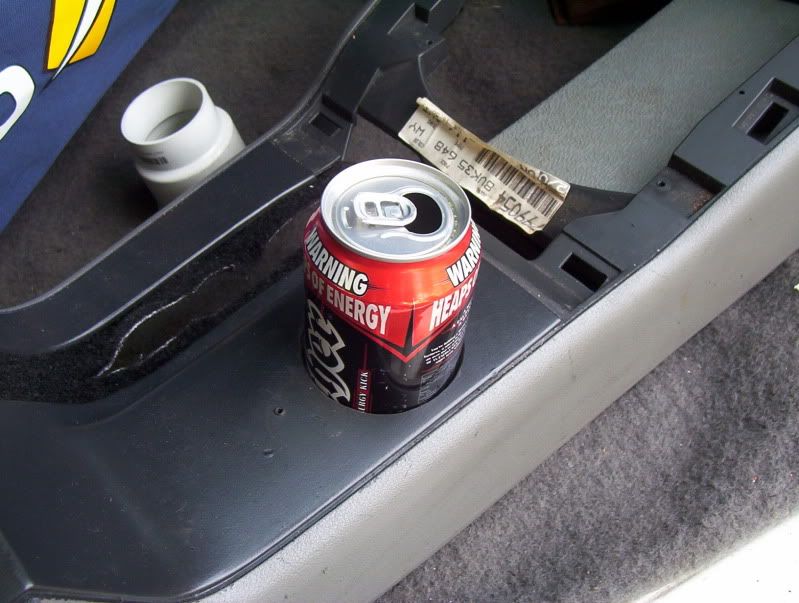
It should look something like this now.
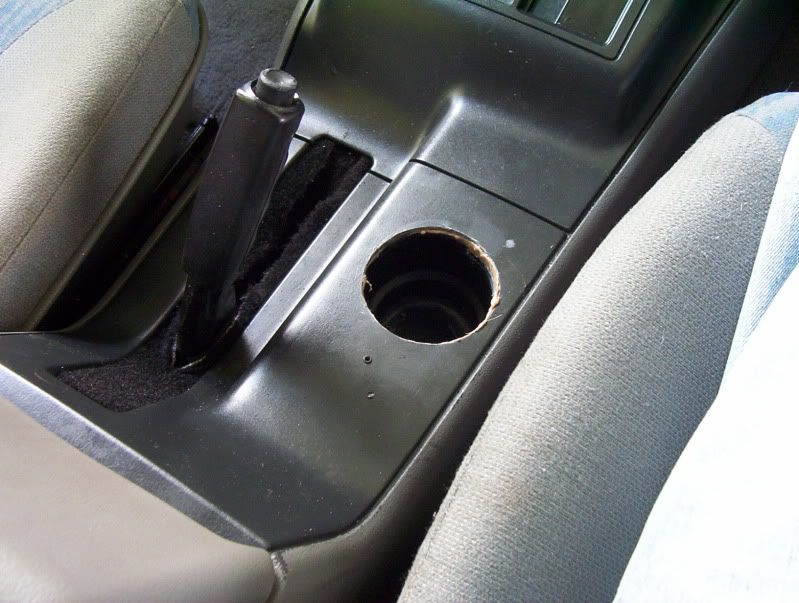
Once it has set properly give it a light sand if the adhesive has oozed out like mine did and mask up around the hole and give it a final coat of plastic paint OUTSIDE the car and Cut a round piece of carpet to fit into the base of the holder. If your happy with the final finish thats great, but i plan on finding some piping to fit onto the lip of the holder to give it a neater look.
I am yet to do the final stage as my cup holder adhesive is still setting. Once its set properly i will get some pics of the final product.
Hope this was Helpful!
Cheers
Josh
Yes i know afew of you have done stuff similar to this but thought i would post a how-to for those who haven't.
You will need,
Flat blade screw driver
Philips Head screw driver
Hair dryer or heat gun
Cold water tap near by
Cup Holder itself - Pic Below
Adhesive - I used liquid Nails
Plastic spray paint
Hole Saw Bits
This is the plumbing fitting i am going to be using, bought it from bunnings, cost $3 max, what ever you use make sure a drink fits in it, can etc, dont just guess.
#1 Remove the Centre Console
#2 Remove the Arm rest from the centre console, i only did this as it makes it easier to work on the console.
#3 You need to remove the vents at the back of the console in order to take out the air ducting which runs up both sides of the console, once you have taken the vents out undo the 2 screws ( 1 each side ) of the console and the plastic ducting will come out.
#4 Now with that out, mark where you want your cup holder, you SHOULD be able to fit 2 of these in 1 behind the other, but my console has holes drilled in it from a mobile phone cradle and i put mine in a location abit further back than i would of with a undamaged console. Keep in mind the ducting has to go back in.
#5 Get your hole saw and make sure the blade is slightly smaller than the pvc cup holder BUT still big enough to fit a can etc. and start cutting, double checking your drilling in the right spot. Go slow as you dont want to damage the console EG crack it. Once you have cut the hole DONT throw out the off piece as that comes into use later.
#6 Once the hole is cut tidy the edges up with a small file etc if needed, now put the cup holder into position to make sure its a nice fit.
Give the top of the cup holder abit of a scuff up with some sand paper so the glue has something to stick to, if your cup holder has embossed writing on it like mine did on the top make sure you take that off too.
Now get the offcut and give it a good clean as well as the base of the cup holder, My offcut fit perfectly on the base of the cup holder, so i used it as the base. Simply glue it in place.
Allow the glue to dry give the whole lot a clean and then give it afew coats with your plastic paint.
#7 Now put the ducting back into position and test fit your cup holder, mine was hitting on the ducting so i used a Hair Dryer ( No its not mine
) to soften the ducting up where the cup holder was hitting it and moulded it to suit, This took afew goes to get right and make sure you put it under cold water when you are finished as that will harden the plastic back up and it should retain its shape.This was my first go at the ducting, i had to give it 3 more goes before i was happy. You could cut the section out that hits the cup holder and drill some holes into the holder itself so that when you put the a/c on it cools your drink at the same time, i think this would work as long as the holes lined up with the section you cut out.
#8 Put the Ducting back in and put plenty of adhesive around the top of the cup holder and clamp it into place. Let it dry, this can take anywhere from an hour to afew days depending what you use.
It should look something like this now.
Once it has set properly give it a light sand if the adhesive has oozed out like mine did and mask up around the hole and give it a final coat of plastic paint OUTSIDE the car and Cut a round piece of carpet to fit into the base of the holder. If your happy with the final finish thats great, but i plan on finding some piping to fit onto the lip of the holder to give it a neater look.
I am yet to do the final stage as my cup holder adhesive is still setting. Once its set properly i will get some pics of the final product.
Hope this was Helpful!
Cheers
Josh