Welcome to Just Commodores, a site specifically designed for all people who share the same passion as yourself.

New Posts Contact us

Just Commodores Forum Community

It takes just a moment to join our fantastic community

Register

Project Que'y

Zeussy

SSM11K
Joined
Dec 26, 2008
Messages
1,298
Reaction score
14
Points
38
Location
Central Coast
Members Ride
Gen-F Clubsport, Rodeo 2.8 TD 4x4
Hey fella's, back finally..!

Picking up where I left off, all those moons ago, there's not been a hell of a lot of progress, but none the less...
Basically all this stuff has taken place over the last 6 months to a year/when I was last on here..

IMG_0169.jpg


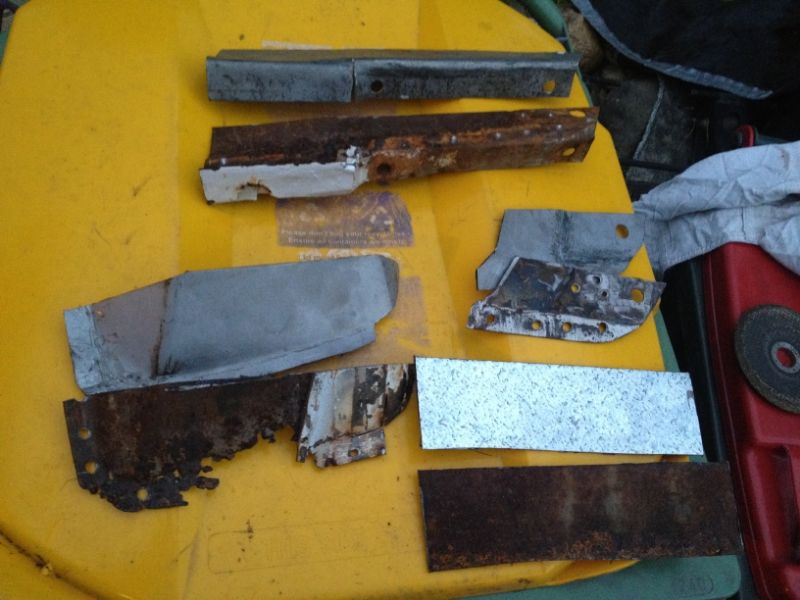
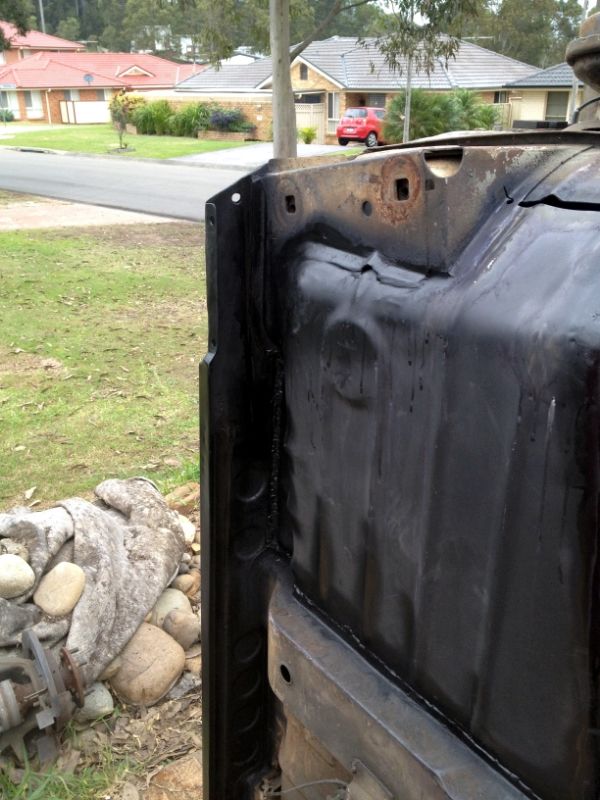
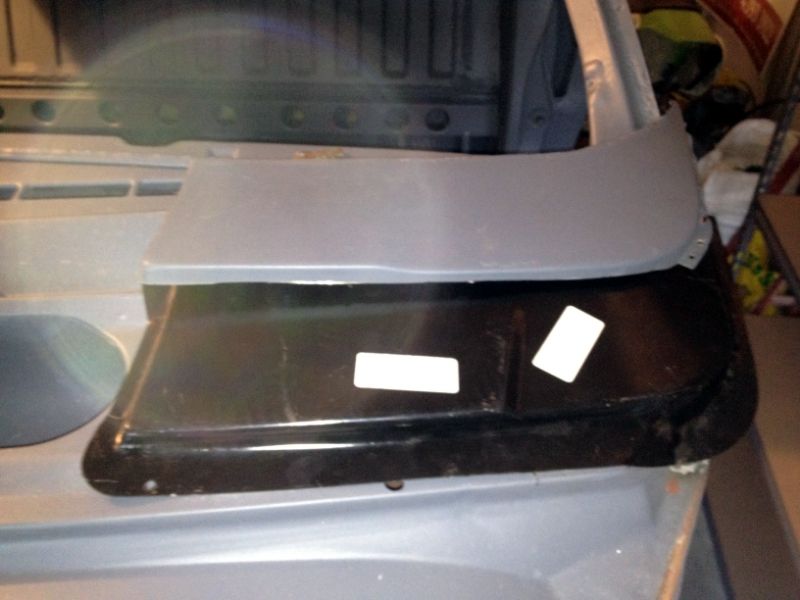
These are the old and new bits for the front drivers side lower part of the cab, where the front guard bolts on pretty much..

IMG_0172.jpg


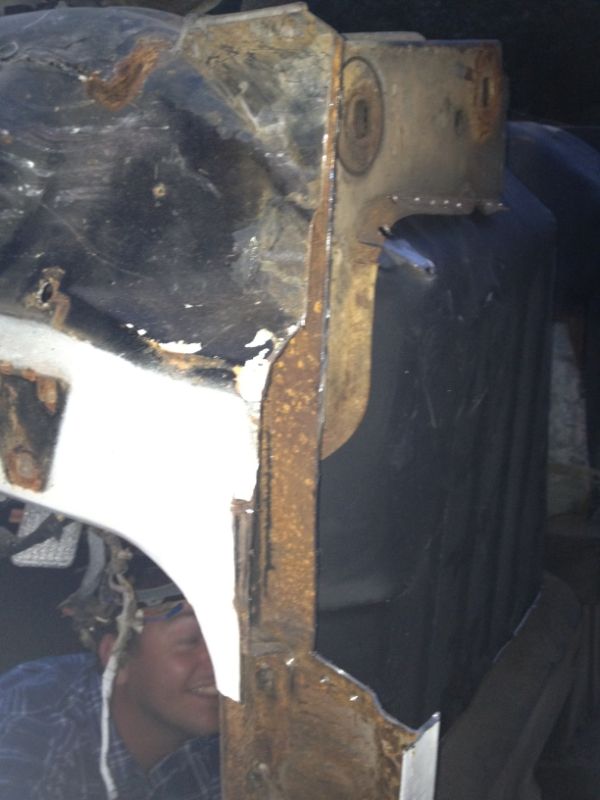
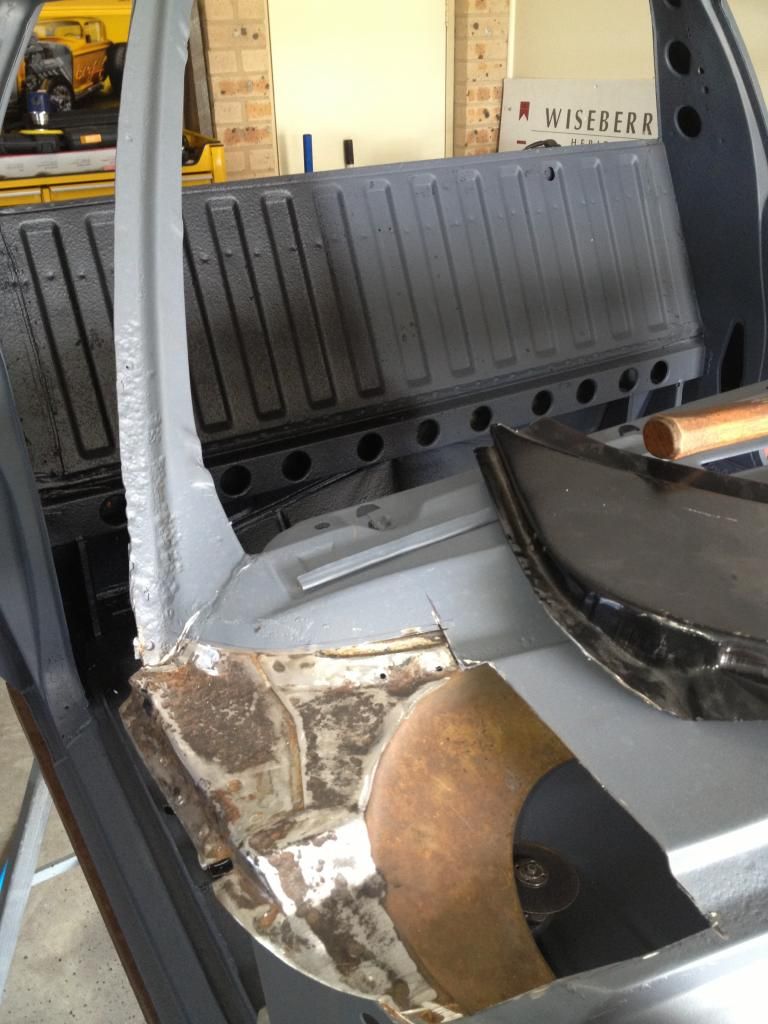
This is the section in question, didn't look too bad from the outside, but knew from the other side there'd be cancer in there.. The floor pan was only being held in by my sisters fiance` (at the time, now husband).. All the 'inner' panels were rust treated, primed with a zinc rich weld through primer..

IMG_0180-1.jpg


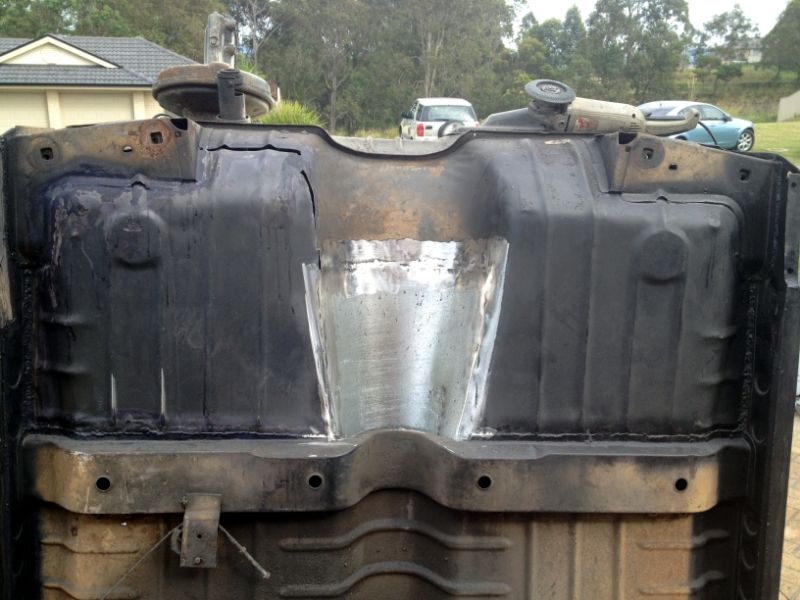
Both front floor pans in, and trans tunnel repaired, just needed to add in a filler strip as you can see on the drivers side..

IMG_0183.jpg


You can see the repaired section in front of the new sill, not quite up to BlownV6's quality of work, :p but pretty good for me, can hardly tell it's been repaired..

IMG_0192.jpg


Another shot from the inside..

IMG_0193.jpg


The passenger side, it was finished a while before the drivers side just never really put a pic up..

IMG_0194.jpg


From the outside, passenger side..

IMG_0353.jpg


All four floor pans finished, sill - lower inners and complete outers finished, front lower sections finished, almost, I think there was a bit more to go on the drivers side rear quarter..
Those rear cross member pieces (where the seats bolt too) were stupidly spastic. Should have just cut them out with the floor pans, then re-welded them in, instead of cutting the old floor pan out in two pieces..

IMG_0366.jpg


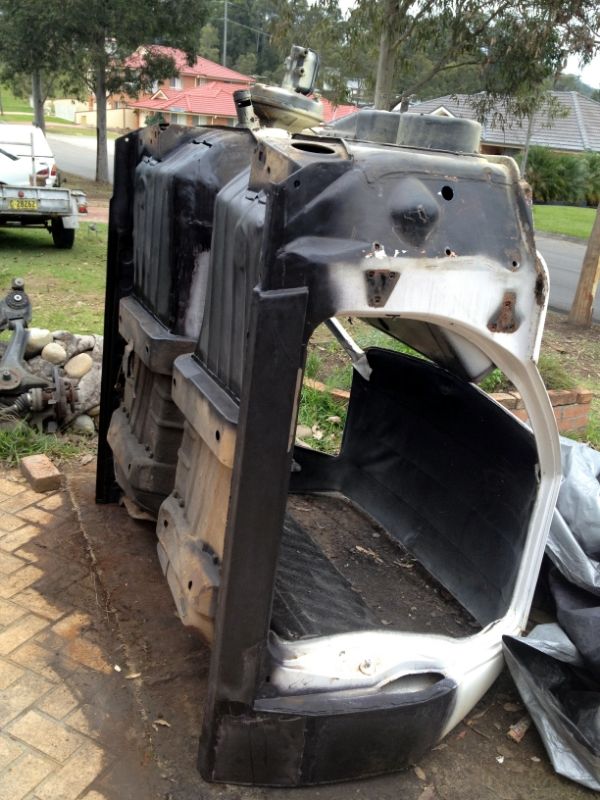
So after the lower sections were complete we figured we'd get it up on some trestles, with the help of my brother-in-law it was easy (he made them!)..

IMG_0412.jpg


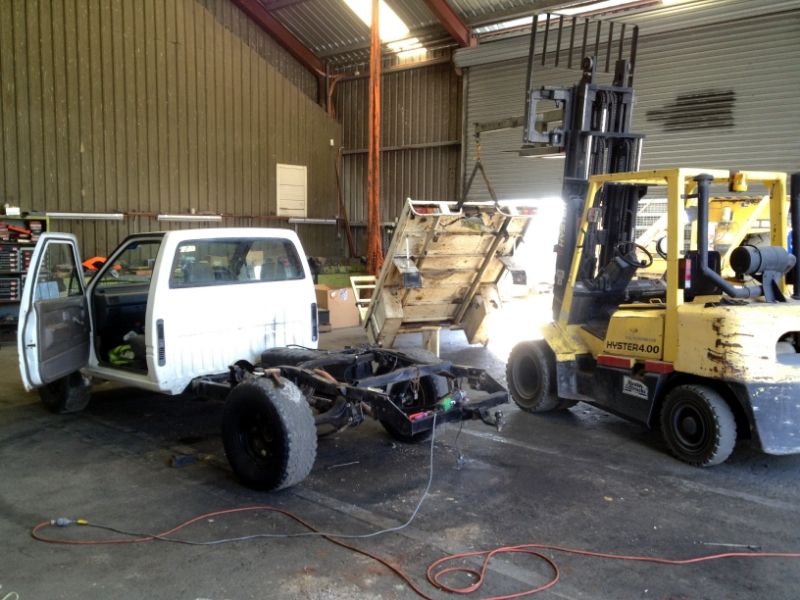
That's about the time the Senator got stolen/parents house robbed, so while waiting for the insurance money I bought a sketchy old rodeo, 1996 model, turbo diesel.. Got it cheap because "the tray mounts were broken off the tray"
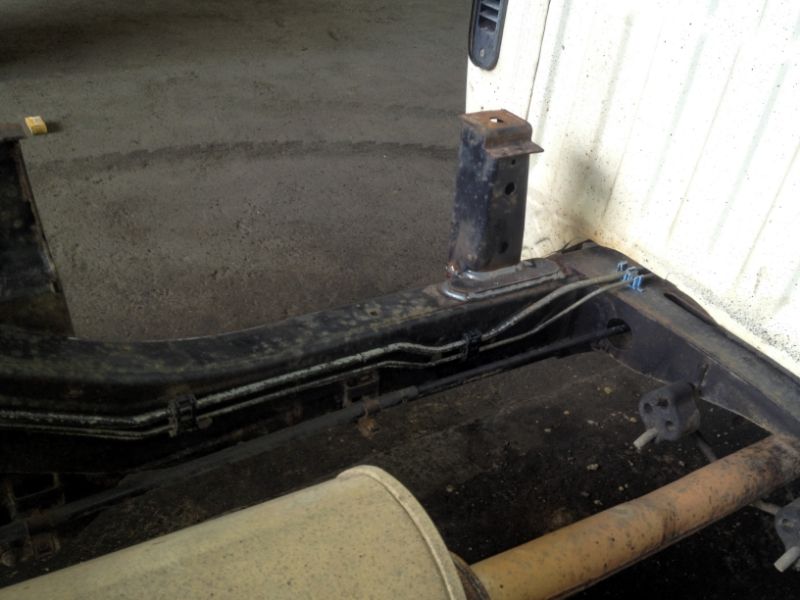
Turns out the tray mounts were snapped off the chassis.. :hmmm:
Saturday arvo/Sunday shonk at work, used the fork lift to make things easier.. Had to remake all the mounts on the tray as well as adding a length of 'c' section along the rear of the tray for strength..

IMG_0417.jpg


Those mounts were snapped clean off, so we added a 6mm fish plate for reinforcement, and welded it back together.. Again, brother-in-law did...

IMG_0439.jpg


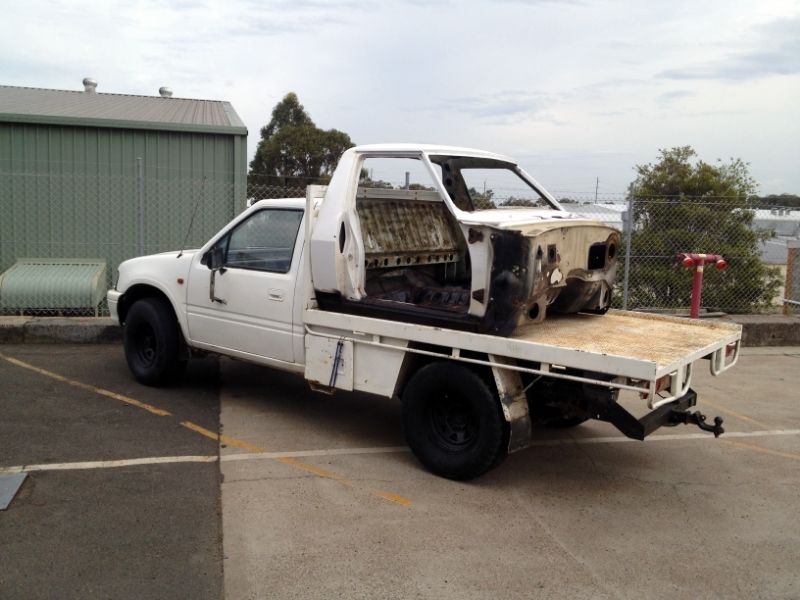
Then I made the best/worst decision of my life, bought a house, with a good size back yard, big enough for at least a three car shed/garage in the future..
So there went most of the insurance money from the Senator, setting the house up, legal fee's etc..
But ultimately good, cause it gets the Ute out of the weather..

IMG_0442.jpg


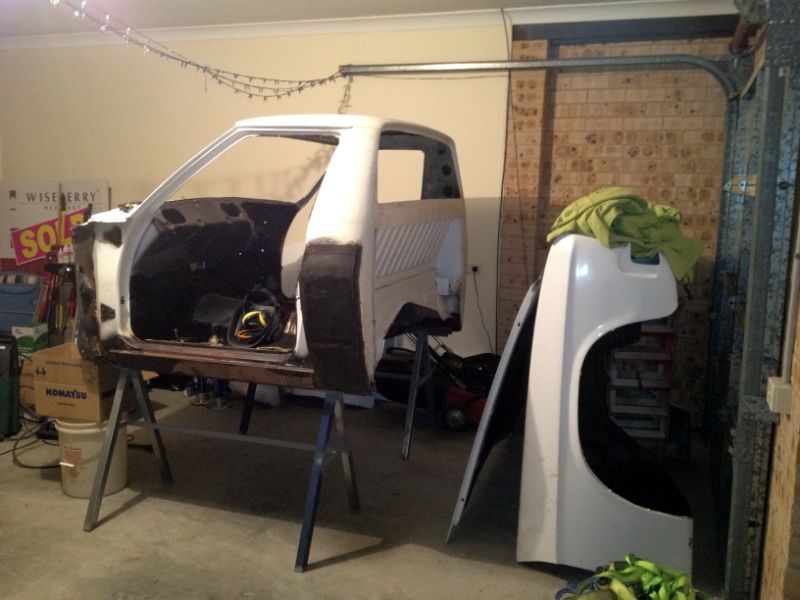
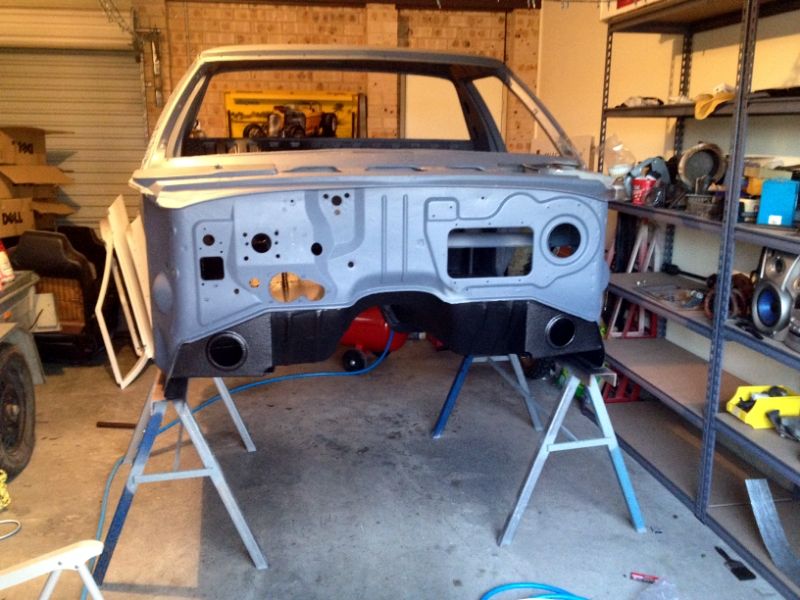
Which, ultimately gave me the excuse to finally get the cab blasted, because it could be kept out of the weather..
That Ute's slowly paying for itself..!

IMG_0443.jpg


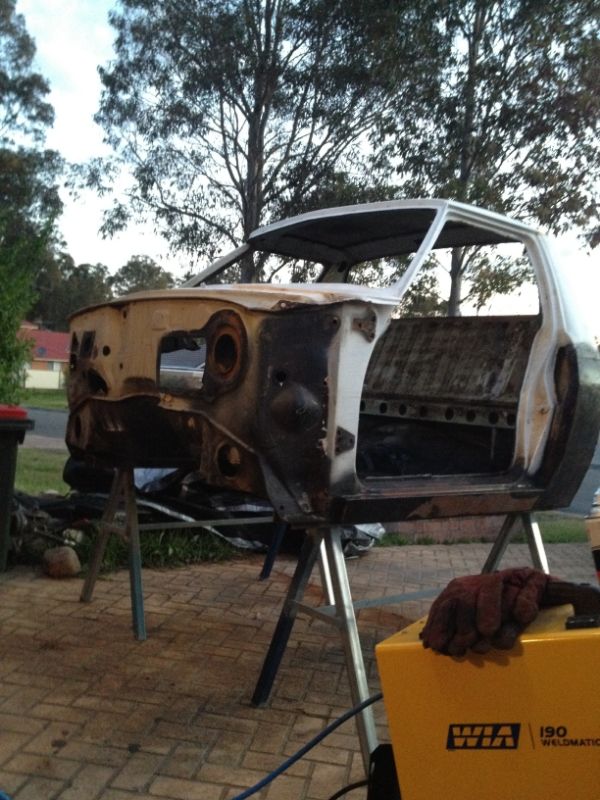
Which then led to me cutting the cowl panels off, already knew there was rust there, didn't know how bad but. Passenger side..
Surprisingly the rest of the cab is pretty bloody good, the roof looks pretty much rust free, but it looks like there were a few dance parties on there from time to time. It's definitely not flat..

IMG_0449.jpg


Repaired Passenger side inner cowl, basically just cut out the old, and made a replacement panel up, in two sections, as it was too hard to get all the curves/bends in it in one piece..

IMG_0446.jpg


Just as things were moving along smoothly, there had to be something to break the rhythm.. I had received HZ/HJ cowl replacement panels, not HQ items, which turns out are hard to find the complete unit..
Decided to just chop them up and use only the outer sections of the new panels, as the original one is rust free apart from a little towards the outside of the car..

IMG_0460.jpg


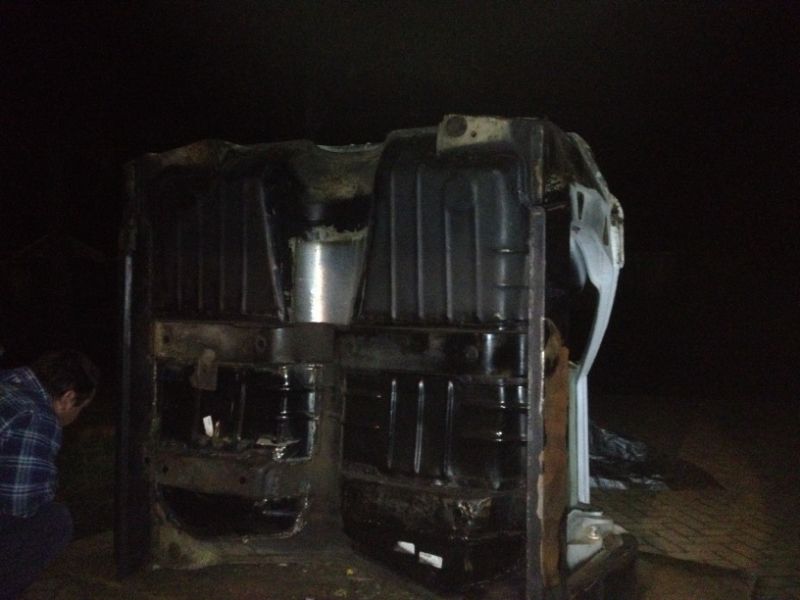
Then, I needed to see some 'progress' being sick of rust repairs, I decided to seam seal and spray up the underneath floor pan with under body deadener off the schultz gun, used the paint-able version, not the tar like cheaper type..

IMG_0463.jpg


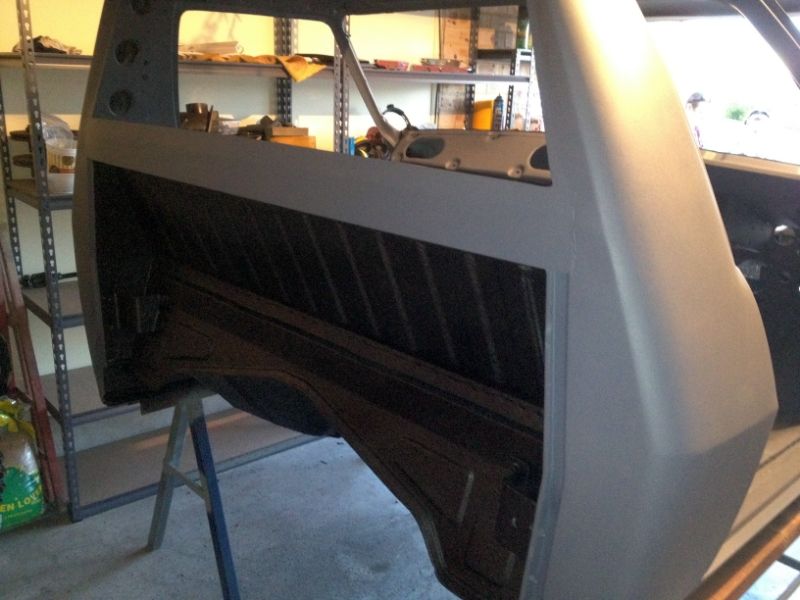
And decided to give the rear section a spray with it as well, to help prevent stone chips and try and cut down on a little bit of road noise.
It can be painted over, which I'm thinking I most likely will paint this section, down to the floor pan, but either way it will be covered by the head board of the tray so it really doesn't matter..

IMG_0497.jpg


Drivers side, inner cowl section, wasn't too bad, I wire buffed it then flapper'd it, then rust treated it, and that's how the inner panel still sits today..
Figured it has been there for like 30 years and it hasn't rusted through, it should be good for another 10 or so..?

IMG_0498.jpg


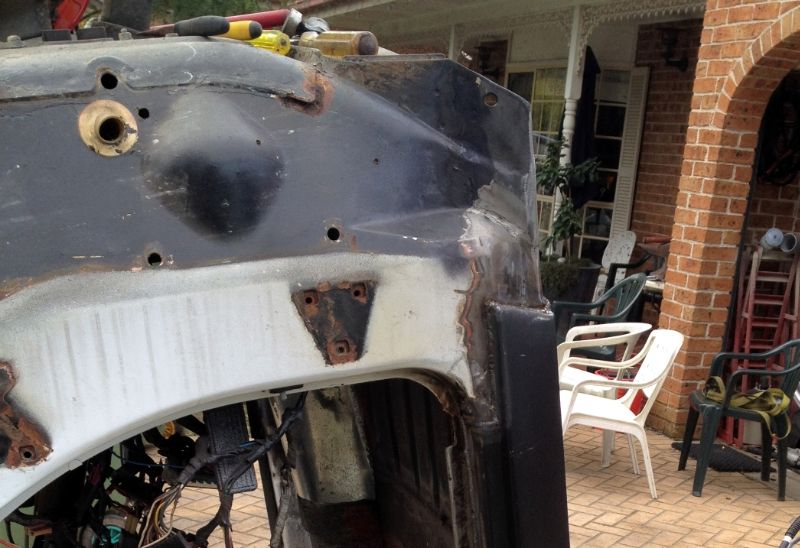
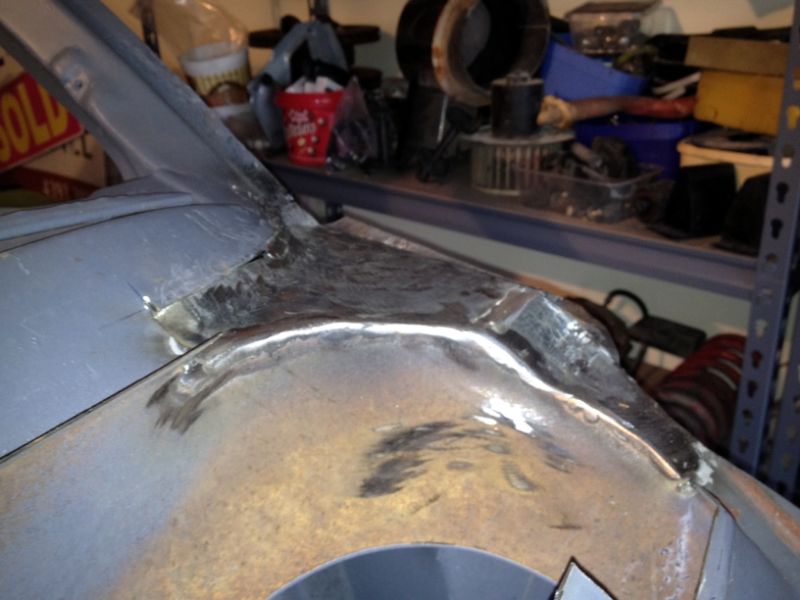
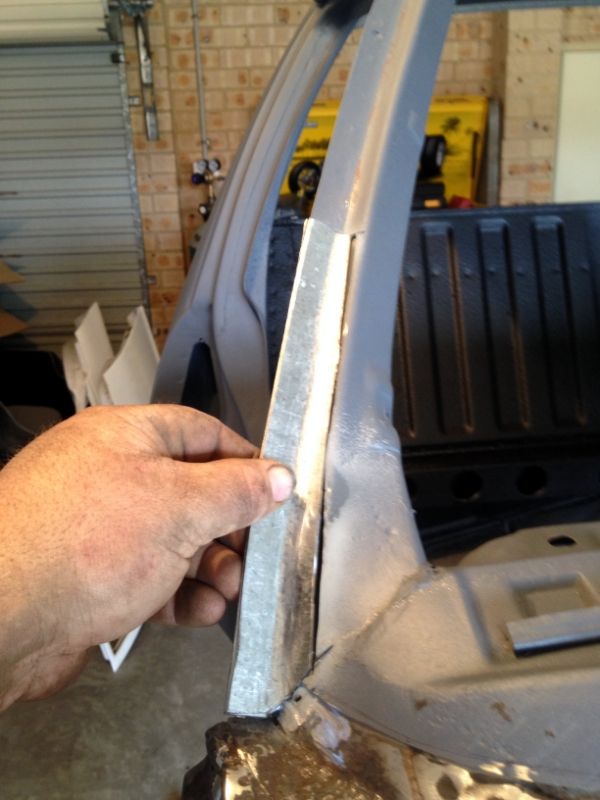
But wasn't happy with the start/lower bit of the 'A' pillar.. That infill piece is double thickness where I'm holding it, to match up with the factory panels..
And not sure what's the go with my finger, but it looks like it's an inch long? lol, its not really..

IMG_0499.jpg


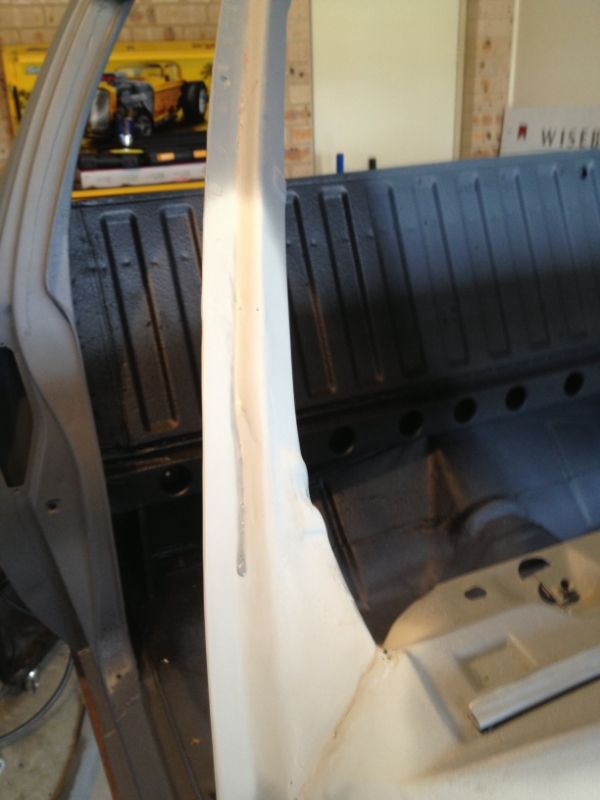
Welded in and smoothed, and primed. The dark line in the crease of the pillar is just a run of primer, too heavy handed, lol.. Have done the passenger side like this too, but can't seem to find a decent after pic, will get one eventually..
You can sort of see the back rest area I've half sprayed it with deadener as well, just because I had half a can left from the floor and didn't want to waste it, eventually it will all be done, once all the rust repairs are done (the inside of the cab) 100% seam sealed, and deadened, even up under the dash..

If I had my time again, I would probably just cut the entire floor out and fab up a complete new one, it was such a PITA to work around all that shitty metal/curves etc. Would've been done in half the time and probably cheaper if we started from scratch with a box section framed/flat sheeted floor. But this way looks almost factory and be harder to pick once it's all "said and done."
 

Zeussy

SSM11K
Joined
Dec 26, 2008
Messages
1,298
Reaction score
14
Points
38
Location
Central Coast
Members Ride
Gen-F Clubsport, Rodeo 2.8 TD 4x4
I have also sprayed the whole under cowl section with the deadener as well as the under sides of the new panels - that haven't been welded back on yet, it's pretty hard to get in there once it's all together, I tried putting a little bit of hose on the end of the gun to try and curve it around under there, but it wasn't working too well.. So I thought I'll do it before I weld them in, except the edges to be welded. Then weld through prime them, heavily, just incase I can't get to any bits after and try and give it another coat once they're all welded on.

One more thing, the fkn sump, I want to find an aluminum smelter/foundry and throw the fkn thing in there, never to be seen again...

Long story short, I don't have it still. He must not have clamped it to the table when it was first welded together and it warped like a mother fcker..
Then he straightened it out by a mixture of heating it up and clamping it to the table and relief cutting it, then welding it back together..
Which led to a few little hairline stress cracks in a few places that I found..
So he welded it up..
Which I found then led to more warping..
Which he has straightened out again..
All of those times in between consisted of me receiving the sump back off him, with him saying "it's done" and me being picky, checked over it every time, finding something else wrong with it..

So, the last time he gave it back to me, I couldn't pick anything wrong with it, it looked sweet, pretty straight too, within a 'mm' from end to end. Which it will pull up a bit with the bolts.
By this time, everyone I work with knows about it, (it's a bit of an ongoing joke around the workshop actually) so we were talking about it and a couple of the guys told me to check it's sealed - completely.
Filled it with water to see if there were any leaks, didn't want to use diesel, or oil, as if there was a crack it could make it a real pain to clean out if it needed welding up and wouldn't you know it leaked straight away from one corner..

That was like 2 months ago...

So, I'm thinking either just get a new one from the states of the same sort and either mod it the same, but take it somewhere else that really knows how to weld alloy properly, the first time.
Or remake/modify the engine mounts so the sump doesn't need modifying at all.
Or me make up a complete custom one out of steel, tack it together and get it professionally welded up. But that involves getting a 6mm, or even 10mm steel plate laser/CNC cut to the shape of the flange on the original sump... $$$


Also, pretty much decided to go with a 9" for the diff as well, probably spooled, just need to get the brackets cut off the axle tubes and weld on some leaf spring brackets. Spoke to a diff place about doing this, but by the sounds of the way he was talking he would just make new axle tubes and mount the brackets to that. I don't know if "that's the done thing" or it's just easier/cheaper/quicker to remake the tubes instead of cutting off the old brackets or if he doesn't want to "just" weld the brackets on, cause it's "not worth it" $$$ wise to him.


Question for you Blown?! Or anyone that knows for sure! What angle/degree does the pinion/diff have to have? I've been told somewhere around 3* or 4* pointing down, to allow for slight twist when it's loaded up.
But then I've also been told earlier on, that it should mirror the angle from the trans to tail/shaft and that it's extremely critical in setting up the characteristics of the car, ie. Axle tramp/traction etc..


The measurements I have of the diff's are as follows:

Stock V8 Holden ------------------------- 9"

144cm -------------------------------- 138cm -------------------------- Flange to flange.
142cm -------------------------------- 132cm -------------------------- Backing disc to backing disc.

With the widest part of the chassis rail being 120cm.

So essentially, flange to flange it's 60mm narrower, 30mm a side, roughly an 1 and 1/4" which to me sounds reasonable?

The reason the backing disc figures are a bit different is the stock Holden diff has drums, making the backing plate sit pretty much in line with the axle flange.
Where as the 9" has disc rear end, making the backing plate sit in (narrower) a lot further as the flange is up inside the disc etc..

Is it 'acceptable' to run such a big offset on it, I know people do, but is it really 'safe' to do so? I've always wanted to run a rim with a big offset giving me heaps of dish, on the rears but now given the chance I wanted to "double check."
Basically 3/4 of the rim. I could imagine it would load up the wheel bearings/studs a bit more, would it be enough that would need to use a fully floating axle/bearing? Etc...


#walloftextdonotwant
 

Dr HaxZaw

New Member
Joined
May 6, 2010
Messages
1,462
Reaction score
13
Points
0
Location
Sydney
Members Ride
R34 GT-T
Nice work mate. Bet your keen to get the engine on the chassis and get this thing running.
 

Zeussy

SSM11K
Joined
Dec 26, 2008
Messages
1,298
Reaction score
14
Points
38
Location
Central Coast
Members Ride
Gen-F Clubsport, Rodeo 2.8 TD 4x4
Bloody oath mate, so sick of this sump issue, I want a sump that fits sooo bad, at least then I can leave it in the chassis and get the cab on there to start and finish the wiring / ECU mounting etc..

When that day comes, it will be a good day..!
 

Wombles

Cars cost too much.
Joined
Oct 28, 2009
Messages
2,091
Reaction score
30
Points
48
Location
Gippsland
Members Ride
'72 LJ Torana, '95 VS Acclaim and V8 wagon
A stressful, day full of swearing kinda day.
 

Demonica

Donating Member
Joined
Mar 15, 2010
Messages
717
Reaction score
7
Points
18
Location
SE Qld
Members Ride
VS clubsport
Good to see you are keeping at it. She's a beauty with great potential and any progress is goodly :) Nice to see your missus out there giving you a hand too.

Welcome back btw
 

Zeussy

SSM11K
Joined
Dec 26, 2008
Messages
1,298
Reaction score
14
Points
38
Location
Central Coast
Members Ride
Gen-F Clubsport, Rodeo 2.8 TD 4x4
Yeah yeah, getting there slowly, Going to kick it up a notch or two soon, been going on too long already...

Cheers for the warm welcome! :D

No real progress as of yet, but there should be a little soon, hopefully! :beer chug:
 
Top