Welcome to Just Commodores, a site specifically designed for all people who share the same passion as yourself.

New Posts Contact us

Just Commodores Forum Community

It takes just a moment to join our fantastic community

Register

[VZ] Save your SS seat bolsters from getting squashed

derrro

haha tough
Joined
Aug 29, 2008
Messages
124
Reaction score
0
Points
0
Location
Sydney
Members Ride
VZ MY06 SS
Yep - I don't need to change mine around again, but I will take out the driver's seat and disassemble it to show u guys how it's done. BTW the LX8 has identical seat bases to VZ SS so it will be easy as for you.
 

RIP 05

Member
Joined
Sep 7, 2009
Messages
246
Reaction score
3
Points
18
Location
WA Perth
Members Ride
VZ SSZ sedan
Cheers derro, just want to see whats involved before i take it on. How long do you reckon it takes for the swap over?
 

m1lky

New Member
Joined
May 14, 2011
Messages
1,075
Reaction score
4
Points
0
Location
Auckland
Members Ride
VY SS
I'll do mine too with your tut. Cheers mate
 

VZ_SS

New Member
Joined
Aug 7, 2009
Messages
183
Reaction score
2
Points
0
Location
Maitland NSW
Members Ride
VZ SS
I did the same thing on my car. Good post to the op
 
Last edited:

derrro

haha tough
Joined
Aug 29, 2008
Messages
124
Reaction score
0
Points
0
Location
Sydney
Members Ride
VZ MY06 SS
Cheers derro, just want to see whats involved before i take it on. How long do you reckon it takes for the swap over?

I'd give yourself about 3 hrs, including doing a QA after
 

badnuz

New Member
Joined
Nov 11, 2003
Messages
10
Reaction score
1
Points
0
Location
new zealand
Members Ride
VE GTS #0028
great idea... hmmm a few spare hours this weekend that should be spent on the house but meh, car needs some luvin :)
 

tezza

New Member
Joined
Jun 27, 2005
Messages
345
Reaction score
2
Points
0
Location
Sydney
Members Ride
VX SS
Its pretty straight forward once the base and seat back are unscrewed. Held on just by the plastic stops.

I did this on my SS when it had some play in the base. Although i might price a new seat foam, after 11 years she's a bit worn.
 

derrro

haha tough
Joined
Aug 29, 2008
Messages
124
Reaction score
0
Points
0
Location
Sydney
Members Ride
VZ MY06 SS
PIcs of seat removal

Hey, have got round to showing you boys how to remove the seat from your SS. As I have already done this procedure before and I don't want to pull both of my seats out again, I have focussed on the driver's seat (the passenger one is the same, but less involved).

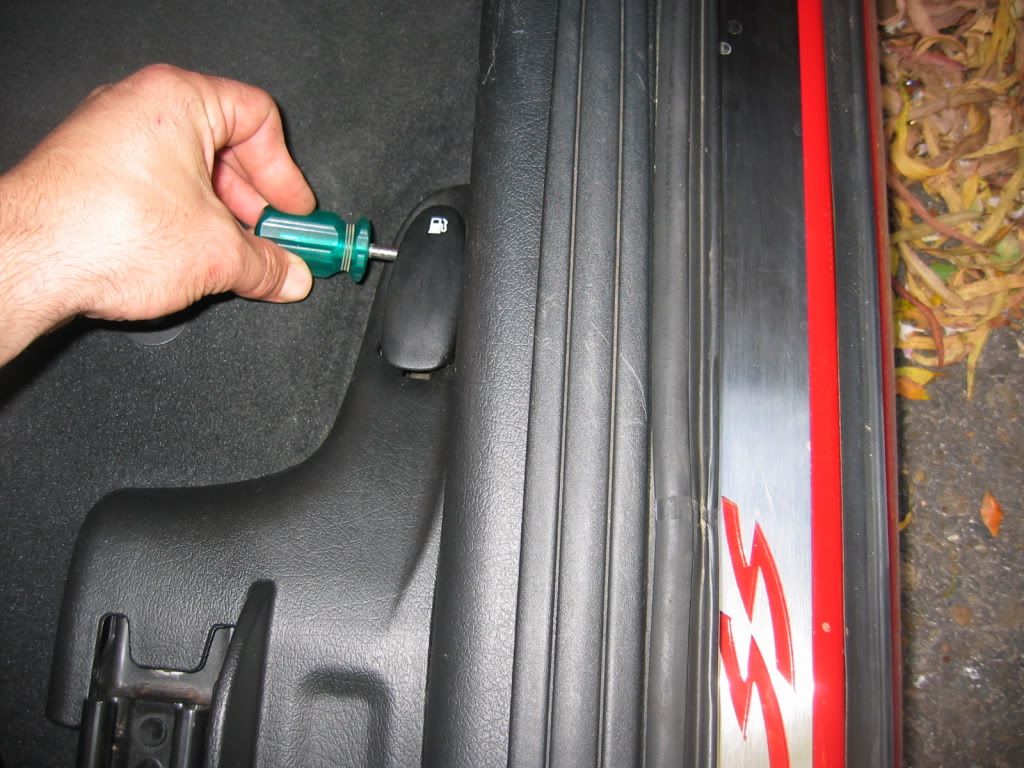
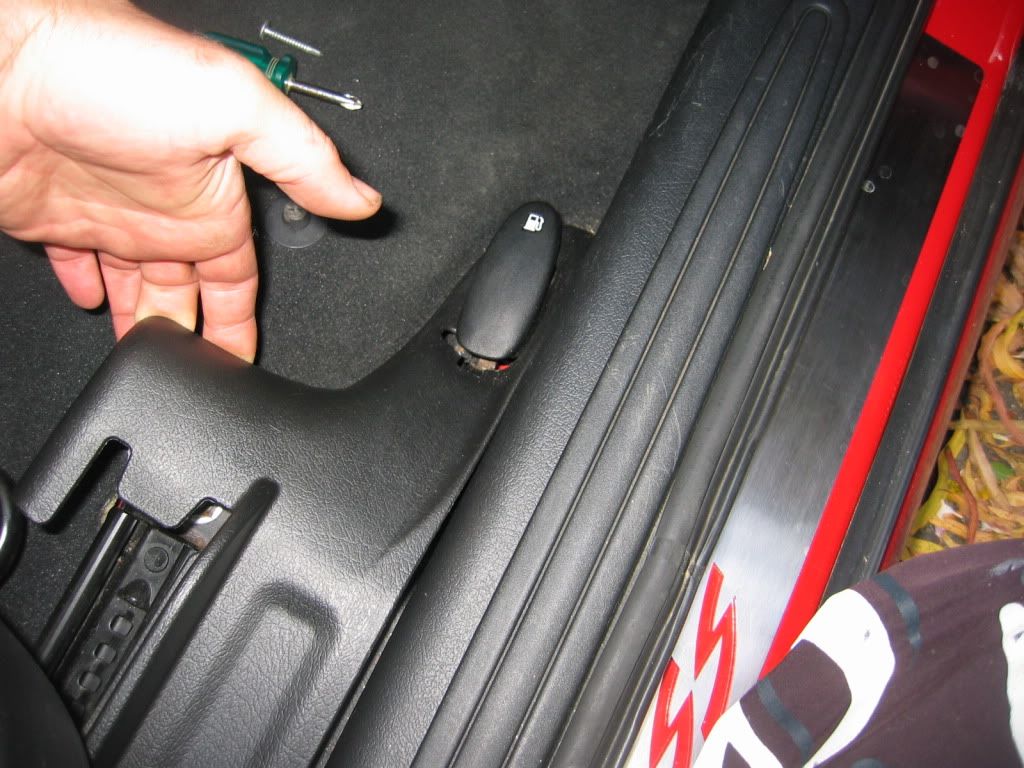
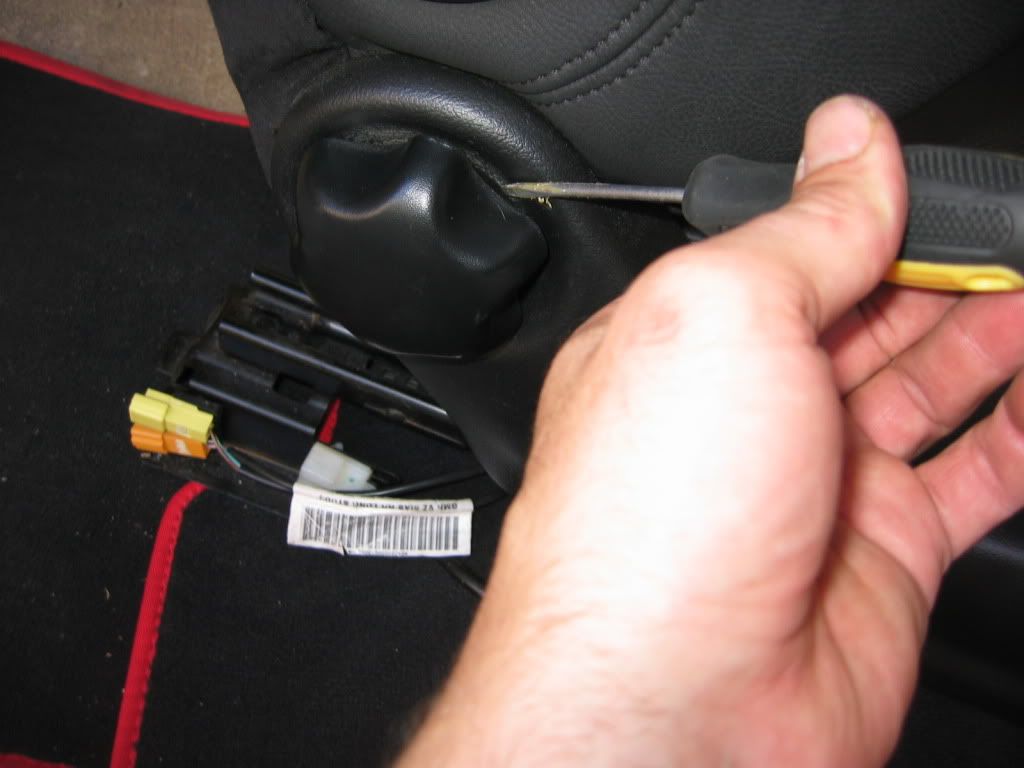
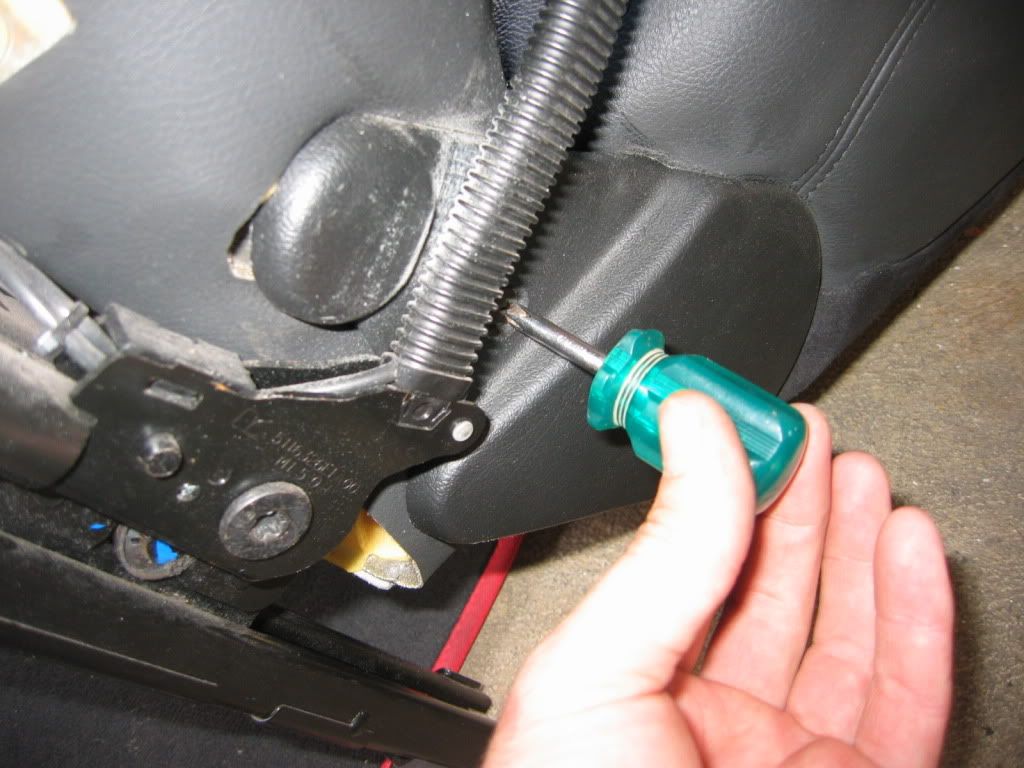
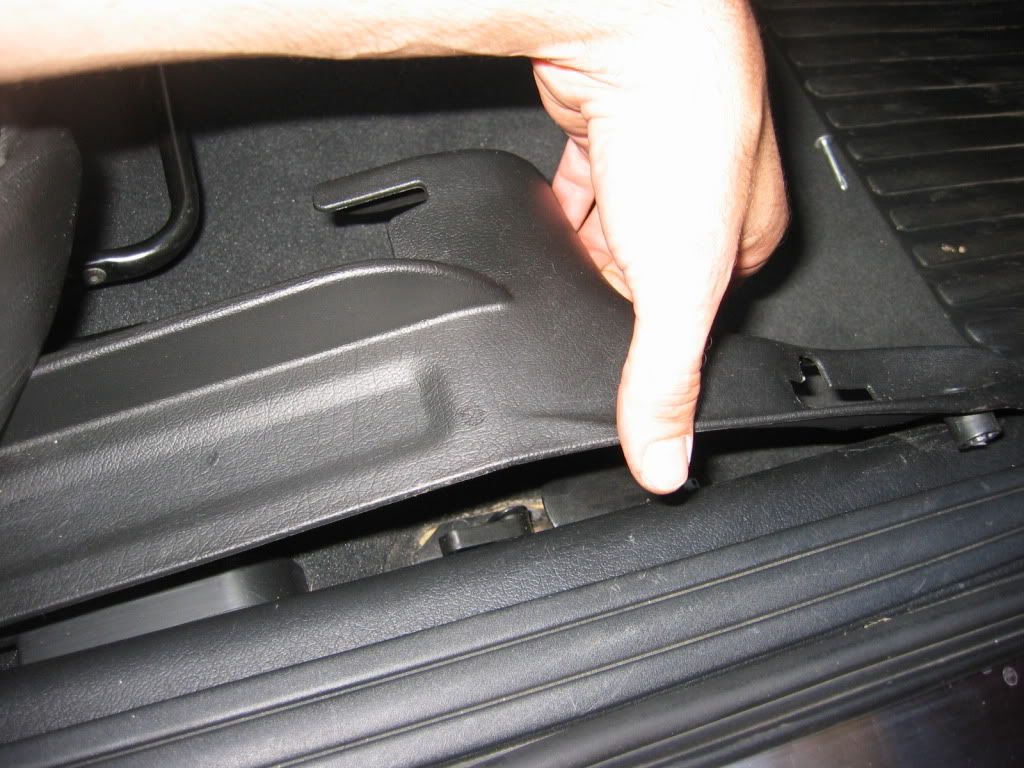
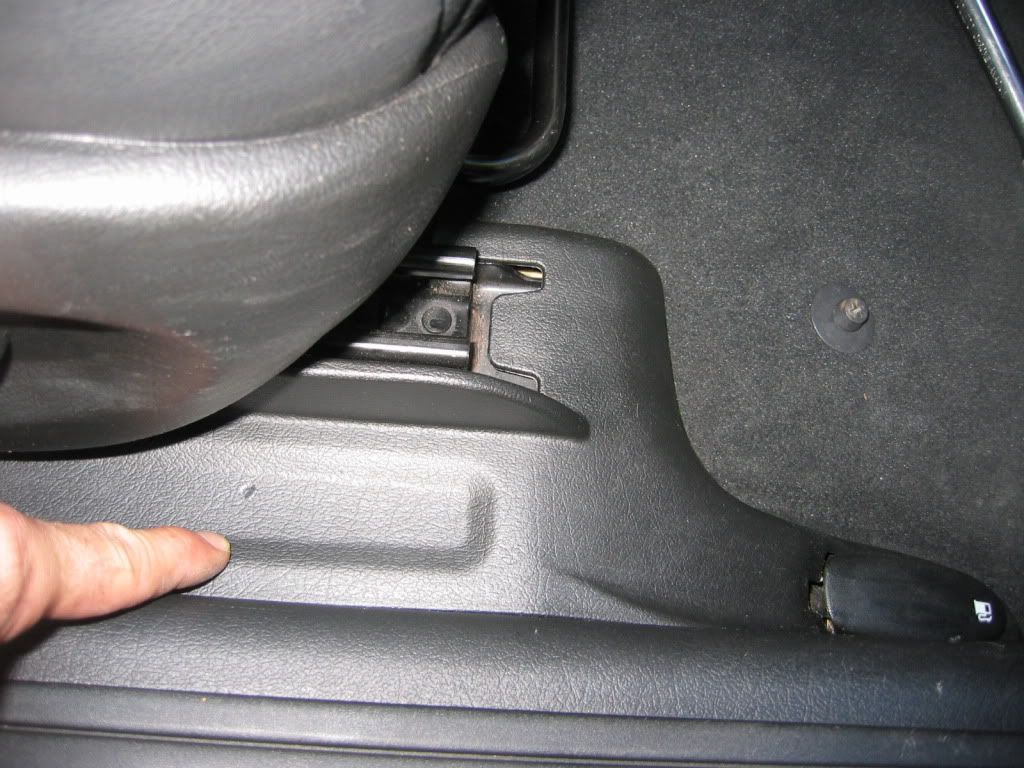
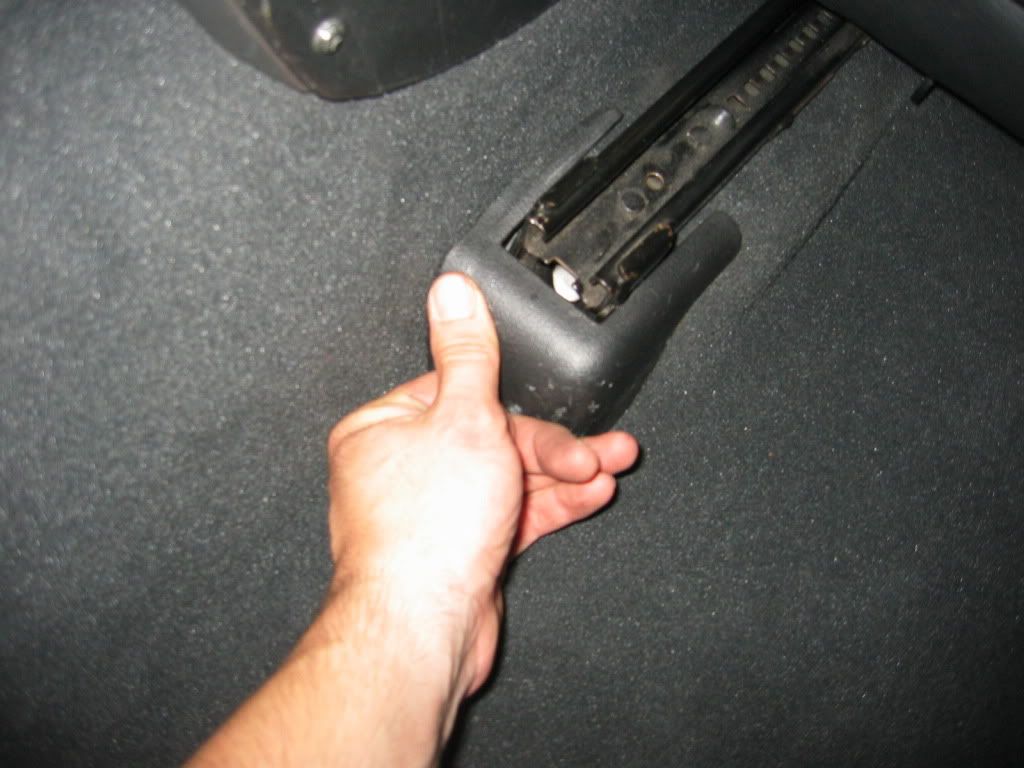
1) You need to remove the plastic trim covering. There is a phillips head screw under the petrol flap release. Undo this.

IMG_5351.jpg


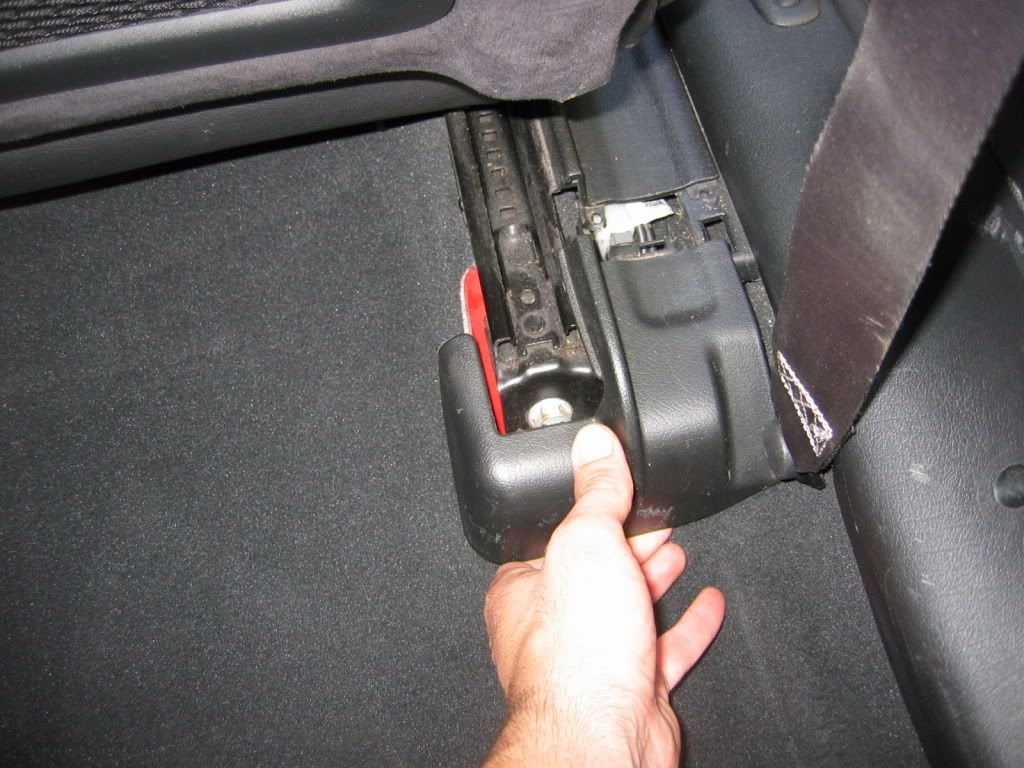
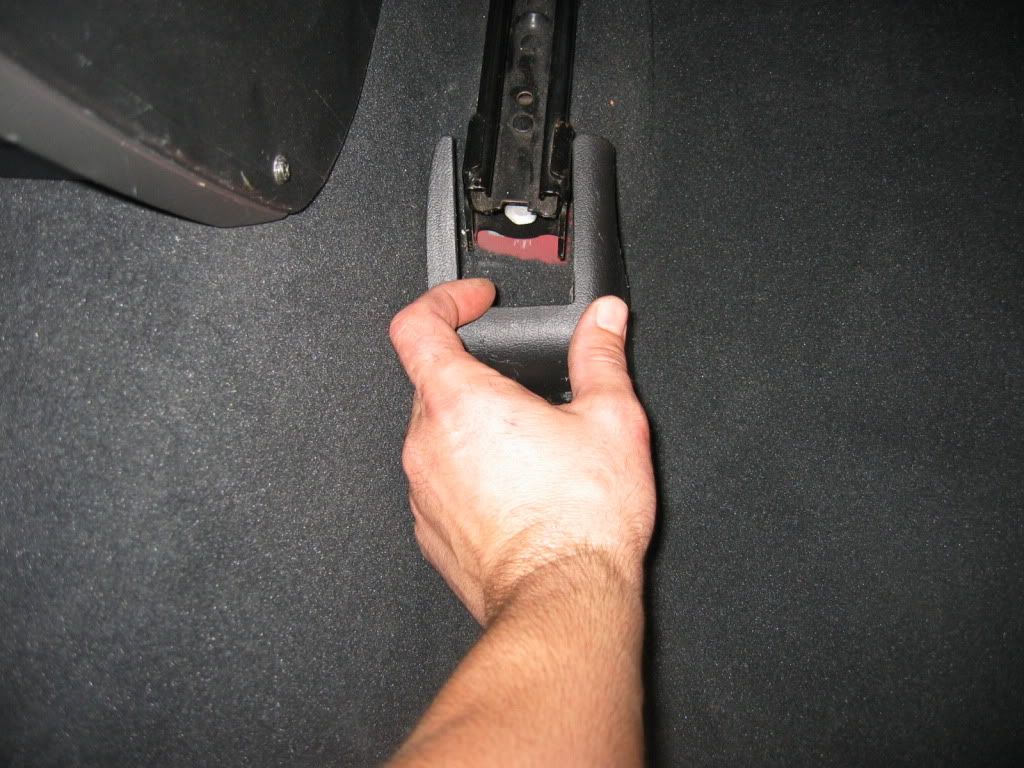
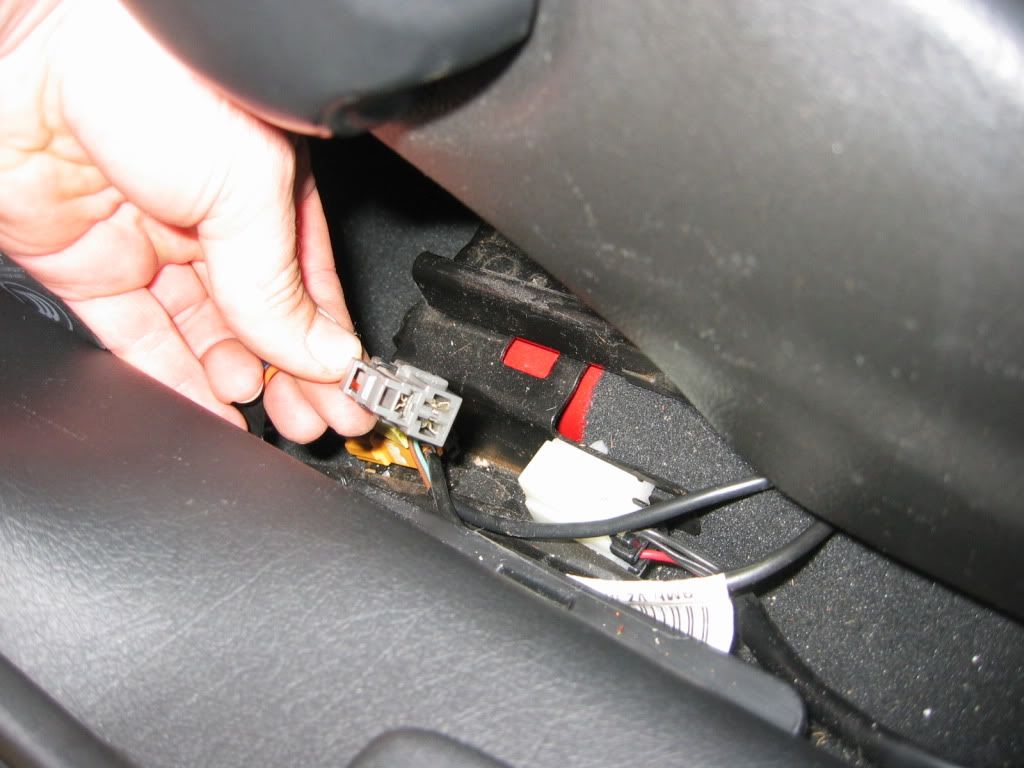
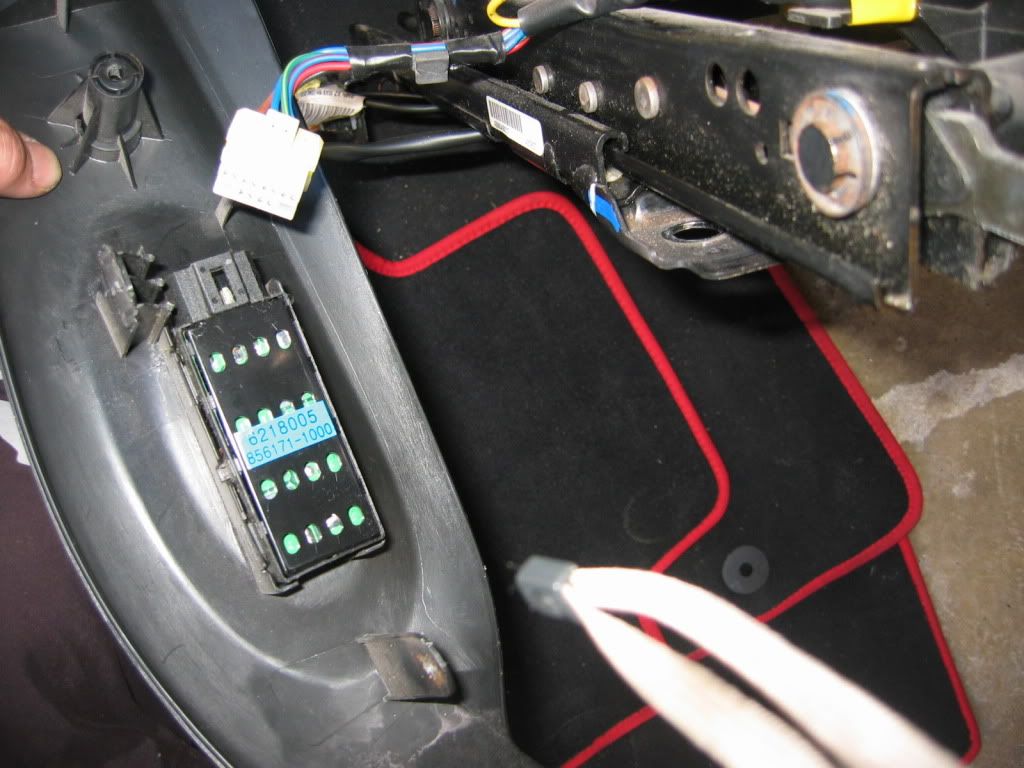
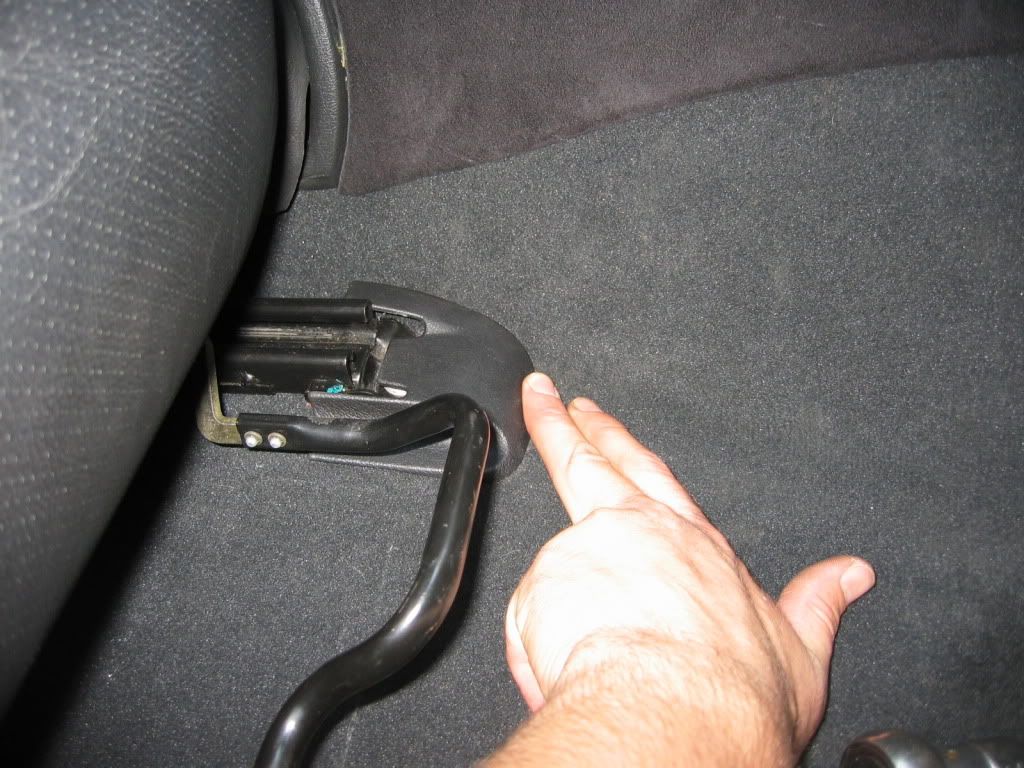
2) Snap off the clip on parts:

IMG_5352.jpg


IMG_5353.jpg


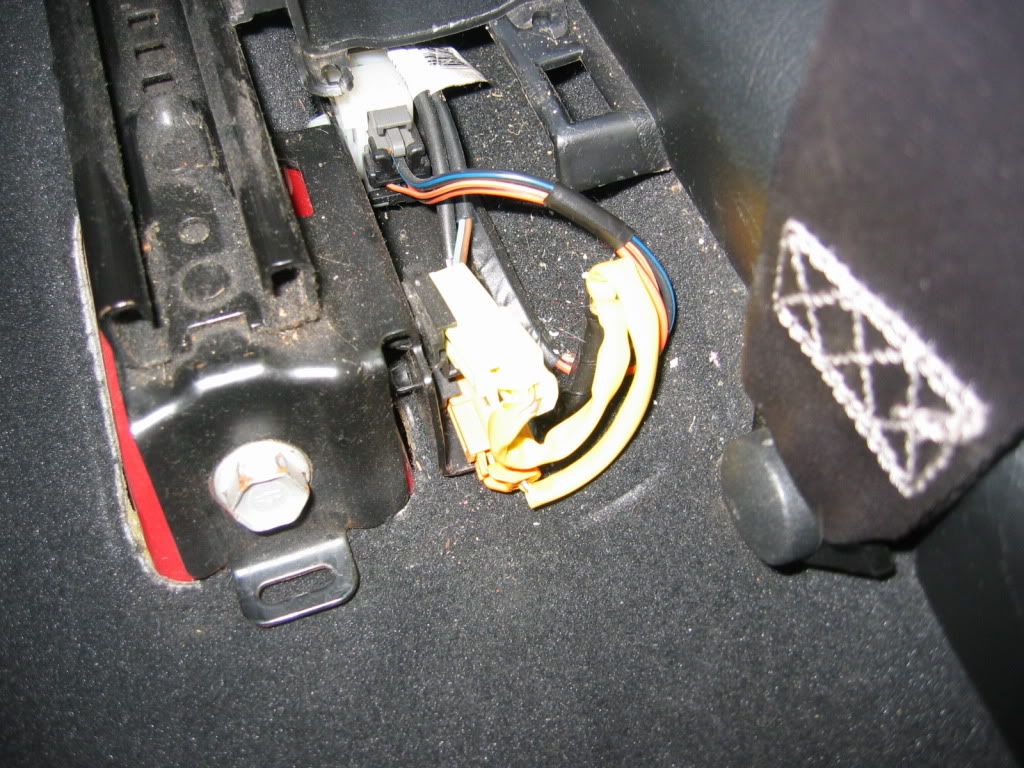
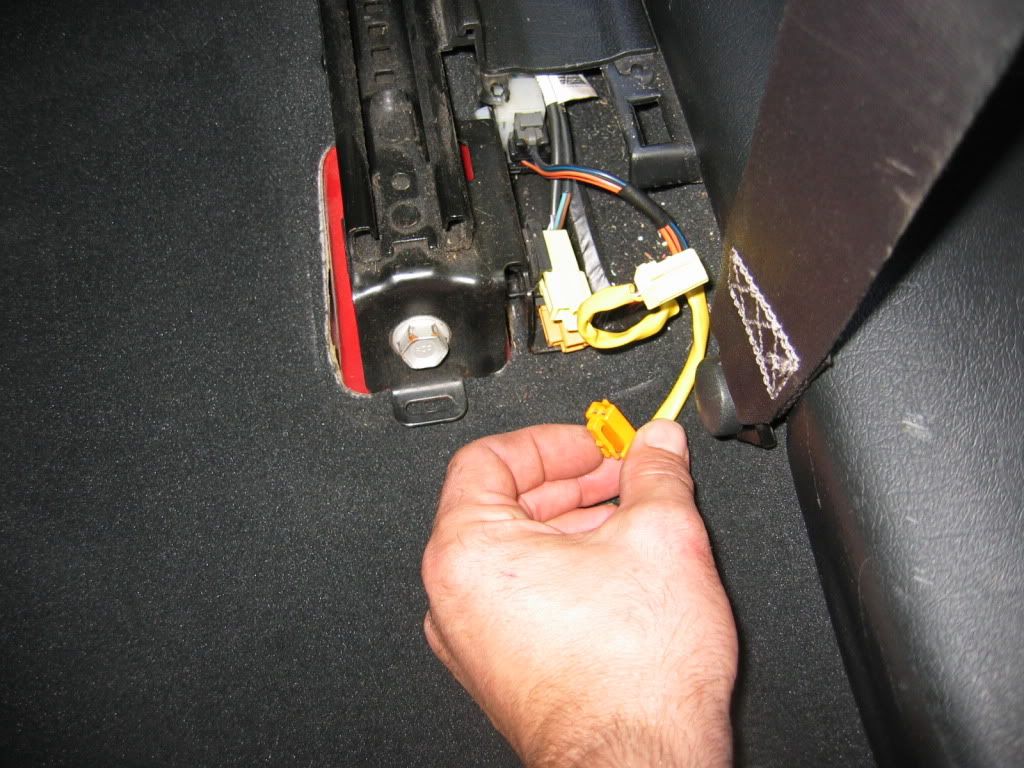
3) Disconnect the electrical stuff (ONCE THIS IS DONE DO NOT KEY ON - YOU WILL GET AN AIRBAG FAULT CODE):

IMG_5354.jpg


IMG_5356.jpg


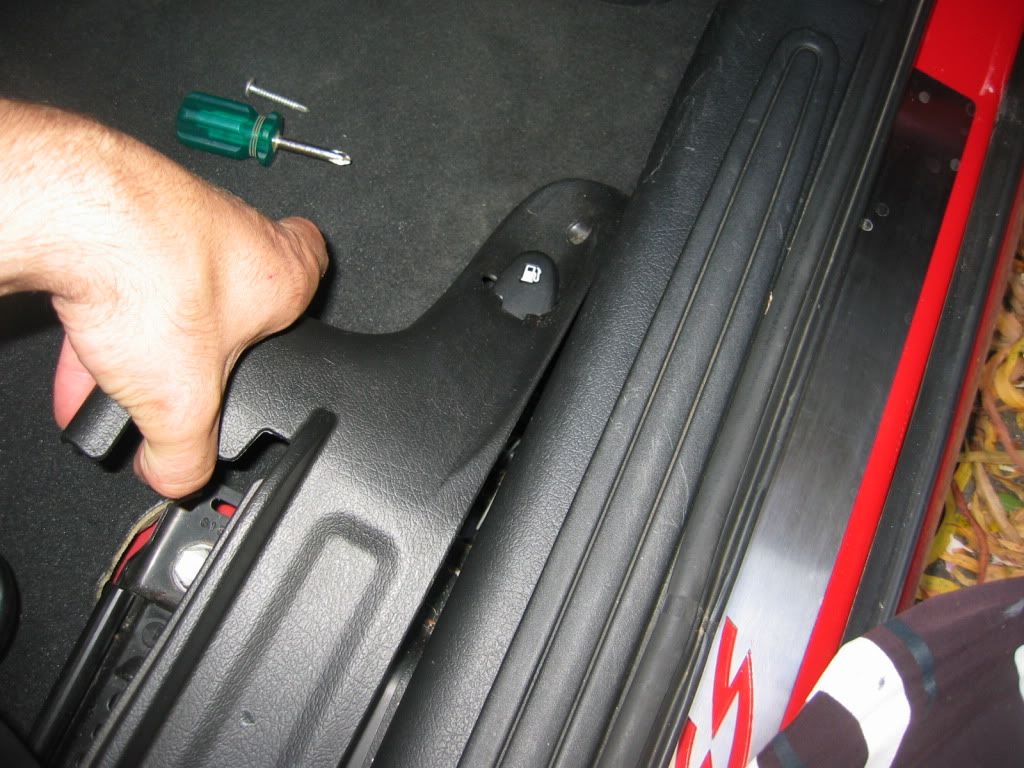
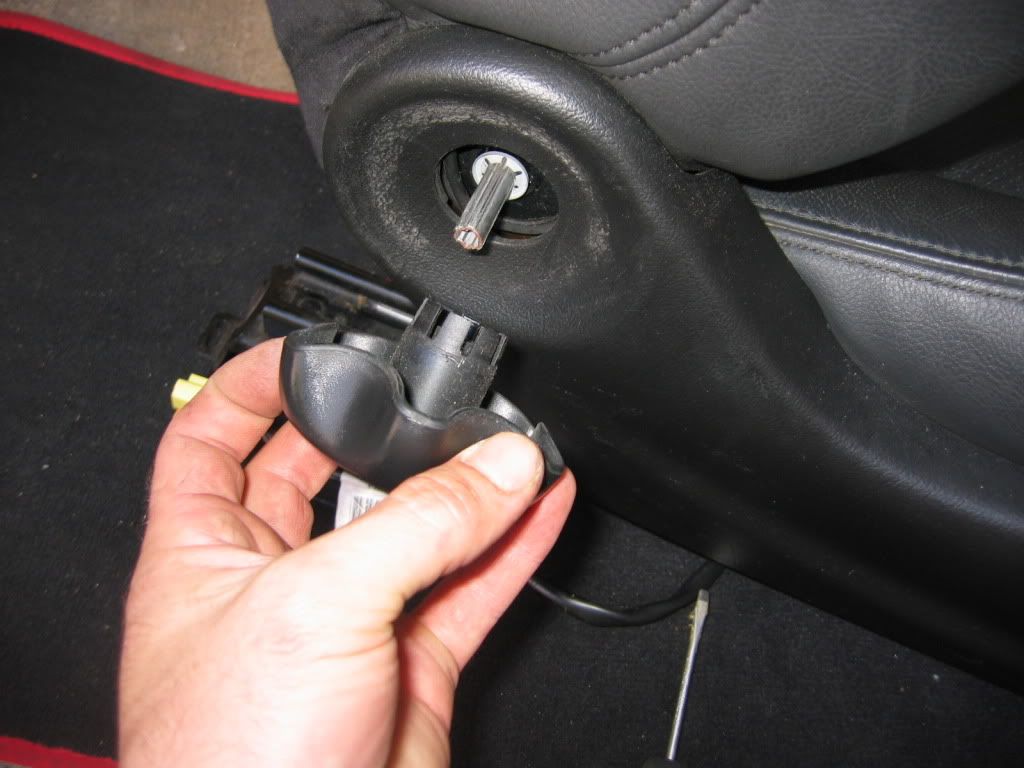
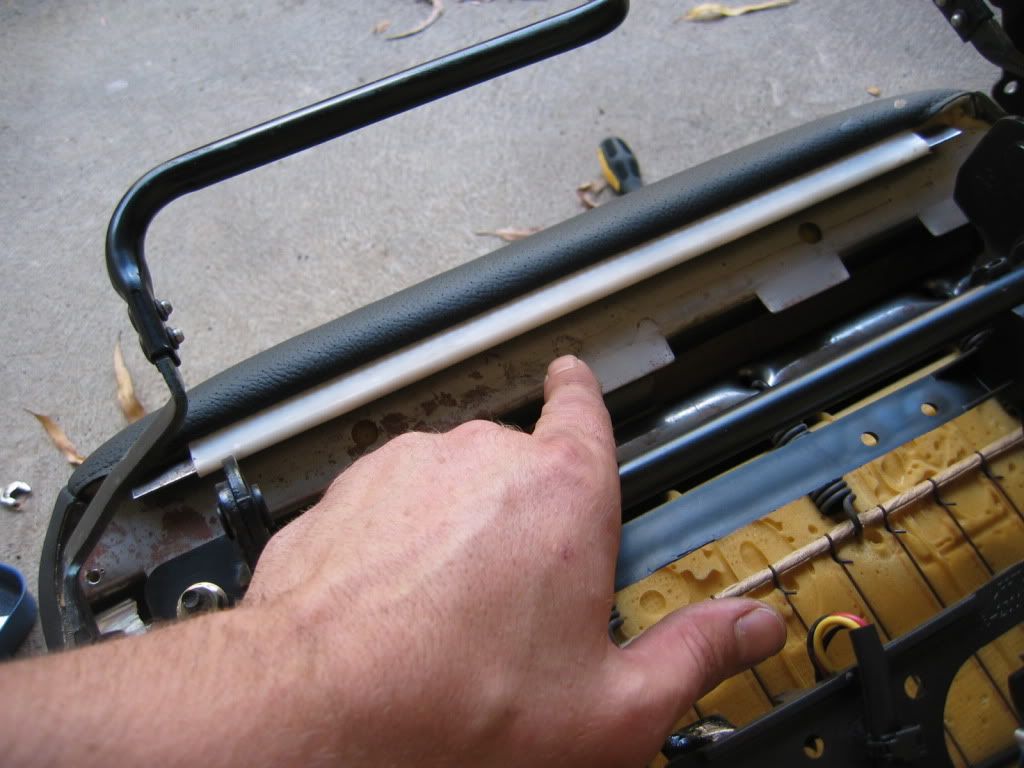
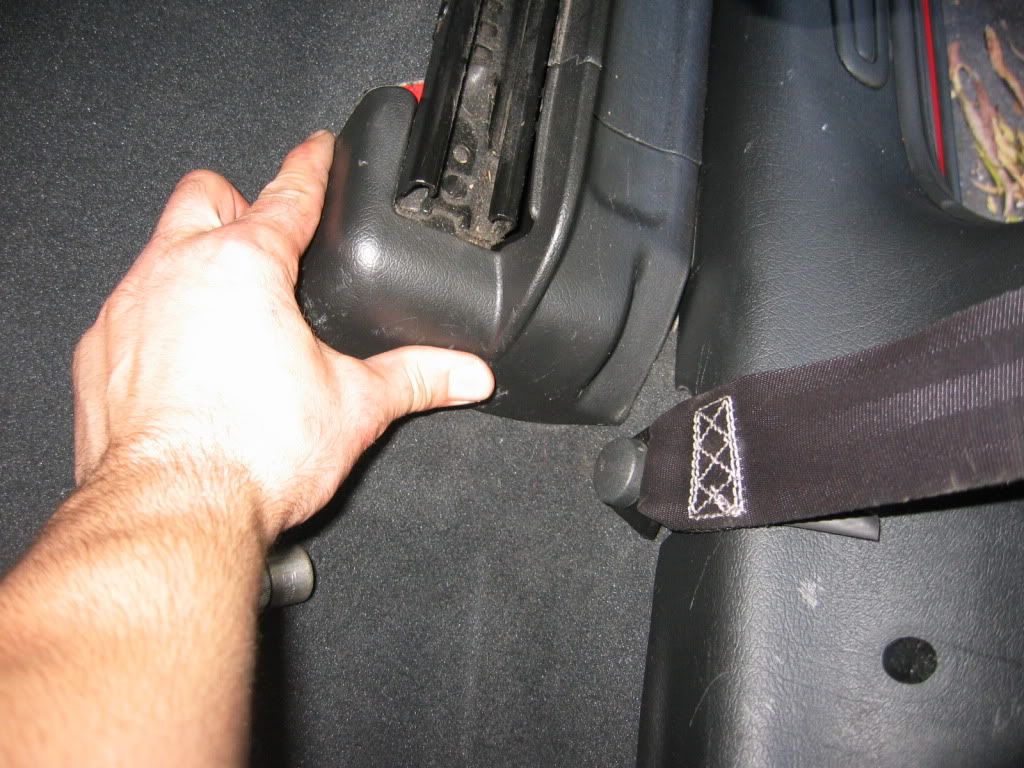
4) Ease the long trim cover over the petrol release lever by pulling up on the lever whilst sliding the trim off:

IMG_5358.jpg


IMG_5359.jpg


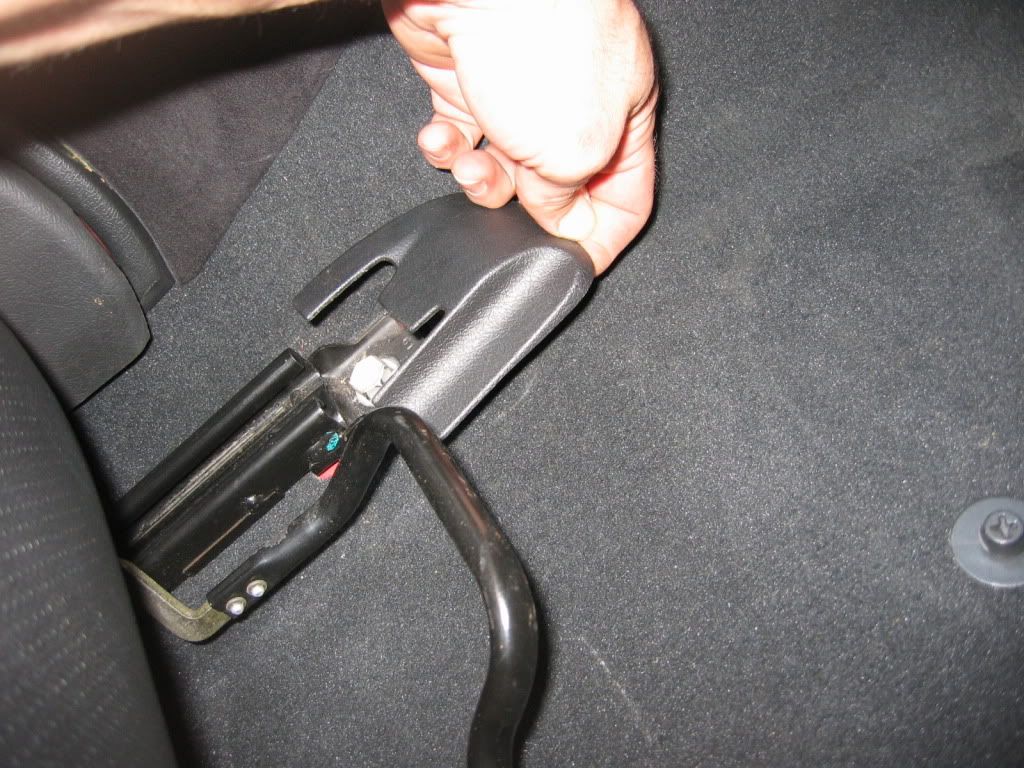
5) Remove the rest of the trim covering and check that you have disconnected the seat electrics:

IMG_5360.jpg


IMG_5362.jpg


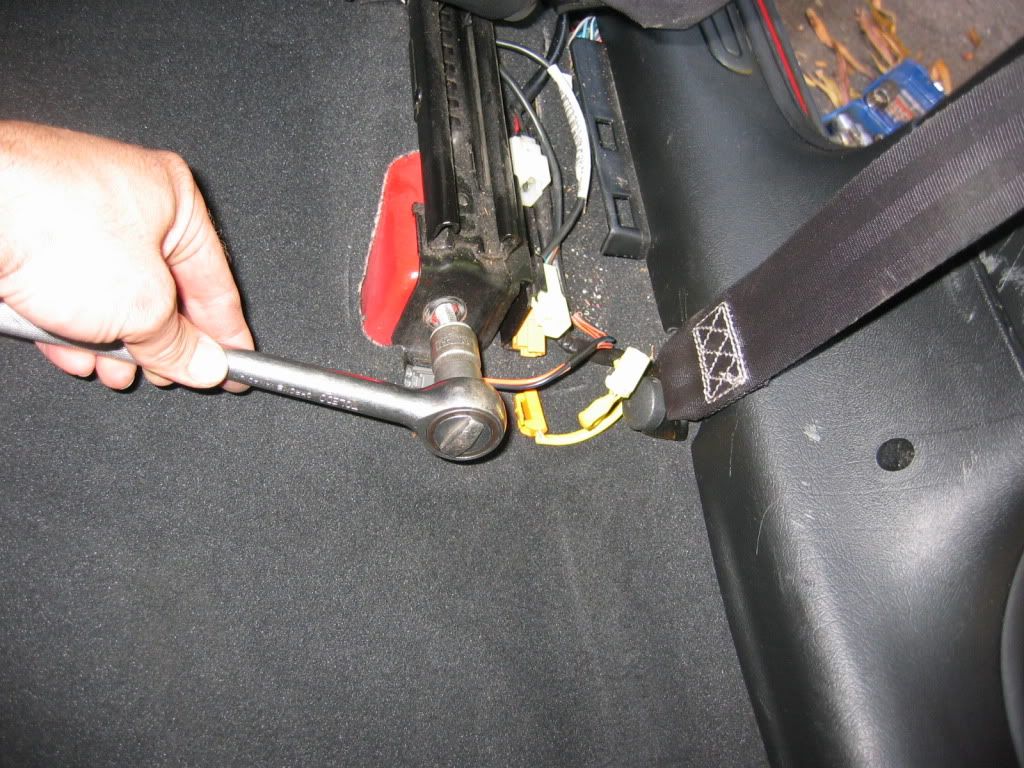
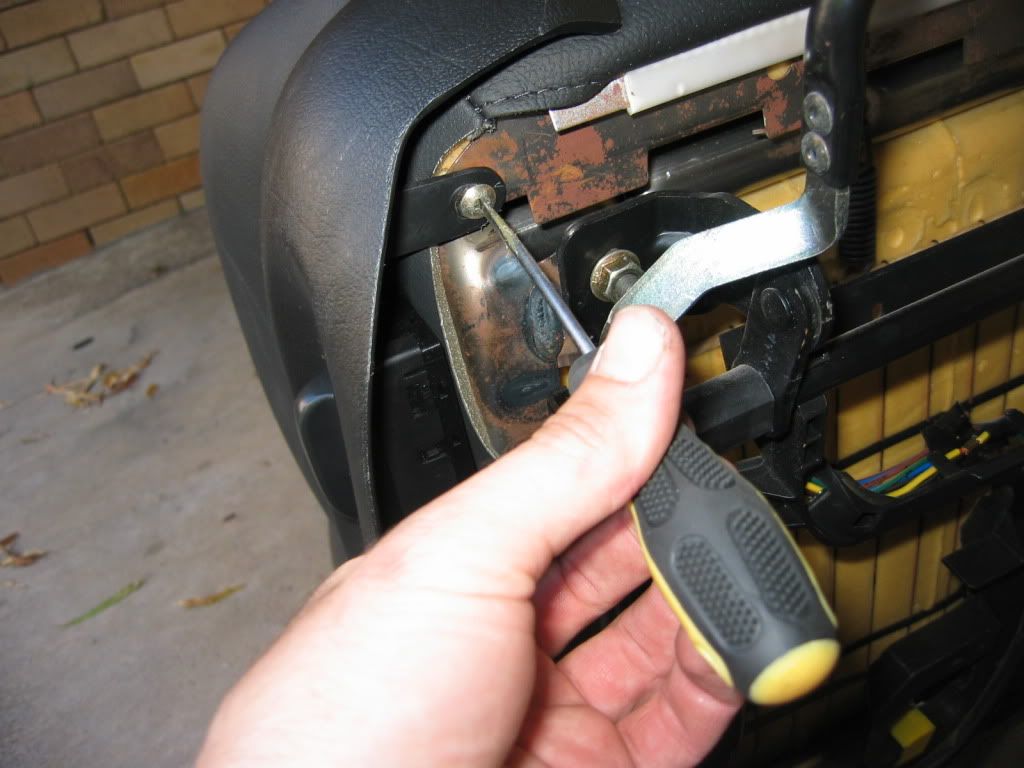
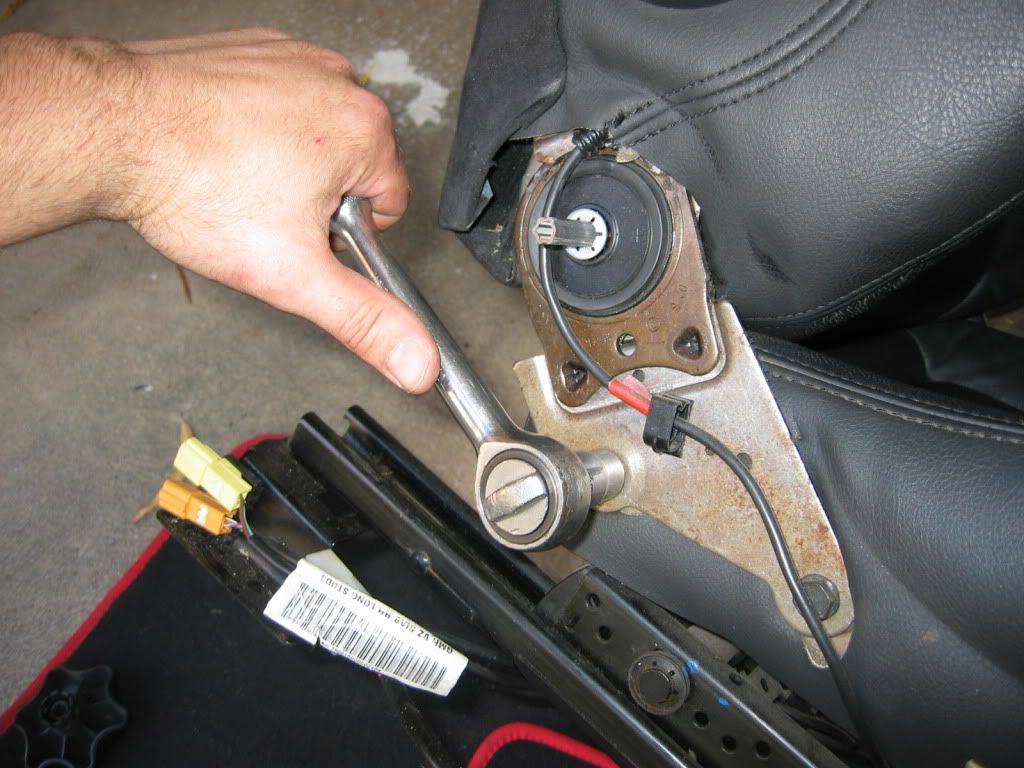
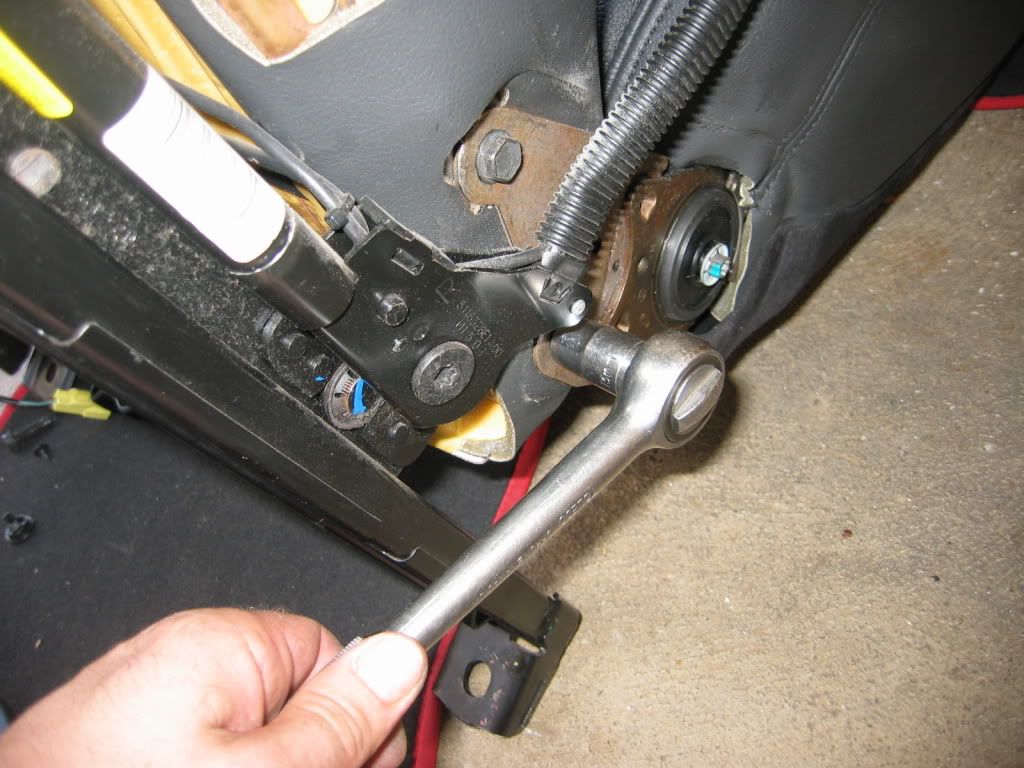
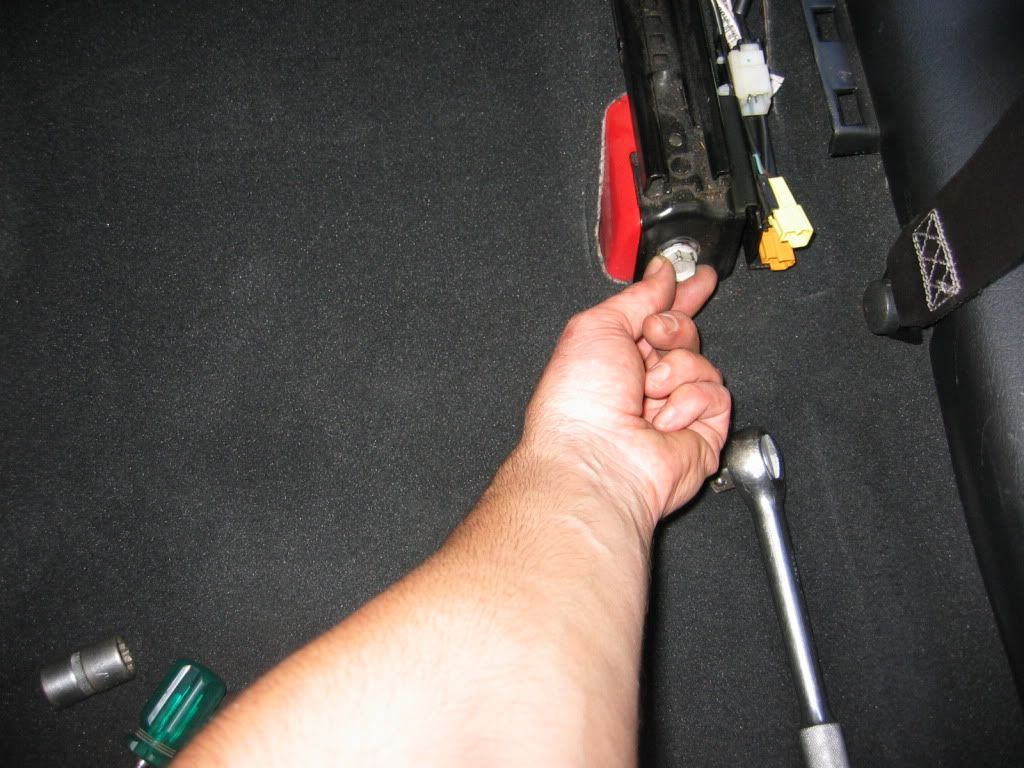
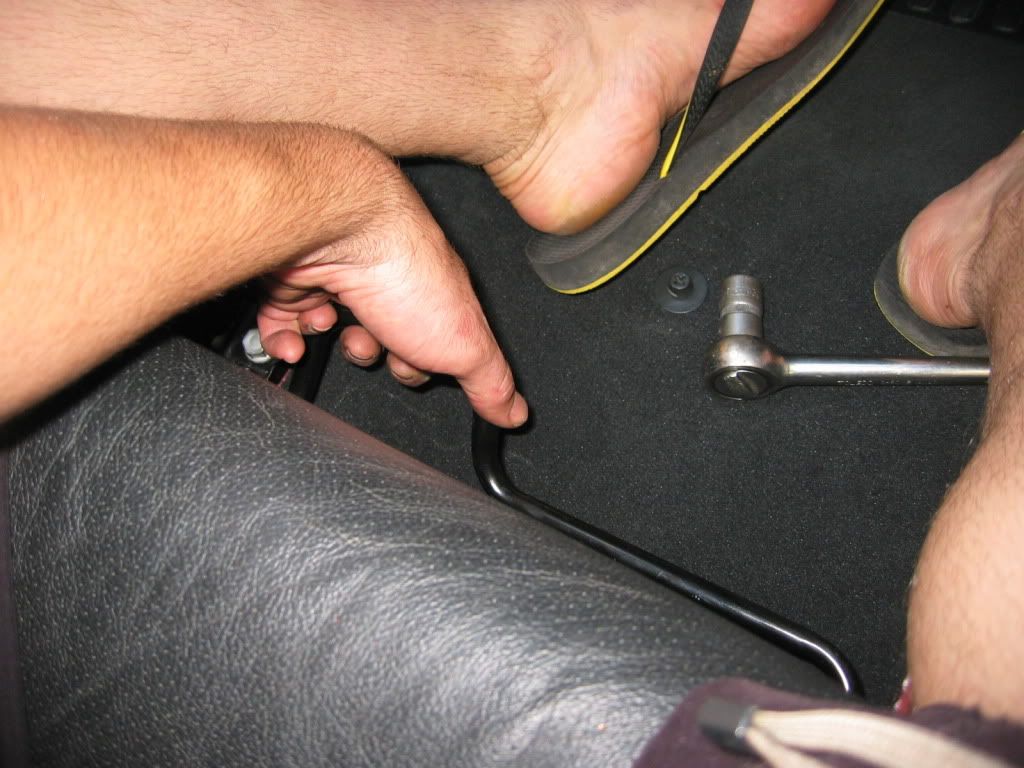
6) Undo the seat bolts:

IMG_5363.jpg


IMG_5364.jpg


IMG_5365.jpg


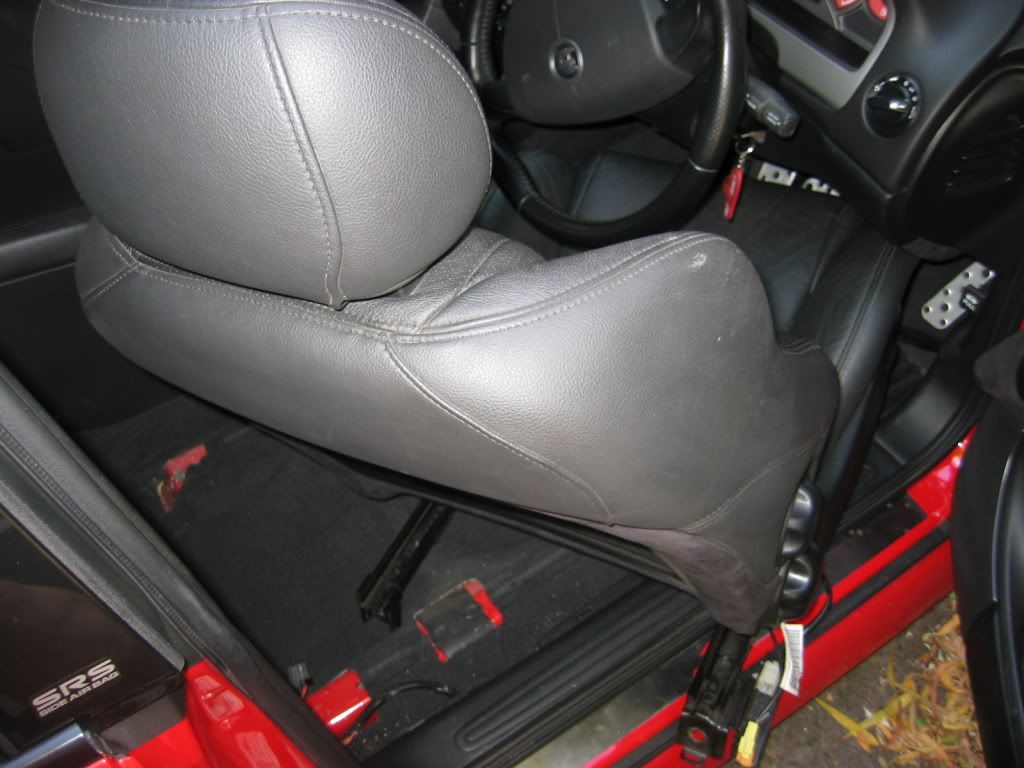
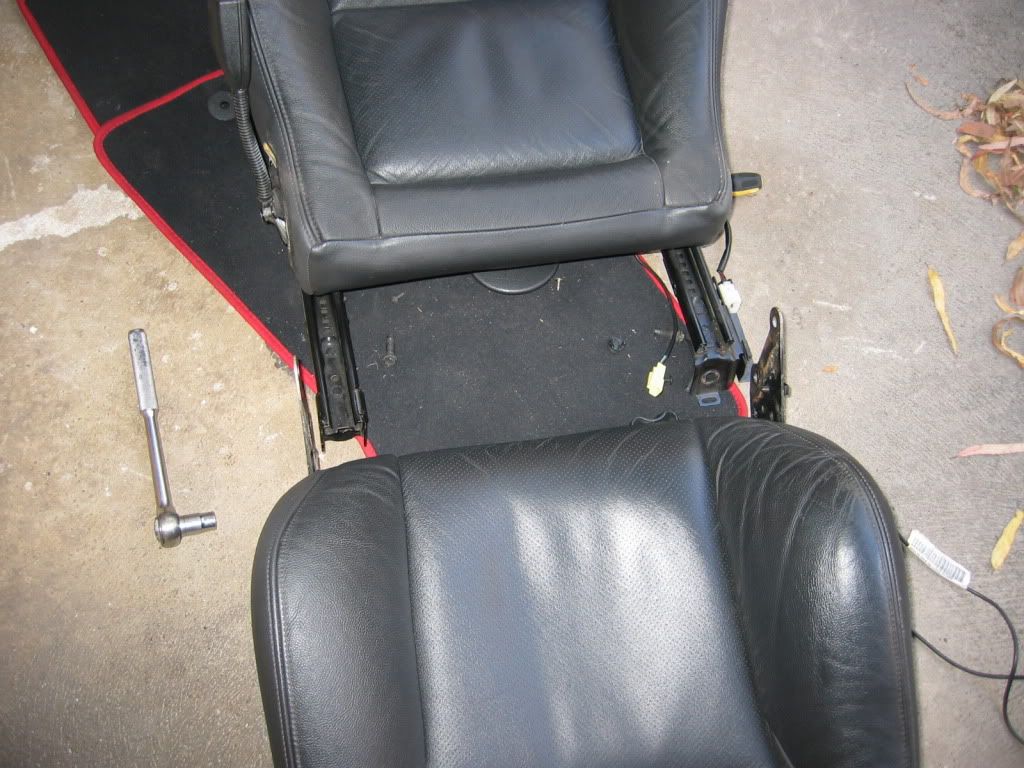
7) Slide the seat out back first:

IMG_5366.jpg


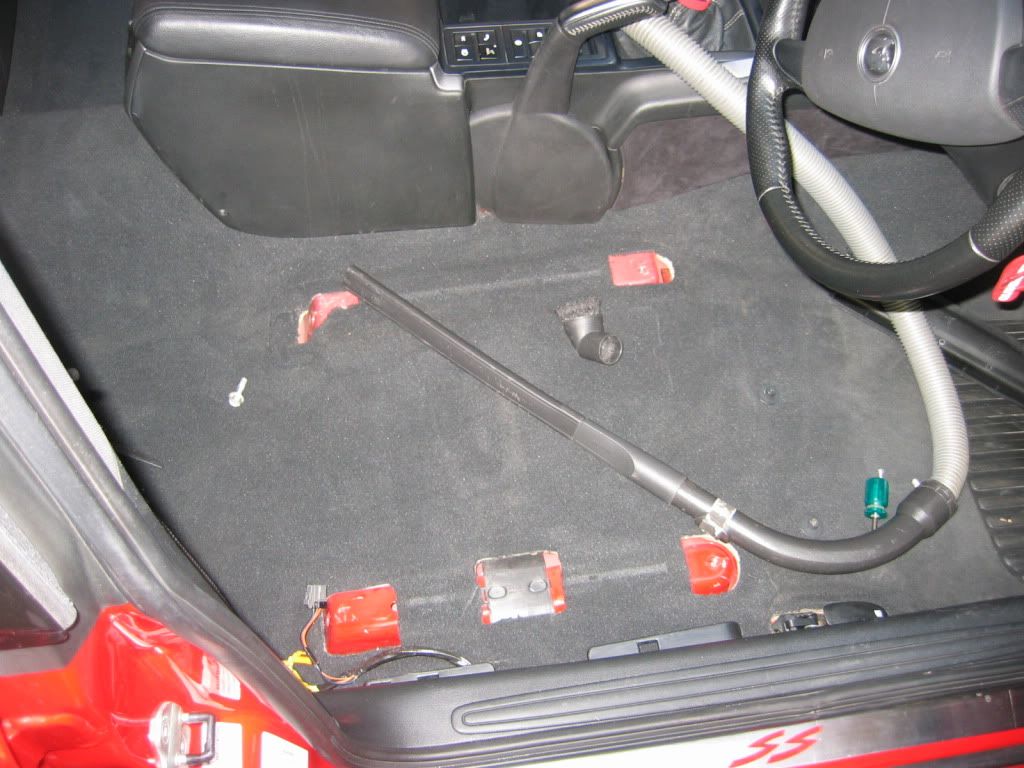
8) Good chave to clean it up a bit:

IMG_5367.jpg


9) On the removed seat pop off the recliner knob (if you have one) with a screwdriver and remove:

Klick!
IMG_5368.jpg


IMG_5369.jpg


10) Remove the side trim from the seat. This is held on by a combo of screws and clips. One of the screws is UNDER the seat:

IMG_5373.jpg


IMG_5371.jpg


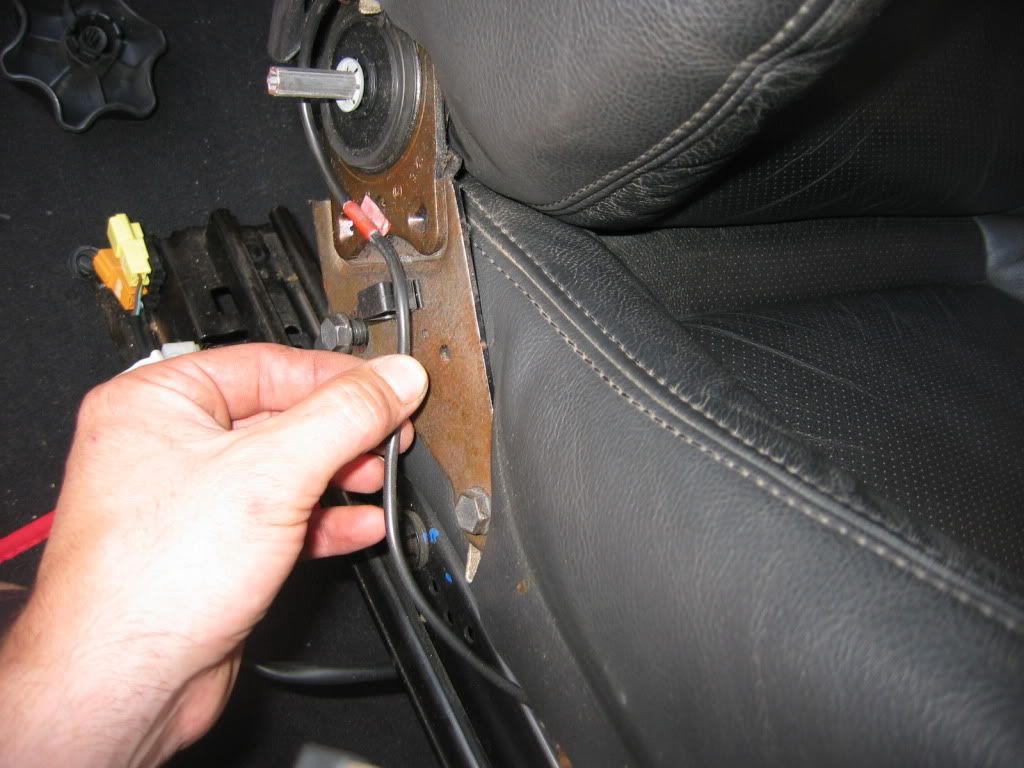
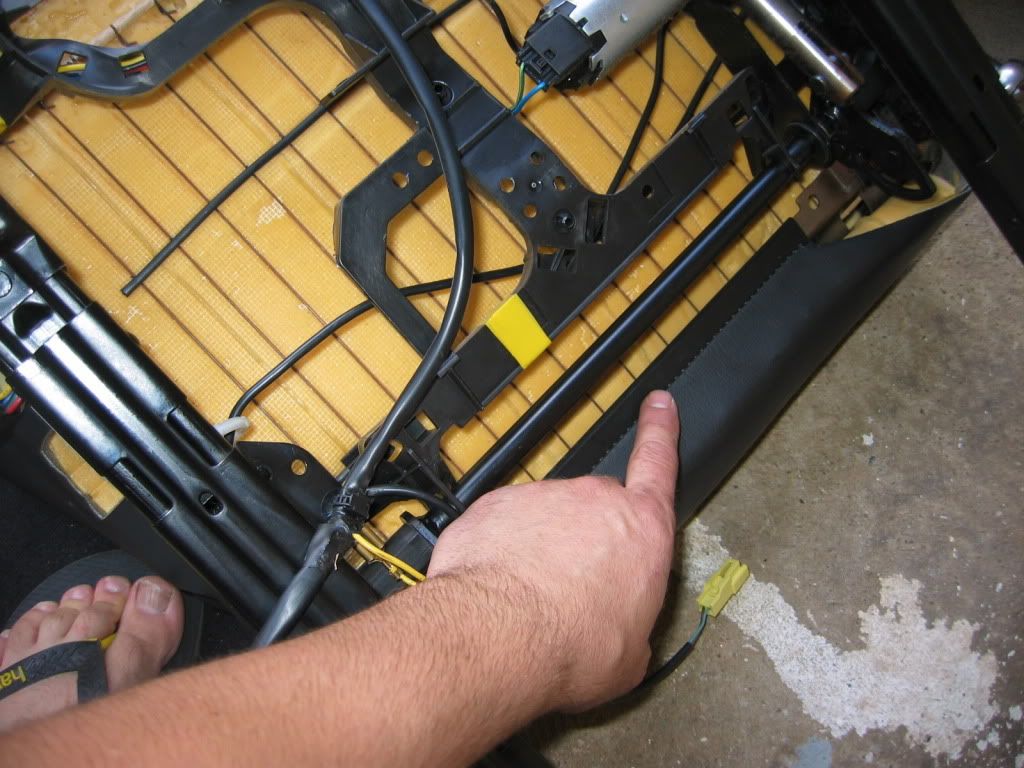
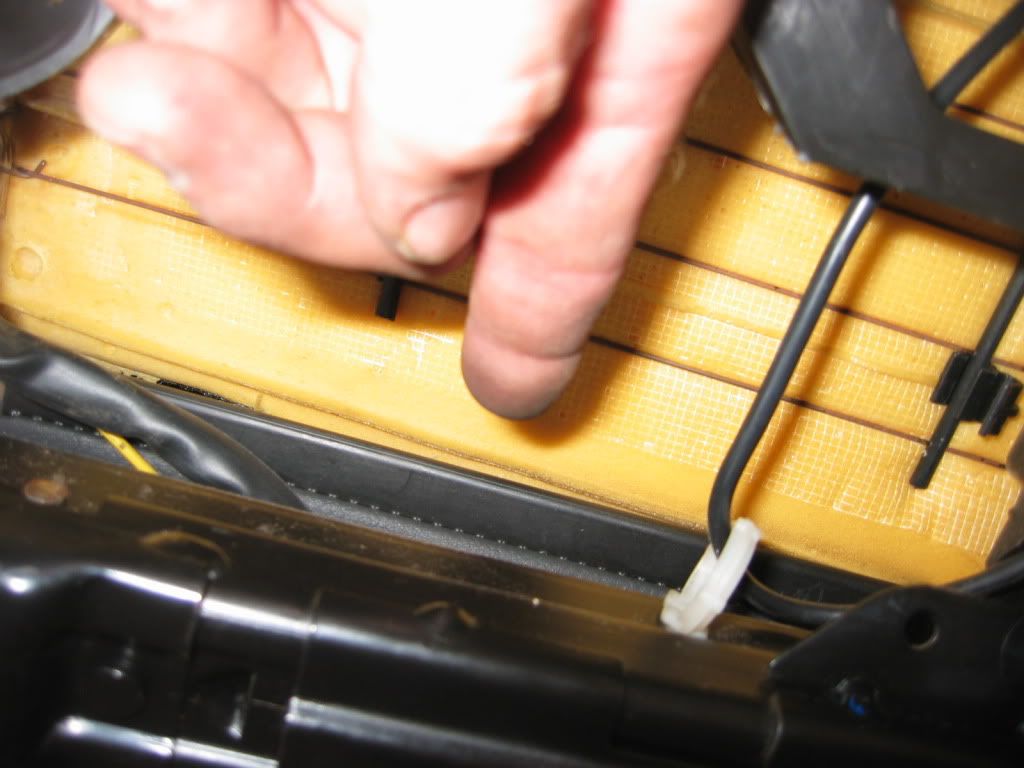
11) Disconnect the seat electrics:

IMG_5374.jpg


12) Remove the trim cover at the other side of the seat:

IMG_5379.jpg


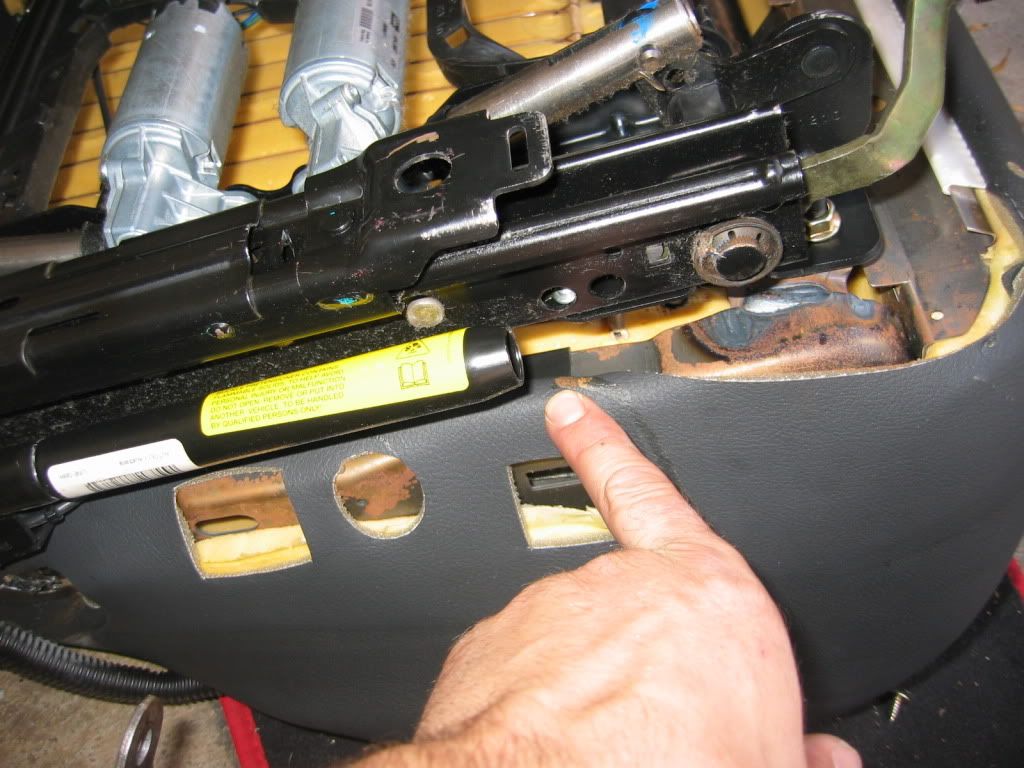
13) Unthread the cable leading up to the side airbag (if you have one):

IMG_5376.jpg


IMG_5377.jpg


14) Unbolt the two bolts holding the base of the seat to the back bit on both sides:

IMG_5375.jpg


IMG_5380.jpg


15) Separate the two sections carefully:

IMG_5381.jpg


16) Turn the base over on a soft surface and unclip the leather/cloth. There are 4 plastic clips you need to un hook from the seat:

IMG_5382.jpg


IMG_5383.jpg


IMG_5384.jpg


IMG_5385.jpg


17) Gently remove the foam, leaving the leather on it. Move on to the next seat and do everything you've done above. When swapping the seat base covers from seat to seat, be careful to insert the foam OVER the metal former. The former must be in the foam pocket, NOT NEXT TO IT.

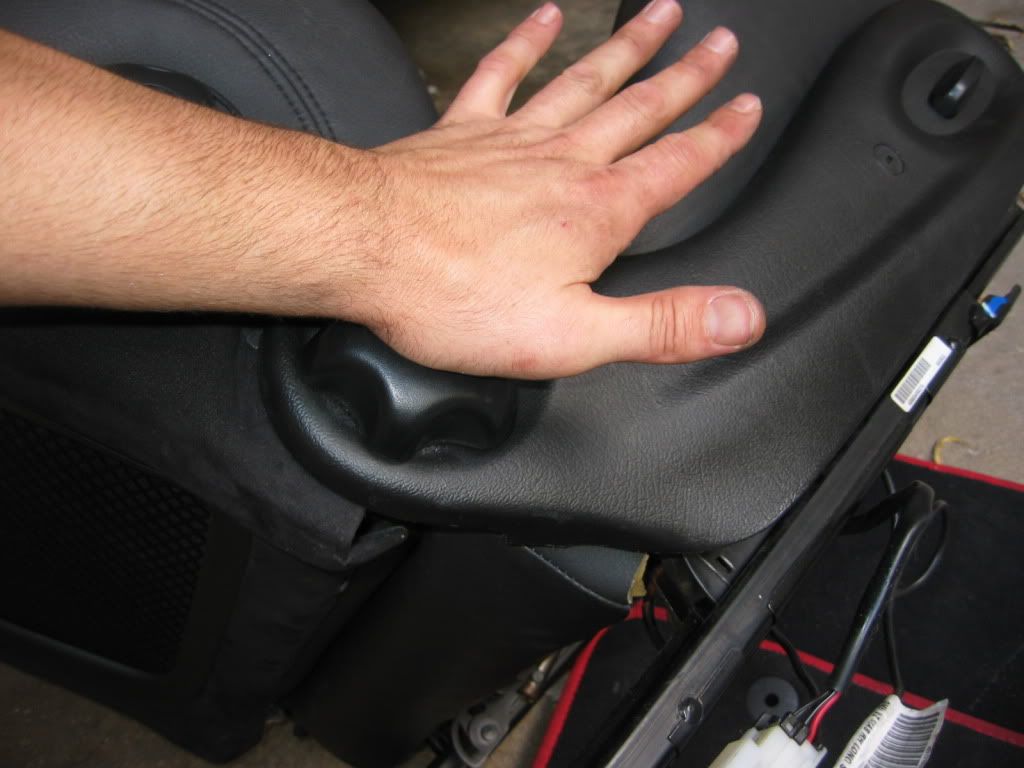
18) Re installation is the is the reverse of removal. To put the seat winder back on put it in place and hit it home with the palm of your hand:

IMG_5386.jpg


19) Put the seat back in but don't tighten it fully:

IMG_5389.jpg


20) Sit in the seat and test that the forward and backward movement is ok.

IMG_5391.jpg


21) Get out and tighten all the bolts and check for proper operation of the seat again. If it's a bit slow snapping into place, repeat the step above.

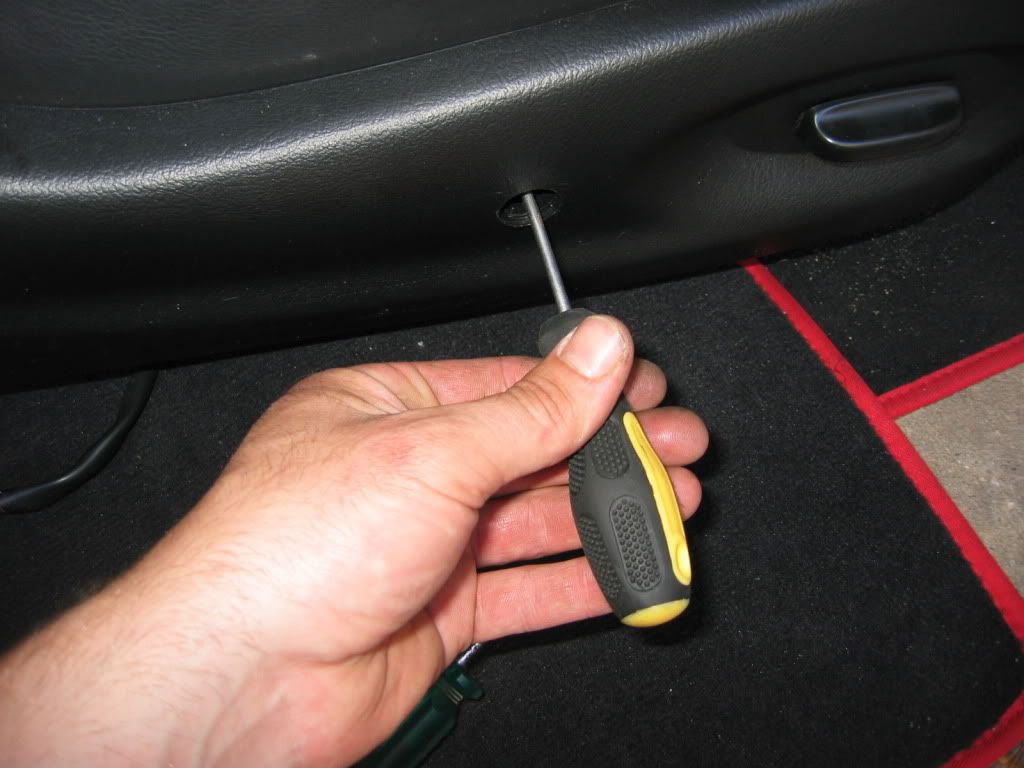
22) Slide the trim back into position. With the petrol flap lever, ease it over gently by raising it slightly again:

IMG_5392.jpg


23) CONNECT the cables again:

IMG_5396.jpg


24) Put all the other trim parts back on and you're done:

IMG_5393.jpg


IMG_5394.jpg


IMG_5397.jpg


IMG_5398.jpg
 

m1lky

New Member
Joined
May 14, 2011
Messages
1,075
Reaction score
4
Points
0
Location
Auckland
Members Ride
VY SS
Cheers for the tut. Will def do this.

Do you have to do anything to stop faults being logged etc when unplugging the airbag?

Is there any trick to the rear plastic covers? I can't get one of mine back on.
 

RIP 05

Member
Joined
Sep 7, 2009
Messages
246
Reaction score
3
Points
18
Location
WA Perth
Members Ride
VZ SSZ sedan
Thanks for the pics, just need to find the time now.
 
Top