myberlina
BAD COP! NO DOUGHNUT!!!
- Joined
- Aug 16, 2005
- Messages
- 395
- Reaction score
- 1
- Points
- 0
- Location
- Melbourne, VICTORIA
- Members Ride
- 2006 VE Calais
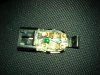
For my window switches I used 5mm LEDs but if i do them again as I plan to do, i would use 3mm LEDs. The main switches are actually LED style in the front so you don't need resistors for that part of your upgrade.
With 3mm in the window switches it will fit into the confined space easier.
With 3mm in the window switches it will fit into the confined space easier.