Trevor 062
Member
- Joined
- Feb 10, 2005
- Messages
- 466
- Reaction score
- 3
- Points
- 18
- Age
- 60
- Location
- St Clair
- Members Ride
- 2012 VE S2 SSV REDLINE & 07 VZ ACCLAIM WAGON
I just used polish on my VT's headlights. Did the job..
Welcome to Just Commodores, a site specifically designed for all people who share the same passion as yourself.
Yes, you are right, but the OP is not talking about foggyness. It's the yellowing of the headlights.i thought the headlights went foggy because of moisture on the INSIDE of the lens??
Are you headlights currently hazing over or going yellow? Well I have found a guide/product which fixes this problem.
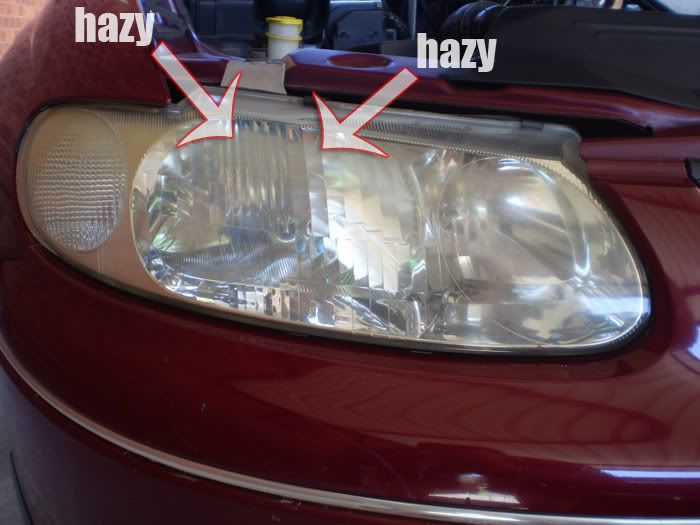
For months I wondered how I could fix this problem & actually was about to buy all the individual pieces required to perform this. In comparison my headlights are not as bad as some I have seen but I am very picky with this sort of thing.
Just to give you an idea, below is what headlights looked like before I started.
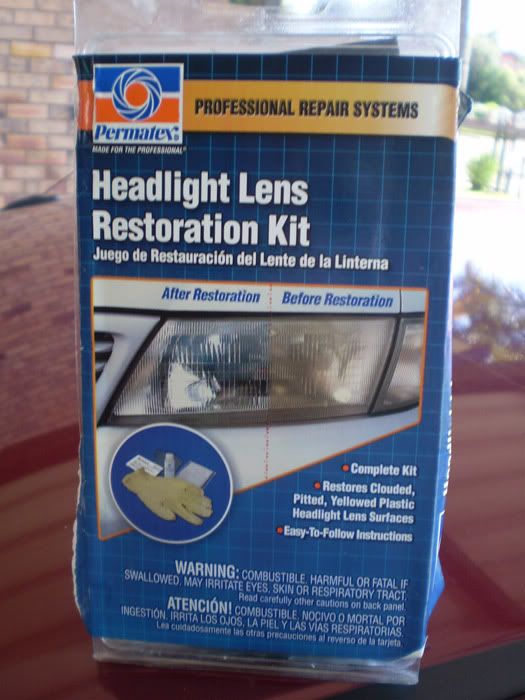
This is the actual kit I purchased, I found it through Autobahn but I am assuming you can pick from most car accessory retailers.
Permatex - Headlight Lens Restoration Kit which includes:
- 1 sheet each of the following grit wet/dry sandpaper (1000,1500,2000,2500 - Lower the number, the rougher the grit)
- Soft Cloth
- Plastic Polish (doesn't specify exactly what sort of polish)
- Rubber Gloves
Steps Required:
1. You need to decide first of all how bad the damage is on your headlights, in my case the headlights where just yellow but not badly scratched so I didn't need to use the rougher grit paper. So I started with the 2000 grit paper.
Soak the paper in water for a good 5-10 minutes just to make sure it is completely wet. Failure to do so can mean causing more damage to your headlight, making possibly worse than when you started.... Be sure to also wet the lens of the headlight to keep lubrication at a maximum.
2. With your roughest sandpaper(lowest # grit, IE 1500) Rub the sandpaper in one direction IE. left --> right until you have a uniform finish and keep dipping the paper into water so you don't clog up the sandpaper.
3. Re-lubricate the headlight and change the water which you dip your sandpaper into so make sure you don't contaminate the new paper. Then start to rub a higher grit sandpaper IE. 2000 in one direction again, this time top to bottom or visa-versa.
4. Follow the same process again this time with a higher grit again IE. 2500 and change the direction in which you are rubbing the headlight again IE left ---> right again.
NB: Make sure that you are regularly dipping the sandpaper into water to clear off any mass attracted by the sandpaper
Also note, at this stage you will not see the headlight clear up.
5. Clean the headlight with water and dry off with a clean cloth.
6. Once dry, use a soft clean cloth + the polish provided & rub whilst applying pressure in a circular motion over the entire headlight. Once applied please allow the polish to dry. Once the polish is set rub the polish off with a clean cloth.
7. If the lens of the headlight still hasn't cleared up, then re-apply step 6.
8. If you notice any spots which have not cleared up, then re-polish these particular areas.
And after all of this, it should look like this.
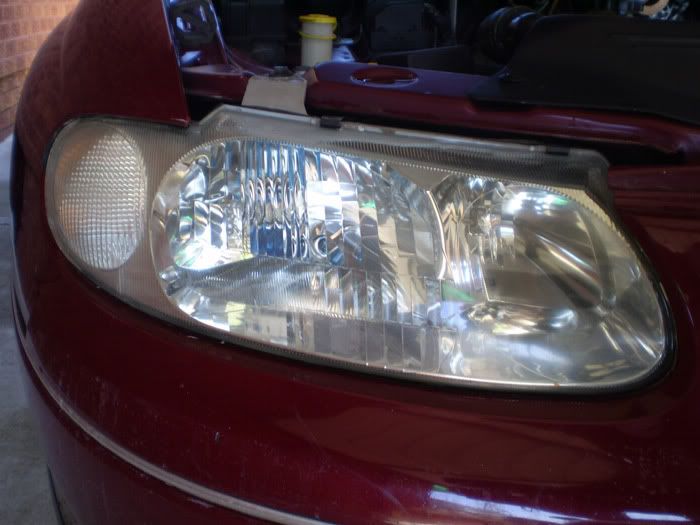
All up this process took me between 30-45 minutes to complete and the kit cost about $30. I know it my case I completely happy with this outcome. :thumbsup:
Hope it helps guys, any questions please let me know.
PLease advise me if you sand the outside of headlight??:bomb:i did this to my sisters toyota echo,just make sure you follow the directions properly,came up alot better than how they were but no matter how much polish i put on the lights,the light scratches just wouldnt come out,luckly she trade it in not long after
")