Welcome to Just Commodores, a site specifically designed for all people who share the same passion as yourself.

New Posts Contact us

Just Commodores Forum Community

It takes just a moment to join our fantastic community

Register

My Torana Rebuild

383 hatch

Well-Known Member
Joined
Jun 14, 2005
Messages
3,922
Reaction score
67
Points
48
Age
41
Location
Cowes, Phillip Island
Members Ride
VG Ute 5.0,Torana hatch 383,WB Ute 5.0,VR stato5.0
Mate, i've got a hairdryer in my bathroom, don't need one on my car...If this car ever gets a blower, it'll be a 6/71 hanging out the bonnet. No 2 ways about it. However, that'll mean it's street driven days will be very limited, so it stays N/A for now.
 

383 hatch

Well-Known Member
Joined
Jun 14, 2005
Messages
3,922
Reaction score
67
Points
48
Age
41
Location
Cowes, Phillip Island
Members Ride
VG Ute 5.0,Torana hatch 383,WB Ute 5.0,VR stato5.0
Well, productive weekend.

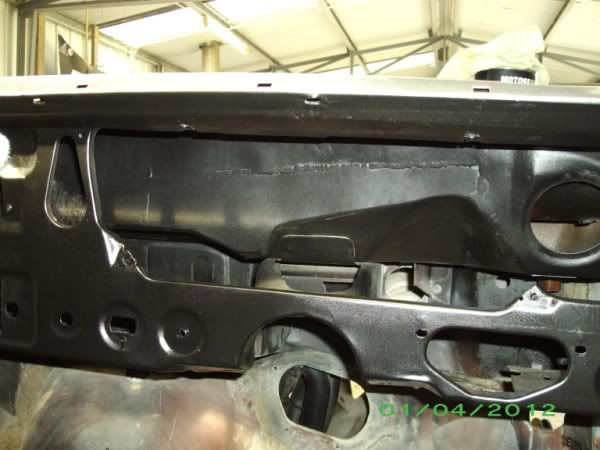
Got the dash all welded in, so that's finished. Some of the welds were a bit of a mission. I hate working under a dashboard at the best of times, let alone laying on my back with my head up against the firewall doing plug welds...:p I got there in the end though, and believe it or not the welds are perfect (shame no one will ever see them lol).

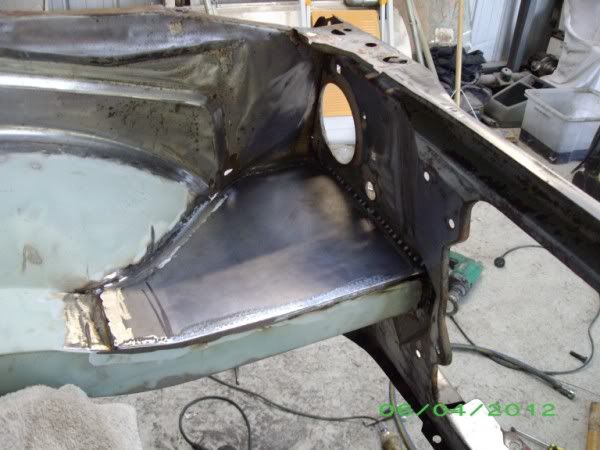
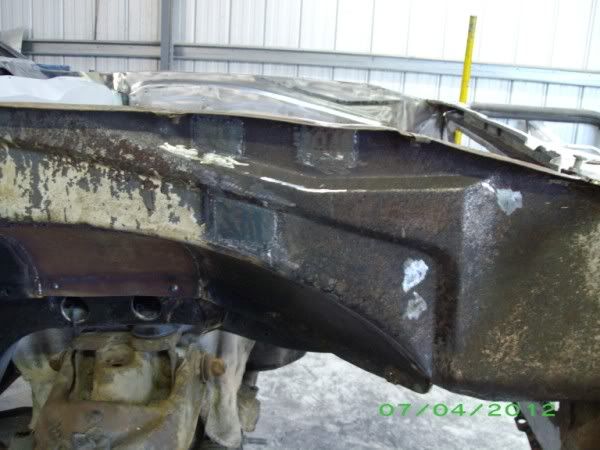
Fixed a bit of rust in the plenum chamber while the dash was out too. That would have been a bit tedious with the dash in, so i took the opportunity to do it.

I also stripped all the paint off the top of the dash while it was out and easy to do. Once it was all welded in i gave it a coat of satin black to tidy it up a bit. It won't be seen once it's all back together, but i know it's done anyway. The top will get painted properly at a later date.

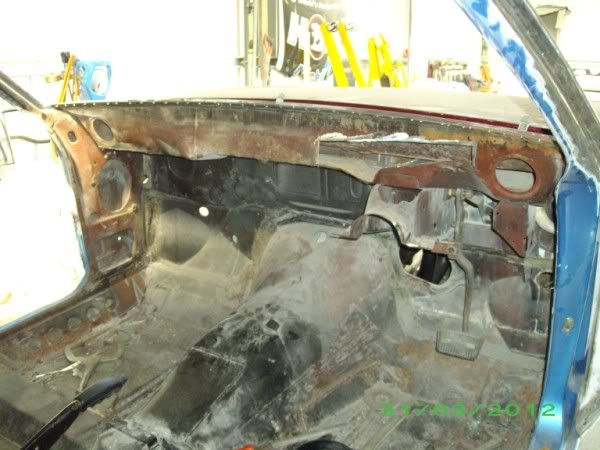
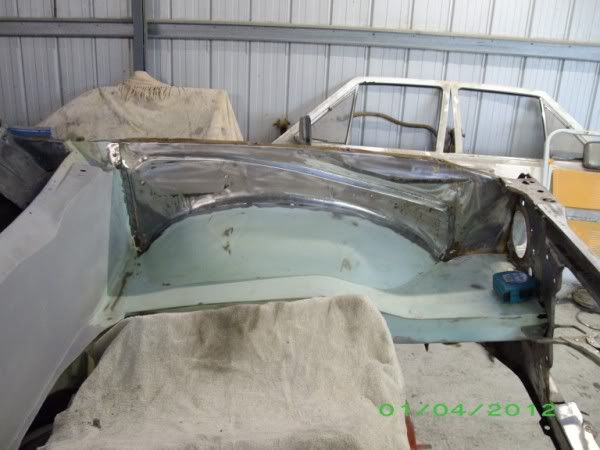
Dashboard removed, rust cut out
IMGP3015600x450.jpg


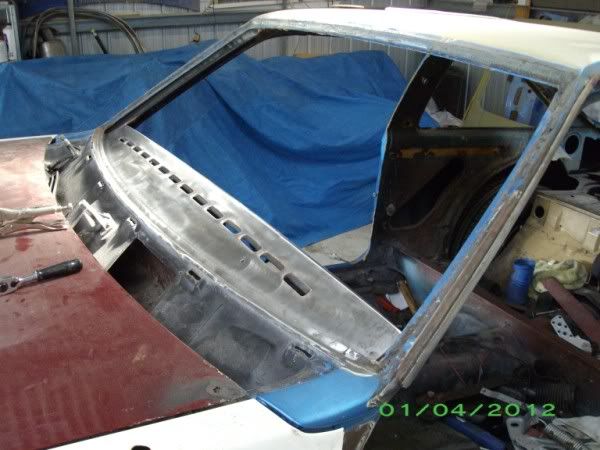
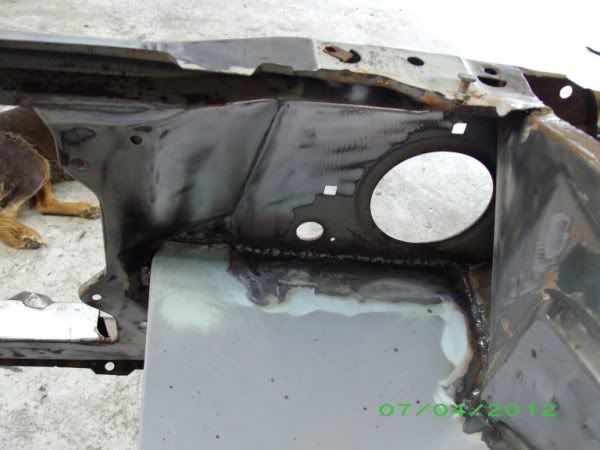
Dash welded in, top back to bare metal
IMGP3020600x450.jpg


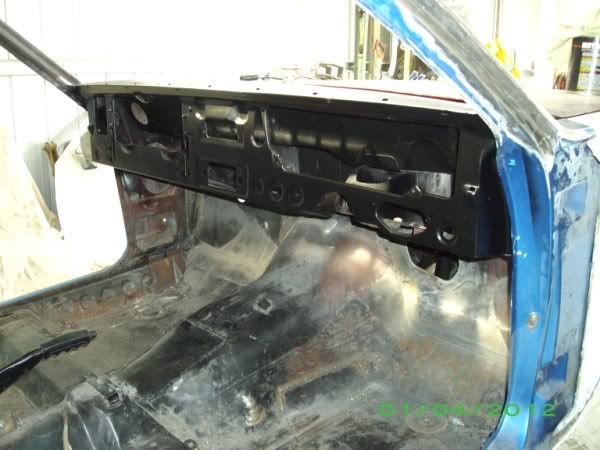
All welded and a coat of paint
IMGP3017600x450.jpg

IMGP3021600x450.jpg


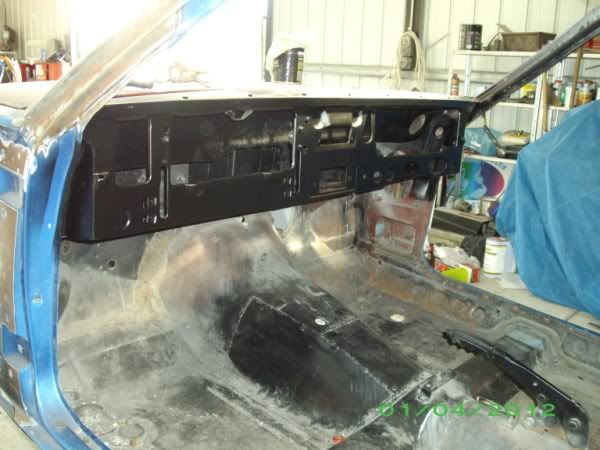
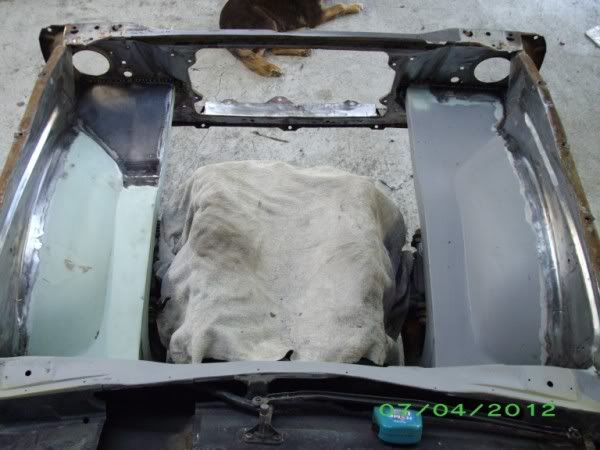
Rust repaired and painted
IMGP3018600x450.jpg


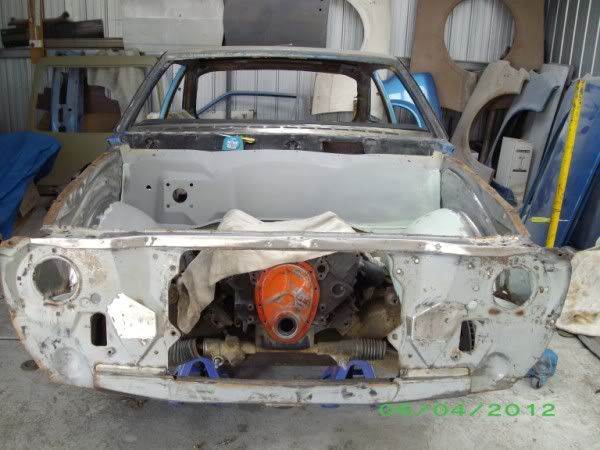
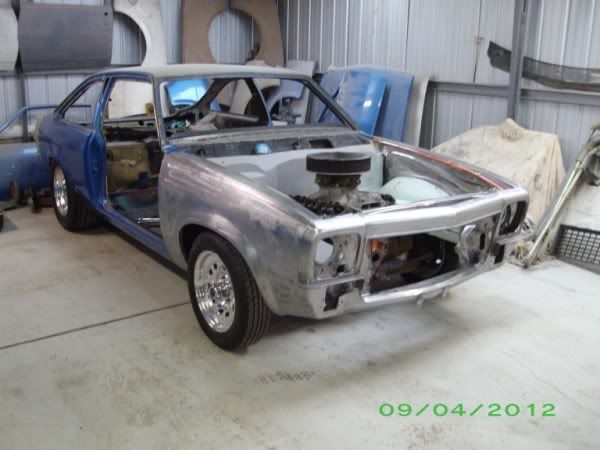
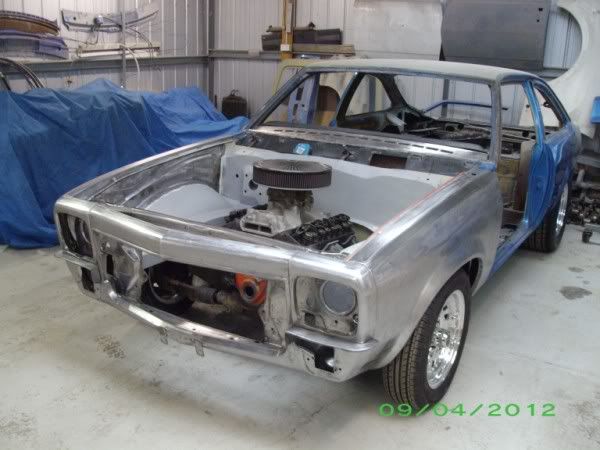
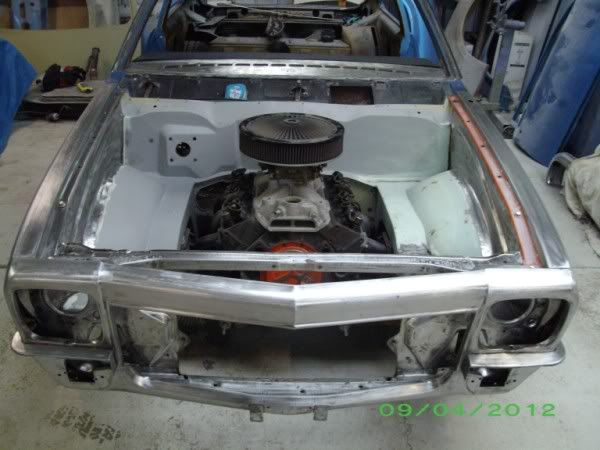
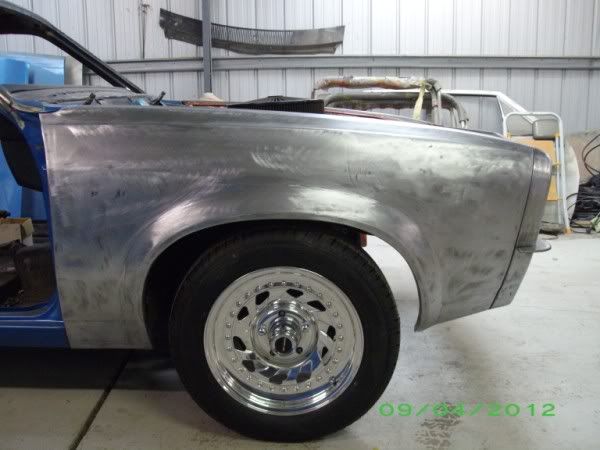
So, with that finished, i moved back to the front end.

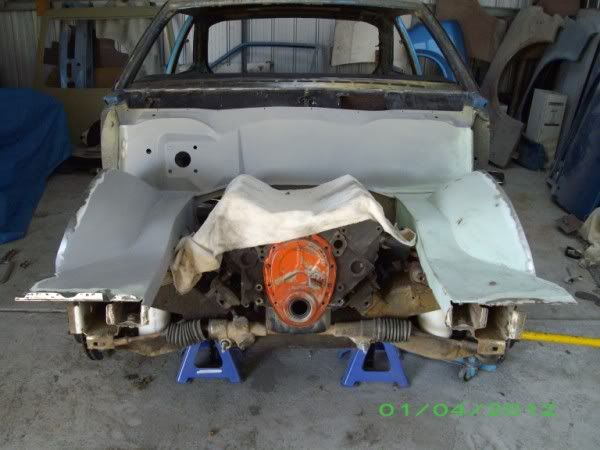
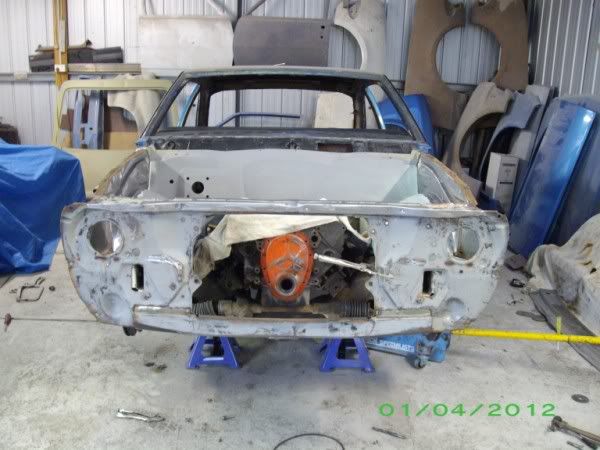
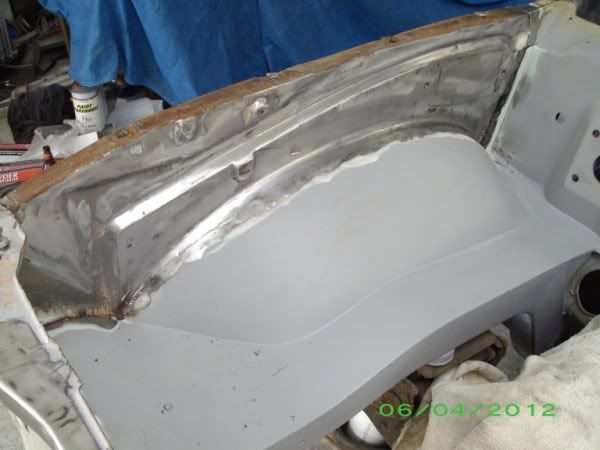
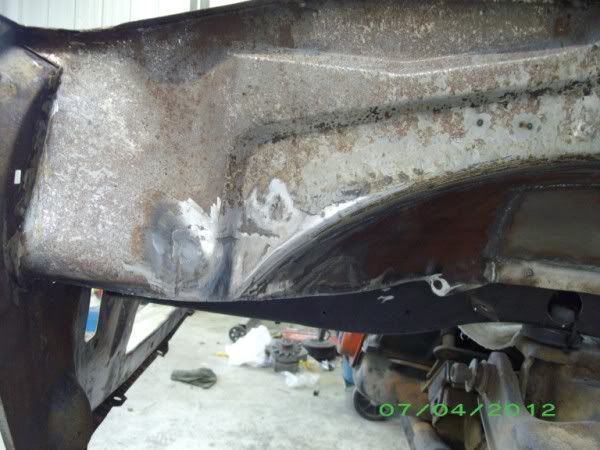
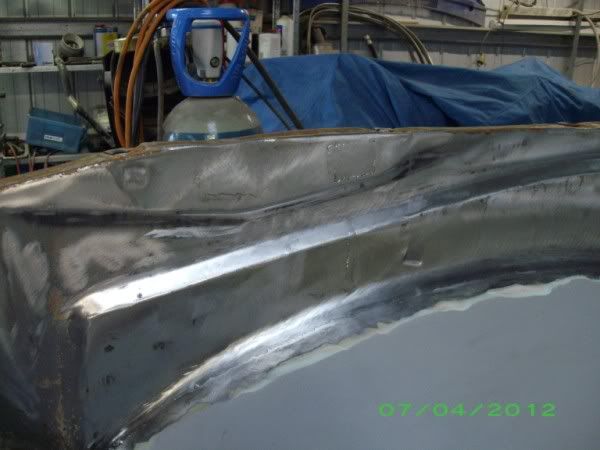
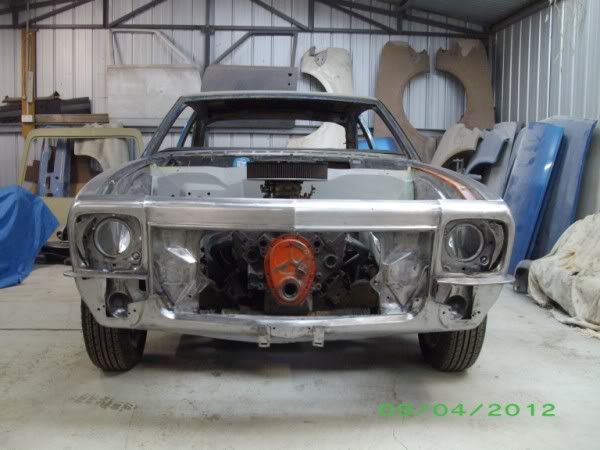
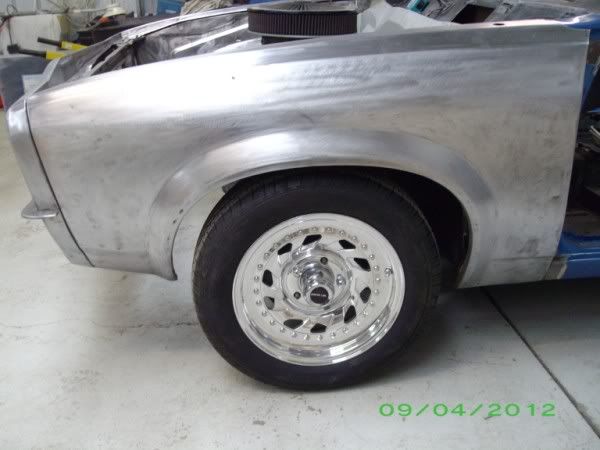
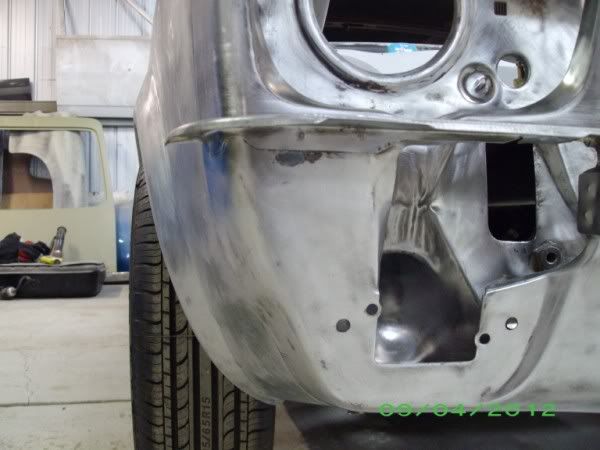
I started by cutting the car inner guards to mate up to the front cut inner guards. Then i removed the front end to strip off the paint and get it all prepared for welding. I stripped the entire front cut with paint stripper and a high pressure washer. Once that was done i fitted it all back on for the final time. It's ready to weld on now.

Front removed
IMGP3022600x450.jpg


All back on after being paint stripped (there is still some primer on the radiator support, but that'll wire wheel off nicely)
IMGP3025600x450.jpg


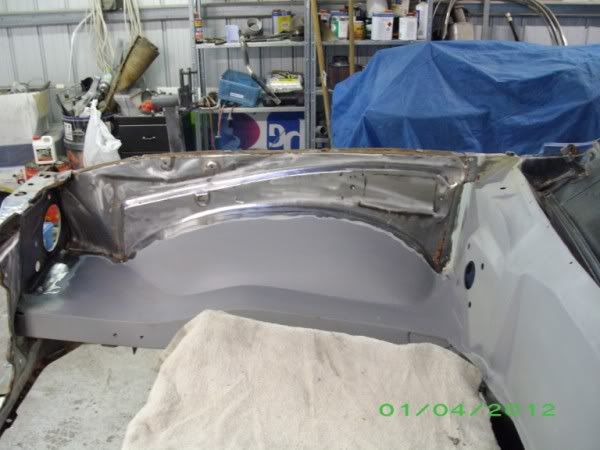
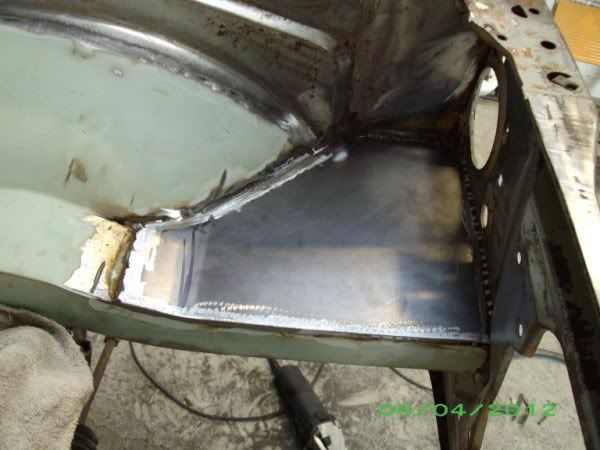
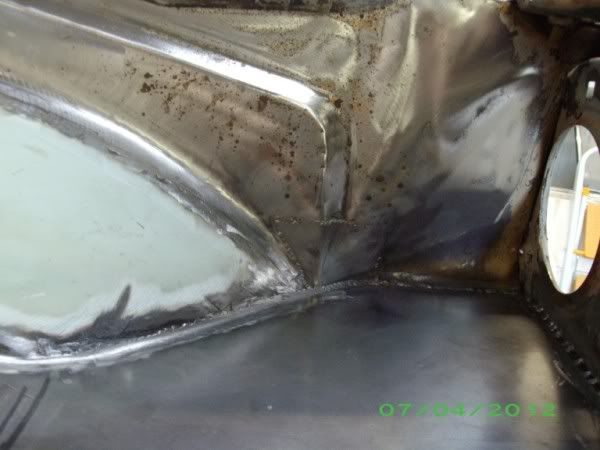
The inner guards, once they are welded and finished off you won't even know they have been joined (note the rust repairs where the hinges go).
IMGP3026600x450.jpg

IMGP3027600x450.jpg


So, that's where it's at ATM. I'll probably weld the front on this week.
 

383 hatch

Well-Known Member
Joined
Jun 14, 2005
Messages
3,922
Reaction score
67
Points
48
Age
41
Location
Cowes, Phillip Island
Members Ride
VG Ute 5.0,Torana hatch 383,WB Ute 5.0,VR stato5.0
So, yesterday really was a Good Friday. Spent it in the shed ofcoarse.

I got the front end all welded on, so that's the LX conversion drawn to a close. The joins on the inner guards came up mint, there was hardly any gap to weld up so once it was all welded and ground down, it finished up nicely. I just have to clean up some penetration on the wheel side and you won't even pick it's been modified (which is the way I like/want it).

I also cut out and welded in a new section in on the L/H side where the battery used to be (many moons ago, i put a flat piece in on the first build but i've never been overly happy with it, young and stupid i guess :p) as it needed to be straightened out at the front to meet the LX radiator support and it didn't take too kindly to being hammer and dollied. So, new piece of steel it was. Much happier with it now, it's 1.5mm steel too so it won't be moving in a hurry.

Just need to finish up welding the R/H inner guard to the radiator support, fix a bit of rust in the L/H inner guard (you can see the hole in the pics) and smooth out the washer bottle mounts and the engine bay metal work is finished (again). I'm also going to do a bit more smoothing on the bottom of the firewall aswell, but that'll have to wait until the motor comes back out.

Anyway, enough rambling, some pics:

All welded on.
IMGP3028600x450.jpg


L/H inner guard done.
IMGP3029600x450.jpg


R/H
IMGP3030600x450.jpg


Battery tray.
IMGP3033600x450.jpg

IMGP3034600x450.jpg


Enjoy. More Easter updates to follow...
 
Joined
Mar 30, 2011
Messages
378
Reaction score
1
Points
16
Location
roxby downs
Members Ride
VH SL/E..VF2 redline W375.. 200 series landcruiser
hahah i just cut out the battery tray from my VH SL/E project and replaced with a smooth panel like you have and it looks nothing like that it took about a roll of mig wire haha.

you are a master i bow down to you.
 

383 hatch

Well-Known Member
Joined
Jun 14, 2005
Messages
3,922
Reaction score
67
Points
48
Age
41
Location
Cowes, Phillip Island
Members Ride
VG Ute 5.0,Torana hatch 383,WB Ute 5.0,VR stato5.0
It's just the measure twice cut once rule. I tend to cut the new piece slightly bigger than it needs to be, then grind the edges down a bit at a time where it needs it until it fits neatly. Obviously, the less gap you end up with to weld, the easier and neater the end result will be. The trick is to also have the voltage up as high as possible without blowing holes in the steel, this will yield a much nicer weld, with maximum penetration and a lot less grinding and cleaning up to do afterwords.

Keep at it mate, you'll get there and learn heaps along the way.

I'm far from a master, but i appreciate the sentiment all the same.
 

Jecs

PAVTEK Race Engines
Staff member
Joined
Feb 22, 2005
Messages
1,188
Reaction score
335
Points
83
Age
36
Location
Geelong
Members Ride
'97 Caprice 355ci & VZ SS Ute
rep'n for all the work you're doin hatch. keep up the pics
 
Joined
Mar 30, 2011
Messages
378
Reaction score
1
Points
16
Location
roxby downs
Members Ride
VH SL/E..VF2 redline W375.. 200 series landcruiser
i do a lot of welding but its all indusrial. nice big gaps for max penitration. i need to get that out of my head . i just did the front piece of the chassis rail and radiator support and they turned nice and neat. im about to start a build thread of it once my new internet is hooked up in a week or so you should check it out and give me some pointers.
 

383 hatch

Well-Known Member
Joined
Jun 14, 2005
Messages
3,922
Reaction score
67
Points
48
Age
41
Location
Cowes, Phillip Island
Members Ride
VG Ute 5.0,Torana hatch 383,WB Ute 5.0,VR stato5.0
rep'n for all the work you're doin hatch. keep up the pics

Cheers Jecs, will do mate.

i do a lot of welding but its all indusrial. nice big gaps for max penitration. i need to get that out of my head . i just did the front piece of the chassis rail and radiator support and they turned nice and neat. im about to start a build thread of it once my new internet is hooked up in a week or so you should check it out and give me some pointers.

Yeh, panel steel is a totally different ball game. Gaps are the devil. However with experience/practice you can weld fairly decent size gaps with a MIG, but it just takes a lot longer and the weld obviously doesn't come out as neat and takes more dressing to finish it off.

Will certainly check out your thread and help where i can.

Todays efforts.

Rust repair completed.
IMGP3035600x450.jpg


Outside.
IMGP3037600x450.jpg


Water washer bottle mounts gone.
IMGP3036600x450.jpg


Outside.
IMGP3040600x450.jpg


R/H inner guard all welded.
IMGP3038600x450.jpg


Just a general look at the bay.
IMGP3039600x450.jpg


So, that's about it for the engine bay for now, I might strip the rest of the paint off the radiator support panel tomorrow. Then it's ready for epoxy primer, then filler work. Time to make a start on the front panels.
 
Last edited:

383 hatch

Well-Known Member
Joined
Jun 14, 2005
Messages
3,922
Reaction score
67
Points
48
Age
41
Location
Cowes, Phillip Island
Members Ride
VG Ute 5.0,Torana hatch 383,WB Ute 5.0,VR stato5.0
Well, that's the Easter weekend just about over.

I've achieved a fair bit this weekend though, so i'm pretty happy.

So, yesterday and today i stripped the paint off both guards, nose cone and the radiator support. I stripped the panels inside and out. I know stripping the inside is pretty extreme as i'm only going to stoneguard them again same as the underside but i wanted to start completely fresh. Also, with it all stripped it gives me a good look to see if there is any rust.

I managed to score a better L/H guard than the white one seen in earlier pics as it was rusted and fairly beaten up. This one needs a few small repairs, but it's heaps better than the white one was and it's 100% rust free. The drivers one also needs some minor repairs, but again it's rust free aswell. The nose cone is probably about the best you will find for an LX in this day and age, only needing a couple of small repairs and 1 tiny rust repair. Overall, i'm very happy with the front panels.

Anyway, some pics.

IMGP3043600x450.jpg

IMGP3042600x450.jpg

IMGP3044600x450.jpg

IMGP3050600x450.jpg

IMGP3048600x450.jpg

IMGP3047600x450.jpg


The only bit of rust i found...
IMGP3049600x450.jpg


That wraps up the LX conversion, on with the rest of the bodywork now.
 
Top