smitchy
Member
- Joined
- Jan 4, 2015
- Messages
- 67
- Reaction score
- 24
- Points
- 8
- Location
- Sydney
- Website
- www.webchemistry.com.au
- Members Ride
- Holden Commodore SSV Redline VF Series II
Title should be edited to The (almost) ultimate bulb replacement guide.
I have the VFF MY15 SV6 Sedan so this guide has been primarily built around this model.
Im in the process of upgrading my exterior and interior lights to max legal i can go, this means no HID, there is plenty of threads regarding HIDs but i could not find a comprehensive guide for other types of lights. Primarily i will be replacing halogens interior with LED equivalent where possible and exteriors with something like Phillips Crystal Visions 4300k.
This guide is really for reference purpose only for me and of course if you find something of help here you can thank me.
I will be taking photos along the way and giving links to where i purchased my gear.
All globes provided by Bling Auto Works, they are a great bunch to deal with and answer all questions by email promptly.
Updates
24/2/15 - Been speaking to a seller on ebay who was very helpful and has packaged up a kit for the VF for front headlights, side fender blinkers, rear number plate, interior lights for a decent price. Should be coming any day now will follow up with pics and before and after.
22/3/15 - Sorry for the delay, finally managed to get the time finish off this post, enjoy!
OEM PARTS TAKEN OUT
Front lamp assembly
- 1 pair Front turn signal lamp = WY21W bulb (OEM)
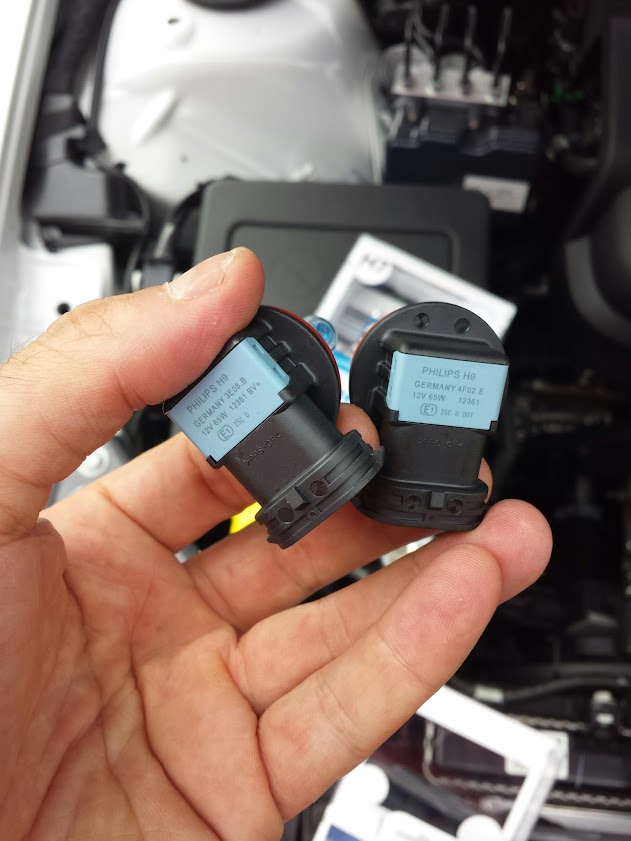
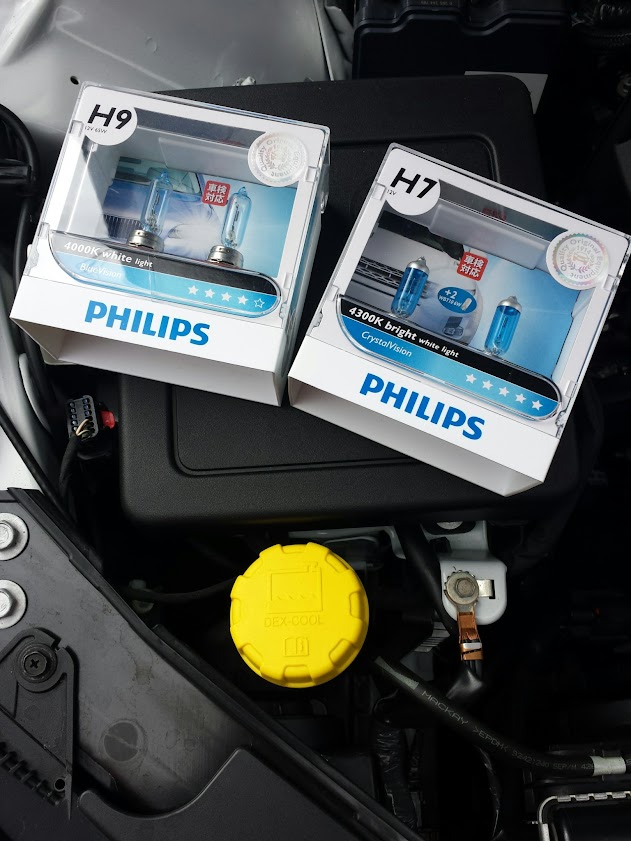
- 1 pair Headlamp outboard low beam = H7LL bulb

- 1 pair Headlamp inboard high beam = H9 bulb 60watt
original globe on the right, replacement 4300k on the left
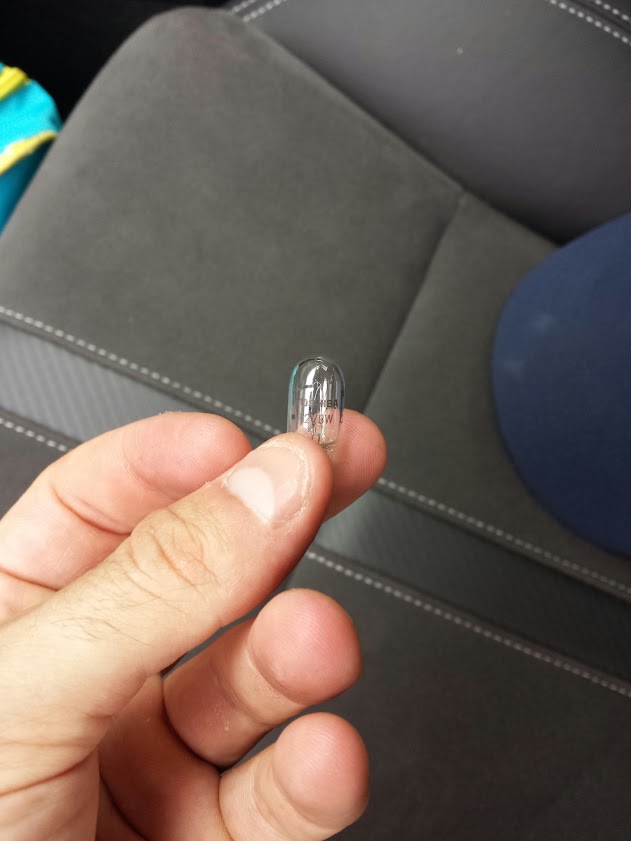
- 1 pair Park lamps = W5W bulb

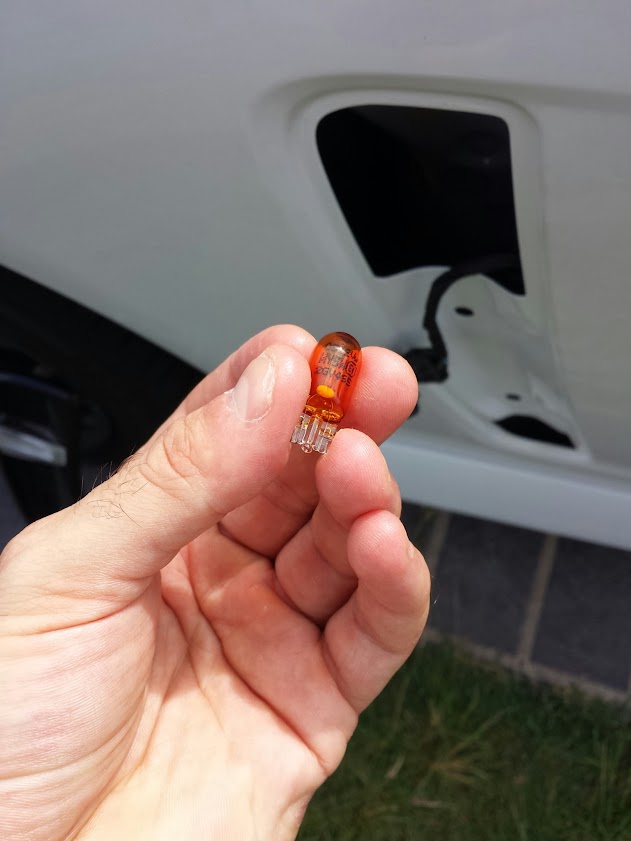
Side fender lamps / undocumented
- 1 pair T10 amber globes
Tail lamp assembly (sedans)
- Reverse lamp = W16W bulb
- Brake lamp = W5WLL bulb
- Stop tail lamp = P21/5W bulb
- Turn signal lamp = PY21W amber bulb
Number plate lamp
- 1 pair W5W bulb
Interior lamps
- 1 pair Rear dome / reading lamps = W5W bulb
- 1x Glove box lamp = 5W bulb
Sedan Boot Light / Undocumented
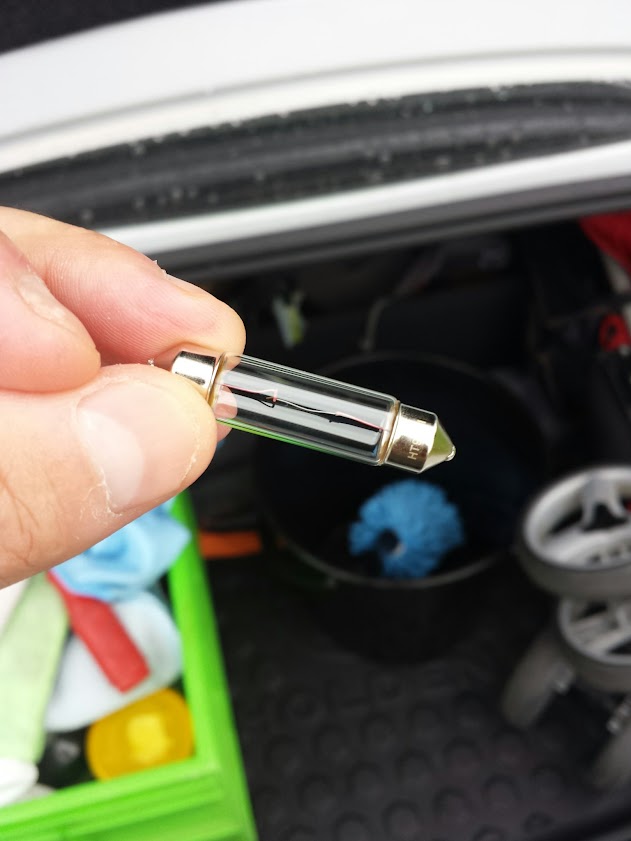
- 1x Festoon type bulb 41mm
THE REPLACEMENT PARTS

Front lamp assembly
- 1 pair Front turn signal lamp = Konik chrome halogen indicators
- 1 pair Headlamp outboard low beam = Phillips crystal vision 4300k H7
- 1 pair Headlamp inboard high beam = Phillips blue vision 4000k H9
- 1 pair Park lamps = Konik CANbus T10 led's COB 6000k pure white
Side fender lamps / undocumented
- 1 pair T10 amber globes
Tail lamp assembly (sedans)
Note: I have decided to not go ahead with this mod because i will be direct replacing the tail lamps with hsv replica drlites when they are released which look heaps better
Number plate lamps
- 1 pair of Konik CANbus T10 led's COB 6000k pure white
Interior lamps
- 1 pair Rear dome / front reading lamps = 1 pair of Konik CANbus T10 led's COB 6000k pure white
- 1x Glove box lamp = 1x Konik CANbus T10 led's COB 6000k pure white
Sedan boot lamp / undocumented
- 1 festoon type 41mm Canbus led (not pictured above)
REPLACEMENT PROCEDURES
Front lamp assembly guide
So this was my first attempt at replacing these light globes in any car for that matter, so i was a real noob at it, it took me a while to figure out how to replace the H7's i would say they are the hardest of all in terms of replacement of globes on the holden so far.
High beams - left side / right side guide
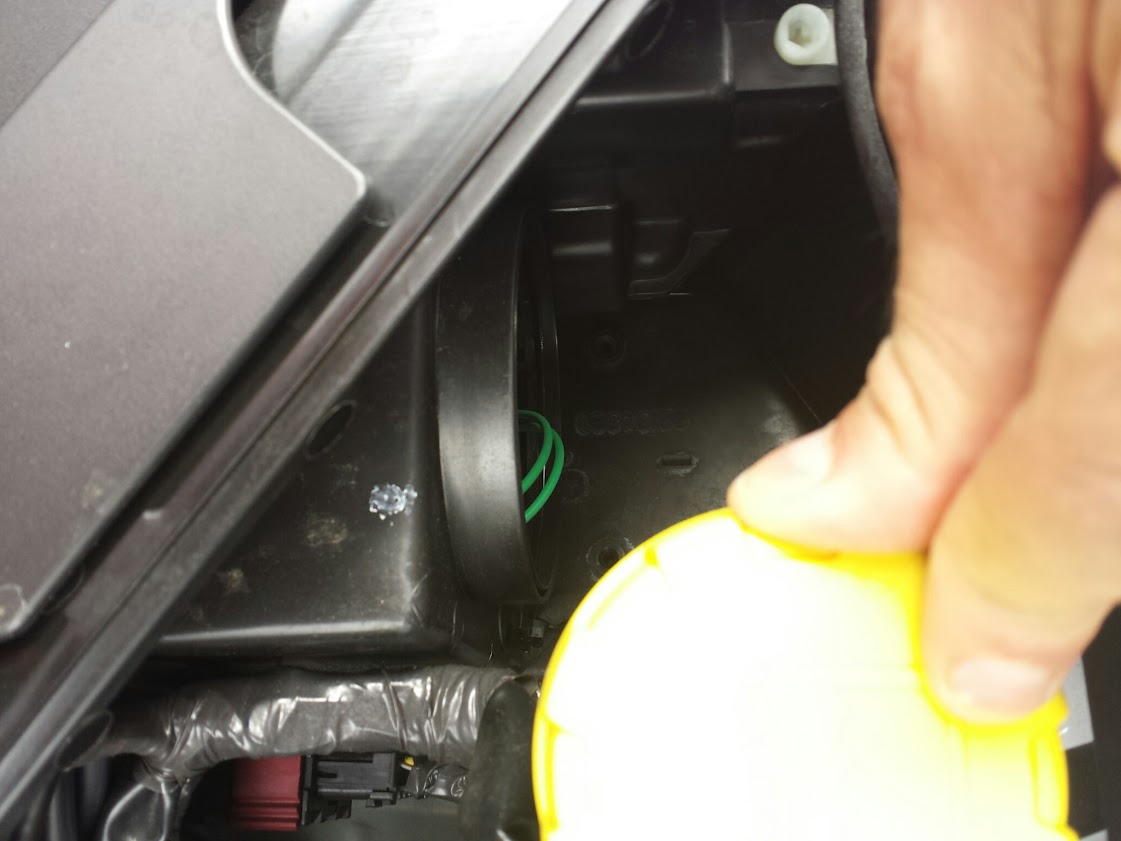
STEP 1) Open your bonnet, these are pretty easily accessible they can be replaced from the front of your car when you pop the bonnet, take a look at this pic its from the top of the left side. If you look directly underneath the Yellow cap of the radiator coolant tube you will see the corner of what looks like a round big at least 70-90mm cap. This can be turned and topped off.
Here is another image of a close up with the cap off.
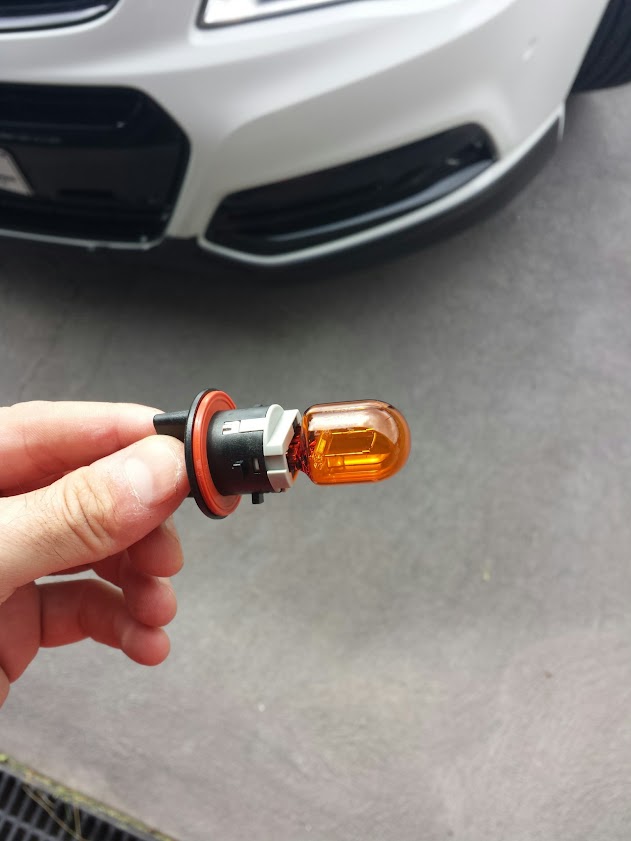
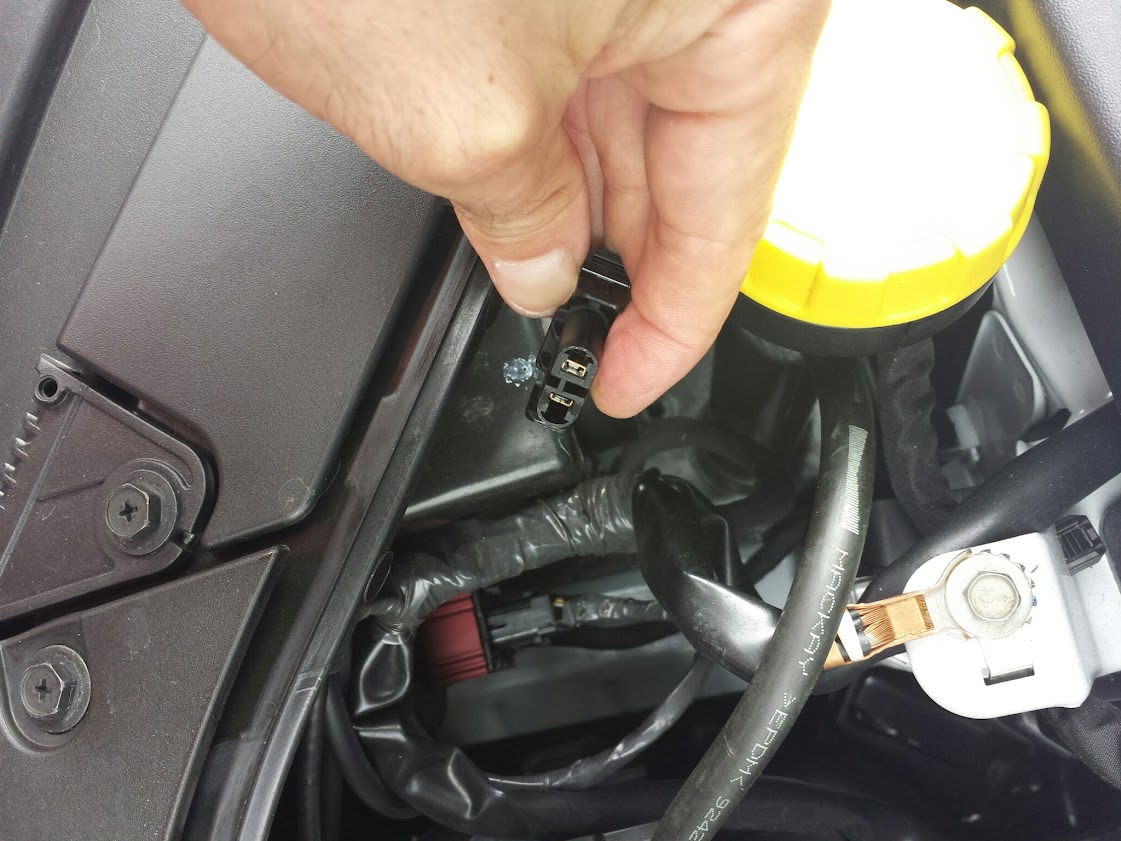
STEP 2) Put your hand in and feel for the globe assembly, Twist them 1/4 way and pull out, it looks like this when its out

You can unplug the globe from the switch, like this
STEP 3) Replace the globe assembly, plug back in and pretty much reverse what you did to get here, do the same for the other side. You are DONE!
Park lamps guide
STEP 1) This one is easy, now that you have replaced the high beams, lets move onto the parkers, here is a pic of where they are located, they are very close to the high beams and can be done with the bonnet open.

STEP 2) Twist out the globe 1/4 way and simply pull the assembly out, looks like this
STEP 3) Replace the wedge type globe with new one, like this

STEP 4) Reverse your steps, to put back together you can do the same steps for the other side, You are DONE!
Front turn signal lamp guide
Now we start to get more complicated, to get to the rest of the front assembly lights, you will need to squeeze your hands through the front wheel arches, i know some have opted to take off the airbox as one way to do it, but i have found an even easier way so read along.
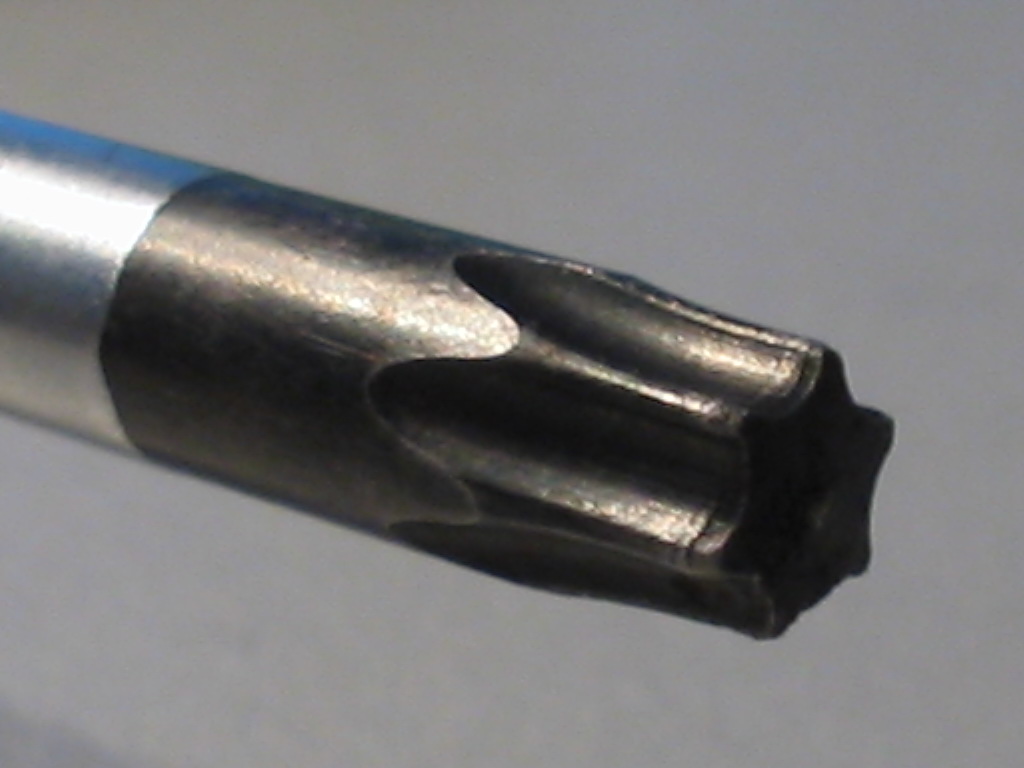
STEP 1) You have to turn your steering wheel either inwards or outwards to make this work, i tried both ways and i actually preferred outwards on the side i was working on. The reason for this i found that i had more room to my hand to move around in, either way will work so you choose what you prefer. As you see pictured here on the driver side i opted to steer inwards. You only need to take off the second and the third screws from the outer lip. You can see i have the first, second and third taken off, but you really dont need to do the first one, this will save you some time. You will need a T10 star screw driver, as you see pictured below.
See pictured below the wheel arch with the screws off.

STEP 2) Slowly pull out the wheel arch padding careful not to rip or fray the ends of the padding you only really need to pull out from the second screw hole to about half way up the wheel arch or so (around the top of the tyre. Its flexible stuff so you wont bend and break it, push it down to expose the inner front bar and inner part of the headlight.
STEP 3) There is no way to take a picture of this light so your gonna have to peek your head in and also feel around the outer top most part of the headlight where the screw style globe is. Generally what i liked to do is sit on the ground, put my hand in feel towards the top where i knew the globe would be, turn my head to the front of the headlight and visualise where it would be. Once you found it, you will feel a screw type connection that you simply screw 1/4 way and it pulls out. It will look like this (see picture below i already pulled it out and changed the globe to the chrome finish)

STEP 4) Simply reverse what you did and reconnect again, You are now DONE!
Headlamp low beam guide
This is the hardest lamp to replace, its fiddly and also not much room, i also had a bit of a hard time turning the screw cap to get to the globe (mine was on REAL tight) it took a few goes. There is no way to take a photo of what it looks like inside the assembly as its too far in the guard you will basically have to move your hand in and get a feel of what your dealing with. I found this diagram on the net that will definitely help you in knowing what it actually looks like inside, you will have to visualise this as your prying your hand in this part of the headlight to get the understanding of how it works.

You will notice there is a clip, take note of this because you will have to undo this to take the globe out.
STEP 1) Once you have your hand inside you should be able to get a feel of what the assembly feels like you will notice a clip, this clip need to be pushed inwards and pulled to one side, the globe is pretty much held in the assembly by this clip, once you visualise and know how to take this clip on and off it gets easier. Once the clip is off you will feel the globe come loose, you will also notice that the pins of the globe are facing a certain way, the pins will be vertical, not horizontal, you need to remember this as you will need to put the new globe in this way also. Take the globe out. This is a picture of what it looks like from the guard when the screw cap is off

STEP 2) Get the new replacement globe and pretty much reverse what you just did. You are now DONE!
Side fender globe guide
Time taken: 5 minutes
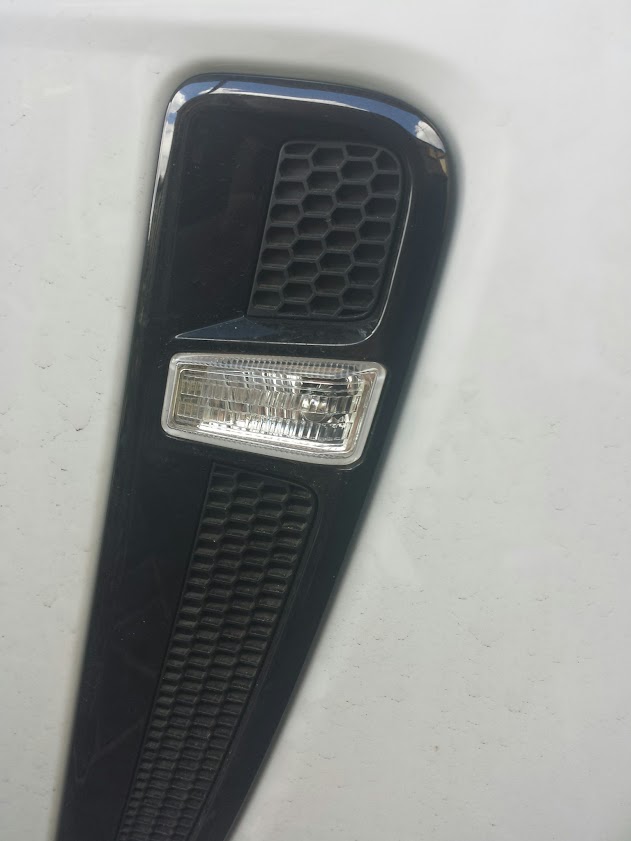
This is actually a lot easier that it looks but some care should be taken. Here is what it looks like before.

and this is what it looks like after
STEP 1) Get yourself a soft microfiber town, get a credit card and wrap the card like in this picture.

STEP 2) Use the corner of the card and slip it into the top part of the fender assembly like in this picture.

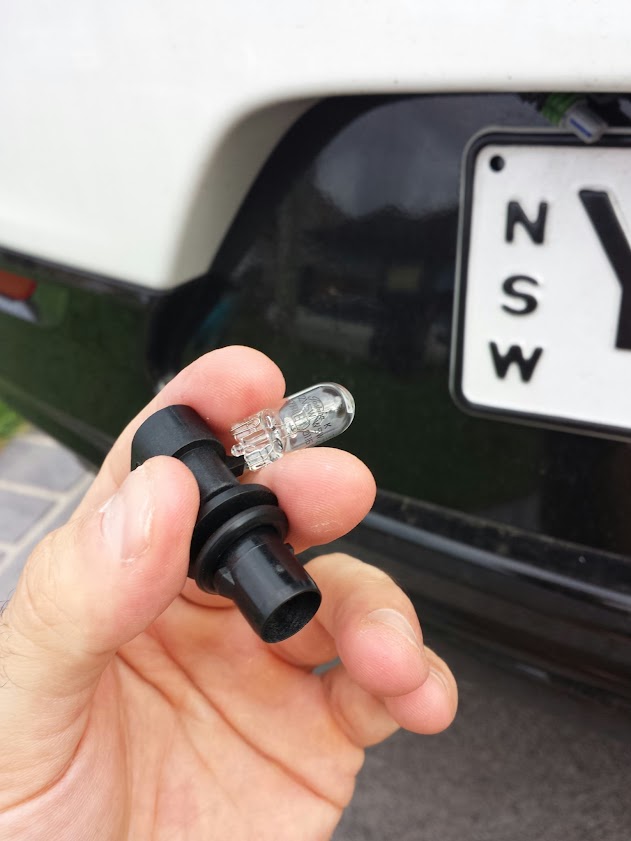
STEP 3) Press down and you should see that it pops the top clip, once this part is out you can pry the rest of it off easily, there are a couple other clips and none of mine snapped, but just be careful and try not to snap them you will probably have to replace them. But like i said i didn't have this issue. Once it is off you simply screw off the small lamp and it will look like this.

STEP 4) Replace the globe wedge style so it ends up looking like this below and then snap back the fender plate easily. You are DONE!

Number plate lamp guide
Time taken: 5 minutes
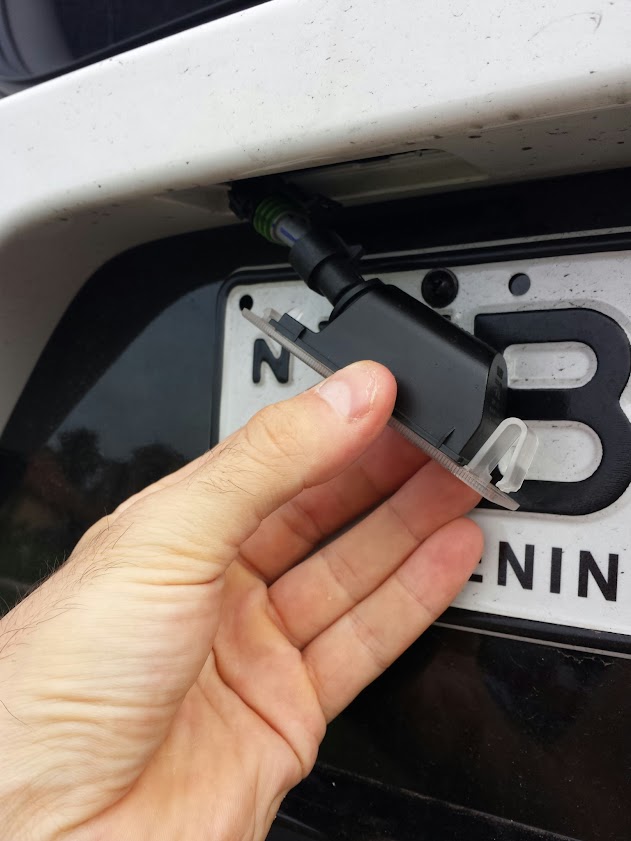
STEP 1) There are 2 lights to change, both exactly the same procedure. You will need a small flat head screw driver, or a flat small chisel or something small and flat to unclip and pop out the light, you can cover it with the microfiber towel if your paranoid in scratching anything. Use the flat screw driver and from the LEFT SIDE (outer side) slip in the flat part and pop out towards the bottom it should come out easily and look like this.
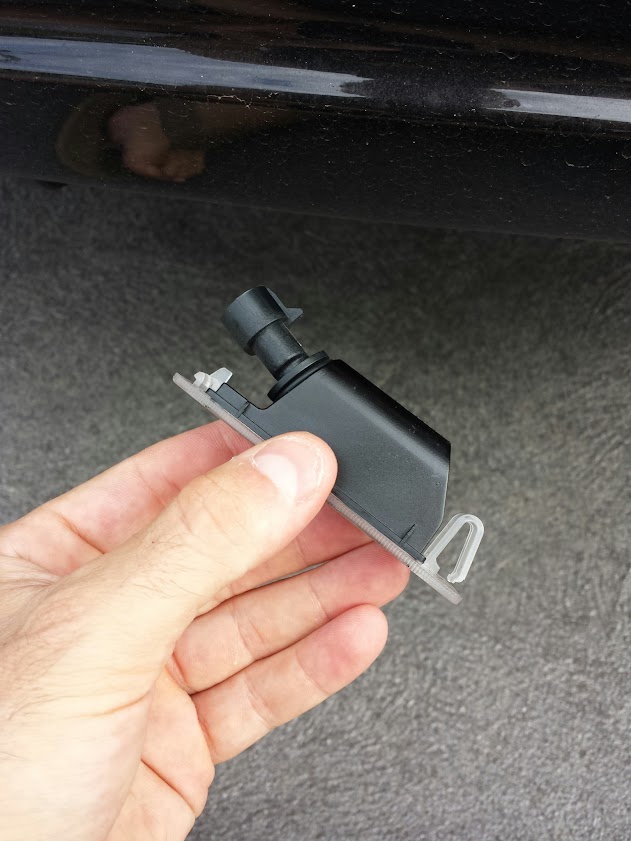
STEP 2) Unclip easily the assembly from the cable, to look like this
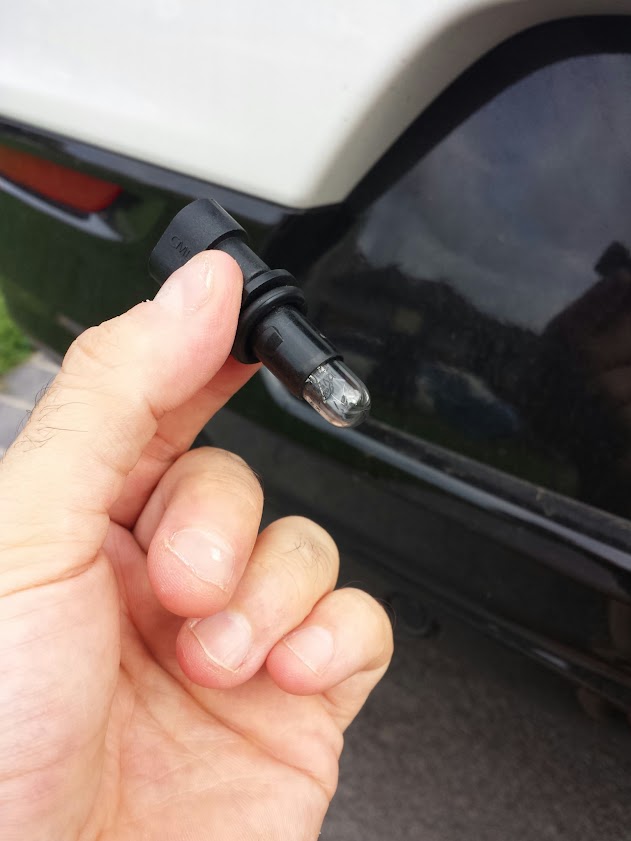
STEP 3) Unscrew the globe assembly and you will be left with this
STEP 4) Take out the globe and replace it with the led and put it all back together, then repeat with the second globe. You are now DONE!
Interior lamps replacement guide
Time taken: 10 minutes
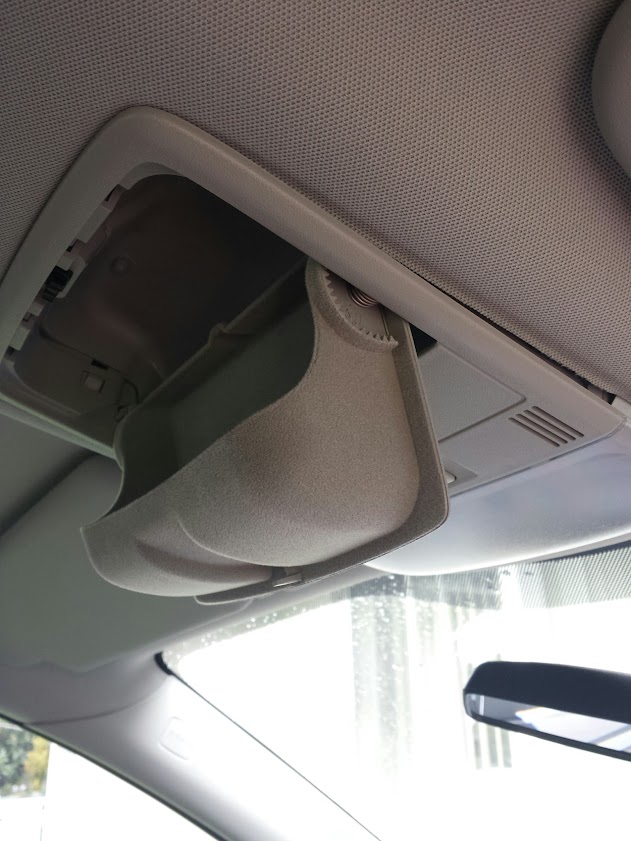
STEP 1) Open the sun glass holder like how you see pictured.
STEP 2) Now put your hand in and with you fingers on the top part of the sunglass holder push foward and backwards and downways, it should pop out with not toooo much force, like this

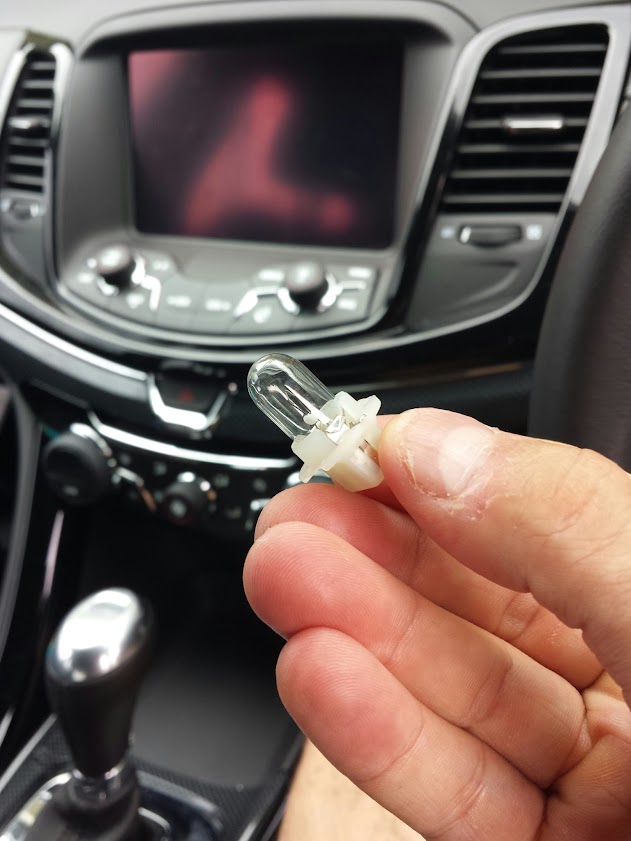
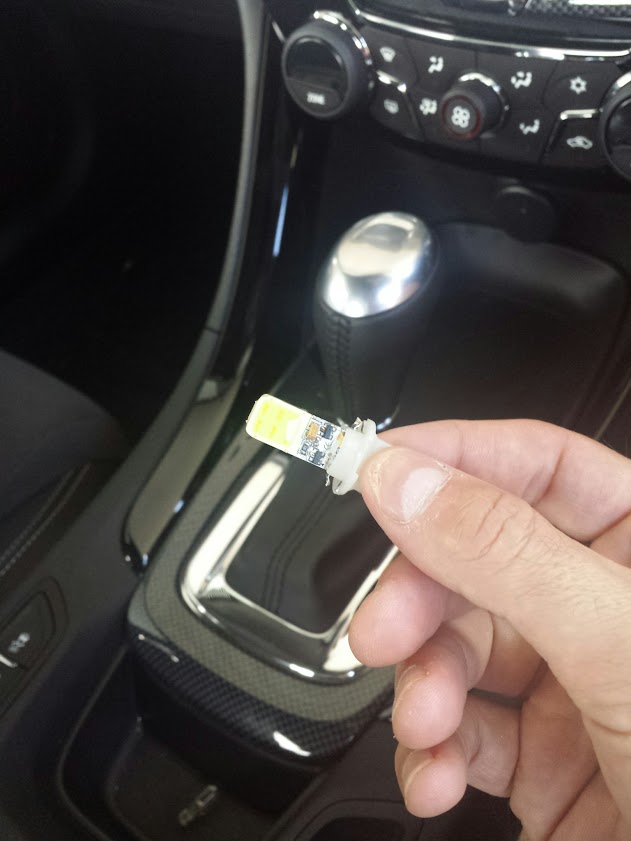
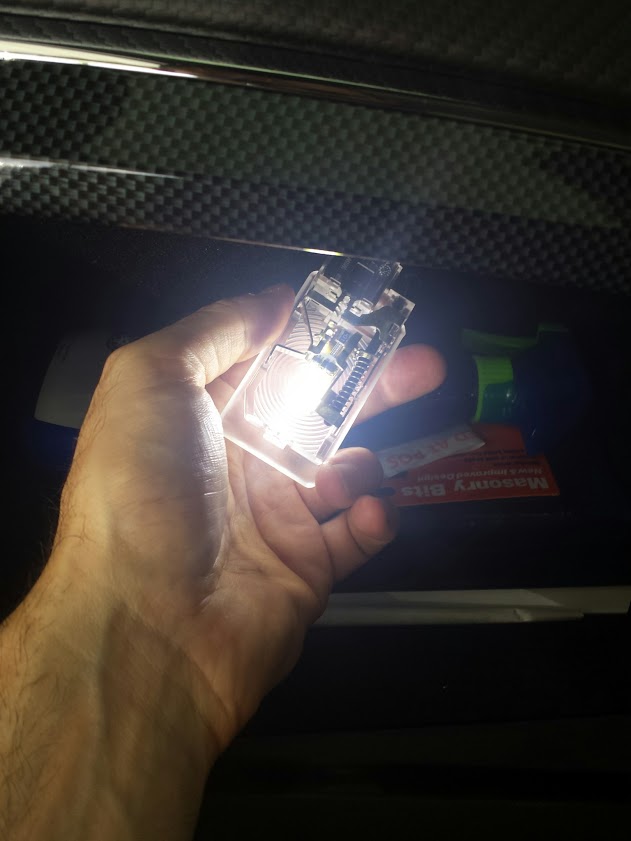
STEP 3) In the front part the middle hole is a screw type T10 globe twist it and pull it out, it looks like this.
STEP 4) Now replace with the led globe it will look like this.
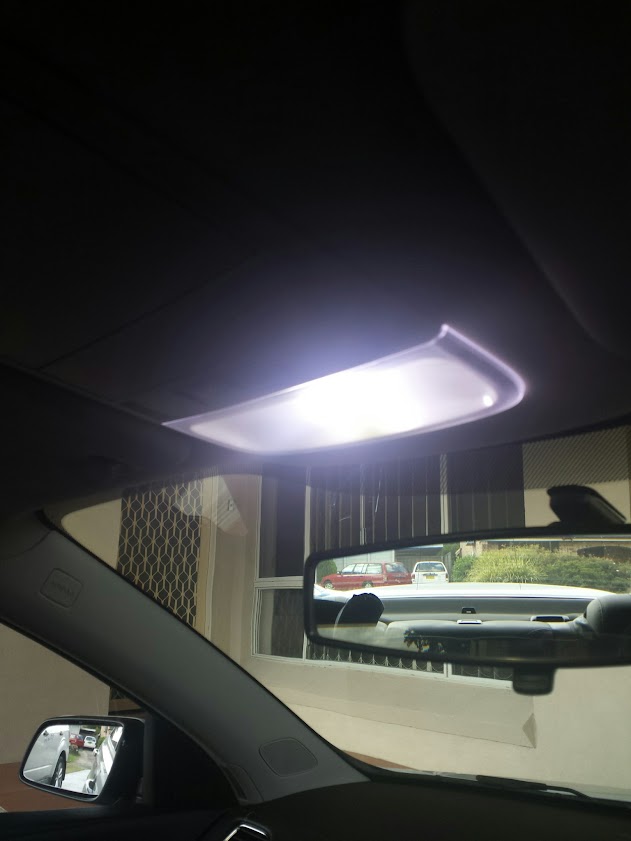
STEP 5) Reverse what you did to put it all back together. Here is what it looks like now.
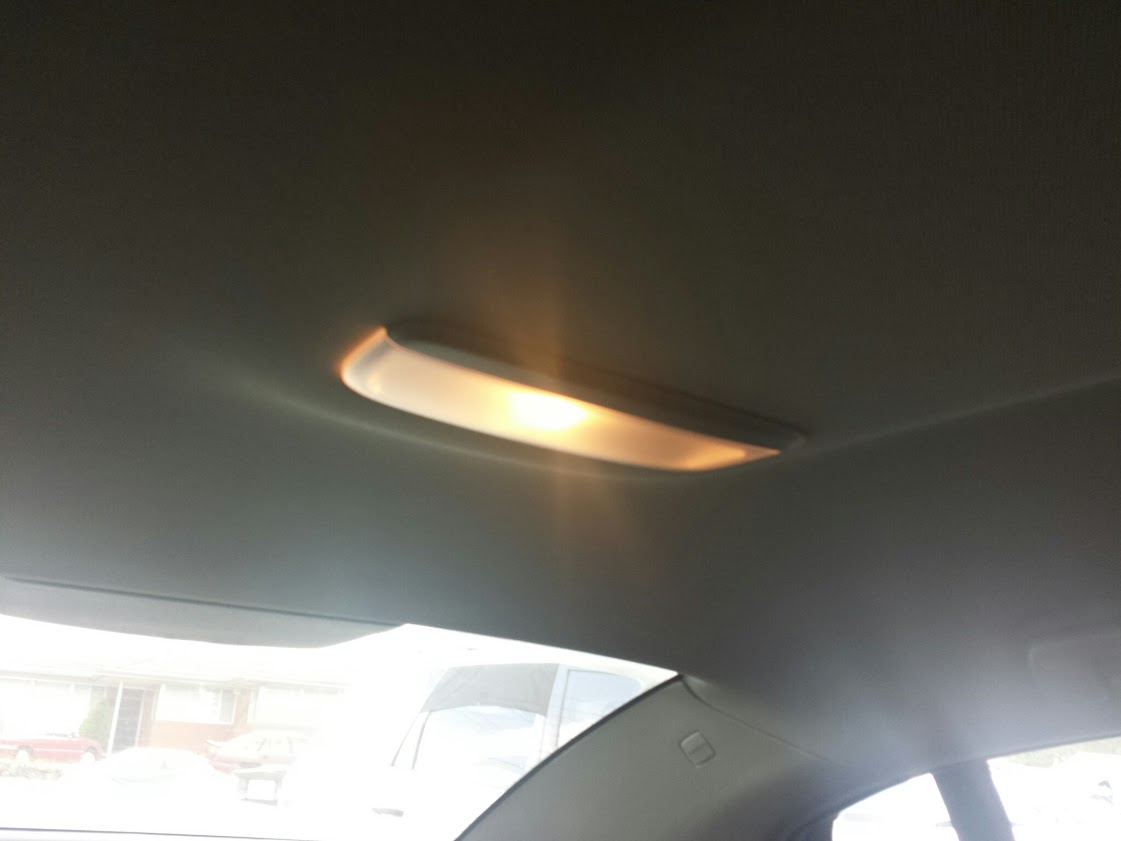
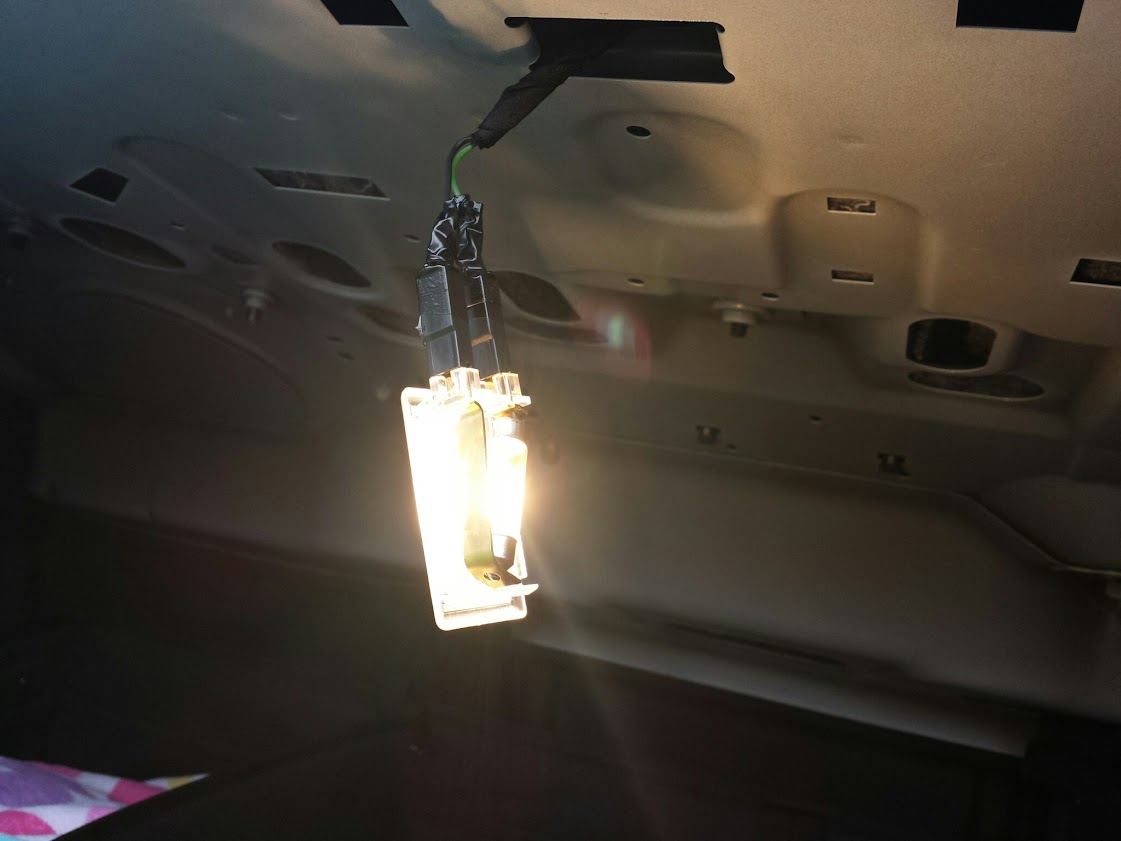
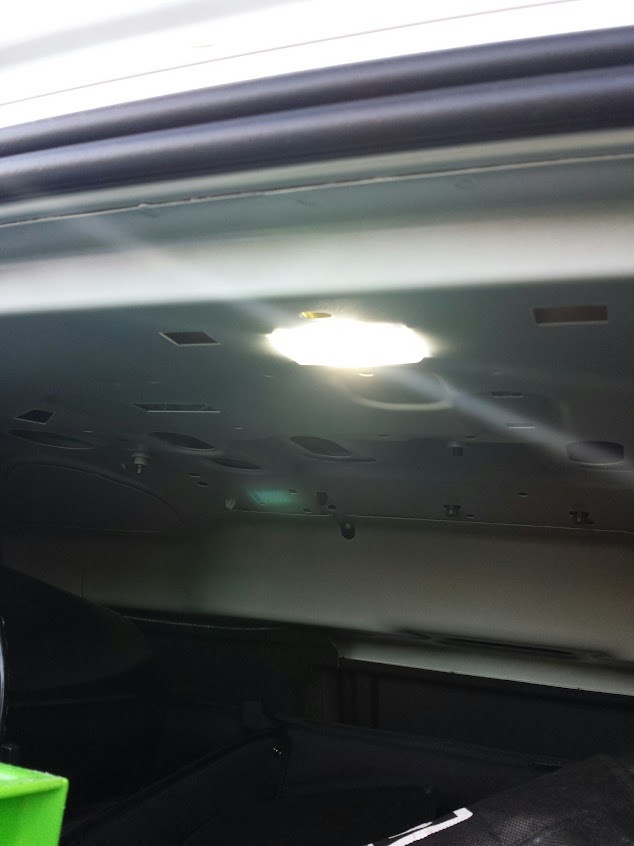
STEP 6) Now lets move onto the rear center light, Here is what it looked like before so you can see the difference in color from the front and back
STEP 7) From the inner part push forward (towards the back window) and down and it will pop off like this, then replace the T10 wedge type globe with a led one and reverse what you did put back together. You are now DONE!

Glove box lamp replacement guide
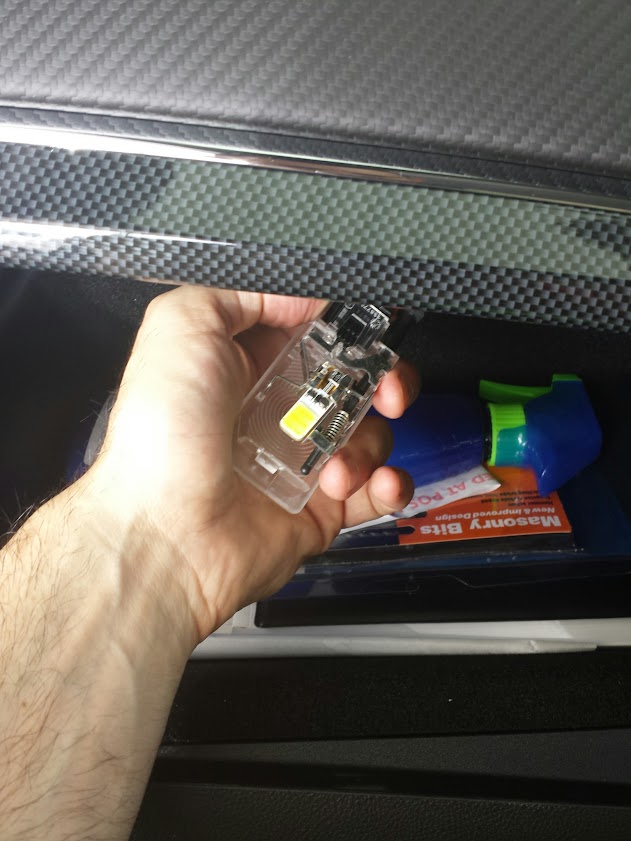
STEP 1) Open the glovebox up and see the lamp assembly on the top part of the glovebox, you will need a flat screwdriver or chisel or anything else to pop out this assembly. You will need to do this from the BACK CORNER part of the assembly, towards the back part of the glovebox not front part. Once out it looks like this

STEP 2) Replace the globe with a T10 led light like as you see pictured here. This globe is in very awkward, it sort of clips in suspended, anyway its not too difficult but a little bit fiddly.
STEP 3) This is what it looks like on as pictured here. Now just reverse what you did and put it back together. You are now DONE!
Boot lamp replacement guide (sedan only)
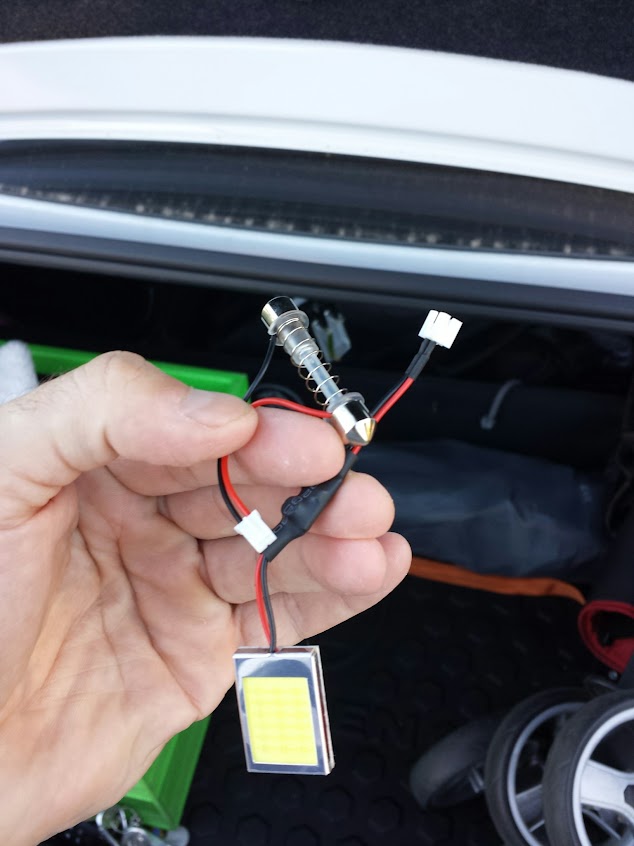
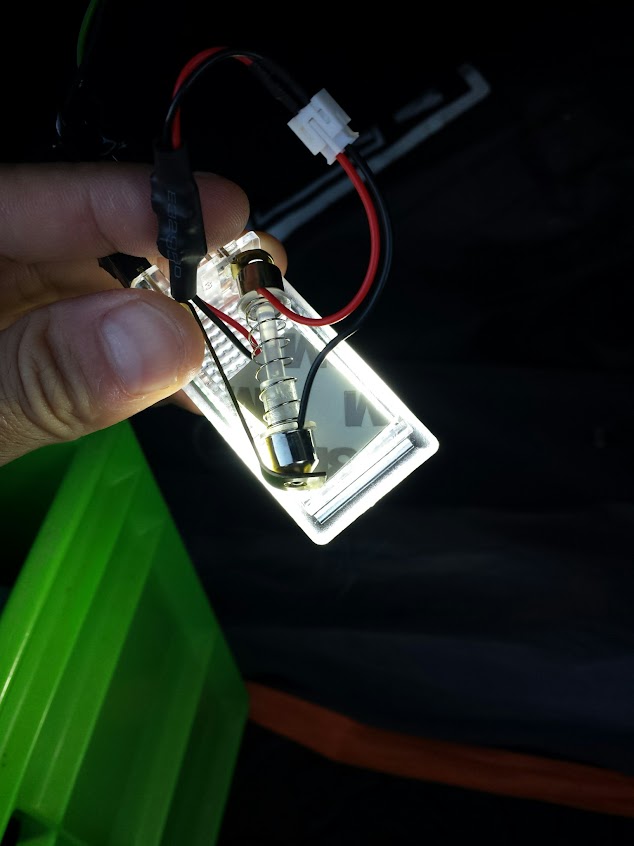
STEP 1) This is a festoon type lamp, different from all others. It pops out very easily as you see pictured here
STEP 2) Final stage is to replace the boot lamp, not hard at all but i did use a high quality wide spread LED which really lights up the boot. Take out festoon lamp, replace with what you see in pic DONE!
CONCLUSION:
Hope some of your guys like my write up, took a while to do getting parts, takeing pics and finally doing this post. Any questions are welcomed!
I have the VFF MY15 SV6 Sedan so this guide has been primarily built around this model.
Im in the process of upgrading my exterior and interior lights to max legal i can go, this means no HID, there is plenty of threads regarding HIDs but i could not find a comprehensive guide for other types of lights. Primarily i will be replacing halogens interior with LED equivalent where possible and exteriors with something like Phillips Crystal Visions 4300k.
This guide is really for reference purpose only for me and of course if you find something of help here you can thank me.
I will be taking photos along the way and giving links to where i purchased my gear.
All globes provided by Bling Auto Works, they are a great bunch to deal with and answer all questions by email promptly.
Updates
24/2/15 - Been speaking to a seller on ebay who was very helpful and has packaged up a kit for the VF for front headlights, side fender blinkers, rear number plate, interior lights for a decent price. Should be coming any day now will follow up with pics and before and after.
22/3/15 - Sorry for the delay, finally managed to get the time finish off this post, enjoy!
OEM PARTS TAKEN OUT
Front lamp assembly
- 1 pair Front turn signal lamp = WY21W bulb (OEM)
- 1 pair Headlamp outboard low beam = H7LL bulb
- 1 pair Headlamp inboard high beam = H9 bulb 60watt
original globe on the right, replacement 4300k on the left
- 1 pair Park lamps = W5W bulb
Side fender lamps / undocumented
- 1 pair T10 amber globes
Tail lamp assembly (sedans)
- Reverse lamp = W16W bulb
- Brake lamp = W5WLL bulb
- Stop tail lamp = P21/5W bulb
- Turn signal lamp = PY21W amber bulb
Number plate lamp
- 1 pair W5W bulb
Interior lamps
- 1 pair Rear dome / reading lamps = W5W bulb
- 1x Glove box lamp = 5W bulb
Sedan Boot Light / Undocumented
- 1x Festoon type bulb 41mm
THE REPLACEMENT PARTS
Front lamp assembly
- 1 pair Front turn signal lamp = Konik chrome halogen indicators
- 1 pair Headlamp outboard low beam = Phillips crystal vision 4300k H7
- 1 pair Headlamp inboard high beam = Phillips blue vision 4000k H9
- 1 pair Park lamps = Konik CANbus T10 led's COB 6000k pure white
Side fender lamps / undocumented
- 1 pair T10 amber globes
Tail lamp assembly (sedans)
Note: I have decided to not go ahead with this mod because i will be direct replacing the tail lamps with hsv replica drlites when they are released which look heaps better
Number plate lamps
- 1 pair of Konik CANbus T10 led's COB 6000k pure white
Interior lamps
- 1 pair Rear dome / front reading lamps = 1 pair of Konik CANbus T10 led's COB 6000k pure white
- 1x Glove box lamp = 1x Konik CANbus T10 led's COB 6000k pure white
Sedan boot lamp / undocumented
- 1 festoon type 41mm Canbus led (not pictured above)
REPLACEMENT PROCEDURES
Front lamp assembly guide
So this was my first attempt at replacing these light globes in any car for that matter, so i was a real noob at it, it took me a while to figure out how to replace the H7's i would say they are the hardest of all in terms of replacement of globes on the holden so far.
High beams - left side / right side guide
STEP 1) Open your bonnet, these are pretty easily accessible they can be replaced from the front of your car when you pop the bonnet, take a look at this pic its from the top of the left side. If you look directly underneath the Yellow cap of the radiator coolant tube you will see the corner of what looks like a round big at least 70-90mm cap. This can be turned and topped off.
Here is another image of a close up with the cap off.
STEP 2) Put your hand in and feel for the globe assembly, Twist them 1/4 way and pull out, it looks like this when its out
You can unplug the globe from the switch, like this
STEP 3) Replace the globe assembly, plug back in and pretty much reverse what you did to get here, do the same for the other side. You are DONE!
Park lamps guide
STEP 1) This one is easy, now that you have replaced the high beams, lets move onto the parkers, here is a pic of where they are located, they are very close to the high beams and can be done with the bonnet open.
STEP 2) Twist out the globe 1/4 way and simply pull the assembly out, looks like this
STEP 3) Replace the wedge type globe with new one, like this
STEP 4) Reverse your steps, to put back together you can do the same steps for the other side, You are DONE!
Front turn signal lamp guide
Now we start to get more complicated, to get to the rest of the front assembly lights, you will need to squeeze your hands through the front wheel arches, i know some have opted to take off the airbox as one way to do it, but i have found an even easier way so read along.
STEP 1) You have to turn your steering wheel either inwards or outwards to make this work, i tried both ways and i actually preferred outwards on the side i was working on. The reason for this i found that i had more room to my hand to move around in, either way will work so you choose what you prefer. As you see pictured here on the driver side i opted to steer inwards. You only need to take off the second and the third screws from the outer lip. You can see i have the first, second and third taken off, but you really dont need to do the first one, this will save you some time. You will need a T10 star screw driver, as you see pictured below.
See pictured below the wheel arch with the screws off.
STEP 2) Slowly pull out the wheel arch padding careful not to rip or fray the ends of the padding you only really need to pull out from the second screw hole to about half way up the wheel arch or so (around the top of the tyre. Its flexible stuff so you wont bend and break it, push it down to expose the inner front bar and inner part of the headlight.
STEP 3) There is no way to take a picture of this light so your gonna have to peek your head in and also feel around the outer top most part of the headlight where the screw style globe is. Generally what i liked to do is sit on the ground, put my hand in feel towards the top where i knew the globe would be, turn my head to the front of the headlight and visualise where it would be. Once you found it, you will feel a screw type connection that you simply screw 1/4 way and it pulls out. It will look like this (see picture below i already pulled it out and changed the globe to the chrome finish)
STEP 4) Simply reverse what you did and reconnect again, You are now DONE!
Headlamp low beam guide
This is the hardest lamp to replace, its fiddly and also not much room, i also had a bit of a hard time turning the screw cap to get to the globe (mine was on REAL tight) it took a few goes. There is no way to take a photo of what it looks like inside the assembly as its too far in the guard you will basically have to move your hand in and get a feel of what your dealing with. I found this diagram on the net that will definitely help you in knowing what it actually looks like inside, you will have to visualise this as your prying your hand in this part of the headlight to get the understanding of how it works.
You will notice there is a clip, take note of this because you will have to undo this to take the globe out.
STEP 1) Once you have your hand inside you should be able to get a feel of what the assembly feels like you will notice a clip, this clip need to be pushed inwards and pulled to one side, the globe is pretty much held in the assembly by this clip, once you visualise and know how to take this clip on and off it gets easier. Once the clip is off you will feel the globe come loose, you will also notice that the pins of the globe are facing a certain way, the pins will be vertical, not horizontal, you need to remember this as you will need to put the new globe in this way also. Take the globe out. This is a picture of what it looks like from the guard when the screw cap is off
STEP 2) Get the new replacement globe and pretty much reverse what you just did. You are now DONE!
Side fender globe guide
Time taken: 5 minutes
This is actually a lot easier that it looks but some care should be taken. Here is what it looks like before.
and this is what it looks like after
STEP 1) Get yourself a soft microfiber town, get a credit card and wrap the card like in this picture.
STEP 2) Use the corner of the card and slip it into the top part of the fender assembly like in this picture.
STEP 3) Press down and you should see that it pops the top clip, once this part is out you can pry the rest of it off easily, there are a couple other clips and none of mine snapped, but just be careful and try not to snap them you will probably have to replace them. But like i said i didn't have this issue. Once it is off you simply screw off the small lamp and it will look like this.
STEP 4) Replace the globe wedge style so it ends up looking like this below and then snap back the fender plate easily. You are DONE!
Number plate lamp guide
Time taken: 5 minutes
STEP 1) There are 2 lights to change, both exactly the same procedure. You will need a small flat head screw driver, or a flat small chisel or something small and flat to unclip and pop out the light, you can cover it with the microfiber towel if your paranoid in scratching anything. Use the flat screw driver and from the LEFT SIDE (outer side) slip in the flat part and pop out towards the bottom it should come out easily and look like this.
STEP 2) Unclip easily the assembly from the cable, to look like this
STEP 3) Unscrew the globe assembly and you will be left with this
STEP 4) Take out the globe and replace it with the led and put it all back together, then repeat with the second globe. You are now DONE!
Interior lamps replacement guide
Time taken: 10 minutes
STEP 1) Open the sun glass holder like how you see pictured.
STEP 2) Now put your hand in and with you fingers on the top part of the sunglass holder push foward and backwards and downways, it should pop out with not toooo much force, like this
STEP 3) In the front part the middle hole is a screw type T10 globe twist it and pull it out, it looks like this.
STEP 4) Now replace with the led globe it will look like this.
STEP 5) Reverse what you did to put it all back together. Here is what it looks like now.
STEP 6) Now lets move onto the rear center light, Here is what it looked like before so you can see the difference in color from the front and back
STEP 7) From the inner part push forward (towards the back window) and down and it will pop off like this, then replace the T10 wedge type globe with a led one and reverse what you did put back together. You are now DONE!
Glove box lamp replacement guide
STEP 1) Open the glovebox up and see the lamp assembly on the top part of the glovebox, you will need a flat screwdriver or chisel or anything else to pop out this assembly. You will need to do this from the BACK CORNER part of the assembly, towards the back part of the glovebox not front part. Once out it looks like this
STEP 2) Replace the globe with a T10 led light like as you see pictured here. This globe is in very awkward, it sort of clips in suspended, anyway its not too difficult but a little bit fiddly.
STEP 3) This is what it looks like on as pictured here. Now just reverse what you did and put it back together. You are now DONE!
Boot lamp replacement guide (sedan only)
STEP 1) This is a festoon type lamp, different from all others. It pops out very easily as you see pictured here
STEP 2) Final stage is to replace the boot lamp, not hard at all but i did use a high quality wide spread LED which really lights up the boot. Take out festoon lamp, replace with what you see in pic DONE!
CONCLUSION:
Hope some of your guys like my write up, took a while to do getting parts, takeing pics and finally doing this post. Any questions are welcomed!
Last edited:
")